Showing posts with label Hex and Counter Games. Show all posts

Saturday, November 9, 2024

A Second Look at Mark Herman's Rebel Yell: Chancellorsville

Back in July, I posted here on my first thoughts about Mark Herman's much discussed ACW game, Rebel Fury, published earlier this year by GMT.  It's a fairly simple, divisional level game that covers six battles:  Fredericksburg, Chancellorsville, Chickamauga, Chattanooga, The Wilderness and Spotsylvania.  The mechanics are very similar to Dan Fournie's ancients game, Baetis Campaign, published in C3i magazine earlier this year and reviewed here.

Chancellorsville (henceforth referred to as Cville) uses the same map as the solo introductory game, Fredericksburg, which frankly was not a lot of fun.   Cville promises more sport for the Union as half the federal forces begin on the south side of the map, at Fredericksburg,  under Sedgewick, while the other half enter from the north map edge under Hooker.   The Union has the initiative for two turns, as per the game's Turning Movement rules, but after that the Confederates inevitably get to move first because of their superior generals, Lee and Jackson. 

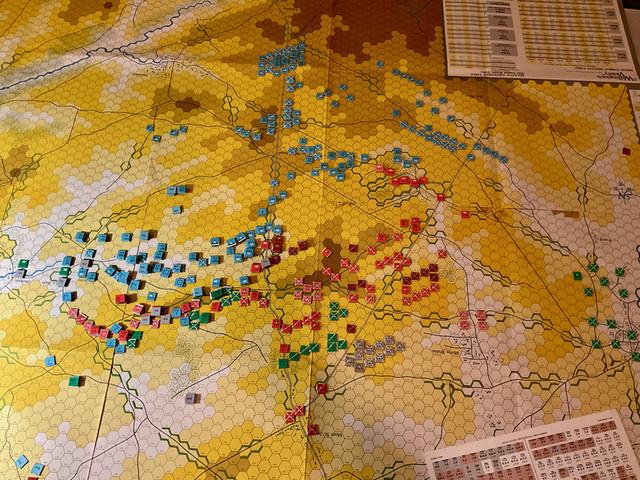
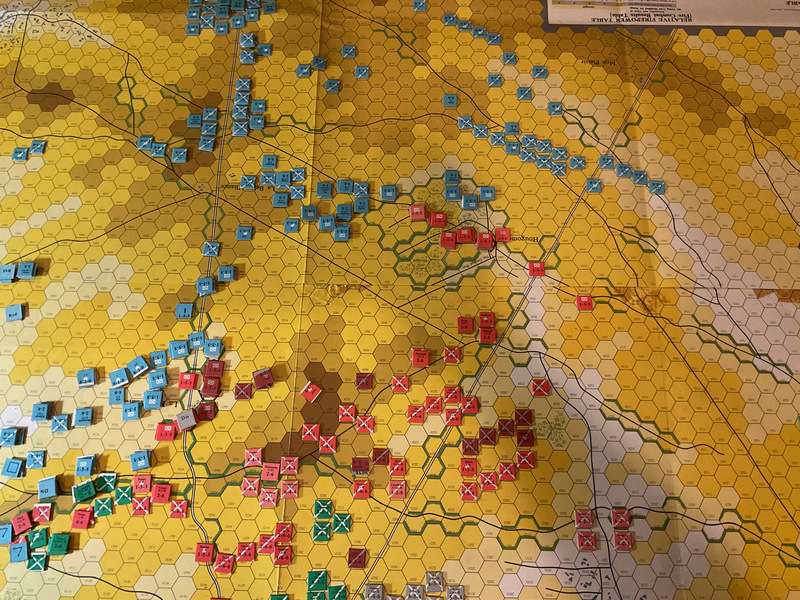
Playing solo, I found it posed an interesting challenge for the rebs:  how many divisions should I pull out of the entrenchments across the Rappahannock from Fredericksburg to send north to try and stop Hooker?   In my solo game, the answer was just enough to slow the Union forces on either end of the map.   As you can see below, the Union came close to their victory conditions, establishing a road route from south to north that is entirely more than two hexes removed form any Confederate unit, while likewise clearing the rail line south from Fredericksburg from Confederate influence.    I got close, but not close enough.


However, if you look at the little red cross "Casualty" markers in the photo below, that is history repeating itself with a vengeance, as both Jackson and Lee became casualties, or at least enough of their HQ staffs to render them hors de combat.  Herman has a clever rule whereby one can use a commander's combat rating, called "battle stars", to influence a fight, but there is a good chance that the commander will become a casualty.   As the Confederate player, one has to resist the temptation to use the commanders in combat roles.   For the Union player, at least in this scenario, Sedgewick and Hooker have less ability to influence a combat outcome, so it's best leaving them in maneuver mode so they can enable their units to cover more ground, and for the Union, maneuver, as I learned, is the key to success.  

Judging by this podcast, not everyone is sold on this system, but I like what I've played of it so far, and I would be interested to retry this scenario to see if I could manage a Union victory.  

Rebel Fury offers beautiful maps, well produced components, and an intriguing variant on the IGO / UGO movement mechanic.  Definitely worth a look for ACW boardgame fans.

Blessings to your die rolls,

MP+


Thursday, July 18, 2024

First Look at Rebel Fury by GMT and Mark Herman

Hello friends:

Not a lot of activity here due to time constraints but the gentler pace of summer beckons, I devoutly hope.   Some gaming and painting happening nevertheless.

Recently I had a chance to open and play a recent tabletop game purchase, Rebel Fury: Battles of the American Civil War by legendary designer, Mark Herman, and published by GMT Games.   It promises to be the first in a series of games using the same rules and mechanisms.  It's a somewhat abstract game, at divisional scale, but with an interestingly fluid turn sequence rather than the traditional IGUGO approach.

I only had the chance to play the introductory scenario, Fredericksburg, using the solitaire rules, which is basically a chance to learn the basic game system and not have a good time as the Federal player.  

Here's the initial setup.  The glossy counters on the river are the pontoon bridges.   Most of the Federal force is well back and the limited number of turns (four if I recall) mean that the Union divisions will be committed piecemeal.   In the solitaire rules the Confederates don't move, they just sit in their entrenchments and blaze away.  It's a stark realization of what a foolish battle plan this was.

The game uses a fairly conventional ZOC mechanic which can favour the attached if the attacker can get a supporting unit into the same ZOC as the defence, which can work in the first attacks if the Union is lucky with die rolls.   Here French and Getty were able to dislodge one of McLaw's units and force their way onto the Heights.   However, in most of the attacks, when one attacker is destroyed or forced to retreat, its adjacent friends have no support and their attacks will inevitably fail.

At the end of the game, the Union had two divisions inside the Confederate positions, which was a better result than I expected, but the US needs five units inside the Confederate lines to win the game.

I replayed the game without the solitaire rules, which gives the Union more freedom of maneuver, but it's hard to outflank the Confederates because in the two-player scenario they get extra units which can enter the map from the south and fill in the lines.   So other than learning the combat mechanics, the Fredericksburg scenario is as much fun as a root canal.  Even so I liked the mechanics, and found the combat resolution quite simple once I mastered the basic system of modifiers.   There is command and control, but it's not overly constraining.   Herman's basic idea here, I think, is to help players understand what brittle instruments Civil War armies were.  Divisions can burn out quickly and players should husband their forces for decisive strokes and broad flanking maneuvers.

I look forward to playing the Chancellorsville scenario using the same map, it promises to be much more interesting.

Blessings to your counters,

MP+


Monday, February 12, 2024

First Look At A Bulge Monster Game: Wacht Am Rhein by Decision Games

 I think anyone who remembers the heyday of paper, hex and counter wargames from the 1970s and 80s has a fondness for the monster games, multi-map, thousand plus piece mammoths that took up all available space, chewed up thousands of hours, and often never got finished.     The most well-known were published by SPI in so-called "soap box" format because they resembled those old laundry detergent boxes.


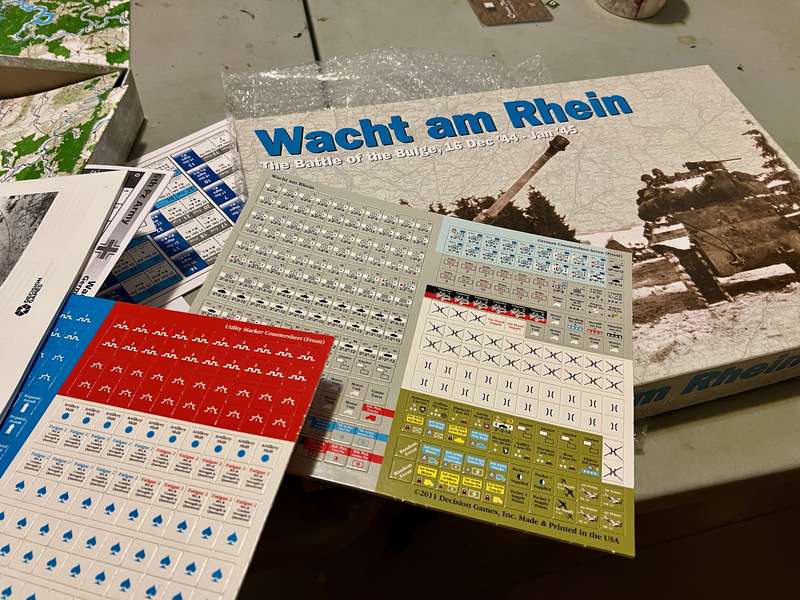
Last December I remembered that I had a Bulge monster game in my stash and I thought it was a good time of year to give it a try.   Wacht Am Rhein is a Joe Youst design, published by Decision Games in 2005, and traces its lineage back to an SPI game of the same title designed by Joe Balkoski and Jim Dunnigan and published in 1977.  There's a lot in the box.


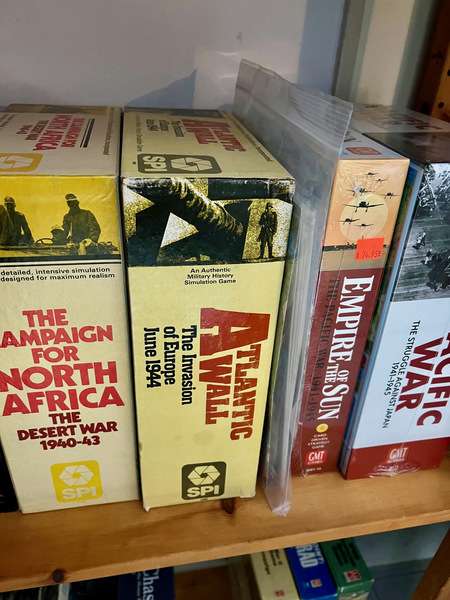
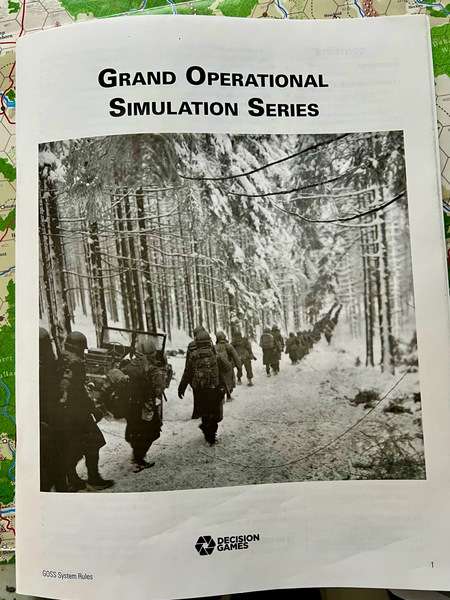
It comes with a big rule book.   The Grand Operational Simulation Series (GOSS) is highly detailed, and is grand-operational in scale, which is one of my gaming sweet spots.  Units are mostly battalion sized, and have three steps; most BNs can break down into company level which is useful when attaching armour to an infantry attack, or distributing AT units among a defensive line.  The system reminded me of SPI's Atlantic Wall which I played a lot of long ago.


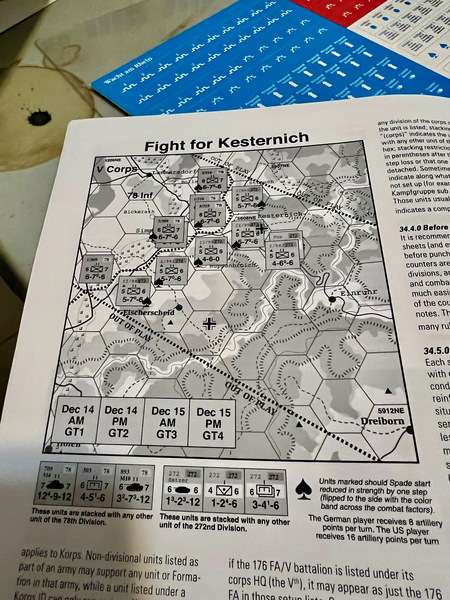
I chose a very simple learning scenario, a four turn (two day) battle called Fight For Kesternich, in which the US 78th Infantry Division tries to capture a ridge on the German/Belgian border guarding the Roer Dam.  Defending the ridge was most of the 272nd Volksgrenadier Regiment.  Historically this American offensive kicked off just days before the Ardennes offensive and forced the Germans to change the northern pivot point of their operation. 


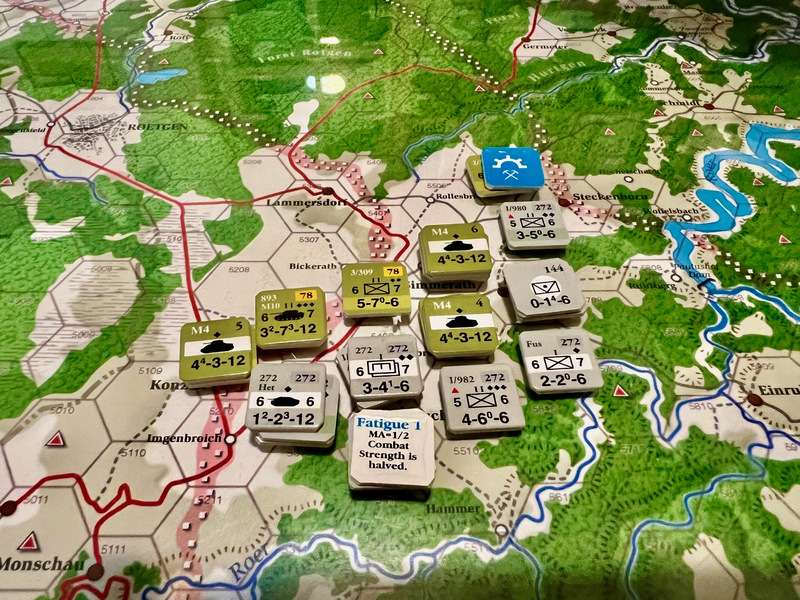
In the scenario, the Americans have two days/four turns to capture two hexes, one being the village of Kesternich (shown below towards the left of the photo, occupied by a stack topped by the German (grey) AT company0, as well as hex 5510 towards the bottom of the photo.  I've broken the US tank battalion down into three companies to support the infantry.    The Germans begin the game entrenched, so are hard to dig out, and there are some hexes occupied by the Germans at start which are rough and restrict the number of units that can attack each turn.  The shot below is taken just after the first US turn, with a little progress made on the attack but the Germans pretty much holding fast.

This learning scenario abstracts artillery, has no weather or night rules, and imposes strict boundaries on the hexes in play.


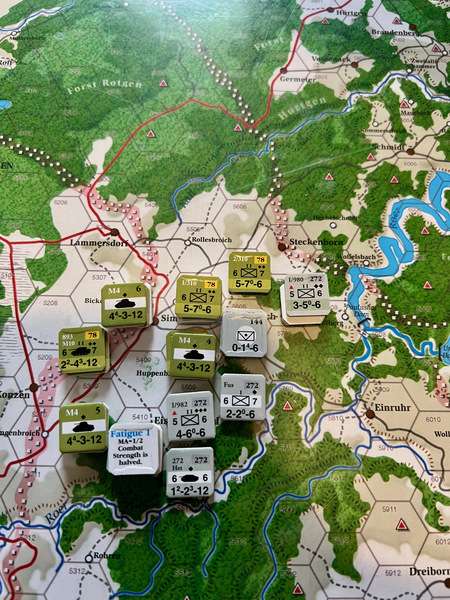
And the state of play at the final turn, No American progress to report, and at the bottom of the photo, the US attackers have actually been pushed back.   Both sides have suffered casualties, and it would be unlikely that the 78th could manage another day on the offensive and still be effective, while the Germans have clung on by their fingernails.

One of the things I like about GOSS is the combat system is quite complex at first, but as you get the hang of it, you see its wisdom.    Terrain determines the starting odds, which are then adjusted for or against the attacker depending on whether the attack is prepared, whether engineers are in support, whether the artillery barrage has been effective, and for the defender depending on entrenchments and, crucially, adjacent enemy units that are not themselves being attacked.   Such shifts simulate supporting and enfilading fire that can be brought to bear on an attack from supporting, adjacent defending units, and they can break an attack.     

Once the odds are calculated, there are a variety of bonuses that can be added to the D100 die roll depending on armour superiority, regimental integrity if more than one BN of the same Regt is attacking, and so forth.  Both defender and attacker roll separately, meaning that an attack can have a NE fail while the defenders' fire is murderous, or vice versa.  Combat results are a tradeoff between step losses, fatigue, or retreats, depending on how badly you want to hold a hex.  A few days sustained combat can easily wreck a division.

So my first attempt at WAR was successful and I learned a lot about the basic system.  The bigger systems have rules for strategic movement, transport, logistics, weather, air support, leaders, etc that I have yet to crack.

It was great fun to make it a little ways up the mountain of this monster game, and I hope to return soon.  The next scenario features the 101st AB defending Bastogne and looks like great fun.

Blessings to your counter clipping!

MP+


Monday, October 16, 2023

Games From My Past

I admit that I was a weird kid.  In senior high school I was poor, had no car, and was thus severely handicapped in the dating game.  What I had was a love of military history, a small income from summer jobs, and an older friend, David, son of my parents’ friends, who introduced me to paper war-games.    Thus I had a subscription to SPI’s house organ, Strategy and Tactics, and an opponent who was happy to beat up on me on evenings when I should have been learning calculus (I never did).   To this day, old hex and counter war-games, especially SPI titles and their distinct, slightly musty smell, are a Proustian gateway to the late 1970s.

Thus it was with great happiness that I discovered via Twitter a fellow who was selling off a considerable stock of old paper war-games.   I took a bit of a risk in sending him money (I won’t disclose the sum but, while considerable, it was very fair) and then waited while the promised games were boxed.  Once I got a legit tracking number, I figured he was a decent chap, and sure enough a box arrived last week, a sort of time capsule of SPI at the height of its powers in the late 1970s.

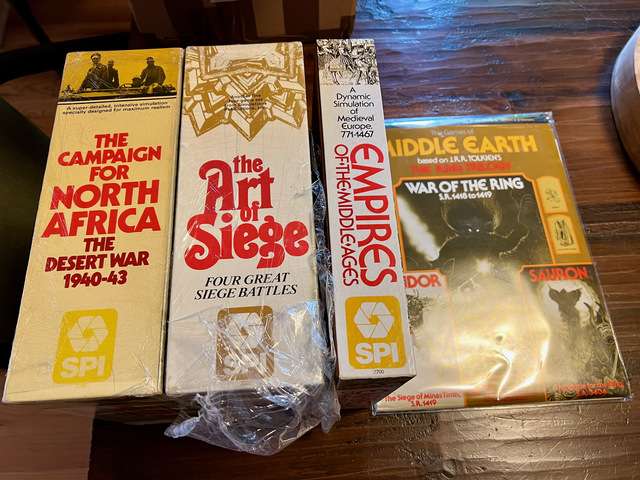
Two of these games are well known to me.  I played Empires of the Middle Ages a lot in undergraduate days, and it probably cemented my desire to do graduate work in medieval studies.   SPI’s Middle Earth trilogy was likewise something that I played, a LOT, though sadly I sold both titles during a period of youthful poverty.

The other two titles are ones I’ve wanted for a long time.  Art of Siege features four famous sieges from Alexander’s siege to Tyre to Lille and Sevastapol in the gunpowder era.   Never played, long wanted.  Likewise, Campaign for North Africa is the Mount Everest of paper monster games.    It has a legendary aura, as a ludicrously complex, unplayable white elephant, but as someone who once played Avalon Hill’s Africa Corps, it represents the extreme other end of the complexity scale from that legendary AH game.  Will I play CNA?  Maybe.   Maybe I’ll die with it on the shelf. But I had to have it.

Did I say that these four games were unpunched?

Blessings to your die rolls.

MP+

Sunday, September 24, 2023

Finished First Playthrough of Burma: The Forgotten War

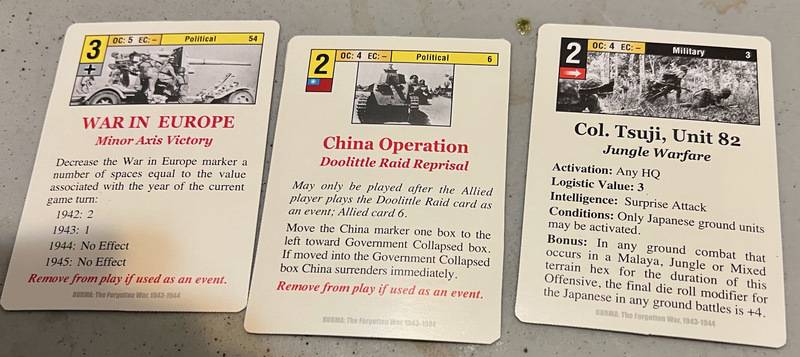
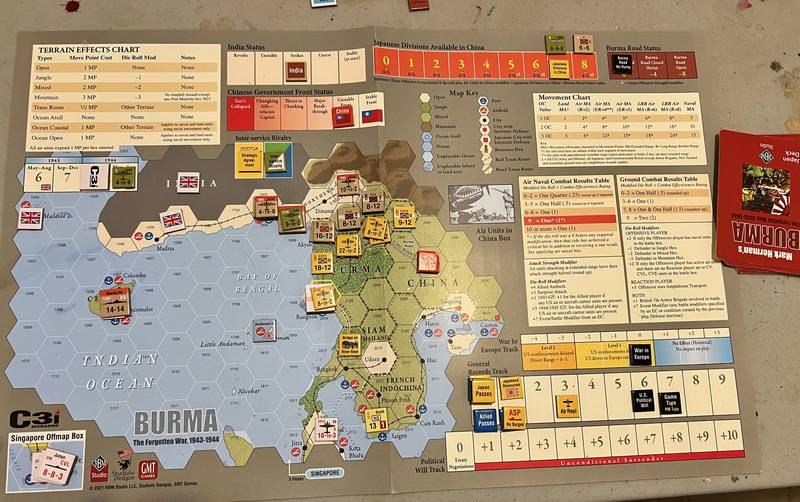
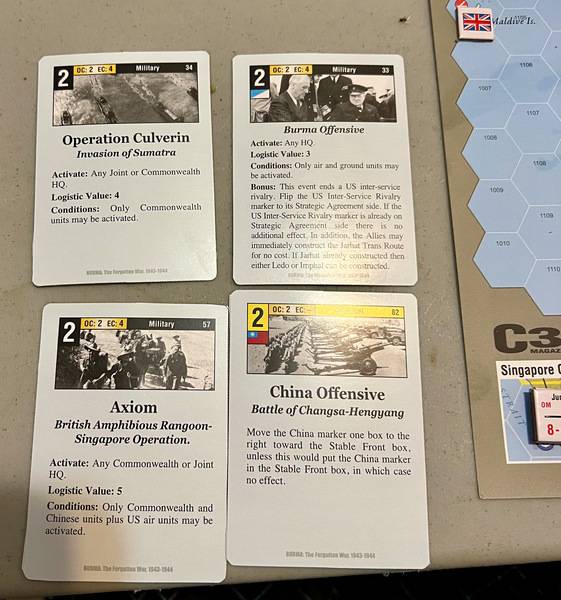
I’ve finished my first solitaire play through of Mark Herman’s Burma: The Forgotten War from C3i Nr 35.  Here’s a quick look at how this game and it’s Empire of the Sun system is card driven.   Both sides get four cards in each of the four turns, but at the start of Turn 4 the Allies get a US B29 unit and through a successful Strategic Warfare turn have reduced the Japanese hand to three cards.   Of these, the best card is Col Tsuji, which if used as an Event card gives Japanese land units a boost but doesn’t allow any of the (still substantial) Japanese air units a boost.   The other two cards, if used as Offensive Cards rather than events, don’t activate that many units (the large number top right hand corner plus the HQ value of 1).

On the other hand, the Allies get four cards, all of which can be used as Events, in which case the number of units activated equals the Logistics value in the text of the card plus the HQ value of 1.  So the Allies can punch hard against the Japanese in the last turn.

And the final result at close of play.  The Allies have totally broken the Japanese lines.   One Japanese air and land unit at the top right is isolated and out of supply,  and their are only two Japanese land units left defending Rangoon.  The Burma road from Jarhat in North India can be traced all the way to Kunming in China, India is militarily safe (though politically a little wobbly) and China is still very much in the war, so one the Victory Points are added up, it’s an Allied decisive victory.

Somebody on Twitter (I refuse to call it by E Muskrat’s name) quipped that game designers are too fond of the word “Forgotten” but truth be told this is the only WW2 game I’ve ever played on the Burma campaign.  I have an MMP game on Burma which I haven’t tried yet, but I think that has a crunchier land war focus, whereas Herman gives you a good sense of the limited options available to the Japanese and the limited resources the Allies had to prosecute this theatre.   In another game I might explore the Chinese subgame more, where the Japanese can just defend on the map and use more cards for Chinese offensives (abstracted) which can drive down China’s ability to stay in the war and thus possibly yield more VPs.   Any Japanese cards that can be played to destabilize India are also worthwhile, as that does limit Allied replacements for their land units.

Good to play a hex and counter game again.  I recently purchased Mark’s South Pacific: Breaking the Bismarck Barrier 1942-43 game (C3i Nr 30) which also used the Empire of the Sun system, and now that I know the EoS mechanics I can give it a try before I try the big game.

Cheers, thanks for reading, and blessings to your die rolls.

MP+

Monday, September 11, 2023

Game On The Table: Burma The Forgotten War

Hello friends:

Just a quick proof of life blog post to show that I’m here and still interested in wargames, just terribly short of time.

On the gaming table currently is a paper game, Burma 1943-44, The Forgotten War.   It’s a design by Mark Herman that shipped in the most recent C3i Magazine publication of Rodger McGowan which is essentially the GMT Games in-house magazine.

This is a strategic-level game that uses the same engine as Herman’s Empire of the Sun (2005) which covers all of WW2 in the Pacific.  I have EOS but thought that the Burma game would be a good way to learn the system, which is card-driven and focuses a turn on a series of possible military, political or economic events.   Cards can be played for specific effects as printed on the card (eg, the Japanese can use certain cards to make India more politically unstable for the British and cutting off key reinforcements and replacements needed to police the Raj instead of supporting the Burma offensive) or the like.

Or, cards can be played for their logistic and command and control values to allow certain units to act offensively, or to react defensively.   Thus, it’s not one of those games where every unit can do something during each turn.  It requires a lot of thought, and as it’s a card game, would doubtless be more fun as a two player game.

The puzzle for the Allies is to use their limited resources to punch a hole through the Japanese defences and push on Rangoon before the war ends.  The Japanese have a decent army and some air units, and can either play defensively or make their own attempts to reach India or knock the Chinese out of the game.

Not a simple game but it’s short (four turns) and halfway through my first try I’m enjoying it and feeling like I’m mastering the system.

Cheers and blessings to your die rolls,

MP+

Thursday, July 22, 2021

#ThursdayNapoleonics, SPI's Wellington's Victory at 1:00pm

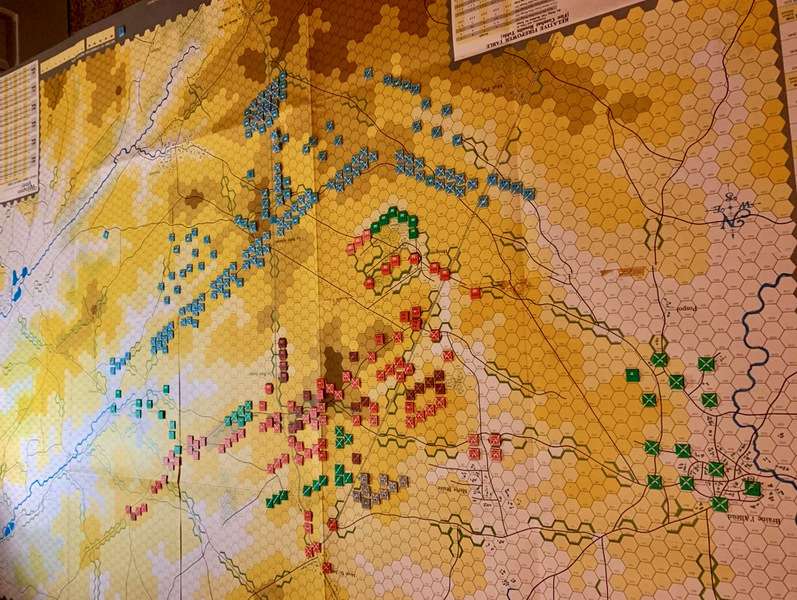
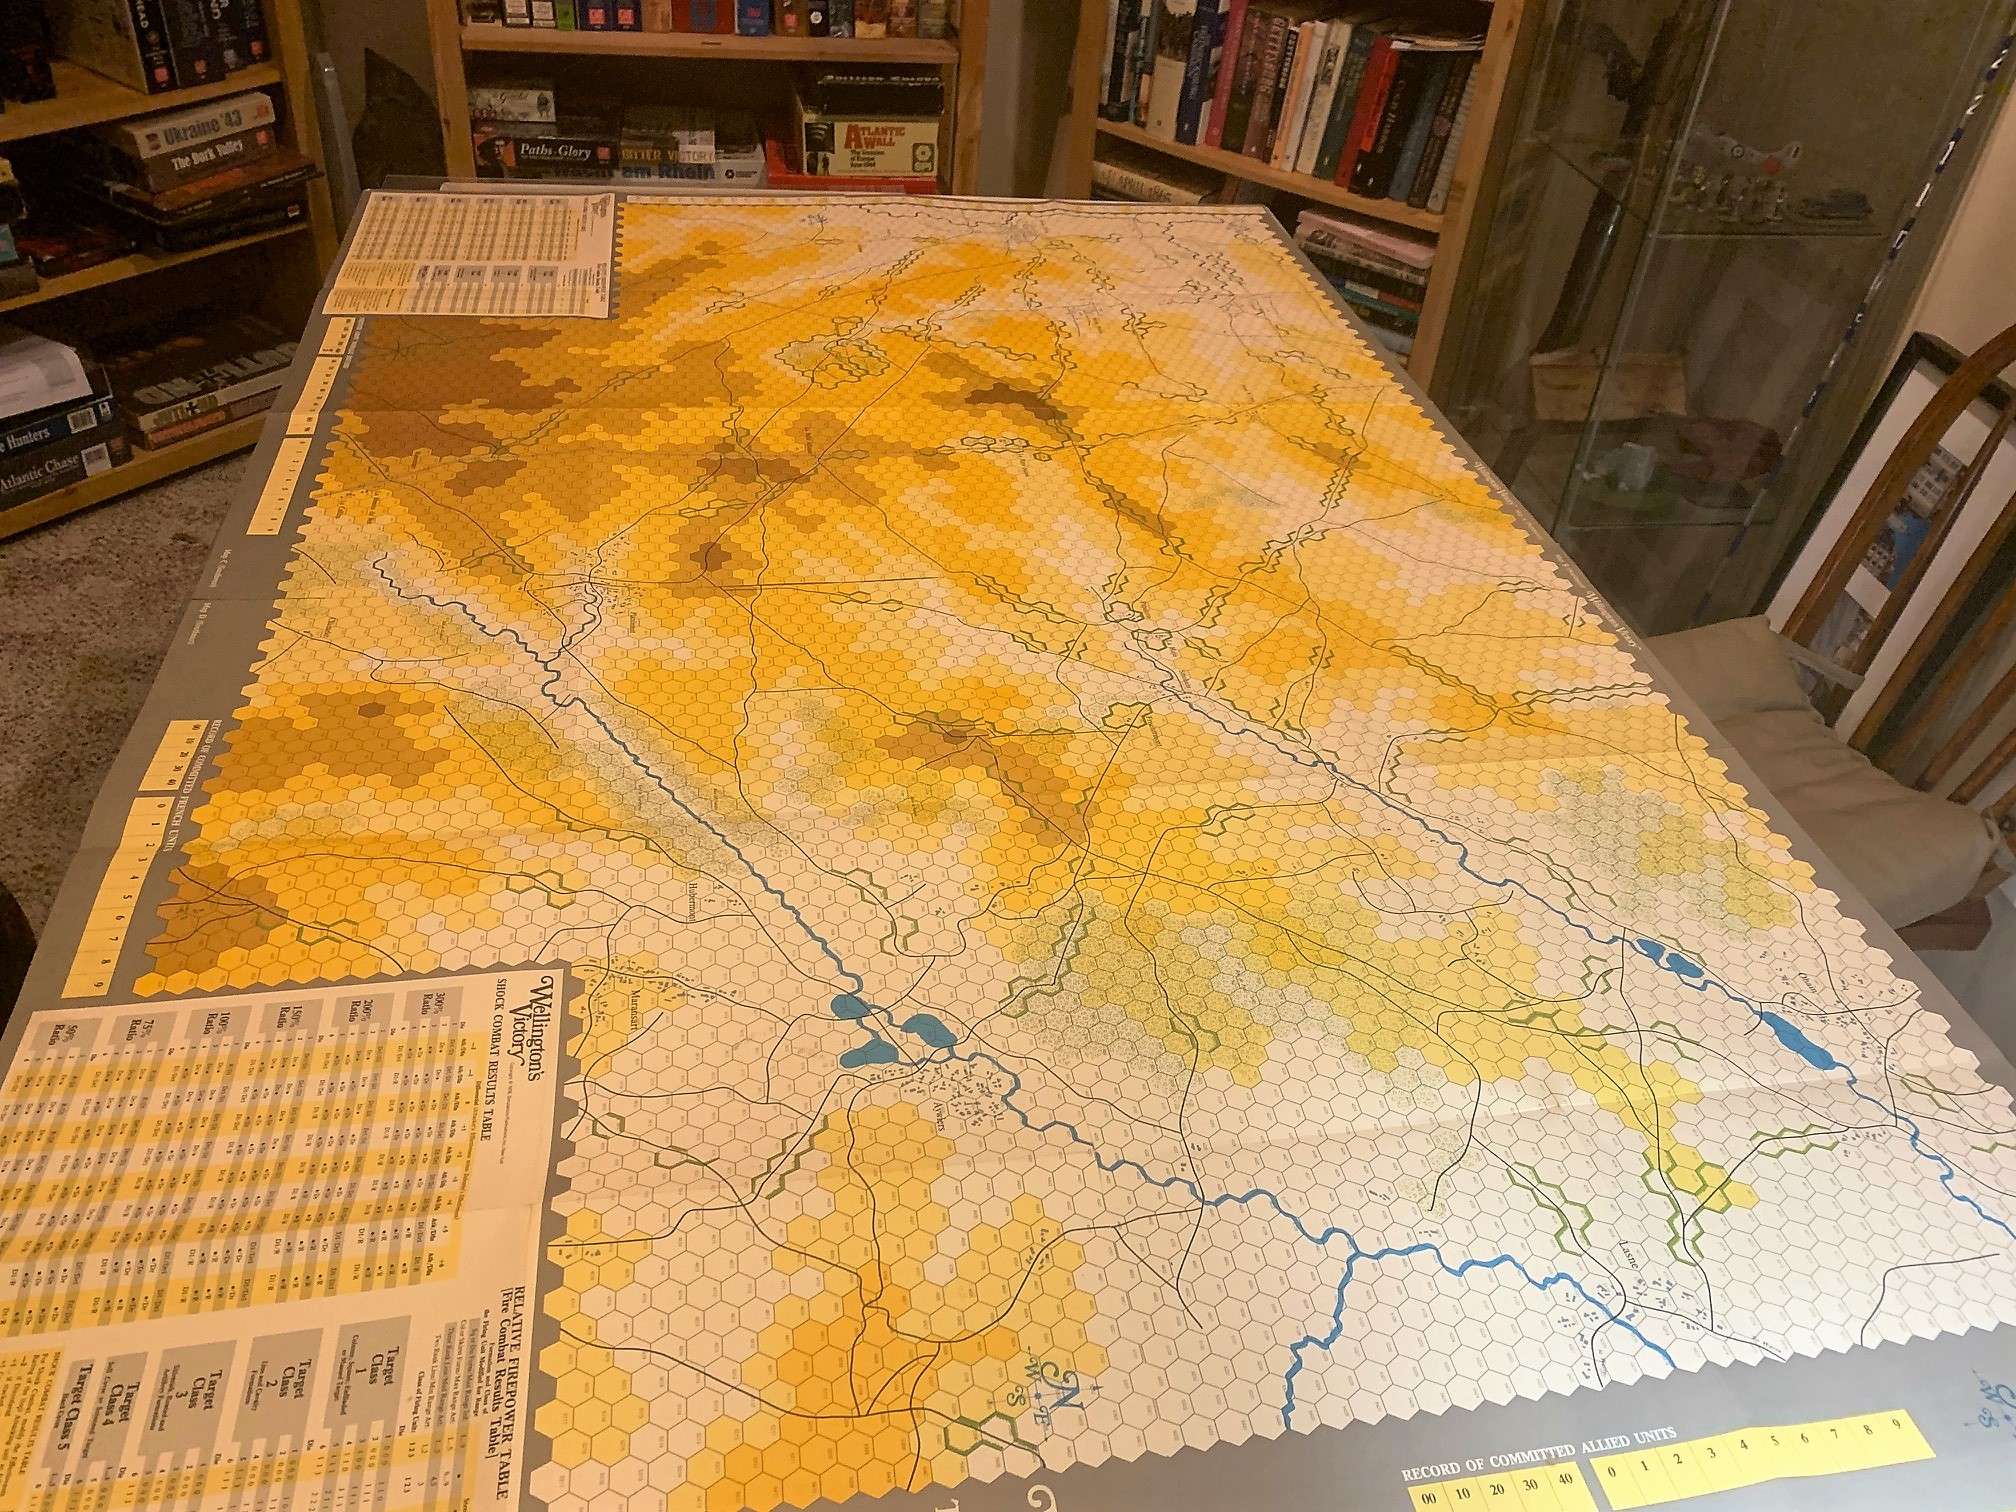
Wanting to finish the latest batch of minis has taken my eyes off the game lately, but the monster awaits, in the cat-proof gaming room, and so we have started the 1pm turn.  Here’s the overall view:

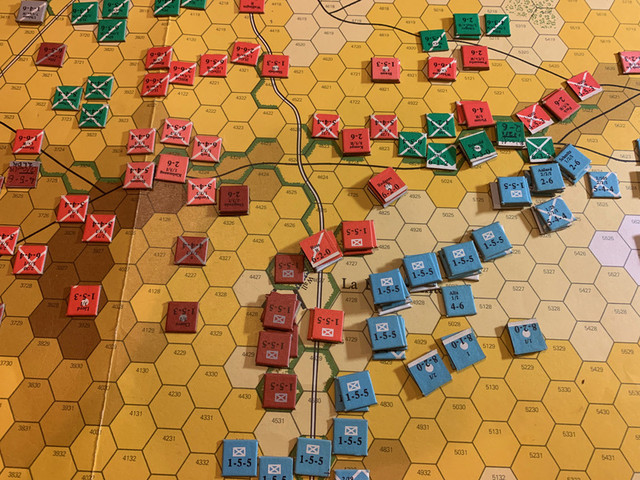
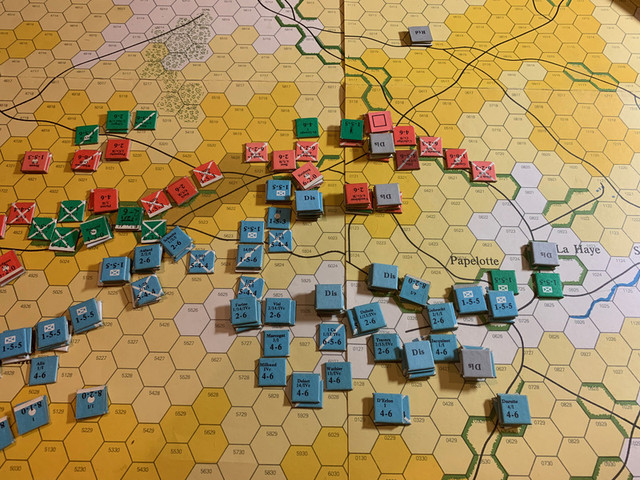
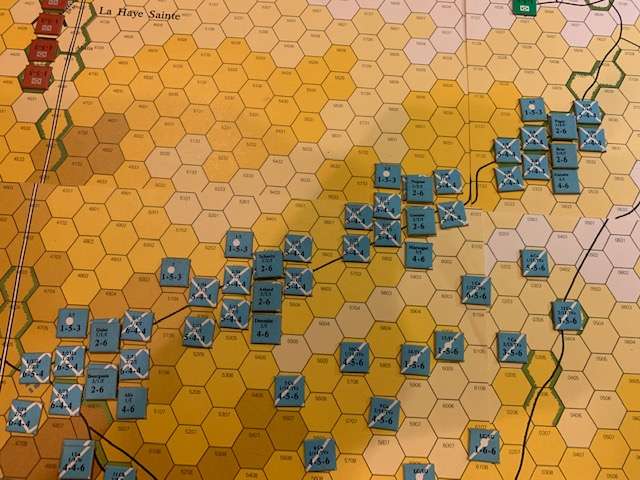
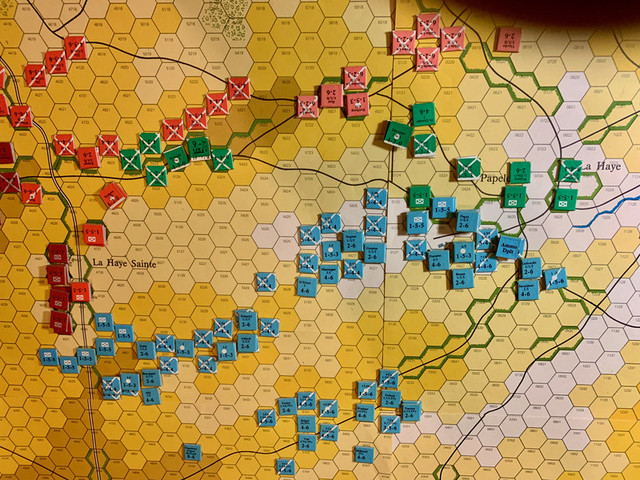
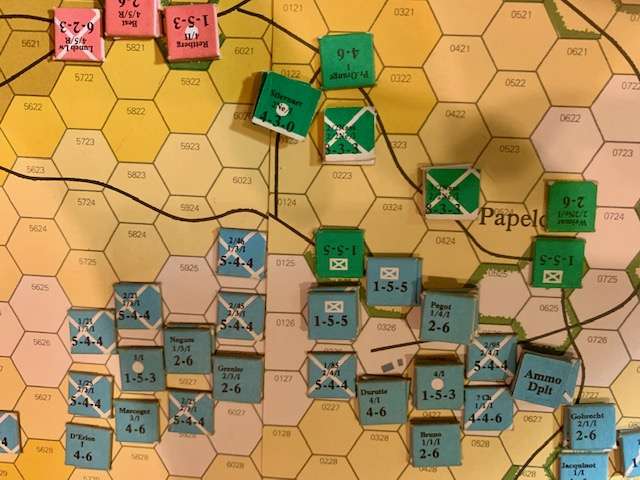
D’Erlon’s I Corps took a bit of a beating in the last half hour.  Three of his four divisions are battered and intermixed, but are continuing to put heavy pressure on Wellington’s left wing.   Currently the British cavalry of Vivian, Vandaleur and Ponsonby are buying time.  Two of Ponsonby’s three regiments charged successfully, routing 1600 French troops and dispatching the crew of D’Erlon’s 3d Div artillery, which was rashly pushed forward.  However, the French have managed to capture Papelotte, and have just cued up three cavalry charges in a bid to turn Wellington’s flank.   About to do the morale checks for the Allied units within the triangles of the blue charge markers.

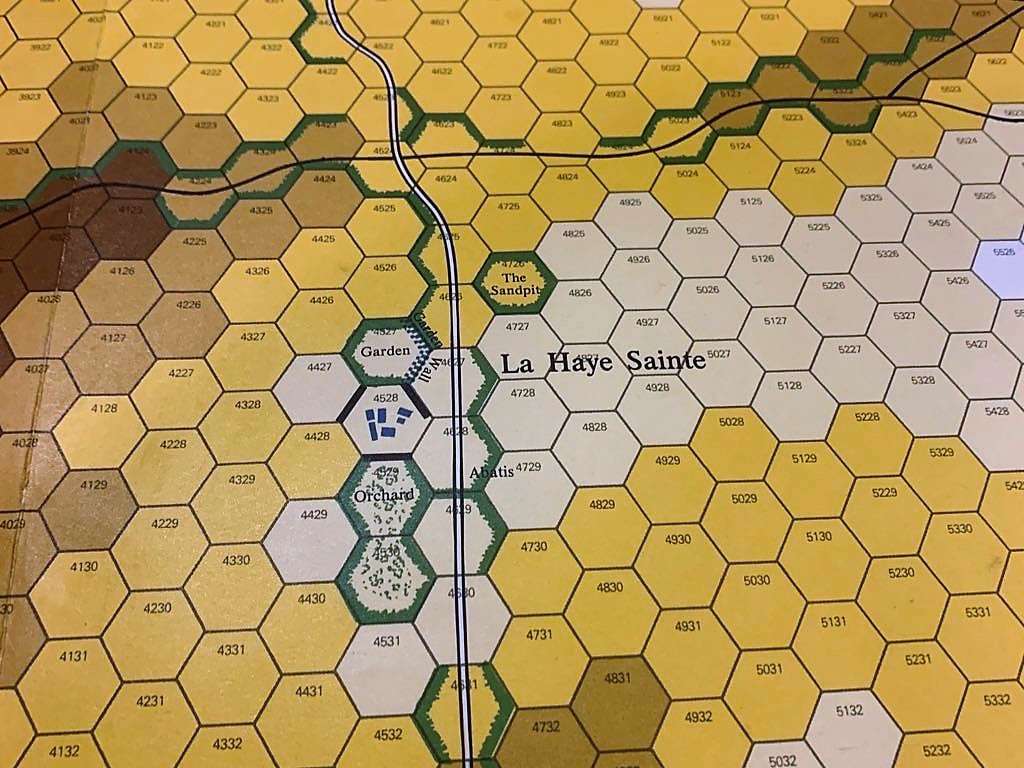
In the centre, bands of French skirmishers are starting to lap around La Haye Sainte and have evicted the King’s German Legion from part of the orchard.   French cannon have started to bombard the Sandpit.  At 1pm, Napoleon commits the Old and Middle Guard and orders them to move forward.


Thursday, July 8, 2021

#ThursdayNapoleonics: SPI'S Wellington's Victory, the Battle of Waterloo at 12:45pm.

Hello friends:

It’s Thursday and time for the weekly Napoleonic update.   

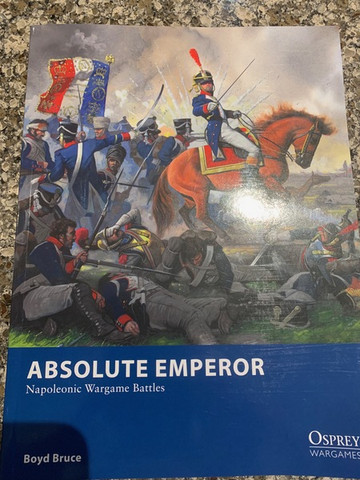
I took a chance on these new Osprey rules, hoping they’d be to Naps gaming what Dragon Rampant has proved for quick and easy (an earlier generation of grognards would have said beer and pretzels) gaming.

Boyd Bruce, the author, promises in his forward that these rules will indeed be simple and fast playing.   It is agnostic to scales and bases, and while the game’s smallest unit is called a division, grouped as corps, the rules still allow for tactical formations (square, column, line) which seems odd to me.   I’ve had to wade through with a highlighter to understand the mechanics, as there is no index or any QR charts, but I think I grasp the mechanics and hope to try it with some 6mm units soon.  More to follow.

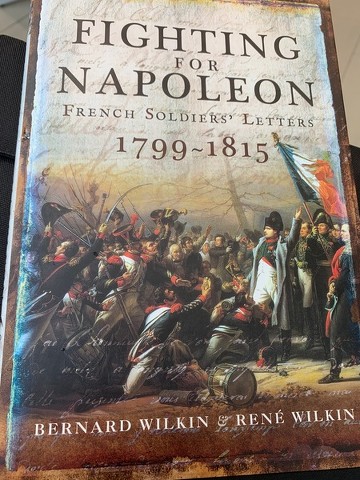
Currently in my bedside reading is this book, obtained from a recent Hellion Press sale.

The authors have done a brilliant job of combing the archives and pulling together letters from a wide variety of soldiers - rankers and the odd junior officer - and  they are generally grim reading.    A typical letter might read:  “Dear Mother and Father, I am tired of war.  Please send me money as I lost my equipment and need to buy more.  I am hungry, cold, have no shoes.  I send my love.”   Many of the letters focus on conscription, trying to obtain release from the army or exemption for younger brothers, and most are very simple, as the letter writers were not all that literate.  Sometimes men from the same village or town would pull together and have someone write a letter  for them, in all their voices.   There are notes for each letter explaining what is known of the soldier writing it, and sadly, many never came home.   Grim reading that inspires respect for the hardships these men endured.

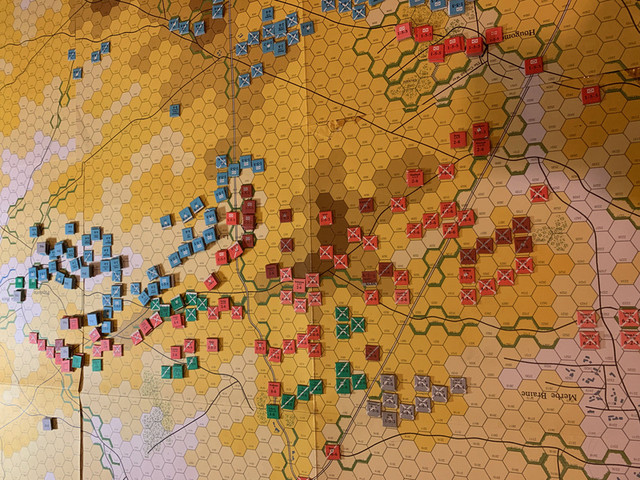
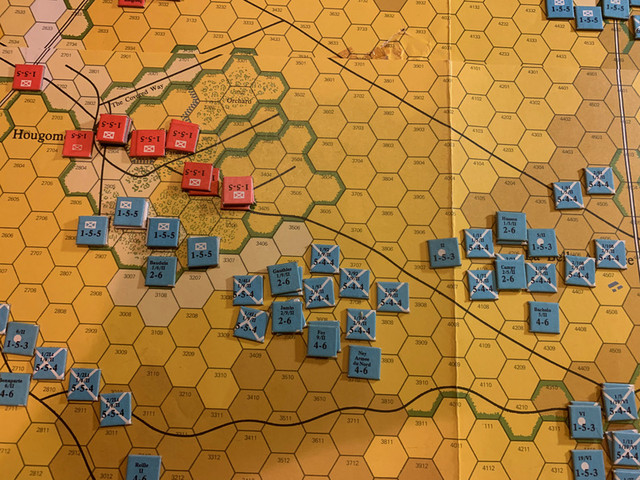
Now, down to the basement and the gaming room, which thus far has remained cat proof.   Here is the Battle of Waterloo having just finished the 12:30pm turn.


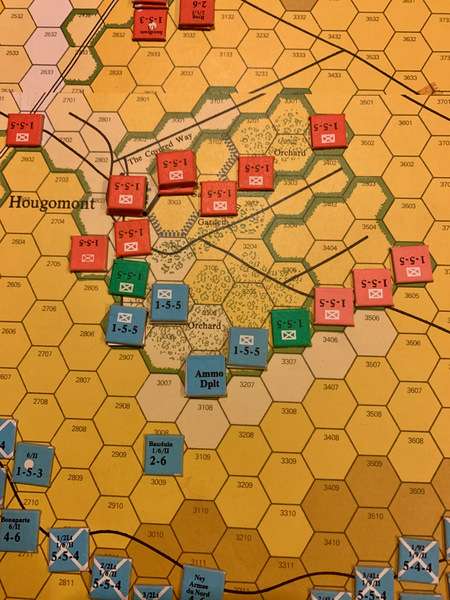
On the right, a token force of French light infantry has forced their way into the orchard of Hougoumont, but show no signs of going any further.  Foy’s and Bachelu’s divisions of II Corps are now committed and appear to be moving towards La Haye Sainte??

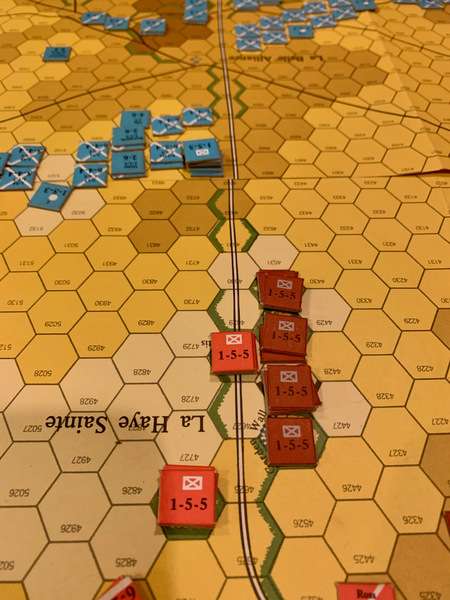
Pressure building on La Haye Sainte and on the Allied centre.  Galling fire from French skirmishers has caused some 300 casualties to the KGL and Rifles holding the farm this last turn.  Allied musketry in response was unlucky.  French I Corps artillery is now unlimbered and ready to fire at long range.

Fighting has been fiercest on the French right.  D’Erlon’s I Corps has been pushing hard, but a company of Dutch/Belgian skirmishers amazingly still hold Papelotte and have already seen off an attack by ten times their number.    Some of the Dutch battalions have broken but the Hanoverians are holding steady and Pack’s redcoats are in line behind the ridge waiting for their moment.   There have been charges and countercharges - Vivian and Vandaleur’s brigades have pushed back Jacqunot’s chasseurs, with losses on both sides.  Of the commanders, Perponcher and Vivian on the Allied side are hors de combat, and Bruno likewise.  Shock combat has proven deadly to chaps in lace coats.

French infantry attacks are proving fragile, as seems right, but the pressure on Wellington’s left is growing and it is a long time before the first Prussian columns appear on the map.

Any advice for Wellington or Napoleon?

Blessings to your die rolls!

MP+

Thursday, July 1, 2021

Thursday Napoleonics: SPI's BIG Waterloo Game, Wellington's Victory, to 12:15pm

For my June project, I am revisiting a game I first played in high school, against a much older and patient opponent, who methodically dismembered me, though if you’re reading this, Dave, you got some key rules wrong!

This is Wellington’s Victory, one of SPI’s monster games of the 1970s, and in my opinion there is no lovelier paper, hex and counter game, though the colour choices for the elevations seem quite arid for the rain-soaked spring landscape of Belgium.   Certainly the national colours for the various units are lovely.   Here is the complete setup for the complete Battle of Waterloo, which commences at 11:45 on the turn track.

Any Waterloo game has to assume that Napoleon knows that Grouchy will not come, otherwise it doesn’t make much sense.   So, in this solo game, my object as the French is to throw as much of my weight as possible against the Anglo-Dutch, though the drain of committed brigades on the Army Morale total (let it drop to zero and bad things happen) mean that I have to decide carefully how much of my force to commit at the outset.

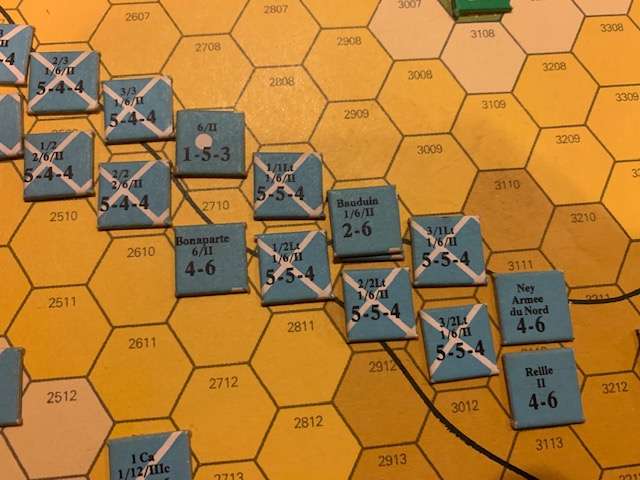
Opening Moves:  French commit Bauduin’s brigade of Jerome Bonaparte’s 6/II Div.  These light infantry battalions will deploy as skirmishers and move against the Hougoumont orchard to keep the British honest.

On the right, me/Napoleon commits all 8 brigades of D’Erlon’s I Corps, as well as the Corps light cavalry division of Jacquinot.  The French plan is to threaten Wellington’s left without getting sucked into the Hougoumont trap while punching hard  against the Anglo-Dutch left.


British throw the 1/95th Rifles and a battalion of KGL lights as skirmishers into La Haye Sainte to reinforce the position.  Meanwhile a regiment of British Guards deploys as skirmishers and moves to reinforce Hougoumont, but no more reinforcements there for now.


D’Erlon’s Corps begins its advance.

French light infantry skirmishers begin to press into Hougoumont’s orchard at bayonet point, both sides taking some casualties.  I begin to feel the magnetic pull of  chateau.  Must Resist!

Close up of the action as the French press against the Belgians and Dutch holding Papelotte.  

Just after this photo was taken in the Allied fire phase, the French columns started coming under cannon fire and three battalions were disordered with casualties.  Meanwhile, Milhaud’s 3rd HvyCav Div is committed and moving up.  Allies responded by committing Vivian and Vanderleur’s two cavalry brigades on the A-D left flank.

More to follow as I play it!   Who knows if I’ll finish the game this calendar year!

Blessings to your die rolls, 

MP+

Tuesday, June 29, 2021

Terrain Tuesday: Terrain of Varying Dimensions

 As in two versus three dimensions.  

Currently set up in my cat-proof gaming room (well, unless I forget to close the door or accidentally lock one of the beasts inside at nighttime - that ended the Franco-Prussian war in a hurry!) is this monster, showing that you can have a LOT of terrain if you aren't too fussy about modelling it.  Recognize it?


Yes?  Good for you!   No?   OK, here's a hint.


I'll have more to say about this game in this week's Thursday Napoleonics feature.


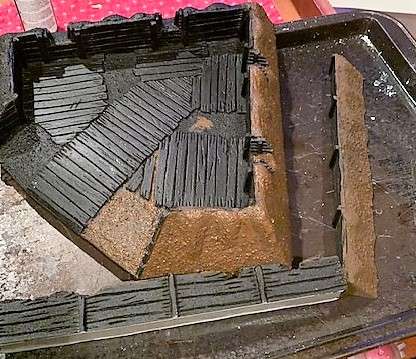
How about somc conventional 3D terrain?  In the meantime, was up early this morning starting to work on these field fortifications from Paul's models, which I'm quite impressed with.   Painting plan is simple.  Black undercoat, Brown Umber (Folkart craft paint, cheap and cheerful) on the outer parts and then a bit of Yellow Ochre drybrushing and flocking the lower parts as it is mostly freshly dug and constructed.  Tan brown on the inside for the lumber, some Army Painter light tone washes, and then a bit of gray drybrushing.   Hoping to have this done soon so I can start Phase Two of  my ACW Seven Pines battle.

Blessings to your table dressings!  MP+


Thursday, March 25, 2021

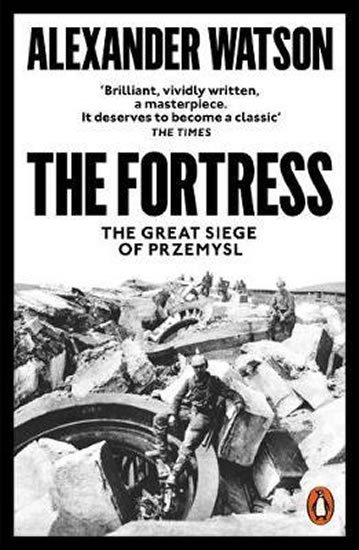
Book Review: Nicholas Watson's Fortress: The Great War Siege of Przemysl


The Fortress: The Great Siege of Przemysl, by Alexander Watson, New York: Basic Books, 2020.  

This is not as long a book review as my last one, more of an appreciation, really, but I can’t remember the last time a book of military history made such an impact on me as Watson’s book on this obscure battle of the Great War in the East.

For those of us in the Anglo-Saxon world, unless we are particularly well-read, our knowledge of the Great War on land is most likely centred on the campaigns in France and Belgium,  with side trips to the Dardanelles and perhaps the fighting in the Alps between Italy and Austria.   The Tannenberg campaign is probably the latest singular exception to this rule, but the frontier battles that raged in Galicia and the Carpathians in 1914-15, and which devoured hundreds of thousands of lives, were a mystery to me until several folks online said that this was a must-read for students of the Great War.

Alexander Watson is a relatively young professor at the University of London, who has already published one book on this subject, Ring of Steel: Germany and Austria-Hungary at War, 1914-18.   Fortress by contrast focuses on the Austro-Hungarian defence of Przemysl, a town on the edge of the Carpathians in what is now Poland, which was surrounded by a ring of mostly obsolete fortresses.   There was no vital reason to defend it, but after the collapse of the Austro-Hungarian offensive in Galicia in 1914, the decision was made for reasons of prestige to hold it with a scratch force of reserve troops from the town and from the far reaches of the Empire.   The city held out until the spring of 1915, when starvation forced its surrender to Russia.

I won’t try to duplicate the many glowing reviews out there, such as this one in the Guardian.   I found the book absolutely gripping, and could quickly see why it’s such an acclaimed and awarded title in military history circles.  I will also say that I found the book unbearably tragic.  Like all sieges, it has the same narrative arc of gallant defiance and comradeship giving way to dull despair as food and hope runs out.   Watson is drawn to the city’s unlikely defenders, mostly older reservists with obsolete weapons, but he is also clear-eyed as to the Austro-Hungarian Empire’s long record of massacres of the local population of Ruthenes (speakers of various Ukrainian dialects) as suspected Russian sympathizers (there are some dark photos out there).  On the other hand, the Russian regime’s treatment of the Jewish population could be just as grim, and as Watson notes, the First World War in Eastern Europe is a prelude to the ethnic cleansing and genocide of the Second World War.    Przemysl, a multi-ethnic city before the Great War, was greatly and sadly changed by the war, and its fate, like that of Sarajevo in the 1990s, reminds us of how fragile multi-ethnic societies can be when forces of hatred are unleashed.

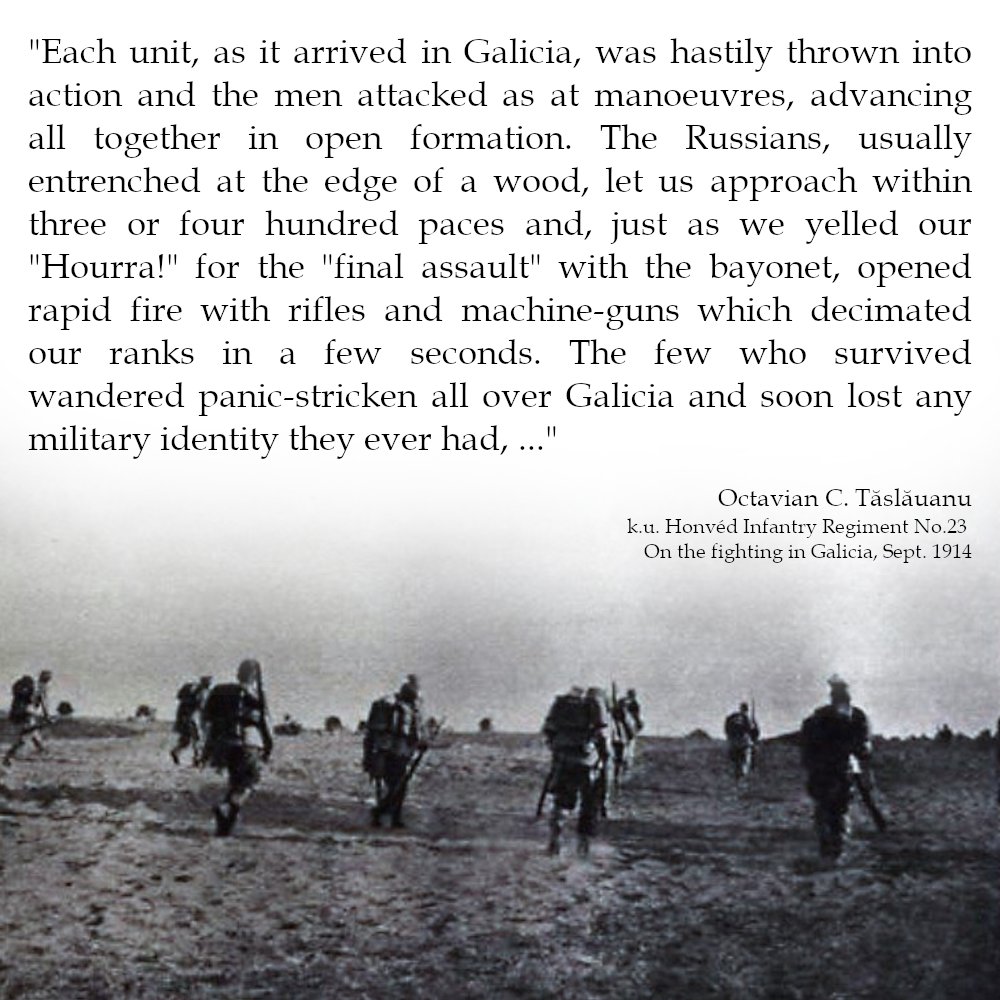
The other thing I found particularly tragic about the book was the stupidity and callousness of the Austro-Hungarian army and its commander, Conrad von Hotzendorf.  It’s hard to imagine a more malignantly irresponsible figure in all of military history.  Whereas the Russian armies fielded against Przemysl appeared to be relatively competent, the  Austro-Hungarian command threw the lives of their troops away - there’s no other way to describe it.  This quote isn’t from the book but is from the must-read Twitter account of @PikeGrey1418 captures it well.  

  Watson’s book is full of this sort of account, and they still haunt me a month later.

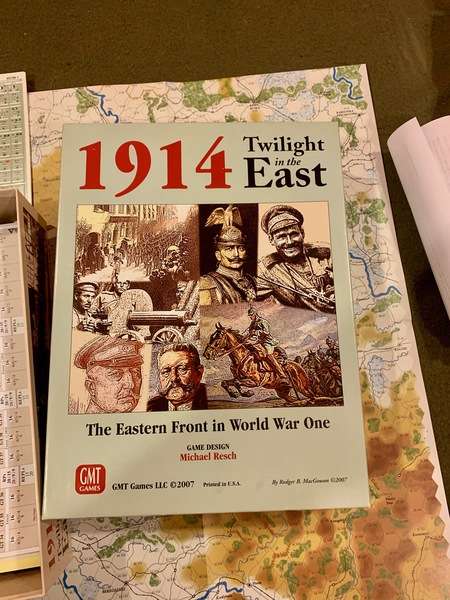
Sitting on my games shelf is this mini-monster game from GMT Games, designed by Michael Resch.  

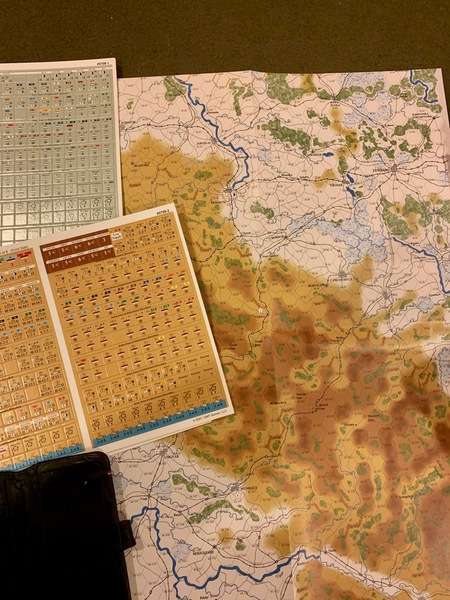
I confess I’ve had it for a few years, unpunched and still in the shrink-wrap, but after reading Watson I had to open it up and have a look.  Here’s the Galicia map, with just some of the counters.


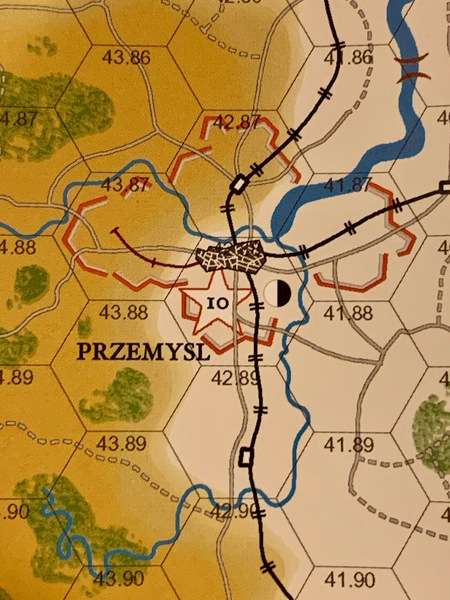
And there’s Przemysl, with its ring of fortresses.

 I may not get to this anytime soon, as I currently have a large Franco-Prussian hex and counter game on the go, but I am very curious to give this a go, as I’ve played Resch’s sister-game on the Western Front, and learned a lot about the difficulty of commanding large armies in that game.  

Even if you never want to add this subject to your gaming repertoire, I can’t recommend Watson’s Fortress enough to you as a superb treatment of an obscure campaign.   Just be prepared to be a little haunted by it.

Blessings to your books,

MP+


Saturday, March 6, 2021

On To Paris! By Compass Games Turns 1 and 2

Currently on the Mad Padre’s hex and counter table I have open On To Paris (OTP), an operational/strategic treatment of the Franco-Prussian war, designed by Milan Becvar for Compass Games.  I understand the game system is ported over from an American Civil War publication from Victory Games, which I’ve never played.   I gather OTP has had a complicated production history, and there are some noted graphics issues which others have noted - in brief, I find the board and the charts hard to read because of strange font and colour choices, but I’ll leave that for now.

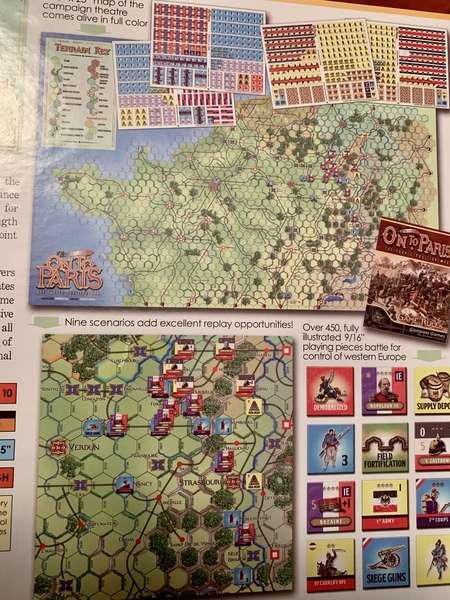
Here’s the back of the box to give you a sense of the game’s look.

OTP is a bit of a head-scratcher for a bear of little brain like myself, but I’m slowly working it out.  The building blocks of each side are infantry and cavalry strength points.   Infantry can be left as SPs for duties like garrisoning fortress, but are best organized into corps which can be attached to armies for maximum flexibility.  Cavalry are organized into divisions which can likewise be attached to armies.   

The turn sequence is a series of random impulses in which each side uses dice-driven random allocations of Command and Initiative Points to organize and reinforce, maneuver, and fight.   Amies have some reactive capability so the non-phasing player can sometimes move to counter the phasing player’s operations, depending on things like commander abilities, which gives it a fairly fluid feel.

Prussian armies are somewhat better at command and control than the French and so are more maneuverable.   There is some historical chrome:  French artillery problems at the beginning of the war mean that French combat strength is reduced in the early battles, though Prussian massed infantry tactics at the stat of the war mean that they take higher casualties.  Both sides have chances to improve their processes over time.

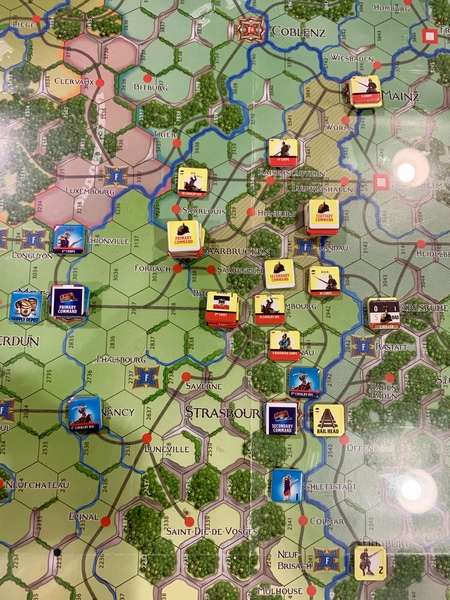
I’m playing a long scenario starting in July 1870.  Here two Prussian amies are massing near Saarbrucken, while a third menaces French forces gathering around Strasbourg.  One Prussian army has crossed the border and is besieging a French corps in the fortress of Bitche (cue puns here).


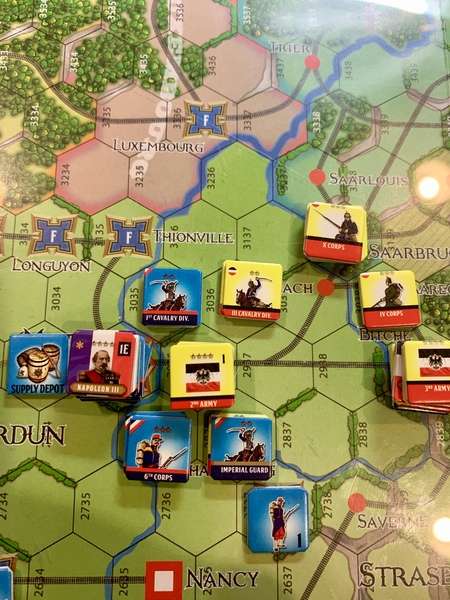
Turn 2 - with the largest Prussian army, the Second, with four corps, bearing down on Metz, the French command sees an opportunity to encircle and defeat it before reserves can come up.  A risky strategy as it would be better to entrench behind the river and rely on Metz’s defence, but (Gallic shrug) en avant! is the cry, as the French sally forth under the gaze of Napoleon III.  If the French get lucky and win the next initiative, they might have a chance of encircling and even destroying Second Army.  Battle has been joined as I slowly work out the combat mechanics.   More to follow.


Sunday, January 24, 2021

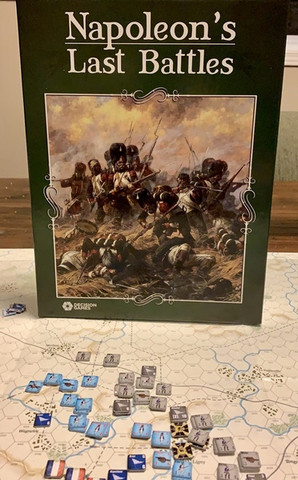
Revisiting a Hex and Counter Classic: Napoleon's Last Battles

Back in 1976, in the heyday of disco, detente, high inflation, and my vain attempts to get Madeleine Bennett to notice me in Grade 6, Simulations Publications Inc.  published Napoleon’s Last Battles, one of the classic war-games systems.  It was designed by Kevin Zucker, one of the galaxy of talent that SPI’s Jim Dunnigan gathered around him like Napoleon and his marshals.    Kevin went on to found his own company, OSG, and is widely considered one of the authorities on Napoleonic board gaming today.

There is a great review of NLB, including photos of the original counter set, and a thoughtful appreciation of its impact on many subsequent titles, on the sadly inactive Map and Counters blog . on I bought the re-edition of NAB published by Decision Games, which picked up most of the old SPI titles after TSR acquired them.   NLB now comes in a shiny box with new artwork, and the original counters have been updated.  


The scale of NLB is operational, with individual counters representing brigades with combat and movement factors.   Optional rules allow for basic command and control; for example, Napoleon can only give orders to three divisional commanders in a turn if they are within his command range of five hexes, and the divisional commanders can only fully employ their units if they are within three hexes.  Combat is hex to hex, though artillery can add their combat factors if two hexes away.  Combat is a simple ratio worked out on a Results Table that only gets bloody if the odds are 4-1 or above, or 1-3 or below.   Otherwise units will safely retreat unless all possible retreat hexes are within the Zone of Control of an enemy unit.  Hex and counter gamers of a certain age will remember what being ZOCed is and why it is fatal.

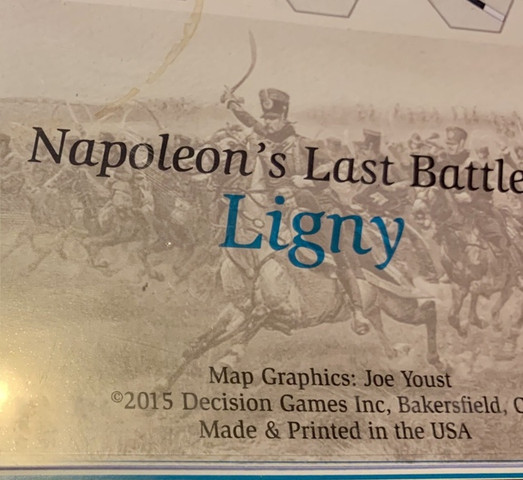
NLB comes with four games (it was the original SPI Quadrigame) of the Hundred Days: Ligny, Quatre Bras, Wavre and La Belle Alliance.  There are of course rules to play all four games as a campaign game.  

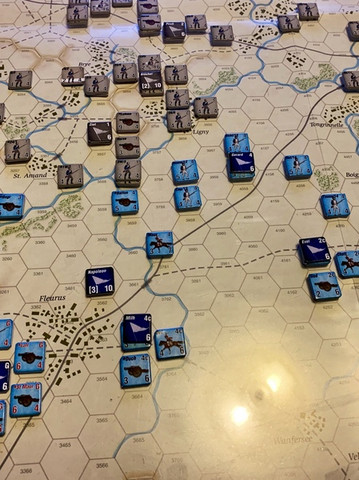
As time only permitted me to play one game, I chose Ligny. 

As in the battle, the French player only has six hours of daylight to inflict serious harm on Blucher’s three scattered corps.   The Prussian must hold with Zeiten’s and Pirch’s corps while bringing von Thielmann’s III corps to the rescue.

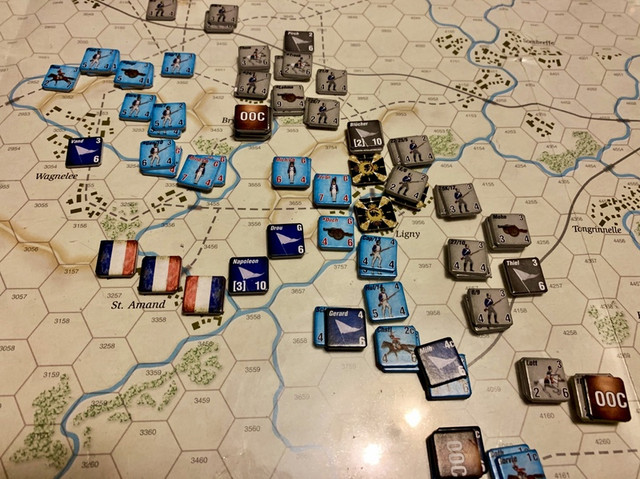
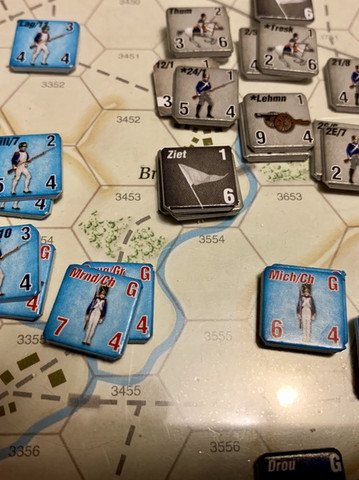
Alas for France, my first run-through did not go so well, as it took me too long to remember how to use ZOCs to my advantage.  At game’s end, Gerard’s Fourth Corps had suffered a mauling at the hands of Von Thielmann’s troops, while the Guard and Vandamme’s III Corps had taken Fleurus easily but were being forced out of Ligny proper.

Hero of the game:  Zieten, who held off Napoleon’s last big attack before twilight and who sent the Imperial Guard packing.  Prussian victory!

NLB is one of those simple game systems that remains fresh and interesting after fifty years, despite it’s new coat of paint in the Decision Games re-issue.  While it might seem dull because its woefully lacking in the chrome that we have since become accustomed to (although SPI’s monster Waterloo Game, Wellington’s Victory, also published in 1976, has all the complexity one could wish for), NAB does the job.  It presents an operational problem in sufficient detail to challenge the player, and delivers a clean result in a few hours, and works well enough as a solo game.  I would be delighted to play it against you on Vassal, if you care to.

 I’m very pleased to have it in my library and look forward to revisiting it again.

Blessings to your die rolls!

MP+

Wednesday, December 2, 2020

Sunk Hopes for Avalanche Press' Russo-Japanese War

My old friend and gaming adversary James (@JamesManto4) recently observed on social media that he’s puzzled by my fascination with extremely granular hex and counter war-games.  It puzzles me too.   I fell into bad company as a young teen and got introduced to SPI monster games by older, debauched boys is all I can say.

It’s generally true that I divide my time unprofitably and inefficiently between paper hex and counter games and miniature games, and that I probably have more unpunched cardboard than I can get through in whatever years remaining that the good Lord graces me with.   I find that operational and strategic level paper games afford a vantage point and level of interest that most miniatures games can’t give me, and when I want a good skirmish or tactical game, out come the minis.   Also, both types of games have their own kinds of aesthetic appeal for me.  

Are you still reading this?  I haven’t even gotten to my main point yet.  So here it is.   I gave up half way through Russo-Japanese War by Avalanche Press.  I just couldn’t pretend that I was enjoying it any longer and having recently turned 58, I am more and more aware that life is short.

Here’s the problem.   Even through pre-dreadnoughts, those ungainly, smoke-belching, baroque iron castles of the sea, have their own fascination, and even though the Russo-Japanese naval war has its many fascinations - doomed fleets of a doomed empire, valour, technology at the cusp of change - the game itself is less than fascinating.   How could it not be inspiring?

                                            So inspiring!

The problem is that it’s not a very interesting war to game because the quality of the two sides was so varied.  The Japanese were a highly drilled, efficient and well-led naval service, and the Russians, well, were not.   Any game which wants to model this qualitative asymmetry has to penalize the Russians, so in this game, while you hit on a 6 on a d6 at long range (5 o 6 on a d6 at close), if you’re the Russian player you then have to roll a second confirmation roll (5 or 6 a d6 for each hit) to see if the shell actually hits its target.  The Russian confirmation gets slightly easier (4-6 on a d6) after eight rounds of combat, but the handicap against the Czar’s ships is still very severe.

RJW follows Avalanche Press’ Great War at Sea rules system, with a host of variations for the pre-dreadnought era.   With two players, the strategic game might be interesting as both sides have to secretly plot their moves, though the general objectives are fairly obvious - in the first phase of the war, the Japanese are guaranteed to show up at Port Arthur in force at a certain time after sailing from their home ports because that’s the main prize.  I suppose the Tsushima part might be more interesting for two players, but as a solo game, even with some random directional die rolls to make things fun, the COAs for both sides were fairly obvious.  There is some strategic challenge for the Japanese because their total fleet numbers are inferior and so their margin for error is slim, but realistically and historically, they can sink the Russians in two job lots with little fear of disaster.

As a tactical game, RJW isn’t that much fun, to be honest.  I decided to sortie the whole Russian fleet from Port Arthur to try and stop the Japanese from landing troops on the Korean peninsula, which meant that they ran into the main Japanese force early on.    I then deployed all the ships to the tactical map.
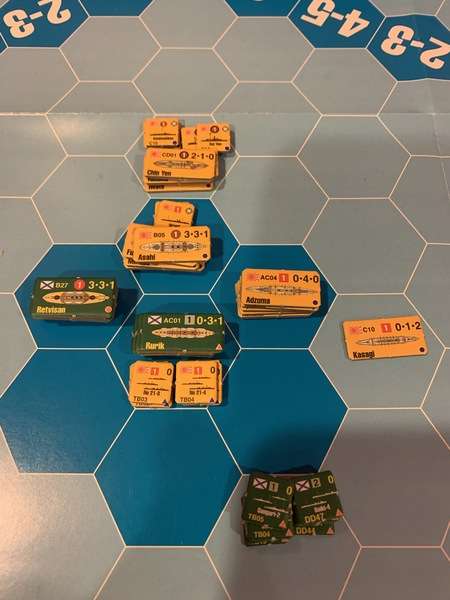
                       Not so inspiring.

The tactical phases are IGO/UGO start with random determination of initiative, through logically the Japanese, being better sailors, should always have initiative.   Ships of different speed classes are then moved in sequences,  each speed class getting its own sequence with fastest going first, and between each sequence there is a round of gunfire and then torpedoes if close enough, and the incentive to get close gives the game a sense of Age of Sail. There is a stacking limit of capital ships per hex, and the movement rules are too abstract to allow for subtleties like trying to cross the enemy’s T as in Jutland.  You just get in close and then it’s Fire Away Flanagan.  Ships have Primary, Secondary, and No armour ratings.  Likewise there are three gunfire ratings: Primary, Secondary, and Tertiary.  Primary shells penetrate all armour and do extra damage for lightly armoured ships.  Secondary shells only penetrate secondary or no armour, and Tertiary shells only damage unarmored ships such as destroyed and torpedo boats.   Torpedoes are bow mounted (less effective) and hull mounted (more effective) and are basically close range weapons with a more destructive effect.

Damage is marked off as Hull hits, Gun hits, Torpedo hits, and occasionally critical hits, using ship logs.  For a large action like my Port Arthur battle, it becomes a dreary round of checking the firing ship to see if it has lost any gun factors, rolling dice, and then marking off boxes on the target ship as necessary.   I remember playing with ship logs as a kid with Avalon Hill’s Wooden Ships and Iron Men and that didn’t seem a bother then, but as I said earlier, life is shorter now.  It boils down to lots of die rolling, lots of paper consulting, and lots of marking off boxes.  To make a long story short, the Russians were getting the worst of it and their battleships were generally in a bad way, with one sunk.   There was some prospect of the Russian torpedo boats getting into the IJN line of battle, but it was a faint hope.   Honestly I couldn’t be bothered finishing it.

To be fair, the RJW scenario book as a ton of history and detail, and the full OOBs for both sides are represented in the counter mix, so the game could be a great resource for someone who wanted to play this era using miniature ships.   Smaller actions might be fun, particularly if you abandoned history and made both sides equal in capability.   It might also be fun to introduce British, German and American ships.  However, out of the box, as is, my hopes for RJW sadly foundered and then sank under the waves.
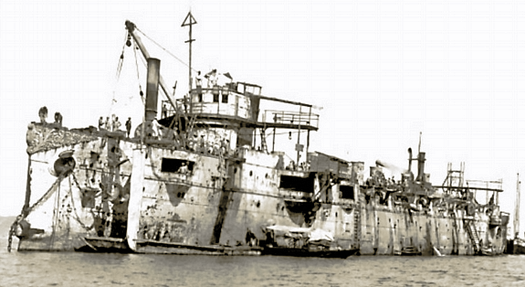
Image:  the authors hopes for a fun game.


Blog Archive

Followers