Showing posts with label Sharp Practice. Show all posts

Wednesday, August 26, 2026

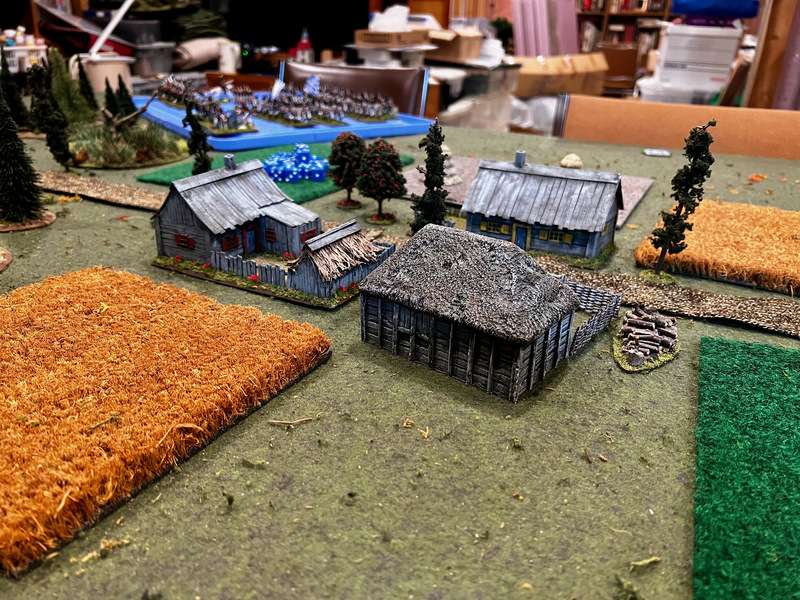
Schlaup's Farm: A Seven Years War Sharp Practice Game


It's been a while since I took out the Too Fat Lardies Sharp Practice rules, and I wanted to give them a try with some Seven Years War figures, and they worked surprisingly well.   I was also reminded of how well the chit/card format works for a solo game.
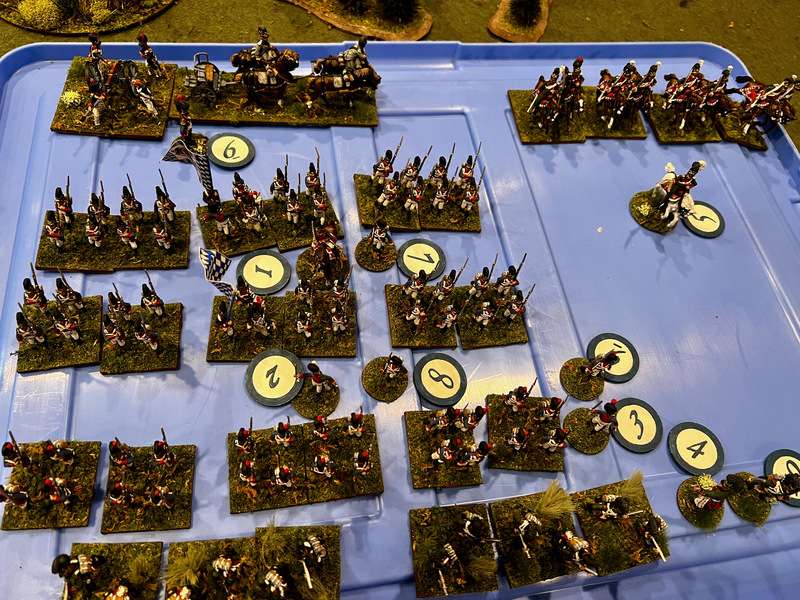
I dipped into my Prussian and Russian collection to put two small forces together.   I didn't use any points, just picked two small forces that seemed appropriate for the Seven Years' War kleine krieg.

The Prussians got a light cannon, a group of 8 hussar skirmish cavalry, a group of six jaeger rifle armed light infantry, and two groups of musketeer line infantry.  They had four Big Men: a Lvl 3 in overall command, a Lvl 2 with the cannon, a Lvl 1 w the line infantry, and a Lvl 2 with the Jaegers.

The Russians got a group of 8 hussar skirmish cavalry, a group of six musket armed skirmishers (Pandours), three groups of 8 musketeer line infantry.   They had three Big Men: a Lvl 1 with the hussars, a Lvl 2 with the line infantry, and a Lvl 3 in overall command.

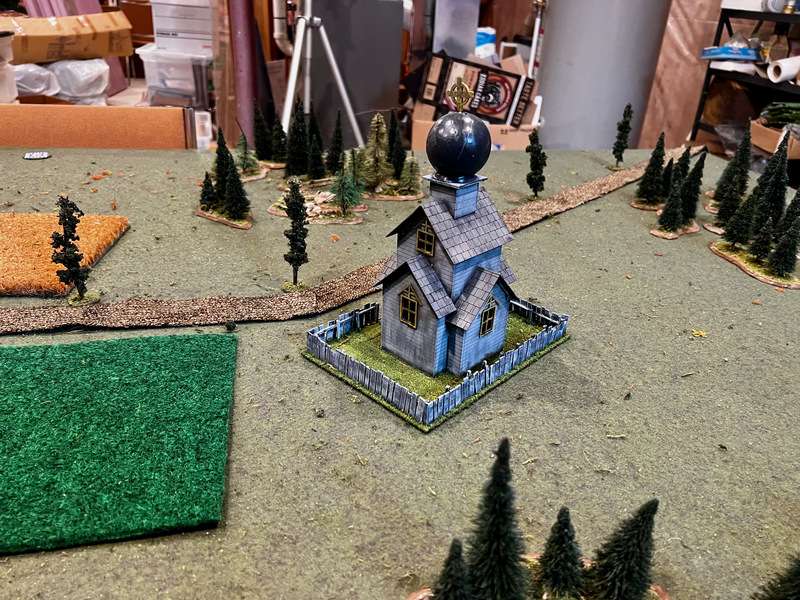
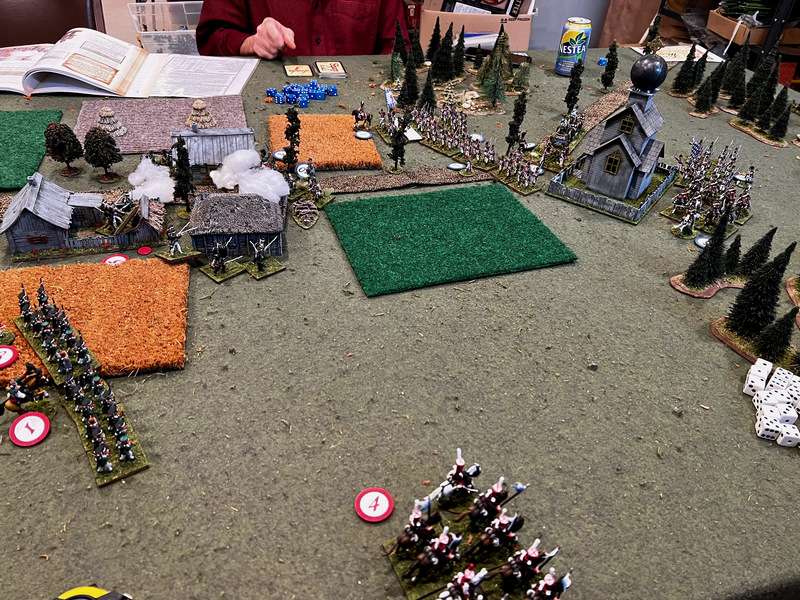
After Turn 2 some of the opposing forces are on the table, shattering the peace of the Schlaup Farm and its inhabitants. Prussians on the left side.  I wish I knew why I insisted on fighting end to end and not side to side.   I randomly selected the Prussians as defenders so they get to deploy a little further forward from the jump off points.


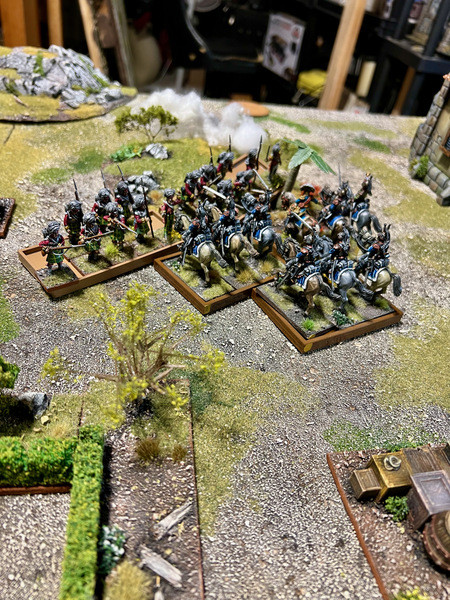
The two opposing groups of hussars looked at each other and growled.  It was the Prussians who got the first card and elected to charge at the canter so they catch the Russians standing.   Since the Russian hussars are classed as irregular cavalry I thought about giving them the evade option but as I read SP, that is only allowed to troops classified in the lists as skirmishers.  So it goes badly, the Prussians lose 2 men and their Big Man is wounded, going to a Lvl 0, but the Russians lose half their 8 men and are thrown back with lots of shock.  The Prussian hussars on the left are by Front Rank, I don't have any idea who made the orange chaps on the right, some of my earliest painted figures.  Falcon, maybe?  Dunno.

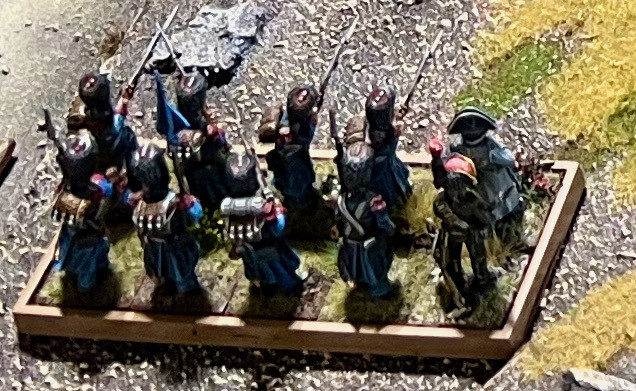
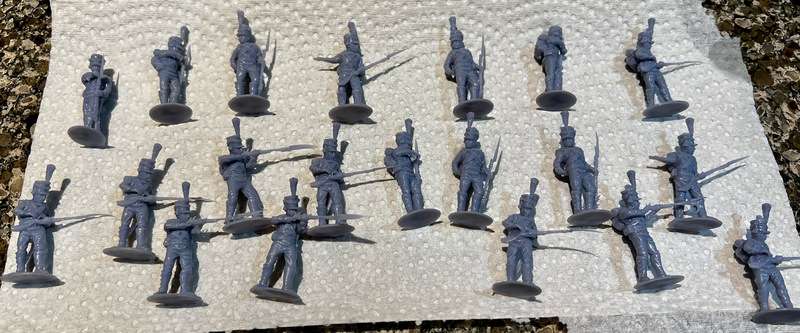
Scharf's Rifles arrive and take up position behind a stone wall, which I count as light cover because it's only breast high.   This was my first time using these figures and this troop type.  In SP their rifles take 2 turns to reload but outrange muskets by 12", so they are useful troops best employed at long range.  They do have the evade characteristic which is handy because they are few in number, and a 6 figure group is more vulnerable to shock than an eight figure.   In SP, these troops can reduce their reload time to 1 action (the action cost for smoothbore muskets) instead of the usual 2 using the Tap Reload rule, which states that "This is a poor choice in the long-term as it causes damage to the rifling on their weapon, however, in extremis, it may be an attractive option" (p. 43).  However, the rules don't state what effect this damage might have and how long before it takes effect.   Probably a factor in a campaign game.  These are Foundry figures as featured in my previous post, and they are having their maiden action.


More light infantry action.   The Russian jaegers (I'm calling them pandours) take up position behind a stone wall and await the Prussian line which are slowly making their way forward through a muddy field.   Unlike the Prussian jaegers, the pandours are musket armed, so their only advantage on the table is that they are classed as skirmishers and can also evade.   It was a mistake leaving them to face the Prussian line alone.  Even with the benefit of light cover from the stone wall they are outgunned six muskets to sixteen, with no range advantage.  I should have tucked them inside the farmhouse, but they might have been lost to me from a bad looting test - quite likely, really, given that these are rough and wild troops.  
One thing I like about SP is the random events, which can occur if three command cards or chits are drawn.  In this case, a random event happened to the Prussian line infantry.  Their Lvl 1 Big Man stepped in something awful and, since he is evidently a pomdaded and perfumed sort of fellow, his Command Rating fell from 1 to 0.  He would need to get to the courtyard, find a well, and wash.   I got a good snicker out of that.


As mentioned, the pandours should never have been left that far forward.   They inflict a little shock on the advancing Prussians and their stinky leader, but the Prussians stop, present, and unleash a first volley that kills two pandours and sends the rest reeling back with lots of shock.  So a lesson learned.


But what about the Russian line infantry?  They were stolidly advancing up the centre of the table.  The Prussian light cannon got a few shots in, killing a few and causing shock, but according to the Russian SYW army list I was using, Russian line have the "Stoic Serfs" characteristic, which allows them to "ignore the first point of shock for each round of fire received or round of fisticuffs".  A very useful ability that rings true to accounts I've read of battles like Kunersdorf (which had its anniversary ysterday!).
So the Russian line continued to advance at a slight oblique towards the stone wall held by the jaegers, and being careful not to show their flank to the hussars, who in turn were reluctant to face that mass of bayonets.   


At this point I stopped taking photos so I'll briefly describe the outcome.  The pandours fell back and were out of the fight.  The Russian Lvl 3 Big Man was lightly wounded trying to rally them.  Meanwhile the Russian line infantry pushed up to the wall, firing at the evading jaegers and killing two of them.   Their advance carried two of the three groups in the formation over the wall but the third group was now separated from their comrades by the right angle of the wall, so I ruled that they were broken off from their formation.  Leutnant Stinky, having disposed of the pandours, broke off one of his two groups and along with the cannon they made life miserable for the exposed group of Russian musketeers, which lost three men and took a lot of shock.

The depleted Russian hussars thought they might sneak around the barn and catch their nemesis in the rear, but the cards went against them, the hunters became the hunter, and in a second melee the Russians lost two more men without doing any damage.  The survivors were out of the fight.  The Prussian hussars had nothing between them and the Russian deployment point, so they galloped up, captured the cart of fodder and vodka, and with the Russian morale rapidly collapsing, I called it a day.

Things I learned:

1) I was reminded how good SP is for solo play.  As long as I can play a complete turn, I can leave it and come back to it when time permits without forgetting a unit that hasn't moved.

2) I use chits but I really need to make some playing cards, the chit pull is awkward and the way I've painted the MDF chits, they tend to stick together.  Also, I allowed myself to put the Tiffin chit back in the cup if it came up too quickly and only apply it the second time.

3) Light infantry and skirmishers are fun to use but the caveats described above apply.  They are too vulnerable to be left in the open.

4) Cannon are fun but don't expect too much of them.  Rolling ten dice is a pleasant experience, and it will cause some damage, but with two actions to reload and one to lay the gun to get the extra dice, it means that a cannon will at best fire every second turn.

5) Formations, formations, formations.   Two, or better yet, three groups of lined infantry in formation, ideally with a subordinate leader to help reduce shock, are terrifying to face if handled properly, and their first fire is a veritable Death Star.   However, they are easily disrupted by bad terrain.

6) Don't forget that a Big Man needs to spend a Command Action to activate a group or formation he's with.   It's not automatic.   It was one of those details I'd forgotten from previous games.

7) A little terrain goes a long way.  I think the table I set up had a good mix of terrain to troops.

One final thing, I mentioned that I was using Sharp Practice army lists for the SYW and yes, I have lists for the Russians and Prussians but I'm blessed if I know where they came from.  If you'd like them, let me know in the comments and I'll send them to you.

Cheers and blessings to your die rolls!  MP+

Monday, March 13, 2023

With Boney In Spain: A Sharp Practice Playtest


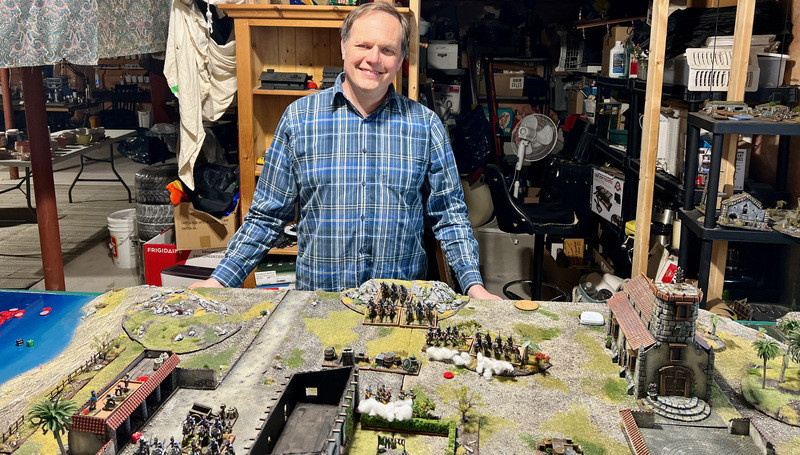
Last week I had the chance to visit my friend Joe Saunders to playtest his Sharp Practice game for HotLead in two week’s time.   Joe of course is the proprietor of the Miniature Landscape Hobbies YouTube channel, and a friend of the Canadian Wargamer Podcast.   Here is the always friendly Joe beside one of his epic scratch built terrain boards, in this case depicting a village somewhere in Spain.    

The scenario was built around Napoleon’s one visit to Spain in 1808.  The Emperor is travelling cross country by coach wit a small elite escort but the details of his trip are leaked and Spanish partisans are lying in ambush.  French and British troops are hastening to the site.   The Emperor wins by getting from one side of the table to the other.

Close up of Napoleon (front rank on the right) with his elite escort Chasseurs of the Guard.  All figures painted by Joe.  The Napoleon casting is I believe a Warlord sculpt, and Joe’s tutorial on painting him is here.  Napoleon is rated as a Level 4 commander, the best in there can be in the rules, so he has a ton of clout on the battlefield.  The downside is that from turn on, he is in long range of Spanish guerrillas, so he needs to be careful.

When I learned that I got to play Napoleon in a tactical game,  I absolutely HAD to play the French!

The game unfolded with a full run of cards allowing all units from both sides to deploy.  The British had a light and a heavy cavalry unit on their side of the table, directly facing Napoleon.   It was only a matter of time before they decided to charge, and while I did my best to block them with a unit of dragoons, I had deployed my other unit of cavalry, cuirassiers, on the far side of the table where they weren’t able to protect L’Empereur, which proved to be a fatal mistake.

In retrospect, Joe and I decided that both sides should only have light cavalry, as heavy impact cavalry in Sharp Practice is murderous.  Otherwise, the British player will do their best to ride down Napoleon as quickly as possible and end the game.

As an example of what impact cavalry can do, here are my cuirassiers charging into a hapless formation of Highlanders.  The cards allowed me to hit them while the Jocks had their muskets unloaded, so they got bundled off the table with heavy losses. It was one of those rare moments in Sharp Practice where you get perfect card draws: I  moved into charge range with the last card of one turn, and got to charge with the first card of the next turn.  Fun when it happens, especially given how rare such moments are.

It’s always fun to help a friend think through the balance and structure of a war-game scenario.   I wish I’d taken some more photos of Joe’s lovely terrain and of his wonderful collection of 28mm Naps.   Hopefully I’ll get some more for you at Hot Lead in two weeks time.

Cheers and blessings to your die rolls,

MP+

Tuesday, January 3, 2023

Resisting (?) The Allure of Big Napoleonics

Hello and Happy New Year.

One of the last two games of 2022 for me was a game of Sharp Practice with my friend and podcast partner James at his place.   Besides the pleasure of spending time with an old friend, there was the thrill of playing with James’ 28mm kit, which he has been assiduously assembling and painting for the last two years along with our mutual friend Scott.   While Scott has been focusing on the French, James has done Bavarians, Russians, and is now working on Austrians and Prussians.

Here is the force of invading Bavarians that we assembled for this skirmish on the steppes of Russia.  The figures are a mix of metal (including Front Rank) and various plastics including HAT.

And the defending Russians, which I took.

It’s hard not to be tempted by how attractive these units are. James is a decent, workmanlike painter who has a knack for turning out figures that are wargaming standard, in large numbers, and in fairly short time.   When he wants to he can kick it up a notch, as with the Russian officer in the centre, on his prancing horse waving his expensive hat.  The overall effect is very impressive.

On the tabletop, these figures are paired with some fine scenery.   As with the figures, James aims for a wargaming standard with his scenics, but the overall effect, as with these Russian houses, is quite pleasant.   


Likewise this MDF church (Our Lady of Cabbages) is nicely presented with a scratch built fence, and the unfortunate billiard ball dome will be replaced by a nice 3D printed spire for future battles.

Here’s one shot of the battle, which went badly for me.   We advanced from the long ends of the table, and spilt the village, where my light infantry was slowly evicted by the better fire of the Bavarian rifle-armed jaegers.   I foolishly led with my weakest infantry formation (bottom left) which were ripped apart by James’ grenadiers.   James has an intuitive grasp of Sharp Practice and used the order cards to best effect, seizing several extra moves/volleys for his grenadiers.  The only real success I had was a cavalry victory as our light horse basically cancelled each other’s out of the game.

As readers of this blog now, I made the decision a decade ago to do Napoleonics in 6mm and I have not regretted that decision.  However, all this is building up to the confession that this period in 25/28mm is hopelessly infectious.  The figures are just so much more dramatic in the larger scales, which reward painting and uniform details in ways that 6mm can’t.  It’s like comparing an impressionist painting (6mm) with a romantic but realist painting such as Lady Butler (28mm).  The big scale wins in the close ups.    That being said, I am firmly convinced that 28mm for Napoleonics works best with larger skirmish games.    For battles of a brigade on up, I’ll take 6mm any day.   

But, I still feel the need to paint a force in 28mm!    So here’s the likely solution.   Piano Wargames, a very clever fellow named Lucas, has been labouring away for some years now on the troops of minor German states, and has just wrapped up a very successful Kickstarter focusing on the Tyrolean Revolt, which will feature rebels, Bavarians, and Austrians.   The KS offers .STL files as well as metal figures, and I’ve decided that it will be a good opportunity to use my limited 3D printing prowess to do some of these rarer figures for James (and I get to play with them from time to time, so win win).  

Since my experience with printing 28mm figures is minor, I thought I’d practice by ordering some of Lucas’ files already on his webstore, in this case, six light infantry figures from the Duchy of Wurttemberg, which would themselves be the basis of a nice little Sharp Practice force, since they can fight as French against Russians or Austrians until, as invariably happened, they turn coats and fight against the French towards the end of the Napoleonic period.

I had a devil of a time getting the pre-supported files to print, for some reason known only to my Elegoo Mars2 printer, but when I decided to print the unsupported figures, I was fairly successful, though there are some minor flaws in some prints.   Still, I now have enough to print and to see if 28mm is as seductive as it appears to be.  Wish me luck.

Tuesday, July 19, 2016

OP THIUNDERING DICE ROTO 16-3 Complete

My wargaming bestie James was over last weekend for the third instalment of what we call OP THUNDERING DICE.   Since we moved further apart last year, we have been running an ongoing series of slumber parties, and this time, ROTO 3, we decided to play another game of War of the Ring, try Sharp Practice 2 with my ACW collection, and then play a fantasy game of Dragon Rampant.

James got caught up in the Friday not rush north to cottage country and arrived late and somewhat frazzled, but some barbecued goodness and a beer downrange later, he was good to go.   We started with War of the Ring (2nd ed) by Ares Games.  You can read his account of our weekend here.  It was our second complete game.  The first time I played Mordor, this time I played the noble and winsome free peoples.  Both times Mordor lost when the Ringbearer achieved his quest.   It was a near run thing, and it turned on the draw of one chit.  Some would say that a game which invests so much in the military and political aspects of the war, and then hangs on a couple of dumb hobbits meandering through Mordor, isn’t really much of a game at all.   Well, I suppose, but you could argue that one could say the same thing about Tolkien’s book. We had fun, at any rate.

On to Saturday, when The Other Mike joined us.   James introduced us both to Sharp Practice, the second edition of Too Fat Lardies’ well known black powder skirmish game.  We threw an evenly matched force of Yanks and Rebs on the table.   Other Mike and I were new to these rules, though I’ve played SP1, but despite that faint advantage, Other Mile picked it up very quickly.

Here the gallant Major #5 leads his Union boys forward to try and flank the Rebel line.

My company on the left wing gets into line and goes up against an equal number of Yanks.   However, the extra Union Big Man keeping their line steady, plus those annoying Yank skirmishers in the cornfield, would make it difficult for Rebs.  However, it’s the little hill on the right where the game will be decided.

Shock builds relentlessly and my line breaks.  As shock exceeds the number of troops standing in each group, the formation breaks up.  One thing we didn’t realize was that each time a group retreats because of excessive shock, it lowers the overall Force Morale of they side, and that’s a bad thing.  We almost lost the game when this formation was defeated.


The game was, as I said, decided on the right.   Here in this incredibly amazing, exciting action shot, Other Mike’s troops charge down off the hill and shatter the Union left.    It helped enormously that we were able to get our skirmishers on to the right flank of the Union line.

All of us liked SP2 enormously.   As Other Mike noted, it really felt like a subset of a regimental battle that you read about in the battle histories.   It had a gritty, small-unit feel that was very satisfying, and very different from another ACW game we like, Sam Mustafa’s Longsteet.

In the afternoon we reset the table, keeping the terrain and adding my Rohirrim village to play Dragon Rampant.  We gave the forces of Isengard the usual mix of Uruk Heavy Foot, crossbows (Heavy Missiles), archers (Light Missiles), Berserkers (Bellicose Foot), a shaman (Wizardling), and Warg Riders (Heavy Riders).  Against that daunting mix, we gave the Rohirrim a unit of skirmishing cavalry (Light Riders), one of heavy cavalry (Heavy Riders), two units of Heavy Foot, two units of Light Missiles, and two heroes, Gimli and Aragorn (both single model, 6 strength pick units).  We rated Gimli as Elite Foot, Aragorn as an Elite Rider.

It was a ripplingly fun game, where victory seemed within Other Mike’s evil orchish grasp.  Mike’s goal was to burn as many buildings as he could and capture the adorable and plump barnyard animal, Bakkonraed the Swine.   Here the surviving Rohan light archers (some old Wargames Foundry HYW English archers filling in) exult after they routed a unit of Heavy Foot.  In the middle, Gimli exults after massacring the Orc Bellicose Foot.

3

An overview of the battle, just before the Rohirrim Heavy Horse smashed into the warg riders and routed them, killing their general.   Other Mike threw in the orcish towel at this point and we spent a happy dinner hour with James and OM deciding to order their own copies of Dragon Rampant and scheming as to the armies they would field.  We all had terrific fun.

Note, BTW, in the last photo, my amazing spiffing Rohan watch tower.  I’ll get some photos of that in another post.


Blessings to your die rolls!

MP+

Blog Archive

Followers