Showing posts with label Terrain. Show all posts

Wednesday, June 17, 2026

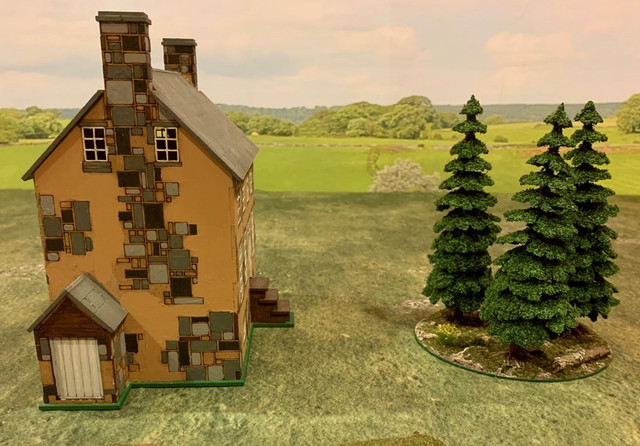
Painting and Assembling the Warbases Prussian Merchant's House

Hi friends:

This series of photos is mostly intended as a visual diary of a recent build of a Warbases MDF house, but might be of interest to some readers looking to make their models a little more interesting than the plain MDF.

This building is from the Warbases Napoleonic Prussia range of 28mm MDF kits, I've built several and they are nice buildings, a little large for big battles but they work well for skirmish games.  This one is the Prussian Merchant's house.  It's a two story building with a stone first floor, a timberframe second floor, and a peaked roof with gabled windows.

My first step was to paint the stones on the first floor.  I know they aren't really bricks, but I thought uniform brick red colour with offwhite mortar would work well enough, and while I've painted stone different colours of gray in their other kits, I couldn't really be bothered this time.  I guess the brick effect works well enough, even if they are oddly shaped bricks.


 The kit comes with a base that is scribed to represent paving stones, so I painted them two different shades of gray.  The outer walls are glued on and went together fairly well, with some rubber bands until the glue (I use white carpenter's glue) dries.


Inner walls in place and while it's unlikely they'll ever be seen on the table, doing them properly was quite satisfying, rather like painting the inside of the cockpit of a plastic model aircraft.   I at least know it's done.  :)   


The wooden ground floor door came out well, I used an AK wood tones paint set with some FolkArt Wrought Iron craft paint for the bars and handle.


The next step is to make the second story walls look interesting.  I wanted a stucco or plaster effect so I watered down some Wood Putty and used an old brush to layer it into the sections that are conveniently outlined on the MDF as being between the lines where the timberframe part will go.    I was careful not to get too much on the latter parts so the timberframe bits will fit neatly.   Once the wood putty was dry I painted it with a craft paint Buff colour and then a bit of a sepia wash.

Once that work is done and the doors and window frames are painted, the timberframes are glued on and clamped until dry.   While drying, the second story floor is painted using AK wood paints.  Again, I'm happy with the result, even though it won't be seen much.


The kit includes a nice little staircase up to the second floor.   The individual stairs fit into recesses in the wall and attach on the other side to the single piece staircase frame.   The railings were simple and I gave the landing some attention with the AK wood paint.   The roof was a challenge, it was just four pieces of plain MDF with the tiles etched into it.  I wanted a more three dimensional effect so found some plastic model railroad sheets in my stash, cut them to fit the roof sections, glued them on and them attached the roof.

The two dormer windows were a bit of challenge, I don't have any WIP photos of them.   Once the roof was on, there were some gaps between the sections that I filled with bits of MDF sprues.  The whole thing was then painted with craft Burnt Sienna, washed with an umber wash, and drybrushed with red paint.


The finished piece scales well with 28mm figures but does make them look almost small.   It's not a wee building!   In a large battle with many units on the table, you wouldn't want many of these structures on the table, but as I said above, they look great for skirmish actions.


I hope this post gave you some ideas on assembling and painting MDF buildings, or at least sold you on the Warbases product.  One minor complaint is that the buildings don't ship with instructions. but you can find them readily enough on the website.  

Even though working on a building like this takes time away from painting troops, the end result is worth it and it enhances the overall look of the table.  I'm happy with the final result and would certainly recommend the Warbases kits.    I might look at an STL file for another building but the painting work would be about the same.

Blessings to your brushes and craft knives.
MP+

Tuesday, April 11, 2023

#Terrain Tuesday: Warbases MDF Fields and Ponds

Hello friends:  

I’ve been quiet here last week, which, as you might expect, was a busy one for my day job as a wargaming vicar, but time to catch up now that Holy Week is concluded.

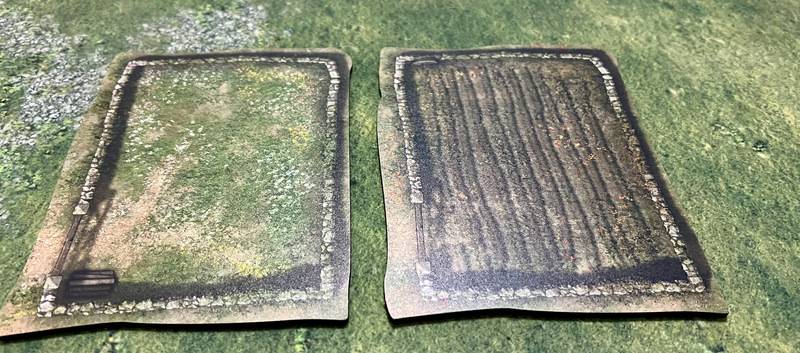
Recently I needed some custom-made MDF bases and ordered them from Warbases in the UK, as my Canadian supplier didn’t seem to need the business.   While I was on the Warbases webstore, I saw that they offered fields and ponds, in a part of the store called Terrain Bases   It wasn’t clear to me that these were 2D images printed onto MDF, I had formed the mistaken idea that they were somehow 3D, which was my own misperception.

There wasn’t a full range in stock, but I ordered two field sets, one in spring (left) and one in autumn (right).  Here are the large pieces from each set, each with a stone wall and gate around the edges.  They blend nicely against my Geek Villain game cloth.  

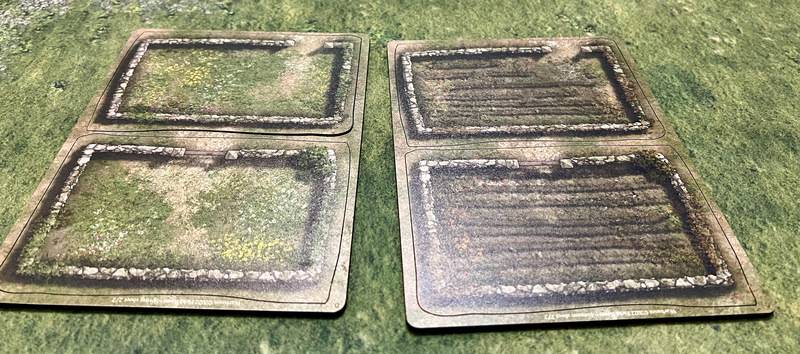
And two small fields in each set, again, spring (left) and autumn (right).

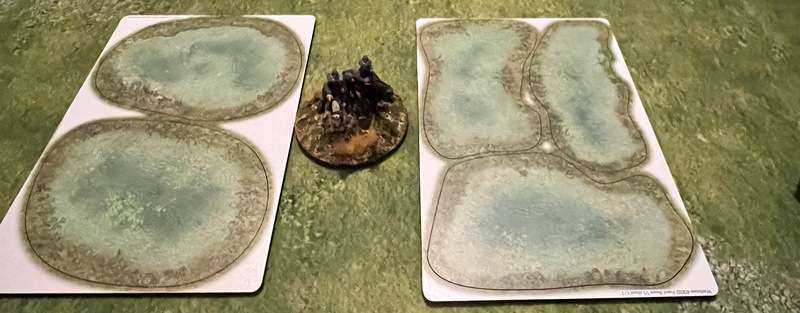
And I bought a set of ponds, which includes a generous five separate ponds.

28mm figure stand for scale.

And a 6mm stand for scale.  In 6mm, depending on the game scale (eg, Blucher where this one stand would represent a brigade), these would be decent sized lakes!

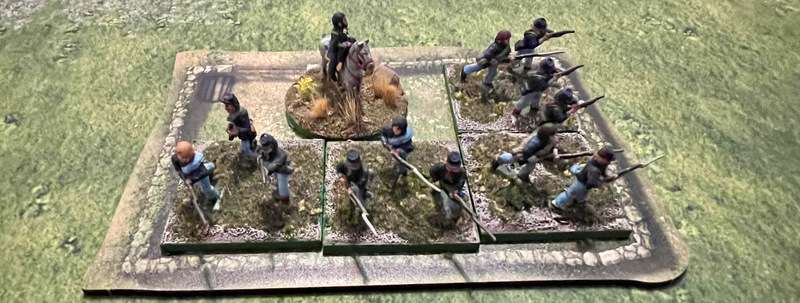
In 28mm, the large stand would accommodate a four or five based unit quite nicely to represent a terrain objective or a defensible terrain feature, such as a walled field.  Useful if one didn’t have enough actual wall section models.

Some folks might balk at the idea of putting 2D terrain representations on the table, which is fine, but for a fast game or if one is travelling light to a club or convention, these models might well be fit for purpose.   The quality of the printed images of the field and pond sections is pleasing, so they are a definite step up from fields and ponds of cut felt.

Cheers and blessings to your tabletops.

MP+


Tuesday, March 28, 2023

Terrain Tuesday: Never Enough Trees!

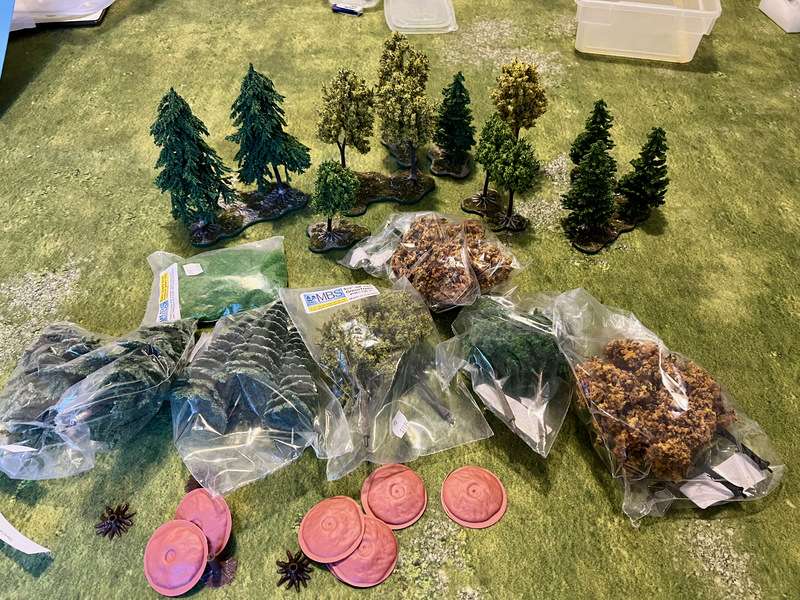
 A wise man (it may have been my friend James, but don’t tell him I called him wise) once said to me, “A wargamer can never have enough trees”.    I agree, though I would make an exception for gams set in the Western Desert.   For years I’ve tried making (and repairing) Woodlands Scenics model railroad tree armatures, until I met a company called Model Builders Supply (MBS) and decided that enough was enough.

MBS is a Canadian company, based in Aurora, north of Toronto, and does a wide range of products, from scenic items for architects’ models to dollhouse supplies, and recently discovered wargaming when they started exhibiting at Hot Lead.    

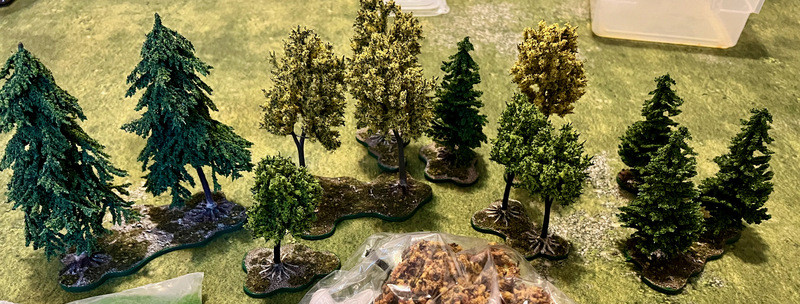
This year at Hot Lead I picked up a two dozen of their 28mm trees, some snow-covered spruce trees for my (sadly backburnered) Rockies Ablaze project, plus some trees in summer and some in autumn for various seasons.   The trees are sturdy and look realistic enough for my tastes.  I also picked up some of their plastic wooden shingle roof sheets for MDF models and some brick/stone sheets to model streets for a 15mm Italian village for WW2 gaming. 

Here are last year’s tree purchases, set onto LITKO irregularly shaped MDF bases.  My friend Joe Saunders likes to say that irregular shapes for basing look best for natural items like trees and such. 


Cheers and blessing to your modelling!

MP+

Tuesday, July 13, 2021

#TerrainTuesday: 6mm Timecast Napoleonic Buildings

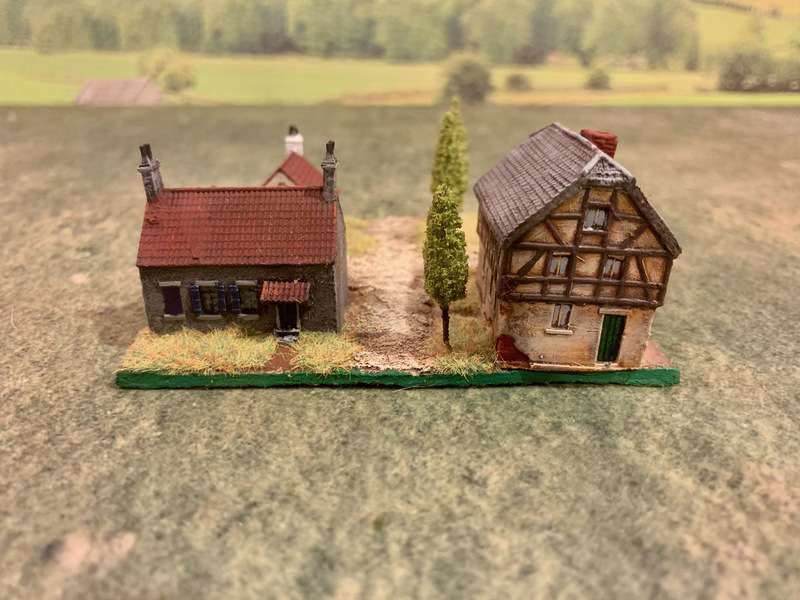
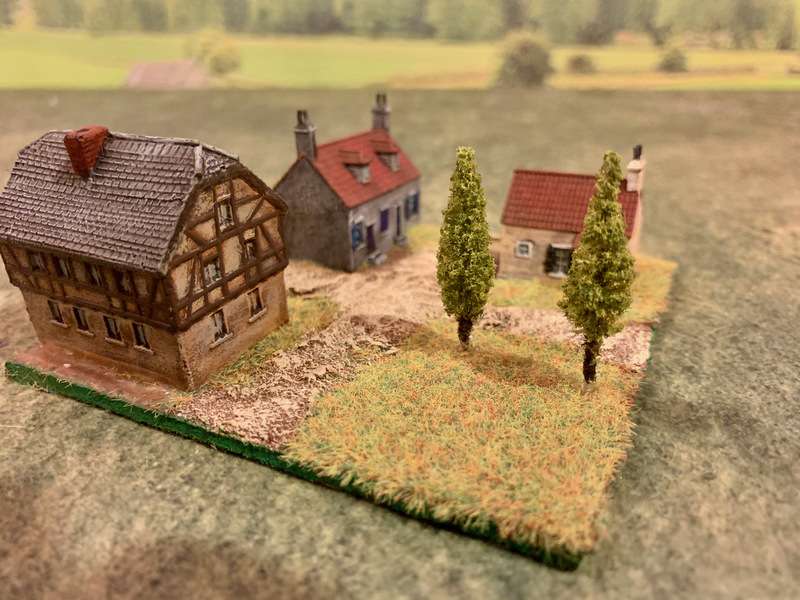
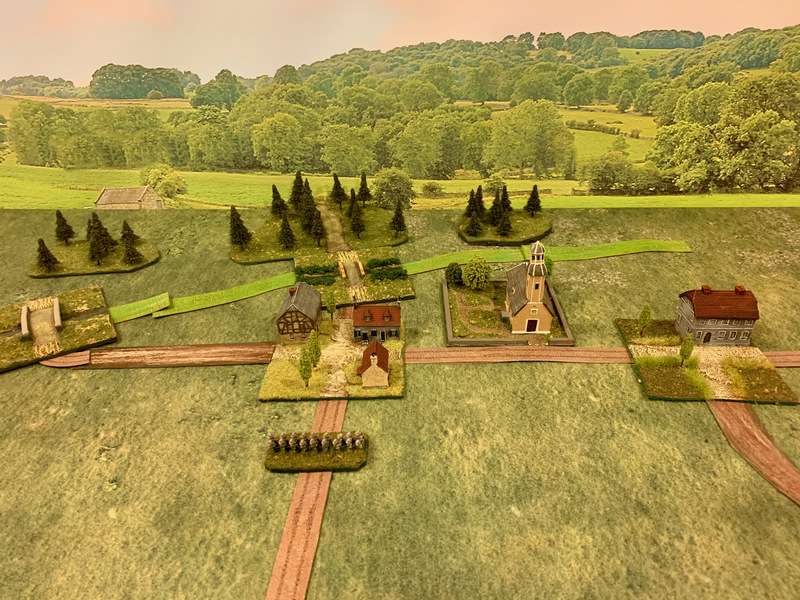
For this week’s Terrain Tuesday feature, I am happy to show off these two completed terrain tiles for 6mm Napoleonics gaming.

The large timber frame building on the right is by Timecast, and is a lovely model, full of detail.    To flesh out the terrain piece and give it the sense of being a village or part of a town, I found two antique metal GHQ building castings in my hoard and painted them up quickly.

Trees are also by Timecast.  The terrain tile also functions as a four way road crossing, making it a potentially significant objective for hard marching marshals, foragers, and other ne’er-do-wells.

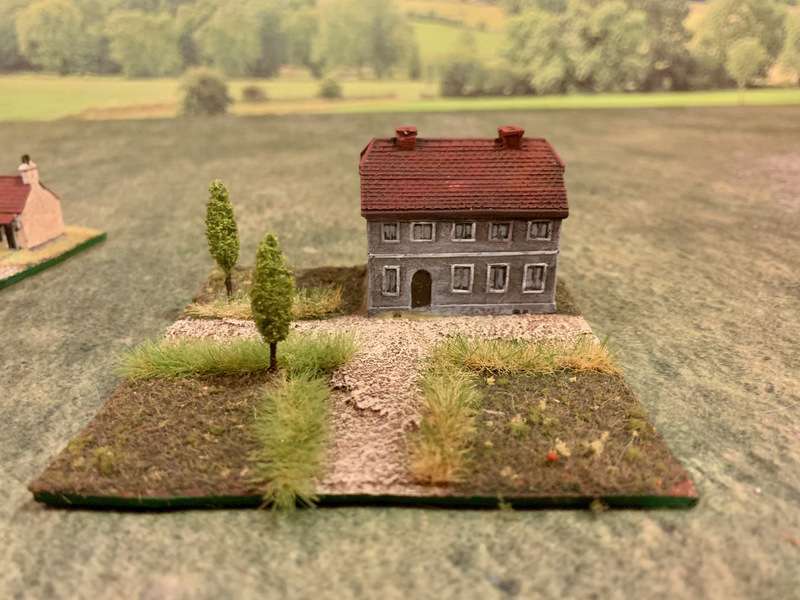
This gray building is also a Timecast model.  I based it individually to suggest an inn or estate house out in the country.

I find a huge satisfaction in working on the scenic aspect of 6mm gaming.  Buildings are relatively inexpensive, a little busywork effort goes a long way, and the finished result adds immeasurably, not dominating the table as a 28mm terrain piece might but adding just enough flavour to evoke a real world location.

This morning I threw a few other pieces on the table besides these newly created models and was entranced by how quickly a scenic view came together.  This visual aspect of small scale gaming is a huge reward in itself for me.

Cheers and blessings to your brushes!

MP+

Tuesday, July 6, 2021

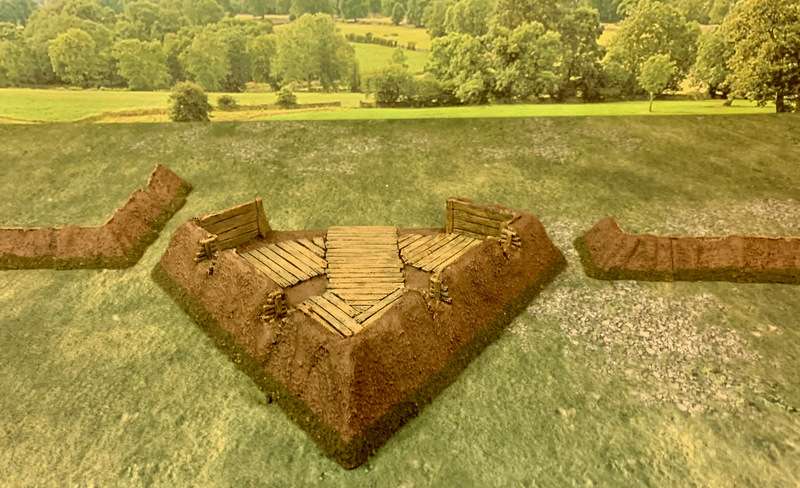
#Terrain Tuesday: 28mm Field Fortifications From Paul's Models

Hello friends!

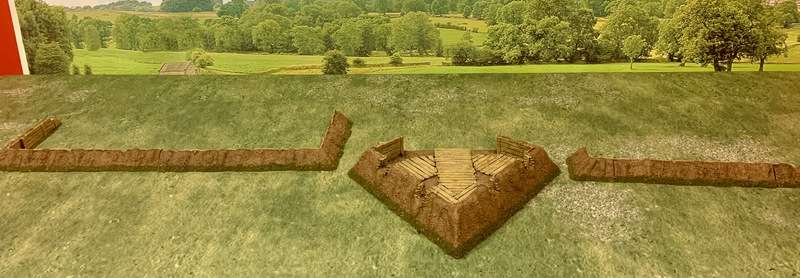
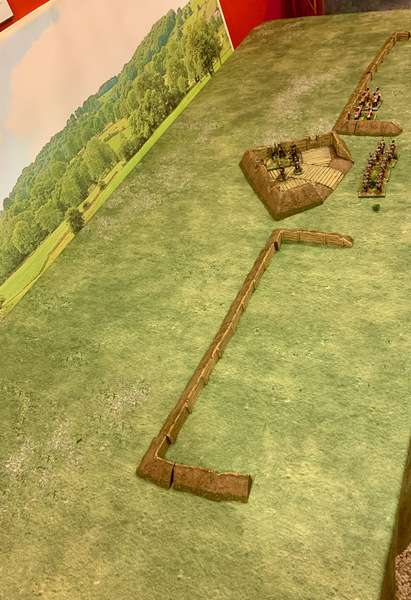
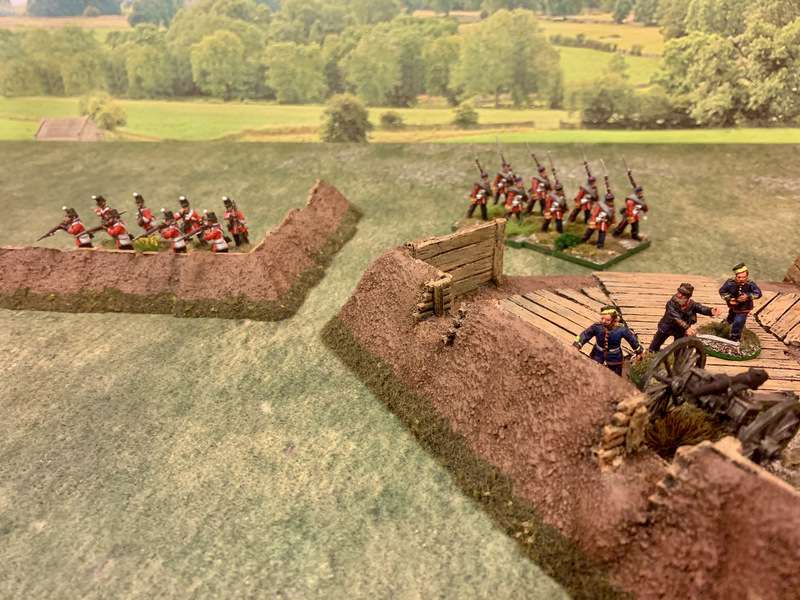
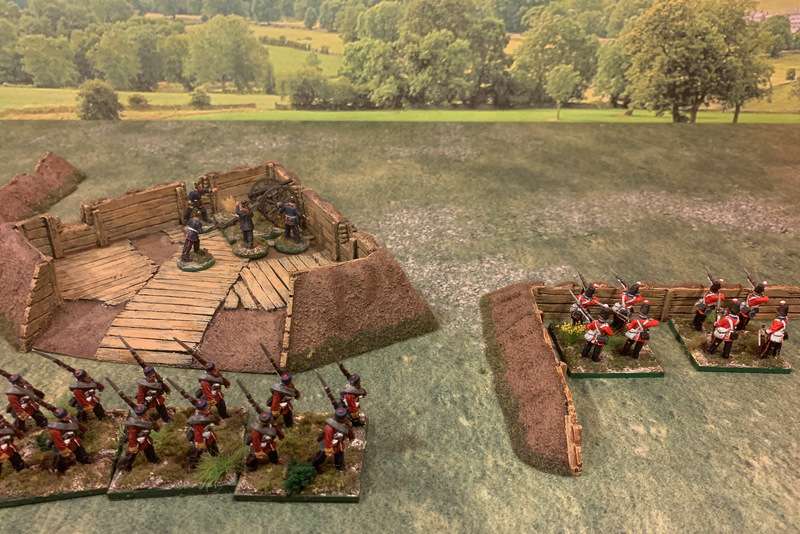
Took me just over a month to get these resin field fortifications from UK based Paul’s Models finished, which is pretty speedy for me.  I now have a massive redoubt and several feet of fortifications. 

 More than enough to cover almost the length of a 6’ table!

 Painting strategy was simply: black undercoat, craft store Folkart umbre brown on everything, then a drybrush of the same brown mixed with Yellow Ochre.  The boards were a mix of yellow ochre and white lightly dry brushed over the black undercoat, and them treated with Army Painter Soft Tone.  I didn’t want the boards to be grey, as they are supposed to be newly cut for the battle I have in mind, Seve Pines.

 Temporarily occupied by a Royal Artillery Whitworth and a mix of Canadian and British troops, who must have read the last blog post here!  These fortifications work well with 28mm figures and could represent any field defences or siege works from the Thirty Years and English Civil Wars up to the early rifle age.

 Good luck to whoever has to take these defences!

Thanks for looking.  Cheers and blessings to your brushes!

MP+

Tuesday, April 20, 2021

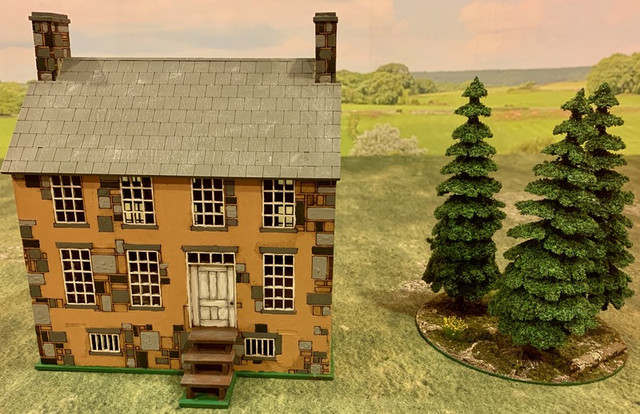
Terrain Tuesday: 28mm Sarissa Manassas Stone House

It’s Tuesday again and time to show off another piece of scenery for the war-games table.   This is the Sarissa Manassas Stone House in 28mm which was a fairly easy build from the flat-pack, though I did manage to get the root cellar door on the wrong side wall and only discovered that when the glue had set.   One overestimates MDF kits at one’s peril!   It sits beside a stand of pre-made trees which I bought at a show and glued onto an old Windows CD with some ground texture and flocking, so perhaps this counts as two terrain pieces.  Hooray! 

 The house will work for my ACW and alt-ACW battles.  It has a big footprint on the table, so perhaps more suited for skirmish games.   I didn’t apply any texture to the walls.  Rather, I focused on the laborious task of picking out the stonework in every shade of grey at my disposal, to give the impression of an old field-stone farmhouse that one still sees in my part of SW Ontario.

Having the self-imposed deadline of a blog post on terrain gave me the incentive I needed to finish this piece and get it off the work desk.  Hopefully it will feature here soon, as an ACW battle is next in the gaming schedule.

Blessings to your projects!  

MP+

Sunday, September 18, 2016

Italieri Country House Finished

While I had my light box out recently, I thought I would grab some shots of some work completed earlier this year but never shown here during the blogging doldrums.

This is the ever-popular 1/72nd scale Italieri Country House (Product # 6074), a mainstay of many wargames tables.  Made of sturdy plastic, with an easily removed roof and second floor, it’s a gamer’s delight, and easy to assemble, though I confess that I bungled the upper floor on this model by putting two of the supports in the wrong places and not noticing until the glue was dry.  Not that you can tell, from this view, and the floor still works, but it is the annoying sort of mistake that comes from being overconfident.

I am not sure if this model is still in production, as it doesn’t show on the Italieri website.


I painted it more or less to match its cousin, the Italieri Country House with Porch, which I assembled and showed here in 2014.  I think this one came out a little better than the first.  The vines on the walls are a laser cut painted paper product from a model railroad store, supposed to be Virginia Creeper, I believe.   I thought it halped the rustic vibe.  As with the first model, the walls were copiously washed with Army Painter Light Tone from a tin, then sprayed with Dullcote to get rid of the shine that product leaves.


 I have seen photos on the inter webs of some of these models lovingly and effectively based, but I think for now it just goes in the box with the 20mm scenery items.   It may be useful in 28mm games as well if you don’t look too closely.


My Italieri village thus far.  That’s Luigi, the Fell Catbeast of Mordor, in the background.  

Italieri also makes a church in this scale, which like the country house models could pass for anywhere in Southern Europe.  Would be nice to have, and I see today there is also a ruined house and a stone house model in their range, so maybe one day.   As I finished this model I sometimes wondered why I do WW2 in this scale when I do it in 15mm and 28mm.   That seems like a rationalization to kick down the road for another day.

Thanks for looking and blessings to your buildings!

These figures bring my 2016 totals to:

28mm:  Foot Figures: 56; Mounted Figures: 8; Buildings: 2; Terrain Features: 4

20mm:  Buildings: 1

6mm:  Mounted figures:  36;  Buildings:  2

Saturday, November 14, 2015

Preparing the Ground: My Napoleonics Battlemat Takes Shape

A few months ago I posted some pics on a project to paint an old bed sheet to make a battle mat suitable for 6mm Napoleonics gaming.  The idea came to me on a train this summer, watching the German countryside go by.

I finished painting all the fields in a variety of shapes and brought it in doors.  It was quite stiff from the acrylic craft paints I used, even after putting it in the dryer a few times to soften it.   I spread it out on the gaming table and smoothed it out with my hands until it lay reasonably flat.

The idea was to suggest a variety of fields, with some just plugged or lying fallow, with various shades of brown, and then different types of crops in greens and yellows.   I’m not a farmer, though I have had parishes in the country, but I don’t claim any great degree of knowledge as to whether one would see these sorts of colours at any one time.  Madame Padre looked a bit sceptical, but granted me a degree of artistic license.

Since I had watered the paint quite a bit to apply it, there were many places where it had seeped through under the painter’s tape I had used to mark out the various fields.  I used various shades and types of artists’ pastel crayons to smooth and blend the field boundaries as much as I could.

Covering the darker colours with the lighter ones didn’t work out perfectly, but it did begin to look better.

The only downside was that I ended up with a lot of dust from the pastel crayons.   I had to wash my hands a few times, and then ran my shop vac over the mat to pick up as much dust as I could.

Now to prove the concept by laying out some terrain items.

I think the size of the fields looks alright with the 6mm scale figures.   Here two of my Austrian regiments (or brigades, depending on the scale) prepare to hold the bridge on the Punkenbruch.


My original intention was to show the roads by laying down play sand, but I confess I don’t like the effect.  I think it looks rather messy, as the sand wanders all over the place.  I’m not sure what to do.  I could splash out on some resin roads similar to the river sections, or I could draw them using light colour pastels and draw over them later to change the look from battle to battle.


I put down some sections of styrofoam under the mat to create contours.  The sheet doesn’t cling to them, but it lays down flat enough that you can see the elevations well enough.

Another elevation view.


And when all is done, it even rolls up, after a fashion.  

I won’t decide until I play a game with it, but I’m reasonably happy with my result.   Hopefully players won’t mind if they hands get a little discoloured, I hope.

Blessings,

MP+

Wednesday, July 1, 2015

Turnipograd Rises

In yesterday’s post on a Russian front battle there were some 15mm buildings featured.   Almost of them are from the Northern Russian Village set published by Paper Terrain.  As I’ve said here before, I am a fan of Paper Terrain.  This company provides a cheap and cheerful way to get decent looking terrain on the table in quantity.

I’ve gotten pretty good at assembling this stuff.    All you need is a good pair of scissors, a sharp knife for scoring the folds, glue (I prefer white carpenter’s glue, slightly diluted) and patience.   I can assemble one of these sheets in an hour while keeping one eye on Netflix, and that’s allowing time for the glue to dry between stages.

As I mentioned a few posts back, I’ve been on a basing blitz of late.   I have all but one of the buildings assembled in the PT Village set, but only five based so far. The bases show off the buildings well and allow me to use the nice little fences that come with each building.  Here is Turnipograd in happier times. 

And a sad dystopian vision of what will happen should Turnipograd ever fall into the bloodstained hands of the fascist invader.  The ruined versions of the buildings are quite useful.  Sadly, for the 4Ground models, I would have to purchase the ruined versions, which for now is an expense too far.

Of course a Mad Padre model village has to have a church.


Presumably this church has been repurposed by the Party as a granary or something.   Scott W includes a gold-painted wooden knob for the onion dome, which is a nice touch.  There is also a proper Orthodox cross to put on the top of the dome, though I don’t think such a cross would be approved of by Comrade Stalin.

A street view in Turnipograd.


A tidy little farm on a busy (Battlefront resin) road.  Judging from those tank tracks leading right up to the window, it looks like someone applied the brakes just in time.


That’s a 4Ground laser-cut MDF Russian house mixed with a Paper Terrain outbuilding, fence and woodpile.   They work well together, I think.

I’m thinking this is either a school or a party headquarters?  Or possibly a community hall where the Junior Pioneers can stage their children’s pageant, “Comrade Stalin’s Glorious Fiver Year Plan for Increased Agricultural Production”?

Defenders of Turnipograd.  These buildings work well with my 15mm models.


They also work well with 20mm models, or at least, with 1/76 scale.  These fascist invaders will soon be crushed by the Red Army, don’t worry.

So that’s the lot.  All now boxed and packed away - movers come in a week!  Very little time left for wargaming projects.  Hopefully Turnipograd will see some use in the fall or whenever I cross swords with the dastardly Kampfgruppe Manto.


These figures bring my 2015 totals to:

28mm:  Foot Figures: 19; Mounted Figures: 10

20mm:  Vehicles: 1; Artillery: 1 

15mm: Armour/Vehicles: 5; 15mm Scenic Pieces: 5

6mm:  Scenic pieces:  7

Kilometres Run: 252


Blog Archive

Followers