
Recently I mentioned that our guest on Canadian Wargamer Podcast #11 was Joe Saunders, who runs a small but mighty enterprise called Miniature Landscape Hobbies. I was so impressed with his method for large scenic bases that I tried it, and here’s the result.
To back up a bit, my previous method was to cut a piece of MDF purchased from a DIY store. This was never very pleasant or satisfactory because I used a craft knife and could never get the lines straight enough, and it was also very taxing on my hands and wrists. There was also the very real worry that I might inadvertantly cut myself. Once the MDF was cut, I would texture it with plastic wood (usually from Lepage), use diluted white carpenter’s glue to apply texture (usually model railroad ballast) and then once dry paint brown, two successive drybrushes (yellow ochre first, then maple tan) and then apply flock and seal with a matte spray.
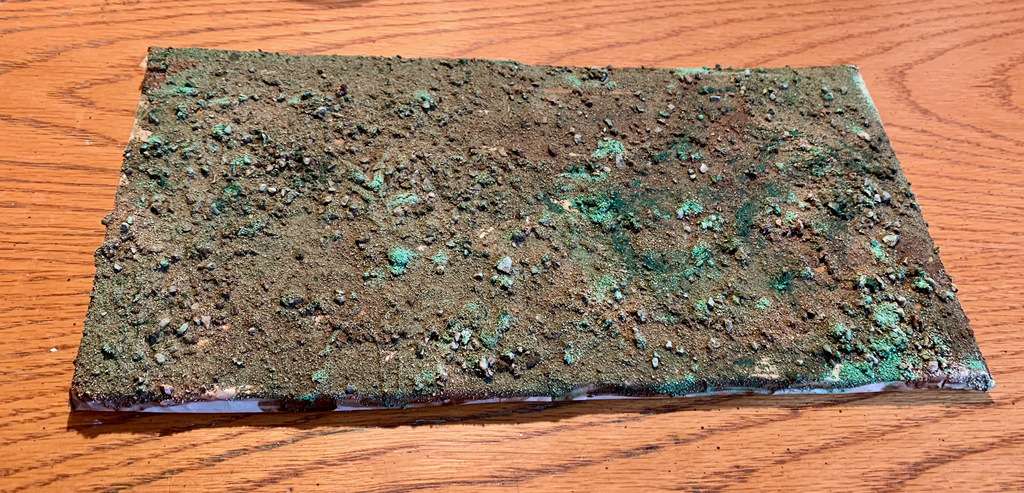
Joe’s technique is explained in this video. Not to describe the whole method, but in brief I used two sheets of cut boxboard with the corrugations going in opposite directions. I them coated it with diluted matte Mod Podge mixed with brown umber craft paint, and while it was wet I applied the grit (ballast mixed with some clean cat litter). The next step according to Joe is to mix rubbing alcohol with brown acrylic ink and then use a pipette and apply the ink mixture while holding the base at an incline to allow the mixture to run freely.
I didn’t have brown ink but I had some green ink, so I thought I’d experiment. What I got was a pleasant greenish hue and in a few places the green ink turned the grit a bright green, suggesting clumps of foliage. I showed this image below to Joe and he thought it was a “happy accident” and suggested a tan dry brush before adding flock.
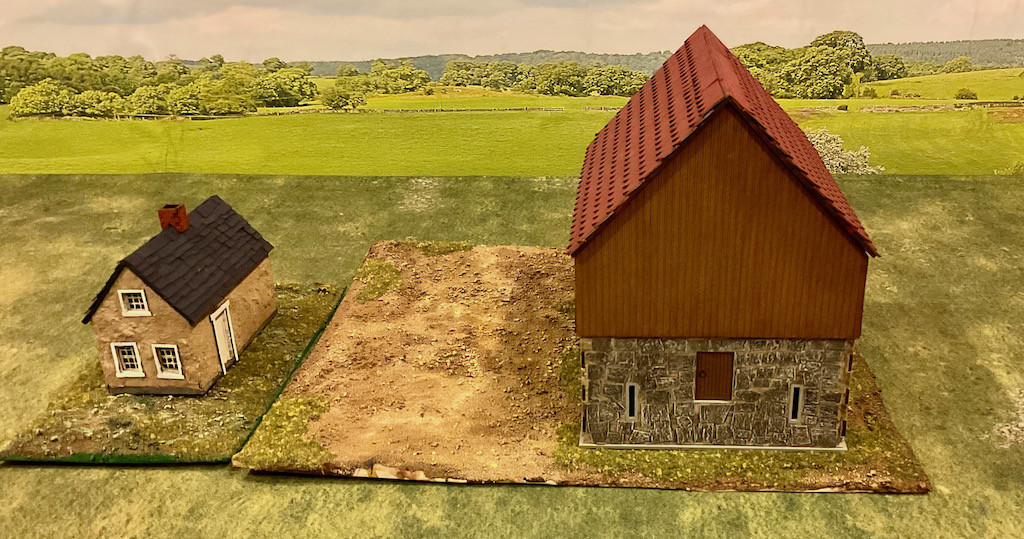
Here’s the finished base on the left, with the Warbases cottage from their Prussian Napoleonics range of buildings. I spent much of the winter cutting up cereal boxes to make the tiles on the roof of the cottage, until some bright chap told me to by the pre-cut roof tiles from Sarissa. I did that for the Warbases Prussian barn on the right, but couldn’t resist the allure of the cereal box and also cut out the stones for the first floor of the barn walls. The base of the barnyard was also made according to Joe’s recipe.
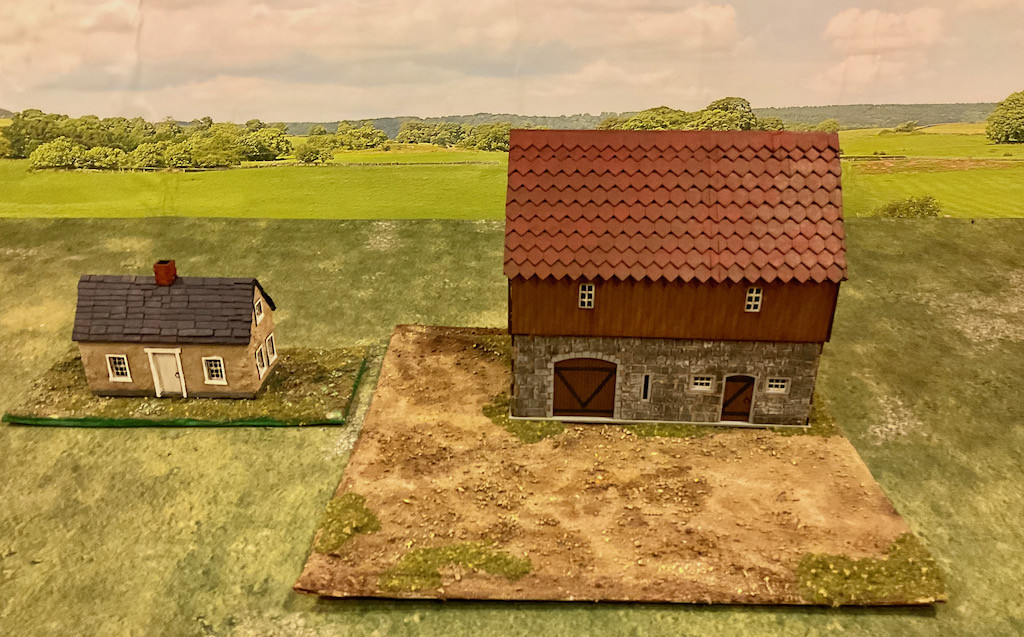
I wanted some texture on the walls of the cottage, which were plain MDF sheets, so smeared them with carpenter’s plastic wood filler to give the impression of stucco. I did the same with the wall section on the barn beneath the wood timbers. Thankfully the wood timbers were all one laser cut piece so quite simple to apply onto the plastic wood before it dried.
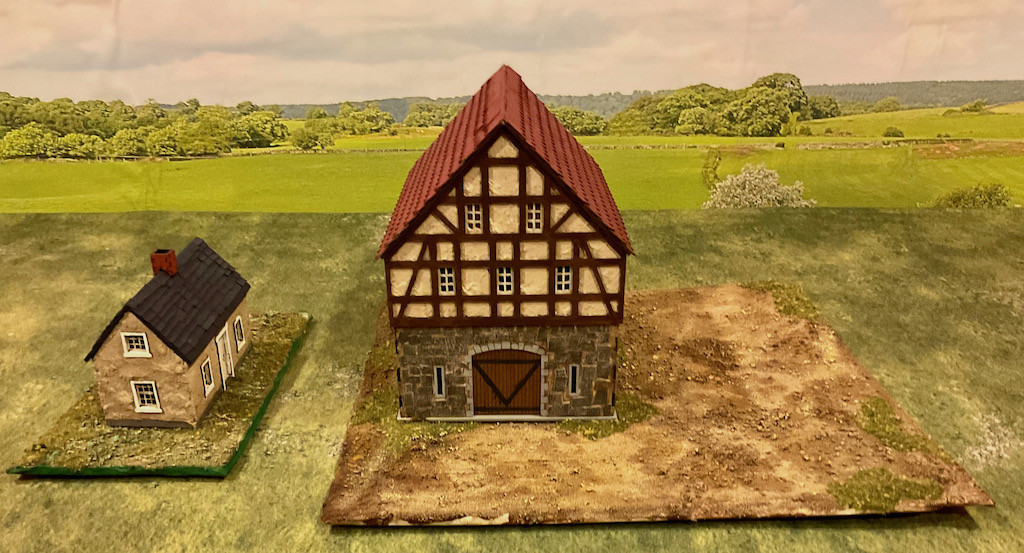
Some 28mm figures shown for scale. The barn is a beast! It won’t be hogging a standard sized table for a big battle, but it will wok for a skirmish game such as Sharp Practice, with Prussian jaegers defending against marauding cossacks, I think.
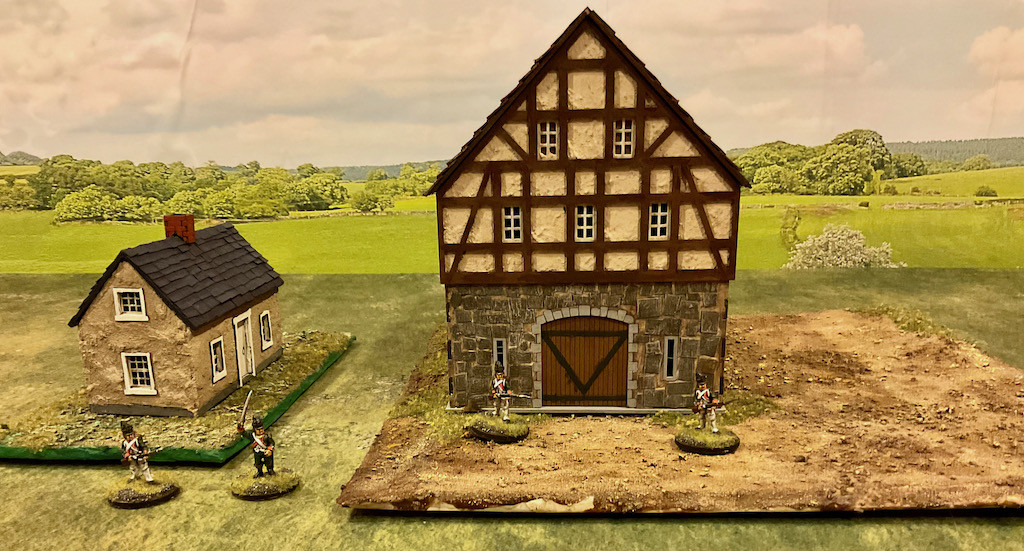
Another view of the stone wall on the ground floor of the barn. Not sure what door halfway up is all about. In my part of Ontario you sometimes see barns with an earthen ramp leading up to a doorway which I am guessing is for transporting hay bales and fodder. I should consider constructing something similar out of styrofoam.
Superb result on the buildings, Michael!
ReplyDeleteOut West, many old barns (and working barns) have doors above ground level with a block and tackle pulley system installed to facilitate loading hay from the ground up into the second story. The door on your model seems a little low to my eye.
O very nice work Mike! Natural looking bases and some really well done buildings. I think the higher doors were for wagon loading too, where they'd park the wagon or cart under the door and it would make piling up goods and cargo that much easier perhaps?
ReplyDeleteLooking good Geezer!
ReplyDelete