Not an episode per se, we just left record on while we got together via Zoom and tried to figure out the Midgard rules from Reisswitz/Too Fat Lardies. Had a good time, but may be hard to follow. On the other hand, you might like this sort of thing.

Not an episode per se, we just left record on while we got together via Zoom and tried to figure out the Midgard rules from Reisswitz/Too Fat Lardies. Had a good time, but may be hard to follow. On the other hand, you might like this sort of thing.
Hey friends:
My preferred rules of the moment for American Civil War battles are Pickett’s Charge, by Dave Brown, published by Reisswitz Press, a Too Fat Lardies imprint. These rules give each side a varying number of ADCs or Staff Officers each turn, which help the player manage their force on the tabletop. The same mechanic exists in Dave’s Napoleonic rules, General D’Armee, and as regular readers of this blog may recall, in April I created some ADC/SO tokens for the Austrian army.
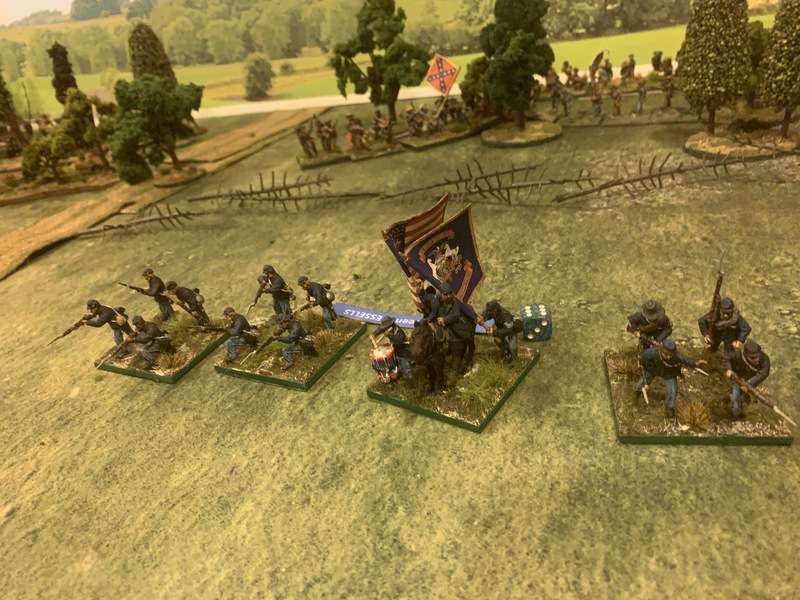
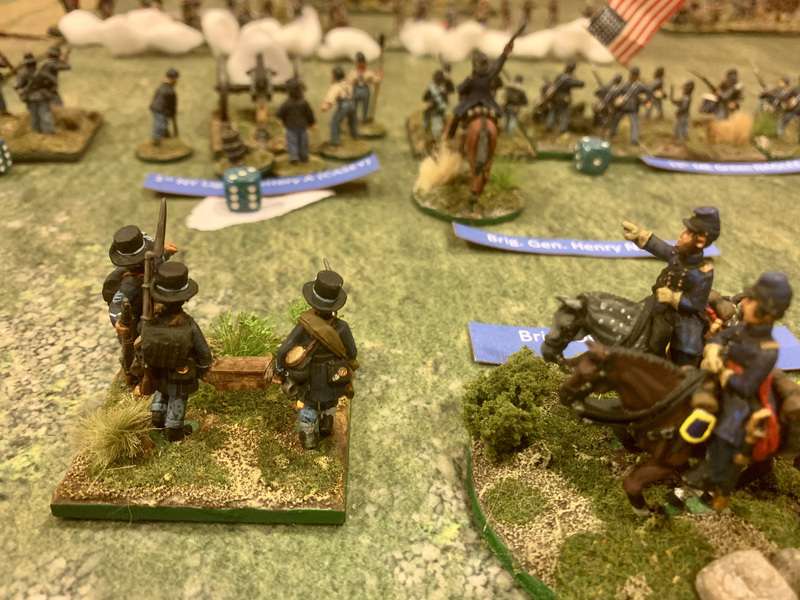
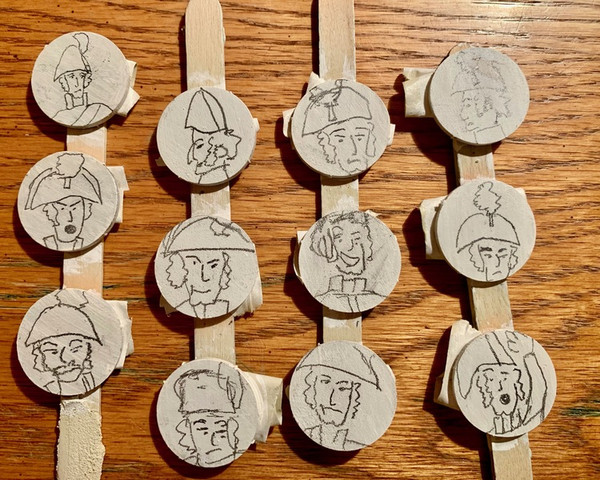
Recently I sketched some Union ADCs/SOs for Pickett’s Charge and finished them the other day.
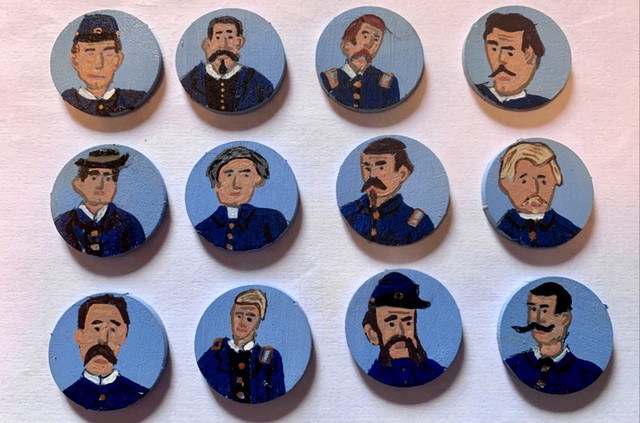
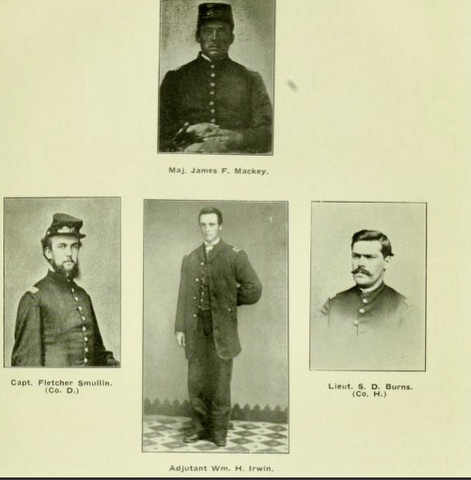
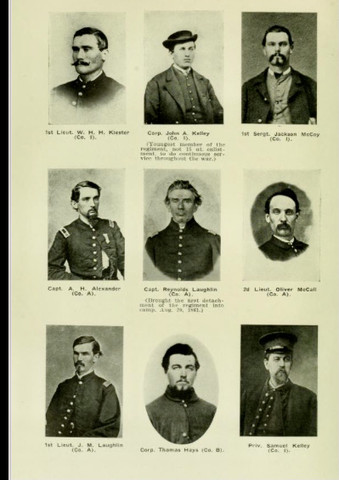
My inspiration came from these photos of personnel from the 103rd Pennsylvania Regiment, from a digital copy of their regimental history. The 103rd PA was roughy handled in the Battle of Seven Pines in 1862 as described here a while ago. It gives me some pleasure to think that these old boys might approve of they likenesses and how they are being used. Hopefully you can spot some of the inspirations for my tokens!
Making these tokens is a pleasant side project, and next up will be French Napoleonic and Confederate ADC tokens, as I ge to them.
Cheers and blessings to your gaming.
MP+
Towards the end of April I described here my intention to try and game the American Civil War battle of Seven Pines (1862), the battle fought within earshot of Richmond and which marked the high water mark of US General George McClellan’s advance up the Peninsula. I’ve now fought the first phase of the battle, the initial attack by D.H. Hill’s division, and will offer a brief play by play for those interested in battle narratives, and will end with some thoughts on how this scenario could be better tweaked as the first in a series of linked engagements.
The rules used are Dave Brown’s Pickett’s Charge (Reisswitz Press/Too Fat Lardies). Having just finished a fight using Dave’s General d’Armee Napoleonic rules, I found it relatively easy to try his ACW rules for the second time, as the mechanics are quite similar.
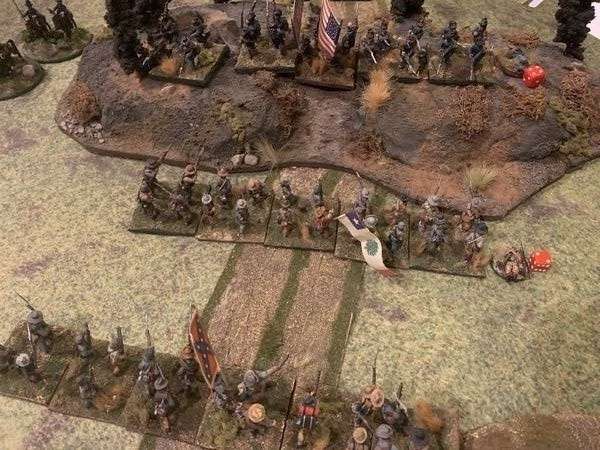
The scenario assumes that the Union picket line has already been driven in, as happened historically. The fight begins with Garland’s brigade running into the furthest formed unit, the 103rd Pennsylvania of Wessel’s brigade of Casey’s Division. Why the green 103rd had been pushed so far forward, on the far side of the Union’s abatis defences, is a bit of a mystery, but they do their job, stopping the initial charge of two rebel regiments.
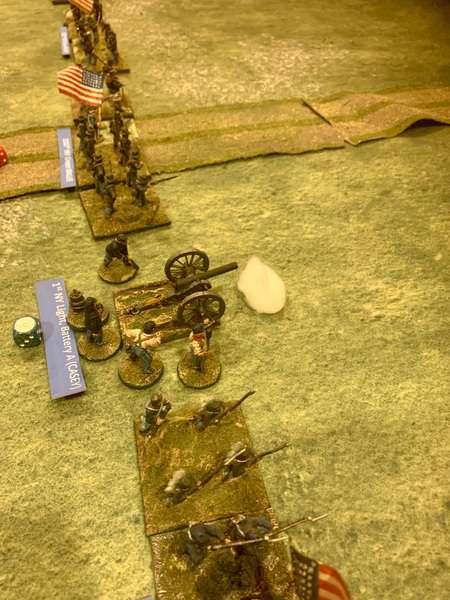
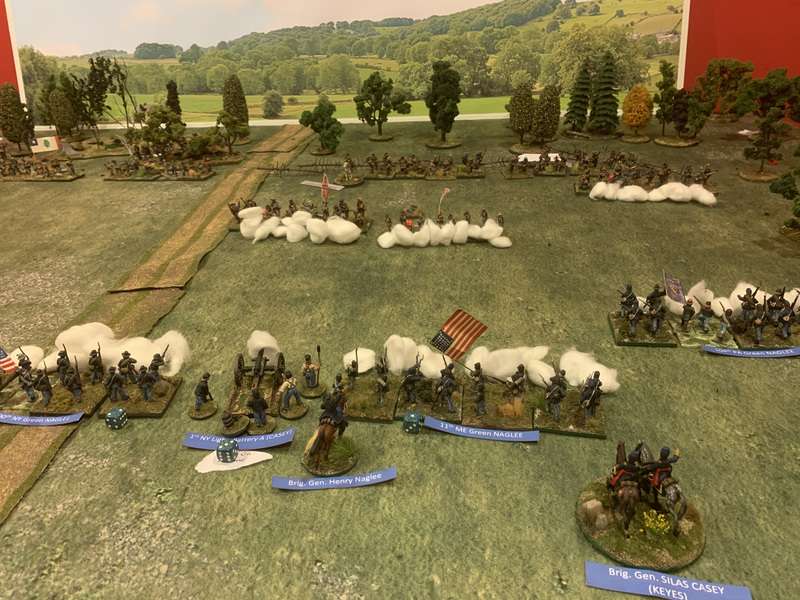
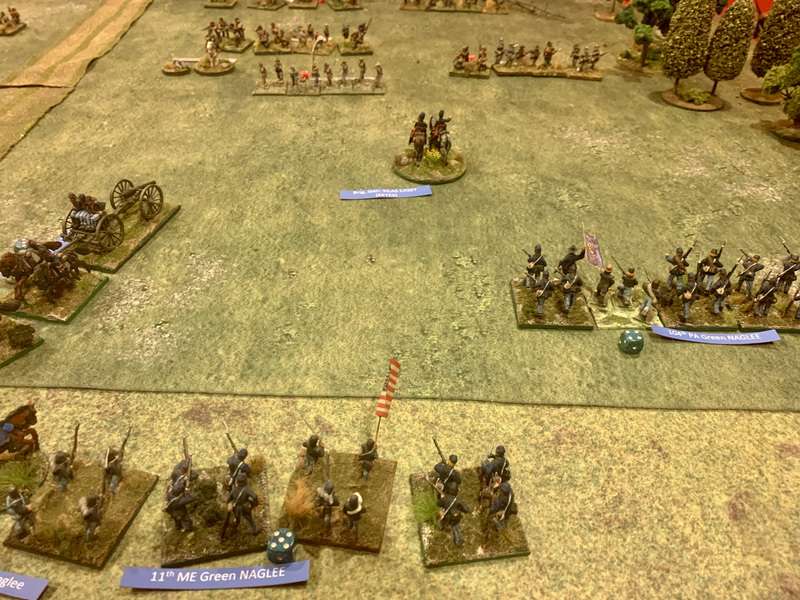
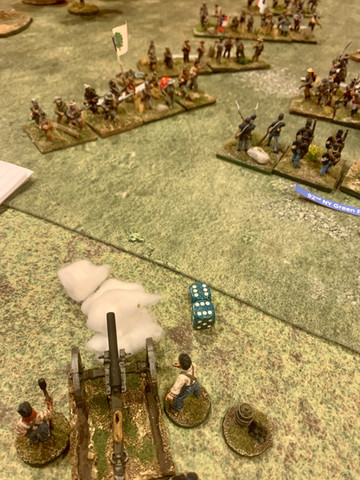
1st NY Light Battery, stationed between Palmer’s and Naglee’s brigade, has a line of sight on one of Garland’s regiments and draws first blood for the Union. There were two other batteries stationed further back in Casey’s main line, and the accounts say that they also fired on the advancing rebels, but given the rules and the lack of any discernible elevation on this part of the battlefield, I didn’t see how that could be simulated.
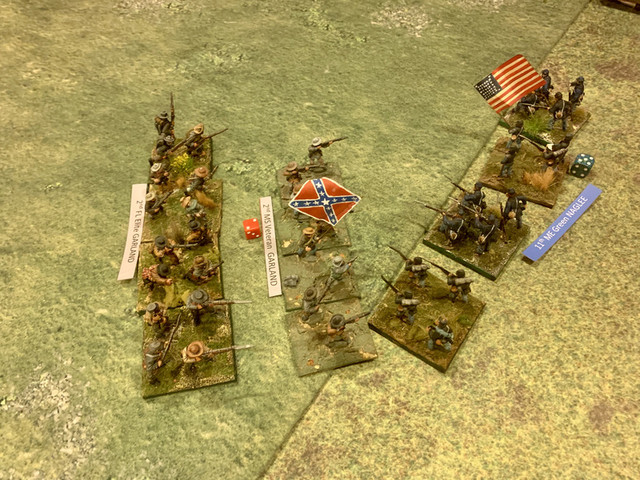
Sheer numbers make themselves felt. On Turn 2 the rebels win the initiative and Garland’s 23rd NC flank charges the green Pennsylvanians.
The 103rd are Whipped and fall back 18”, crossing the abatis like white tailed deer. I couldn’t resist giving them a mounted commander, as the regimental history reports that their OC, a Major Gazzam, found his horse a problem in the dense woods: “In retiring under the heavy fire of the enemy in the woods, Maj Gazzam was swept from his horse by a limb of a tree, and in the fall his head striking a log, was momentarily stunned. He remounted almost instantly and succeeded in reaching the Williamsburg Road, to find the Regiment scattered into fragments and the batteries of Casey’s artillery shelling the woods from which it had fled (16-17)"
Once the rebels emerge from the woods, the tactical problem for the Union seems to be: How best to employ the four green infantry regiments and one battery stationed in advance of the redoubt and fortified positions? One solution would simply be to concede this part of the battle altogether and fall back behind the redoubt. However, Casey had no idea how many rebels he was facing or how much time he had to buy. It’s also quite possible that the sight of their peers falling back with rebels on their heels might have panicked his green division. So it seems like the best thing for the Union to do here is to use the troops on the table to try and blunt the rebel advance, inflict as many casualties as possible, and buy time for the rest of the army to organizes and reinforce (see the comments on victory conditions below).
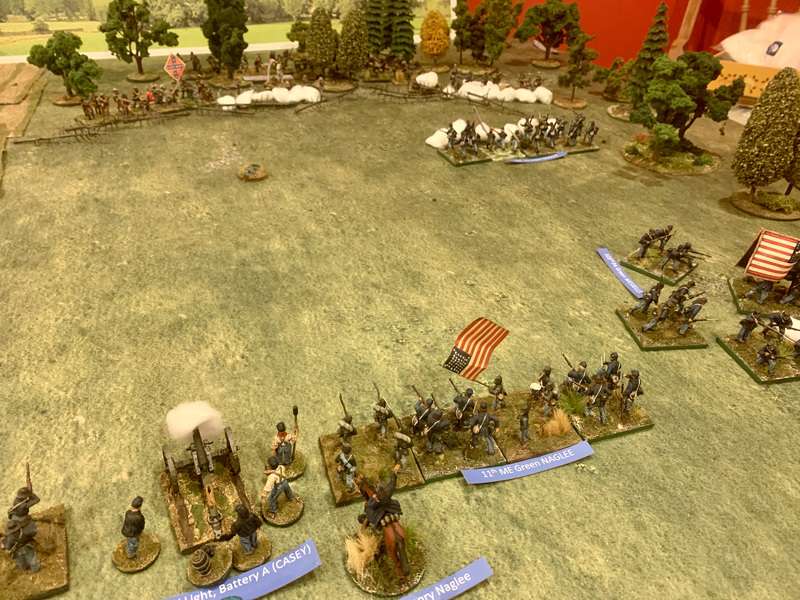
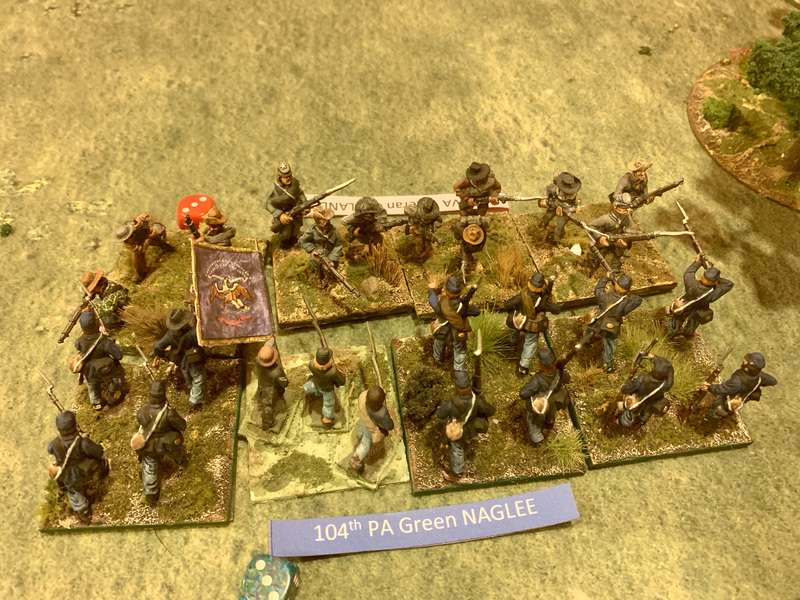
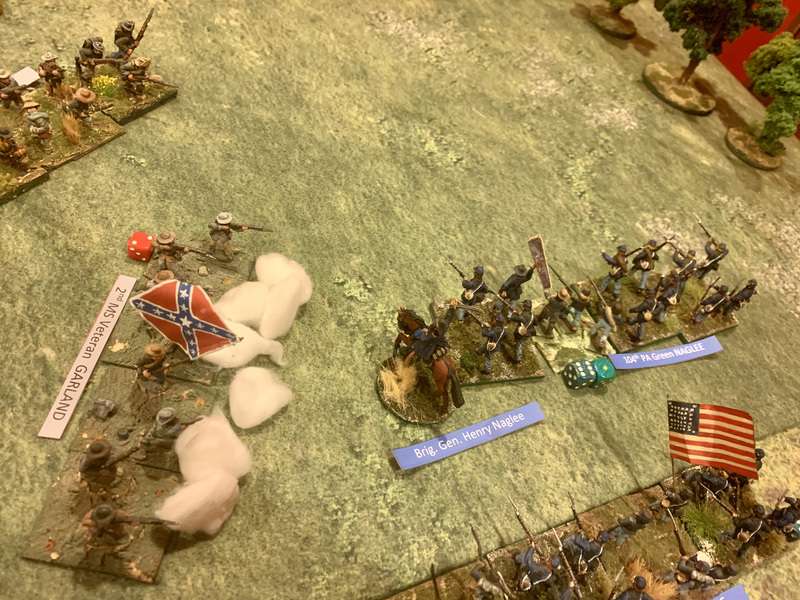
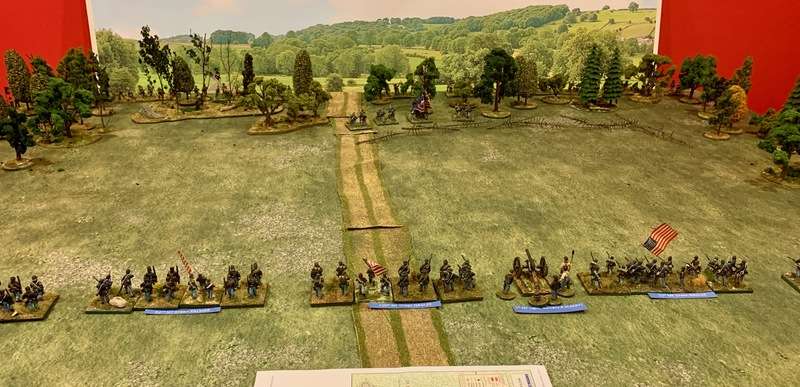
The 104th PA of Naglee’s brigade are advanced on the right to cover the withdrawal of the 103rd PA. The rest of the line braces as Garland’s brigade emerges from the woods.
Casey direct’s Hazzam’s 104th PA to fall back behind the redoubt and reorganize. They exit the table.
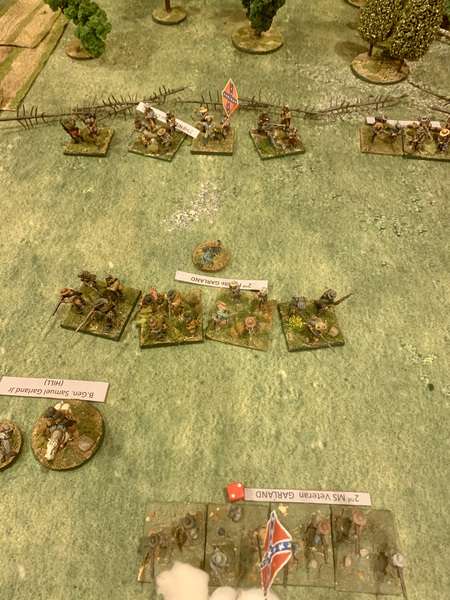
Garland’s brigade is slowly crossing the abatis, most of its regiments having to reform themselves afterwards, while Rodes’ men begin to emerge from the swampy woods.
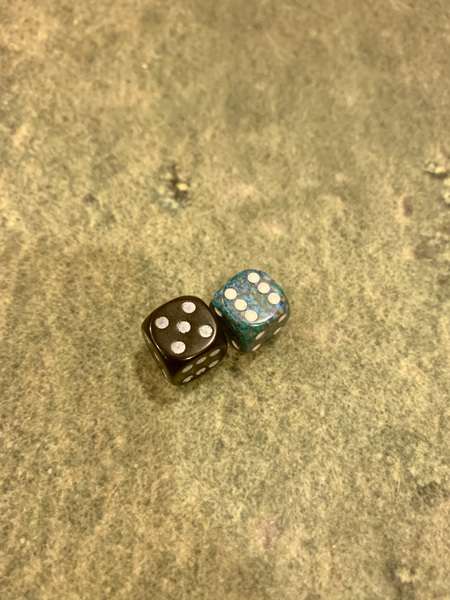
Disaster threatens as the Union artillery throws snake eyes and runs low on ammunition. They also incur a fatigue casualty for working their guns so hard (and mostly ineffectively.
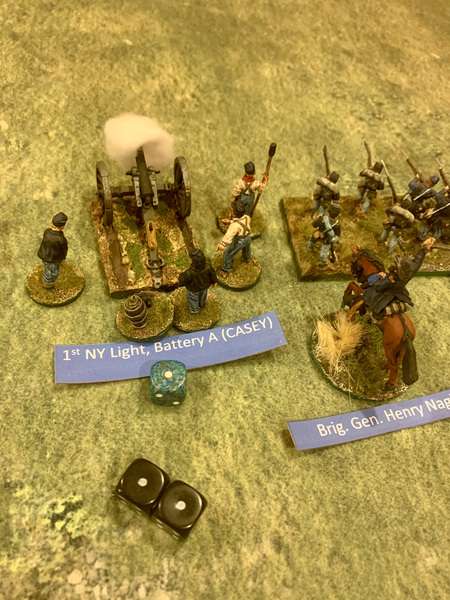
With Garland’s men pressing ever closer, Casey makes a bold move. He uses his two available staff officers to send for ammo to resupply the guns. This move has risks, because if Naglee’s brigade fails is roll to obey orders this turn, then the staff officers are wasted, but the Union is fortunate, Naglee’s brigade obeys orders and the ammo is rushed up in the nick of time.
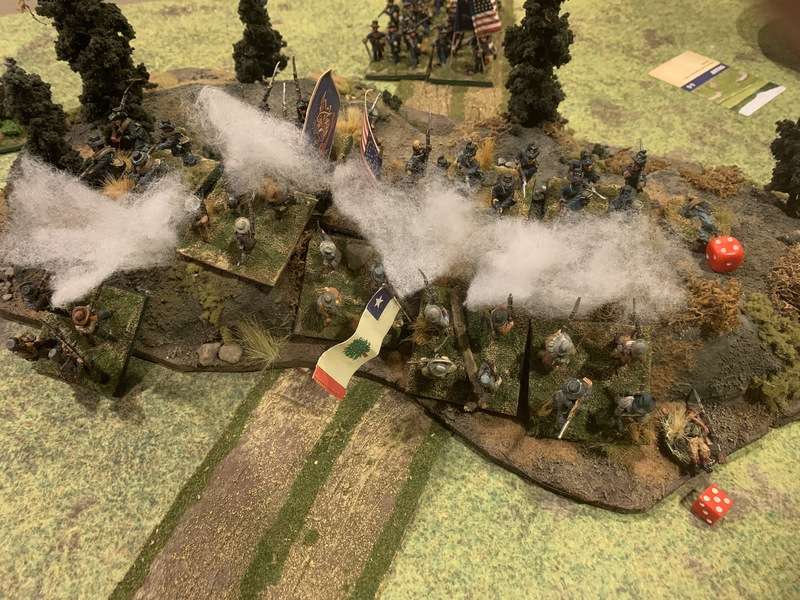
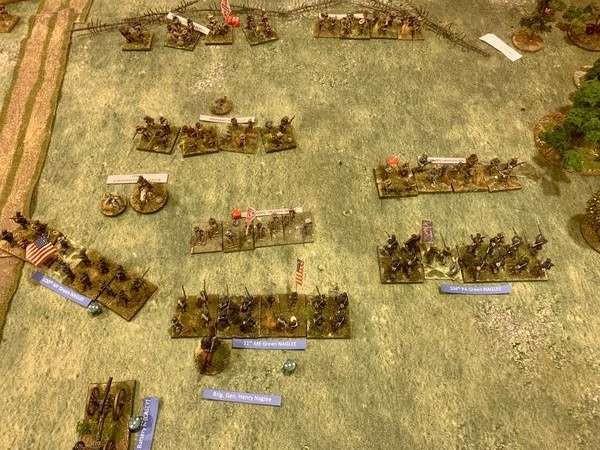
Furious firing between Naglee’s and Garland’s brigade as the 104th PA slowly retire to tie in with their comrades.
Shockingly good shooting by the resupplied New York gunners unleashes a blast of canister into the 23rd North Carolina!
The tar heels take 5(!) casualties, fail their Elephant Test, and fall back Whipped, bursting though and un-forming the 2nd FL behind them.
Union now has the initiative. With Rodes’ brigade hesitating and still emerging from the woods, General Casey sees an opportunity. If he doesn’t take it, it’s just a matter of time before the Confederates tee up multiple supported charges and then his green boys are done. “Charge them, by God!” is his order to BGen Naglee.
On the right, the 104th PA takes only light casualties from the 34th VA, so the charge goes home, but the Virginians hold steady and after a brief tussle the Keystone State boys grimly retire.
Unfortunately the 11th Maine take hits from the 2nd MS and flunk their Elephant Test. Even with their Brigadier attached, they are Whipped and fall back like geese. Their flank supports, the 100th NY, have no choice to retire and Garland can breathe easier. The New York gunners are grateful that the mayhem is enough to cover their limbering and falling back to new firing positions. It was a bold move by the Union and could have caused significant confusion and delay to Garland, so no regrets in ordering the charges.
On the Union left, Palmer’s two New York regiments watch nervously as Rodes’ brigade slowly sorts itself out.
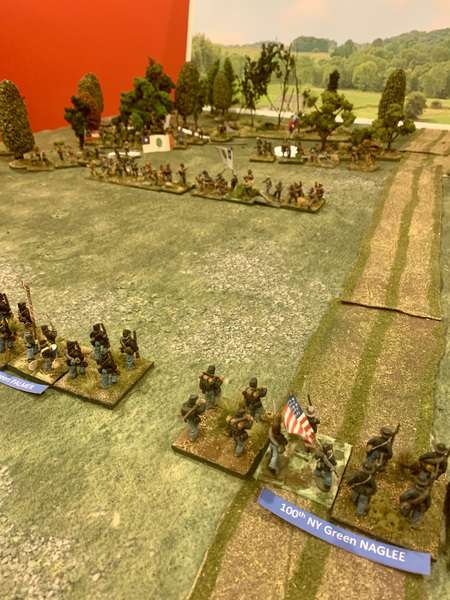
Both Confederate brigades are now in motion with volleys being exchanged as they come. Casey buys the time to steady the 11th ME while the New York Light Btty moves behind the reforming 100th NY to support Palmer.
Palmer’s green boys are smelling the powder now. Mild casualties on both sides. Rodes is itching to charge. He knows Hill is somewhere behind him, bringing up the rest of the division, and that he will expect results.
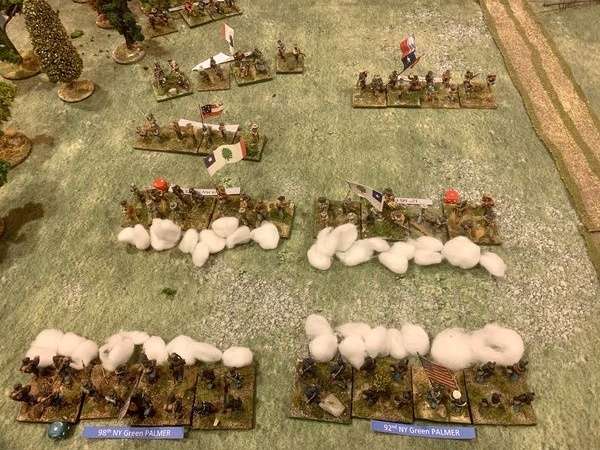
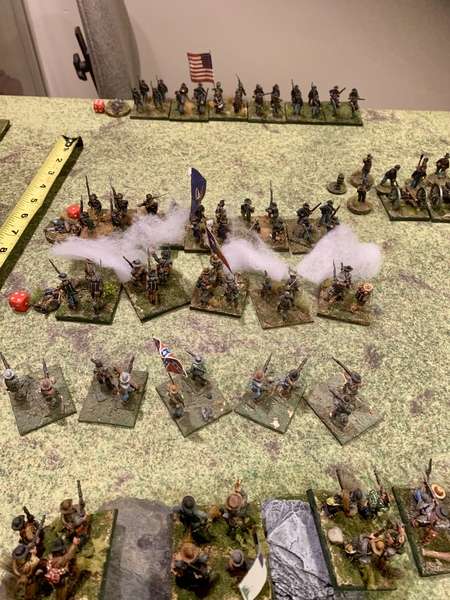
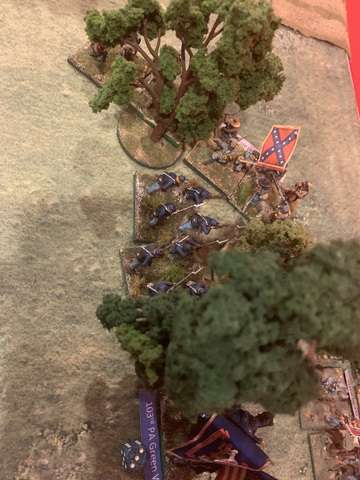
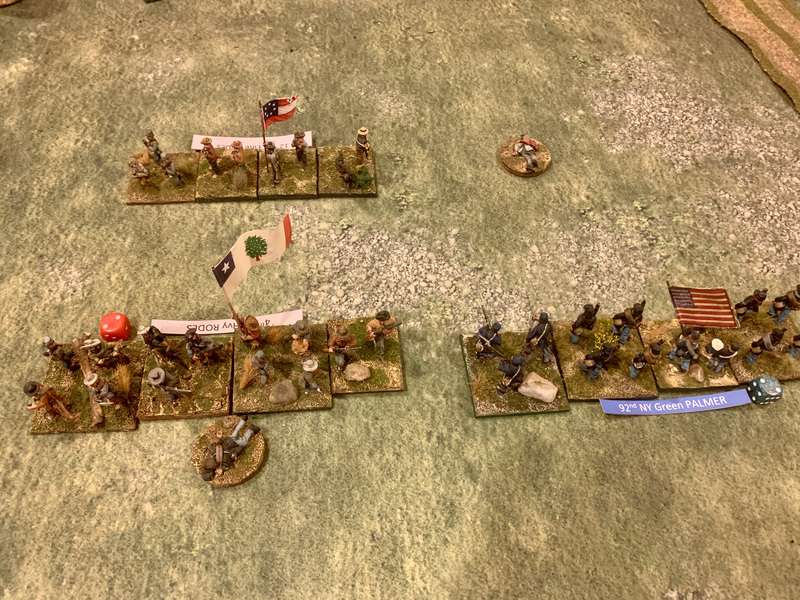
Rodes throws three regiments forward. The 12th MS (unsupported) charges the 92nd NY while the 4th VA, supported by an Alabama regiment, charge the 98th NY. The results were interesting. The 92nd unleashed a blistering volley which staggered the 12th MS, and then easily bested them in the charge rolls, thus sending the Missippians Whipped backwards, while the 98th NY’s defensive fire was risibly ineffective, and they fled the field as the Virginians howled in with the rebel yell. Moral of the story in these rules: NEVER CHARGE UNSUPPORTED IF YOU CAN HELP IT. TAKE THE TIME TO TEE UP YOU SUPPORTS BEFORE COMMITTING.
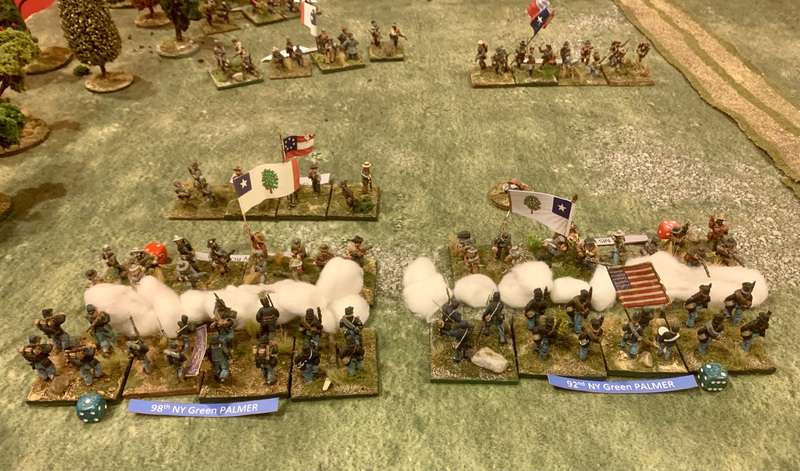
An awkward silence as the 4th VA looks left and the 92nd NY looks right.
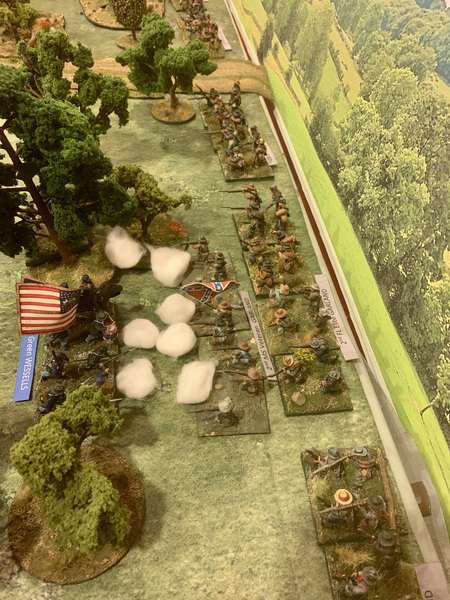
Meanwhile on the rebel left, Garland personally joins the 38th VA, who, supported by the 24th VA (ignore the Texas flag in the photo) hurl themselves on the 104th PA, with BGen Naglee himself directing them. Who will win?
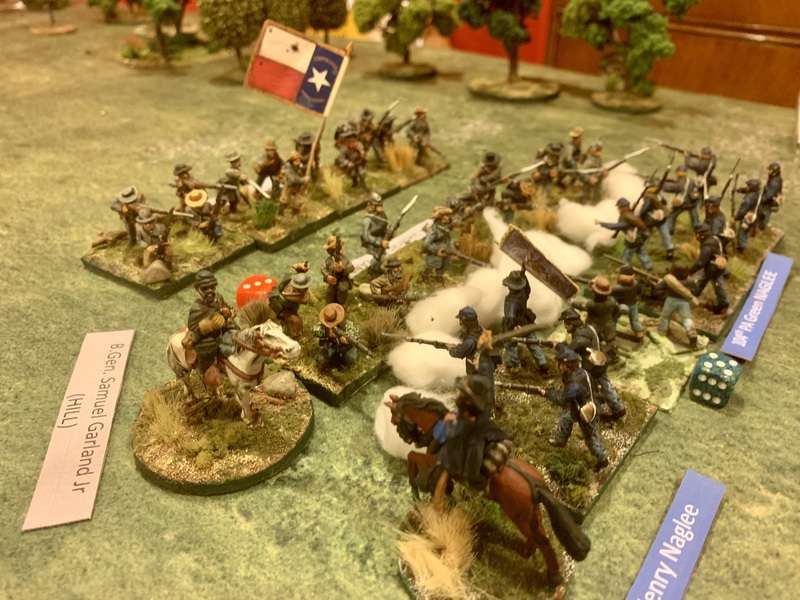
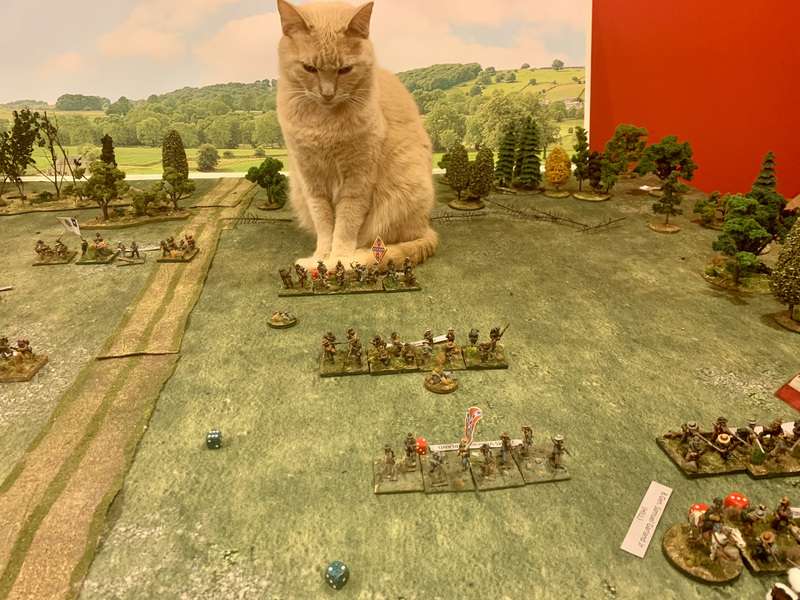
Even Luigi the Cat appears and watches this fight. The result is shocking. The green Pennsylvanians stand and force both regiments of Garland’s Virginians to retire! Shockingly bad dice rolls by the rebels that the one dice Support re-roll could not substantially improve.
On the Union left, another astonishing coup for the New York Light Artillery. Having unlimbered, they do they bit to support the heroic 92nd NY, unleashing a round of canister and rolling a 12(!) on 2d6! That’s five casualties for one of Rodes’ best regiments, the Elite 12th MS, and that’s a Serendipity roll, meaning that the regiment’s colonel is killed and the unit automatically Retires 18”.
Sadly though, the superior numbers of Hill’s Division make themselves felt. Because a unit involved in a charge which fires defensively can neither move nor shoot during the rest of the turn, the uncommitted 2nd MS wheels and fires a deadly volley into the flank of the gallant 104th PA, sending them Whipped from the table, busting through the 11th ME behind them and disordering them.
In the following turn, the 12th MS, supported by the 2nd FL, charge the un-formed 11th ME and send them Whipped off the table as well. Casey sees that enough is enough, and voluntarily withdraws the 100th NY and the NY Light Artillery. The poor 92nd NY catches a heavy volley as they try to withdraw and are also sent Whipped off the table.
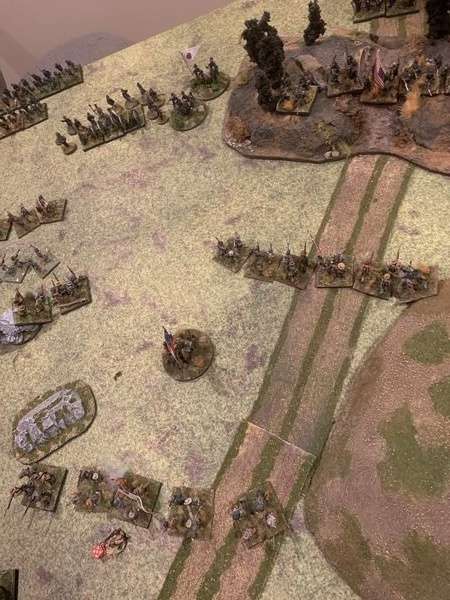
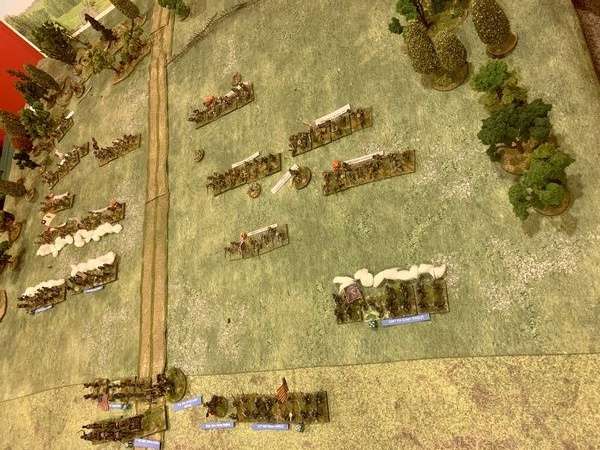
Final Confederate positions.
CONCLUSIONS AND SCENARIO OBSERVATIONS
1) I continue to enjoy these rules. As mentioned above, I was reminded that unsupported charges should be avoided, even if the differences in troop quality is stark. A green unit can do significant damage with its defensive fire, generating a high hurdle in negative modifiers that one roll of the Charge Dice might not clear, which is when you you need a supporting unit, or preferably two, for those re-rolls. Is a regimental-scale set of rules right for a battle like this, which could be fought at smaller scales at brigade (15mm) or even divisional (6mm) scale? Depends on how much you like the actions of individual units. I enjoy a regimental level battle narrative, and it allows me to become attached to a unit like the star of this game, the 1st NY Light Arty, which redeemed itself with new ammo and HAMMERED the rebs thereafter.
2) Staff Officers. I only gave both sides two SOs, the rationale being that the Confederate army at Seven Pines was woefully bad at coordinating, and Hill’s division was separated by the terrible terrain, so Garland and Rodes are basically fighting their own battle. Maybe when Hill arrives on the table in the second scenario, he might add a third SO. The Union only get two because only two of Casey’s brigades are present (Wessell, apart from the 103rd PA, was off in the woods to the right) and in any case it was one of the weakest divisions in the Union Army, all green, and probably not an effective staff at this point in the war. Two SOs for both sides seems about right.
3) Victory Conditions. I should have been tracking the number of turns this battle took. I suspect it was at least ten. I think you want to give the Union an incentive to stand and fight, and so I would suggest giving the Union 1 VP a turn for every turn after the sixth (or perhaps 8th?) turn where there are still at least two formed Union regiments on the table. That also gives the Confederate player an incentive to be aggressive and drive hard on the Union. Casualties are also a factor, as in this game the Union lost 41 casualties while the Confederates lost 31. However, all the Union units are Green whereas most of the Confederate units are Veteran and a few are Elite. Thus, perhaps award the Union 1 VP for every 5 CSA casualties are the CSA 1 VP for every 10 CSA casualties? Something like that. Also maybe give the CSA .5 VP for every Union unit that is Dispersed (dissolves because of excess casualties) and the Union 1 VP for every CSA Veteran unit dispersed and 2 VP for every CSA Elite unit dispersed.
Based on these VP totals, I would say that based on the casualty totals and the time it took for the rebs to clear the table, the Union won this round of the battle.
4) Where Do We Go From Here?
The battle accounts agree that a significant number of Union troops piled up behind the redoubt and the twin houses as skulkers, and had to be rounded up and reorganized. I would therefore think that any Union unit that exits the table Whipped in this scenario is not immediately available in the second scenario. Perhaps a die roll every turn to see if it can be rallied, with whatever casualty levels it had when leaving the table, or even a bit worse.
The table for Scenario Two should have the Union fortifications (above) in the centre of the the table, with the twin houses just behind them. The Confederates will enter from their table edge, with each CSA unit at the casualty levels it incurred in the first scenario. From the very first turn, the Union artillery will be able to fire, as it is finally unmasked as the Union first line is pushed back.
Rodes and Garland’s brigades will need to assault and clear the Union positions, with the hope at some point (perhaps after six turns) that Rains’ brigade will complete is movement and flank the Yanks out of their positions (perhaps this would entail Hill sending his staff officers in search of Rains). Also the CSA will have the benefit of two batteries of artillery (Bondourant’s and Carter’s).
Eventually the third phase of the battle will be the action at Seven Pines, with elements of Couch’s (Keyes Corps) and Kearney’s (Heintzelman’s corps) divisions arriving to counterattack and throw back the rebs.
Unit Standing at the End of Scenario One showing casualties in brackets and W for Whipped Union unit:
Rodes: 6th AL (1), 12th AL (0), 5th NC (0), 4th VA (7), 12th MS (7)
Garland: 23rd NC (7), 2nd MS (3), 2nd FL (0), 38th VA (6), 24h VA (0)
Palmer: 98th NY (4), 92nd NY (7W)
Naglee: 104th PA (7W), 11th ME (7W), 100th NY (3)
Wessels: 103rd PA (10W)
1st NY Buy A (3)
Thanks very kindly if you read this far and if you have any thoughts on how this scenario might be improved, please do let me know. I have some printed fortifications on order, and once they are received and painted, I will try the second scenario. In the meantime, thanks for reading and blessings to your battles. MP+
Hello friends:
Recently someone said on gaming Twitter that they preferred actual battles with stories and backstories to random X points per side battles, and I confess I've been leaning that way myself lately. Since I wanted to return to Dave Brown's Pickett's Charge ACW rules and employ some newly painted figures, I opened Vol. 1 of my copy of The West Point Atlas of American Wars at random and picked a corker of a battle, Seven Pines, the beginning of the end of the Peninsular Campaign of 1862.
Seven Pines was a terribly fought battle on both sides, and brings little credit to anyone except the ordinary soldiers who fought and died there. McClellan's Army of Potomac had crawled its way slowly towards Richmond, giving the Confederates ample time to mass their forces. At the end of May, 1862, McClellan was within a few miles of Richmond, but had inexplicably pushed two of his corps (Keyes' IVth and Heintzelan's III corps) across the swollen Chickahominy River, making them a tempting target for CSA commander Joe Johnston.
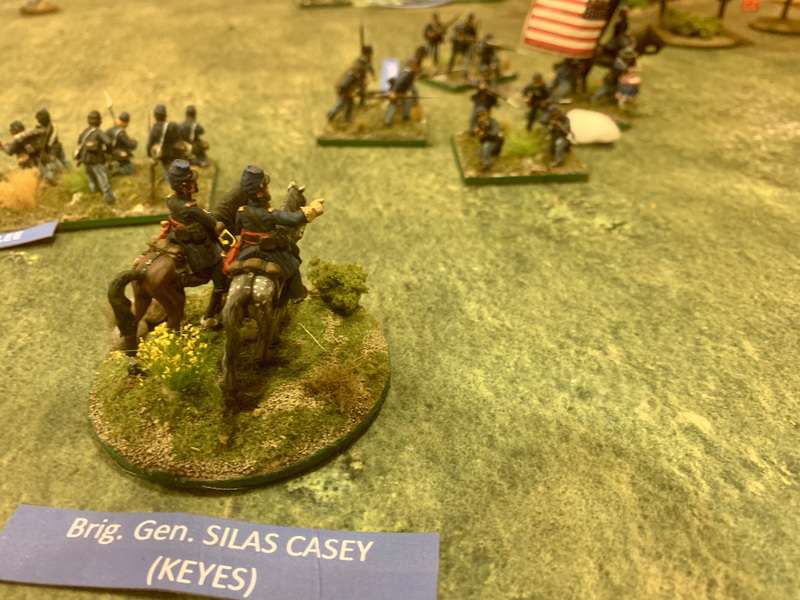
The Union line was arranged in what has sometimes been described as a fishhook, with the most exposed Corps, Keyes', being the least trained. Some accounts say that the regiments in the furthest forward Division, that of Brig. Gen. Silas Casey, were raw recruits, armed with inferior Austrian muskets. As one historian put it, "Casey's division, the smallest and greenest of McClellan's vast arsenal, was inexplicably ordered to lead the army's advance on to Richmond". These poor guys had been marching and working for days, exposed to torrential rains, often without their shelter halves and coats, so they were pretty used and abused going into the battle.
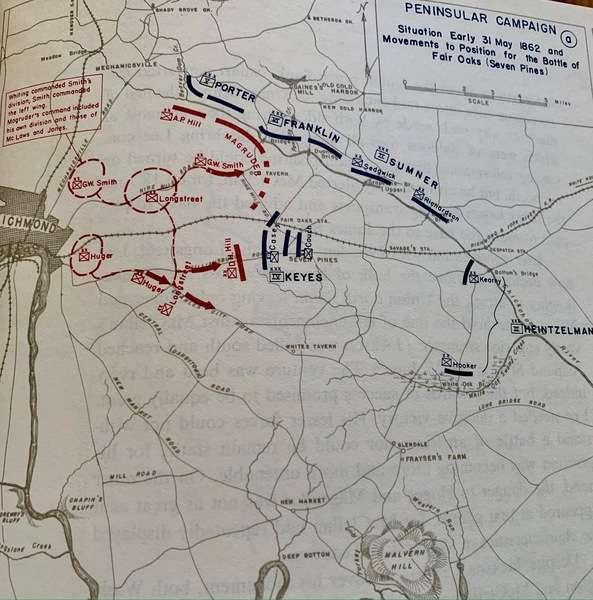
Johnston decided that Keyes' Corps was too tempting a target to pass up, even though by May 30 the CSA command knew that the Union IVCorps was digging in around Seven Pines. Johnston's plan was that D.H. Hill's division would attack it from the front, up the Williamsburg Stage Road, supported by Longstreet's division, while Huger's division would move south to hit the Union left and Whiting's division would move to hit the Union right.
It was a good plan in theory, but there were several problems. First, a heavy rain on the night of 30 May left the roads that the CSA divisions must use a wet soggy mess. That would slow down the rebels, but it was hoped that the same rains would prevent the rest of the Union army from crossing the Chickahominy to help Keyes.
The plan required far too much coordination for an army of the period, especially considering that the chain of the command of Johnston's army was complicated and inefficient and Longstreet basically got in Huger's way because he thought he knew best, while Huger's orders were unclear, leaving Hill to wait impatiently and finally launch the attack on his own. Or something like that. It was basically a big mess and many of the troops Johnston assigned to this movement never made it to the fight. If you have an hour to spare, there's a good lecture here on the leadup to the battle.
GAMING THE BATTLE
This would be an easy battle to recreate as a whole in the smaller scales, but since I do ACW in 28mm, the only way to recreate it is in sections. Fortunately the timeline of the fighting meant that the battle on the first day unfolded as a series of episodes, which is how I intend to proceed.
EPISODE 1: Garland Vs Keyes
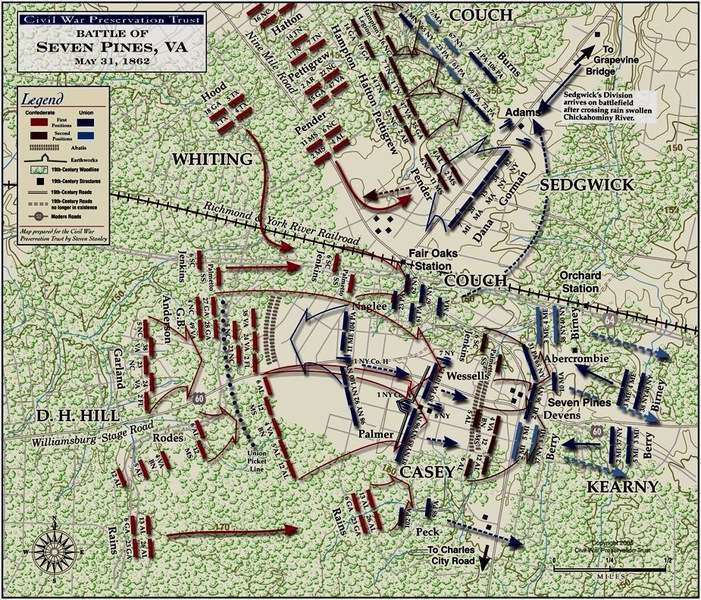
I found this map from the US Civil War Preservation Trust to be most helpful. It shows the initial dispositions of both sides as well as the Confederate plans. Modern maps are no help, as the entire battlefield has been developed, including a substantial portion which is now covered by the Richmond airport.

The Confederates had done enough reconnaissance to know that Casey's division was deployed in an open space that had been cleared of the surrounding trees, and bisected by the Williamsburg Stage Road. Roughly 800 yards east of the start of the clearing were two buildings known as the Twin Houses, about 135 yards south of the road, and in front of them Casey's troops had constructed a redoubt with a battery in the centre.
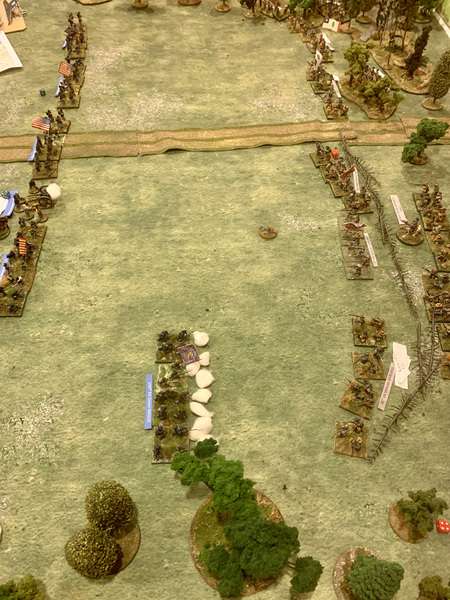
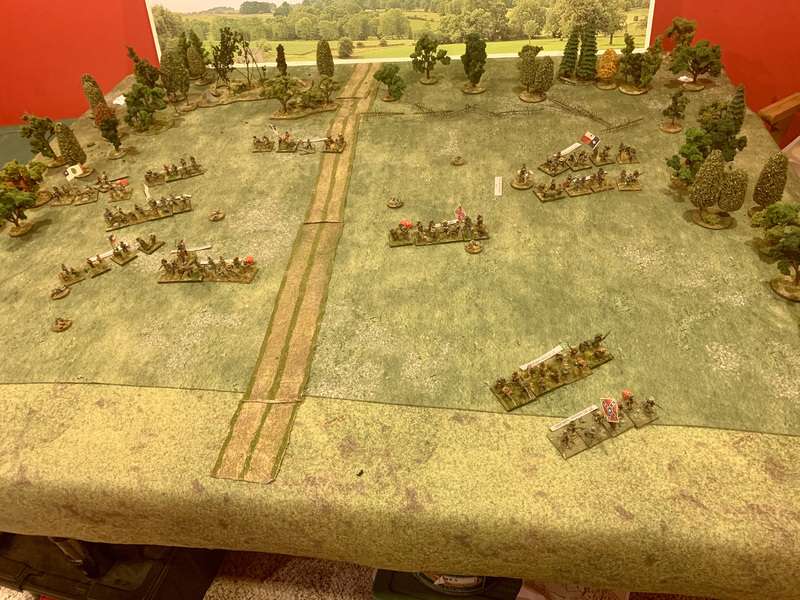
Working with the Pickett's Charge rules ground scale of 9" = 150 yards, with a 6' by 5' table, this is what I came up with. The clearing is about 60" north to south, with Casey's first line, two regiments each from Naglee's and Palmer's brigades, about 27" back from the start of the clearing. I've used model railroad pine trees to represent the abatis. As I figure the ground scale, Casey's redoubt is about 36" back from the first line, so there is no room to represent them on the table in this first episode. However, Casey's two batteries in the redoubt line (1 NY Co A, 7 NY) can fire from off the table if the rules permit. From what I can read of the maps, this part of the battle was dead flat, so no need to model elevations. Some of this clearing was planted, and possibly had snake rail fences, but I am guessing that after a few days camped here, Casey's men would have dismantled them and used the wood.
The first minutes of the fight in the woods doesn't need to be modelled, which is a good thing because it was absolutely terrible terrain. In his report after the battle, Garland wrote that:
The difficulties of the ground were almost insurmountable. The recent rains had formed ponds of water throughout the woods with mud at the bottom, through which the men waded forward knee-deep and occasionally sinking to the hips in boggy places almost beyond the point of extrication. The forest was so thick and the undergrowth so tangled that it was impracticable to see the heads of the several regiments as they moved forward, and the deploying intervals were in consequence very imperfectly preserved.
The accounts agree that the Union pickets were driven in without much resistance. Stephen W. Sears, in his book To the Gates of Richmond: The Peninsula Campaign, has an account by one Yankee skirmisher who hid himself when he saw the first of Garland's men: "I [then] left the place and took a course to get away".
Thus, Garland's brigade will activate on the first turn within inches of the hapless 103rd PA, while Rode's brigade will have to spend several turns moving through the woods (difficult terrain) before they can get into the fight, as per the battle.
Troop ratings are easy to figure out for the Union - every regiment in Casey's division is rated Green, while Casey himself was a competent and brave commander (he was chosen for the job because he'd written an important drill manual before the war). I don't know how to rate the three US brigade commanders - Palmer, Naglee, and Wessells - I'm assuming that they were competent. Rating Hill's division is a little more difficult, but considering the relative quality of the ANV in 1862, I'd rate them as Veteran with a few regiments being Elite, just to reflect the qualitative difference between the two divisions. I hope I'm not buying into rebel mythology here, but these same troops will be carried over to the next episode where they have to face the redoubt (which historically they did), so they will need some staying power.
I'd be happy to hear your thoughts/comments before I kick off the battle, hopefully tonight. If this works, my plan is to work on a set of scenario notes for Seven Pines that might be publishable somewhere in our hobby.
In the meantime, blessings to your dice rolls!
MP+
Good afternoon friends:
My first foray into General d’Armee by Too Fat Lardies/Reisswitz Press showed me that I needed some player aides to better manage some of the core mechanics, one of which is Aides de Camp. When I served, an ADC was just a luckless very junior officer who got tasked with picking up a GOFO (General Officer/Flag Officer) at the airport, getting him to his guest quarters and turning his sheets down, and other sundry details, the indignity of which far outweighed the privilege of wearing the ADC’s aiguillette, the ceremonial length of braided cord worn on the shoulder of the dress uniform.
n Napoleonic battlefields, ADCs were ambitious and dashing young men of good families who rode around with orders and goads from the General commanding, like the unfortunate Lord Hay at Waterloo. In Dave Brown’s GdA, ADCs, as we’ve seen, are the limited resources of time and attention to detail that allow the player to try and exercise _some_ control over the battlefield. So how to represent them in 6mm?
I thought of simply ordering some officer figures to single base as ADCs, but decided against it, as it would take a while to get them and paint them (Baccus is swamped with orders at present and I have no idea if other companies like Adler are any more responsive) and I already have single-based command figures in the pipeline to represent brigade level commanders. I then hit on the idea of trying my dubious artistic skills to sketch some caricatures, starting with Austrians, so I painted some discard sabots from multi-bases in white and then went to work with an HB pencil. I found as I went that I was remembering some officers from my military service as I went, like the fellow with the big hair and the easy smile.
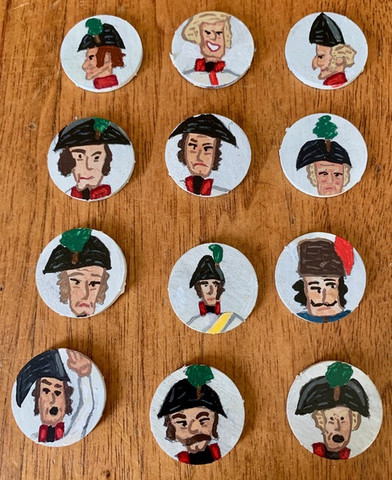
Final result. Started colouring them with the grandkids’ pencil crayons, but the results were quite uneven and so I decided to revert to acrylic paints. I’m quite happy with the final result. Can’t wait to try them in my next game of GdA
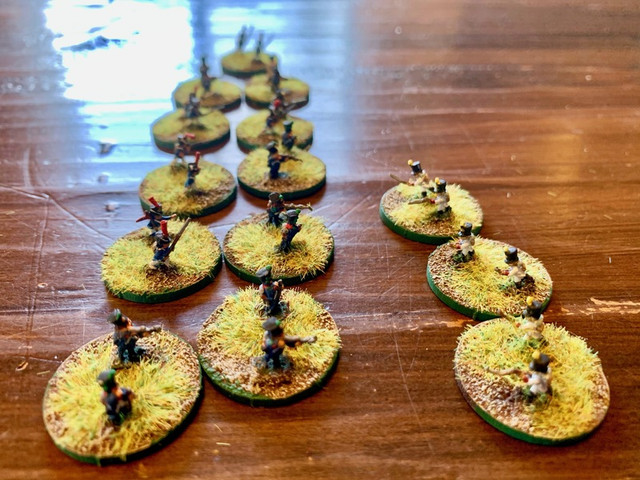
Also finished this week are some skirmish stands so I can try out the Skirmish rules in GdA. I still need to do more Austrians, but I figure the French are more likely to deploy skirmishers than their opponents. Some of the French figures (left) are by Baccus, painted by me, and some are from the collection I purchased. The Austrians on the right were in that same purchased collection.
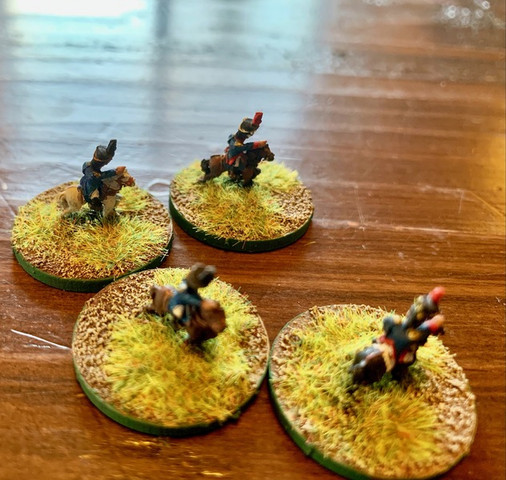
Finally, since I was on a basing jag, four brigade commanders for the French. While I could also employ these figures as ADCs, I like my approach better.
Hopefully we’ll see all this kit in action soon. Thanks for looking and blessings to your brushes!
MP+
There was a while back around 2012 when this blog was buzzing with excitement about my foray into 6mm Napoleonics. I had purchased a large collection of painted Austrian and French figures, bought some new figures from Baccus, and was learning to paint them. I had picked up Sam Mustafa’s Blucher rules and had played a few games with them, and was generally happy with my progress. Then a move, my wife getting sick and dying, a new duty assignment, retirement from the military, remarrying and starting a new life. A lot of things got in the way, and I think the resurgence of my interest in this period and scale has to do with being in the happiest place I’ve ever been in my life. Funny how it all works.
This Easter seemed like a good time for a wargaming vicar to live out the resurrection by raising my 6mm collection out of their boxes and taking Dave C. Brown’s General d’Armee rules for a spin. I had previously played Dave’s ACW rules Pickett’s Charge (PC) and liked them, and found the mechanics similar enough that GdA was fairly easy to pick up.
I decided the the best way to learn the mechanics was to take two identical forces, thus, a French division of three infantry brigades, four batteries, and a light and heavy cavalry brigade faces its Austrian mirror image. All units were rated as Line for simplicity’s sake. This force selection seemed to promise enough complexity to get a sense of rules that claim to be scaled from Divisional to Corps level.
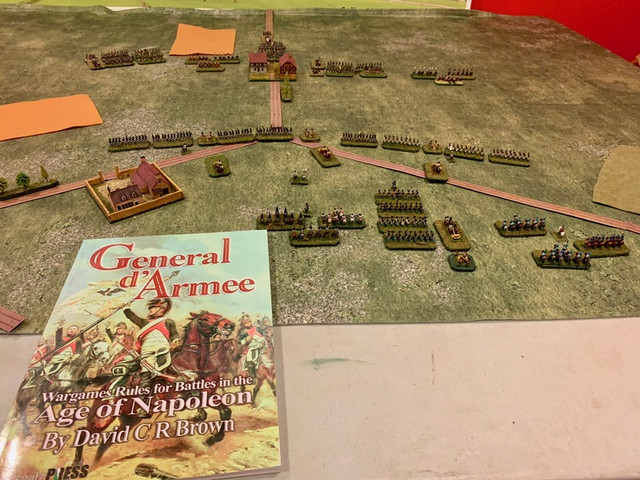
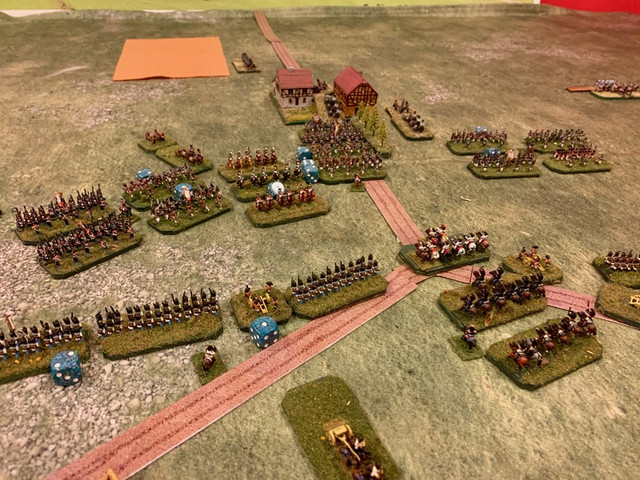
The Austrian force of General Albert Kurvi-Tasch (dubbed by Archduke Franz Joseph “More moustache than brain”) defends the key crossroads south of the village of Schlumpen and watches as the French of General Theodore d'Ordure, dubbed by Napoleon as “the Grossest of the Gross”, comes into view. The backdrop is not 6mm, sorry about that.
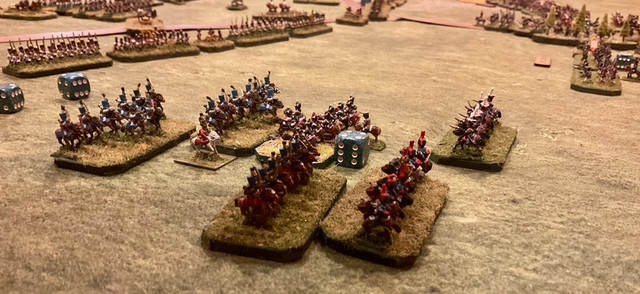
The battle began with the light brigades of cavalry scrimmaging on the Austrian right. Dave’s charge procedure rules were basically familiar to me from PC and are fairly simple to administer in horse on horse actions, where there is no defensive volleying to complicate things. At first things went fairly evenly, with the two brigades somewhat battered and retiring to reorganize. When the went at it again, however, the Charge dice went disastrously for the French: their “2” vs the Austrian “12” on 2d^ (it’s all d6 based) saw the French light horse simply dissolve. Charges can be exciting and tempting because you never quite know how they’ll go.
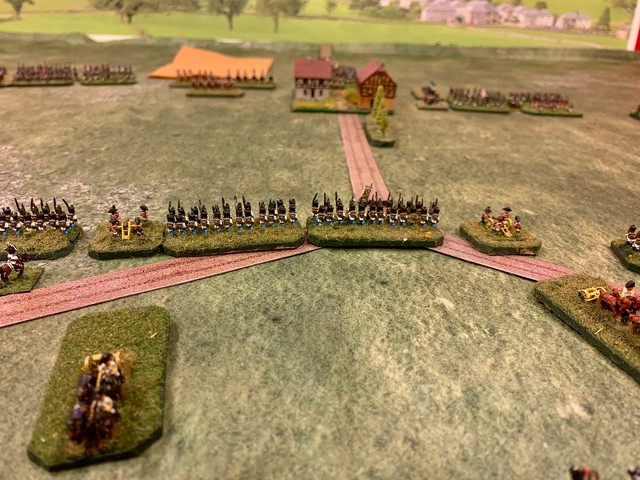
The French reserve advances through Schlumpen in a brigade column, hoping to punch a hole through the Austrian centre with the support of the heavy cavalry to their left and the two flanking infantry brigades. As you have noticed by now, I am using small dice to keep track of casualties, though am not happy with the look. Perhaps I need micro-dice? I’m now wishing my unit stands had little slots for casualty dice like the cool kids have.
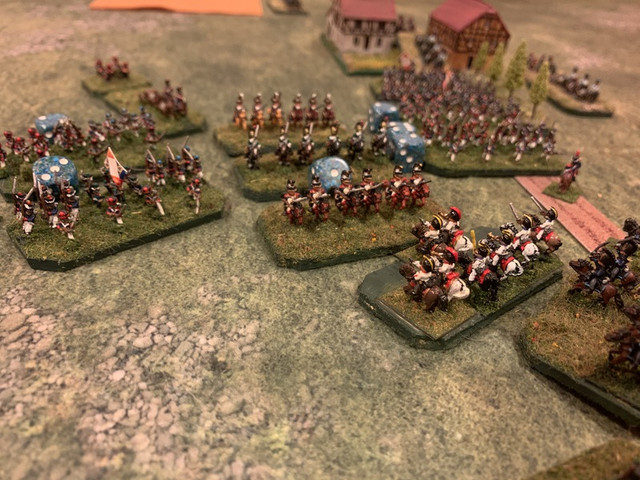
Artillery can be deadly in these rules. The two Austrian batteries in the centre have savaged the lead unit in the assaulting brigade, and checked its advance. Ordure moves his heavy cavalry forward to open the way, and the Austrians respond. It’s still anyone’s battle.
Austrian cuirassier and French dragoon trade blows, largely ineffectually, and the two brigades basically repel one another like bumper cars at a fairground. For me this is where 6mm really shines as a visual scale with the clash of massed units. I would never paint enough larger figures in my remaining lifetime to achieve the same effect.
Speaking of visual appeal, I’m quite happy with the table. The game is being fought on a Geek Villain 6 by 4 fleece Grasslands mat, the roads are from Paper Terrain (glued to cardboard and then cut out) and the buildings are by Timecast which I really like.
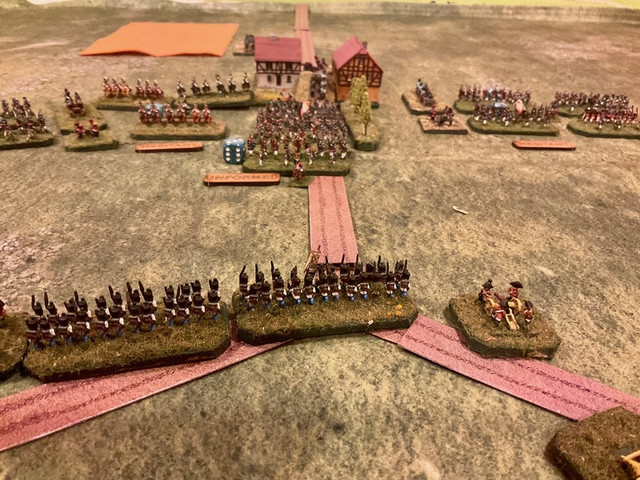
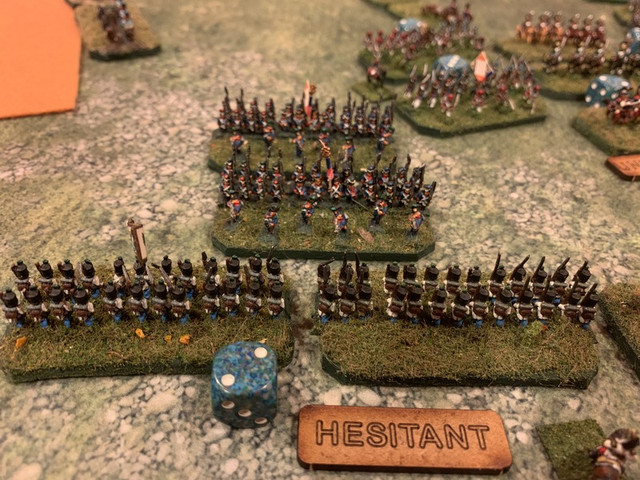
In the final clash of the game, the French columns advance on the Austrian lines. I’m very happy to say that the two French infantry units in the centre are the first 6mm figures I ever painted, almost a decade ago now, and I’m very happy with the way they look. At this point you may be wondering how I portray formations. Good question.
All my units are based the same, in lines, though with French units I usually put some skirmishers in front. However, because in my world a single base represents a single unit, I don’t have any way to represent the formation changes that GdA and other rules call for. My core assumption then for this game is that each unit is currently in the formation that makes sense fir the situation and for its army doctrine. Thus, here the French are in column and the Austrians are in line. Infantry, if charged by cavalry, would go into square if they made the appropriate test. Cavalry are generally in column. I have enough limbers (another benefit of 6mm) to portray artillery either limbered or unlimbered. It seems to work so far.
 \\
\\
With the repulse of the French infantry (as in Dave’s ACW rules, defensive fire from an intact foe is pretty deadly), and with the destruction of the French light horse, the game seemed to be done and an Austrian victory.
One of the features of Dave’s rules that I especially like is command and control. As in PC, GdA uses a varied number of Aides de Camp each turn to help ensure that your brigades do what you want them to do, and reduce the chance that they might go Hesitant and spend a turn dithering in uncertainty. ADCs can help you salvage wavering brigades, can direct artillery in intensive bombardments useful to prepare for a charge, etc. In this game the French could have 5 ADCs a turn to the Austrian 4, but you then have to roll for their availability each turn, so you seldom have enough, which adds some uncertainty and friction - no wonder Richard Clarke and TFL rep Dave’s rules, they are a natural fit with the TFL philosophy.
I look forward to revisiting GdA soon, preferably using an historical battle as the template. I just finished using CCN to fight Wertingen, the Austrian defeat at the start of the 1805 Ulm campaign, and that seems a manageable sized battle to fight.
Thanks for reading. Blessings to you tiny soldiers!
MP+