Showing posts with label Paper Terrain. Show all posts

Friday, April 9, 2021

In Praise of Paper (Terrain) 2 - Basing the Buildings

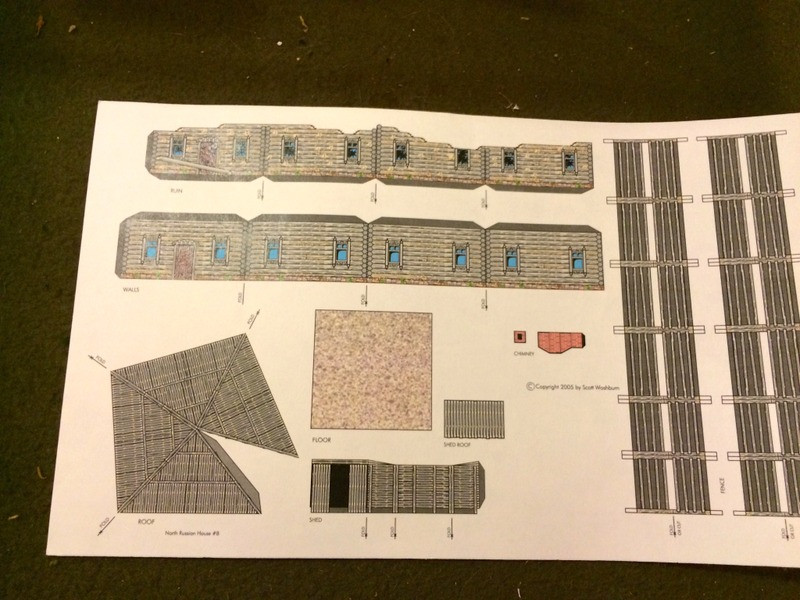
Hello again friends:

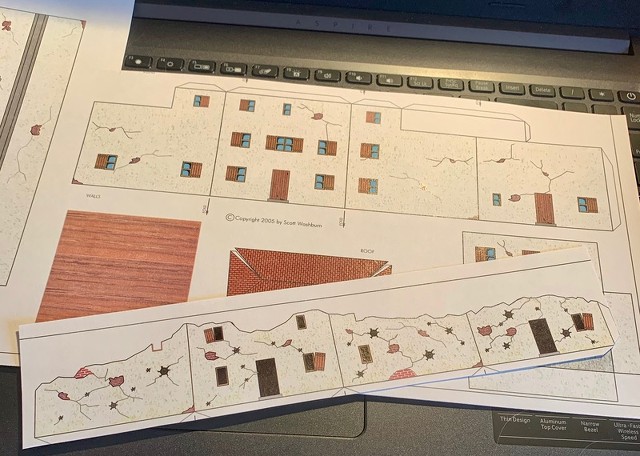
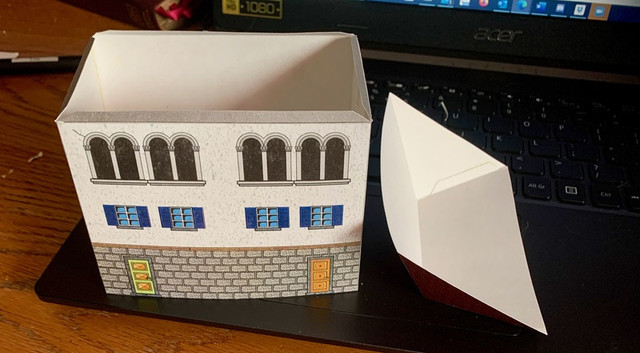
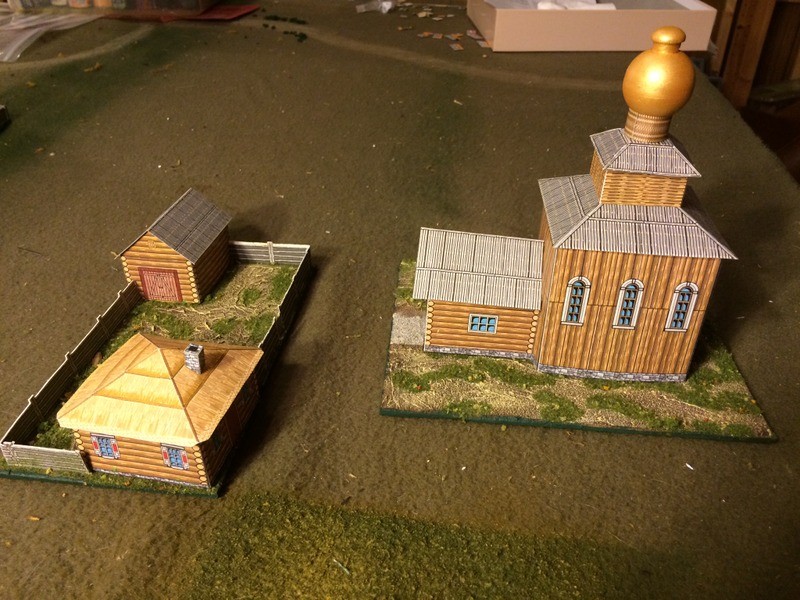
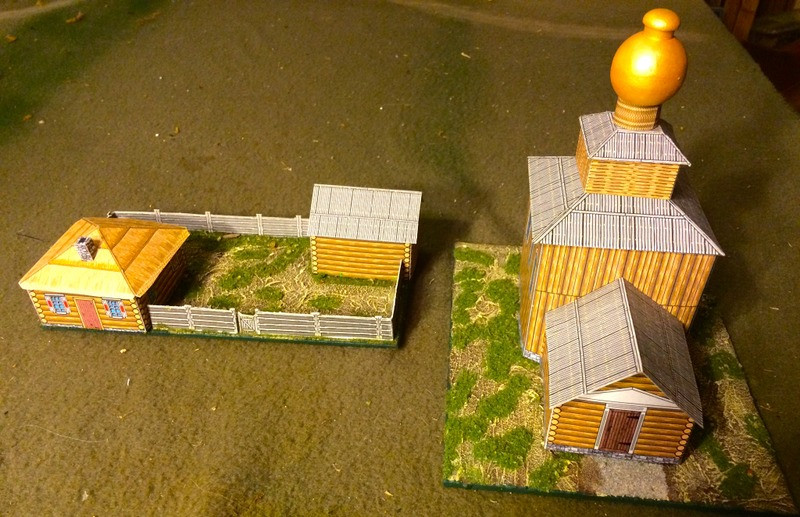
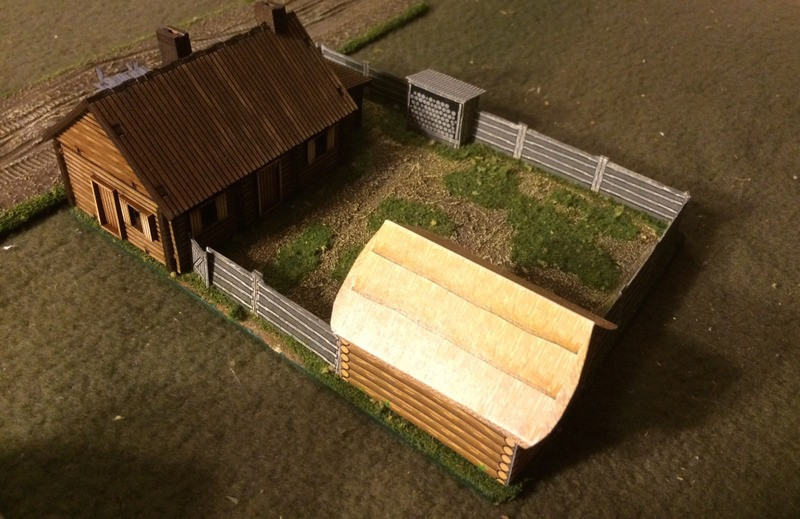
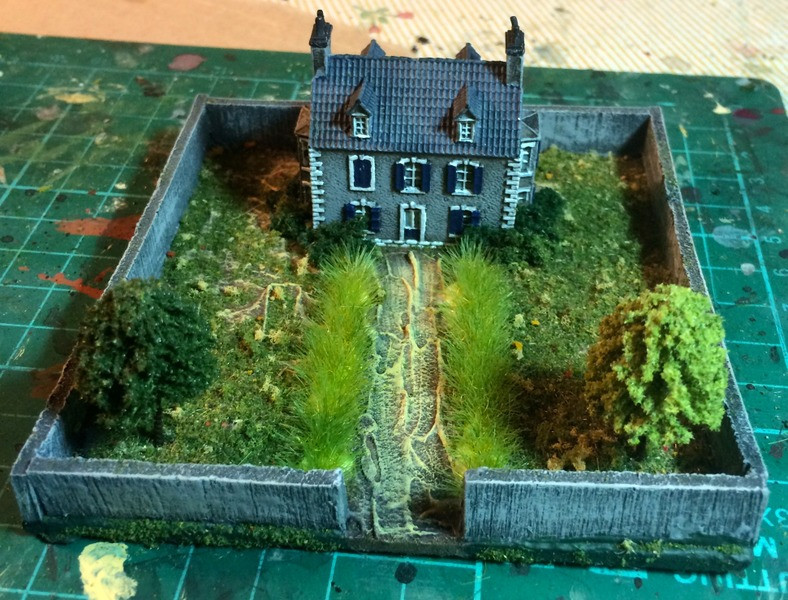
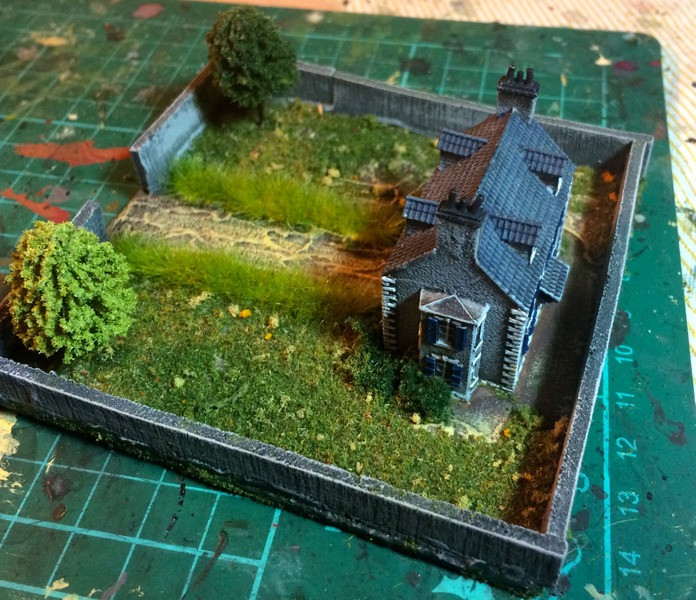
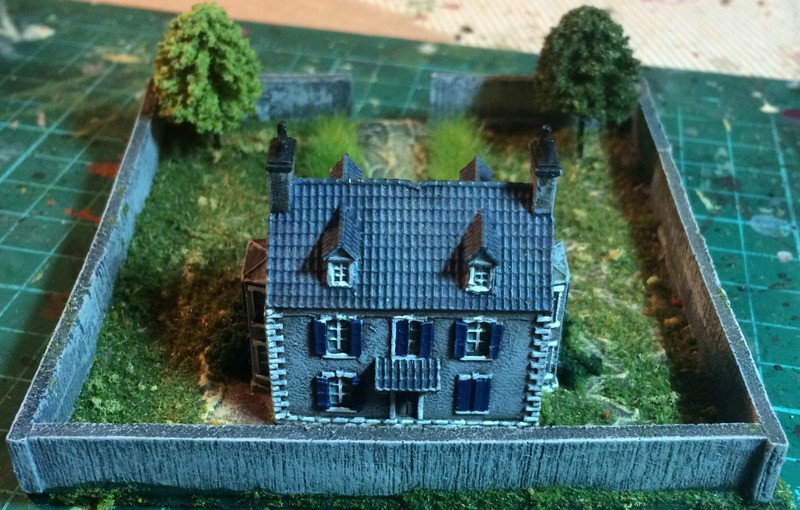
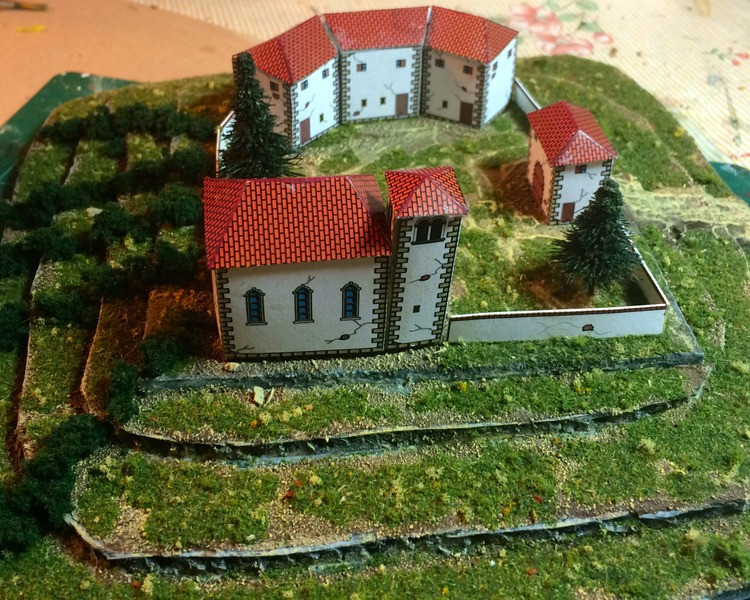
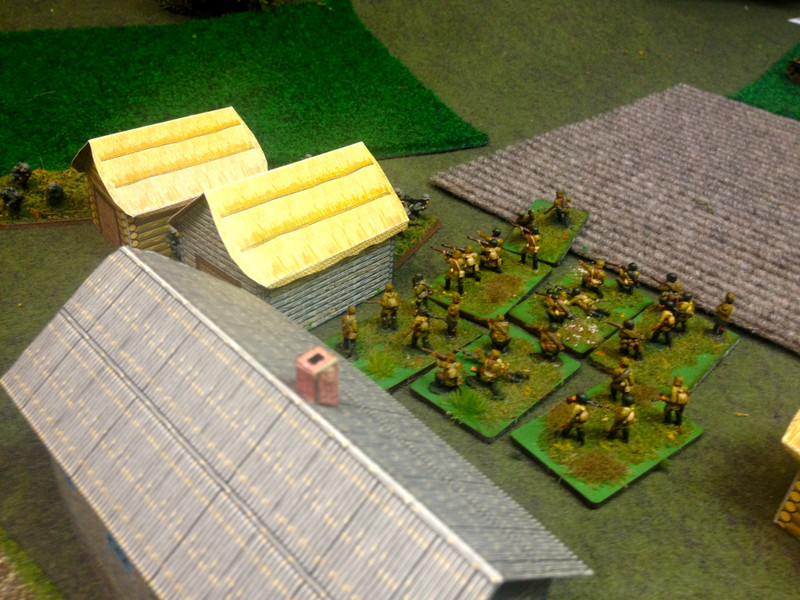
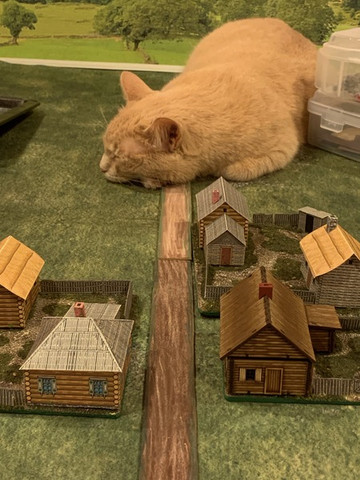
It’s me to preach the gospel of paper again, and specifically to illustrate the basing technique that I use for Paper Terrain products.   With these three 15mm Russian village buildings (including the one odd man out, the MDF building in the righ foreground) I put two paper buildings (plus a small woodshed/outspace) on a single base to represent either a farm or an entire village, depending on the scale of the game (platoon vs battalion).

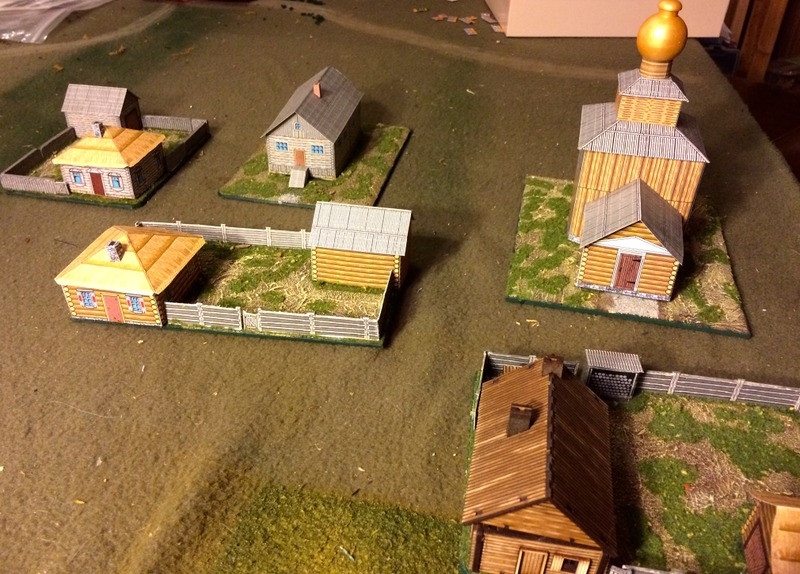
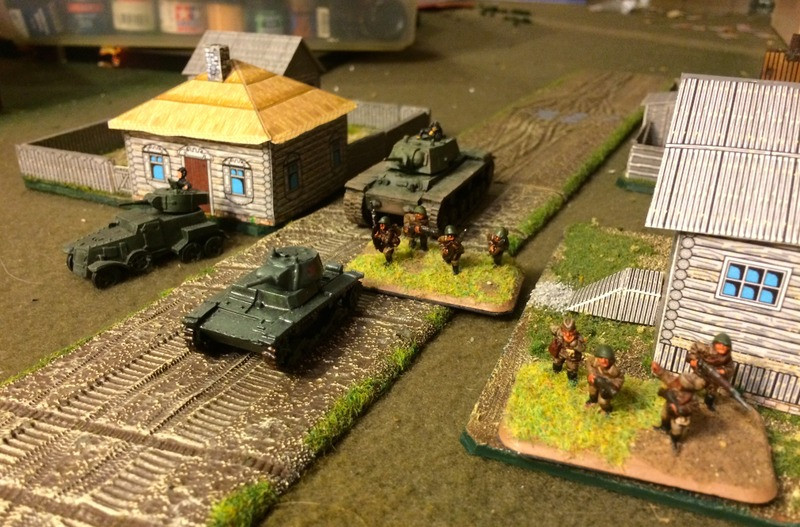
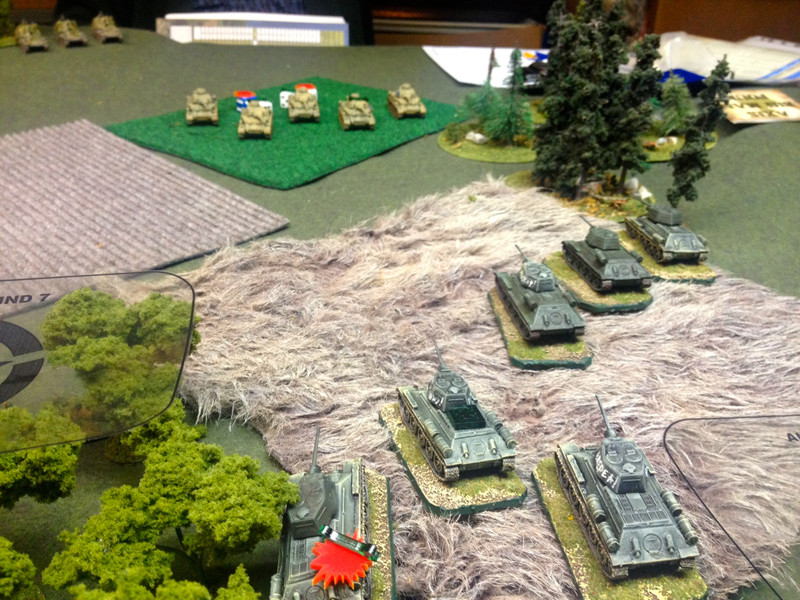
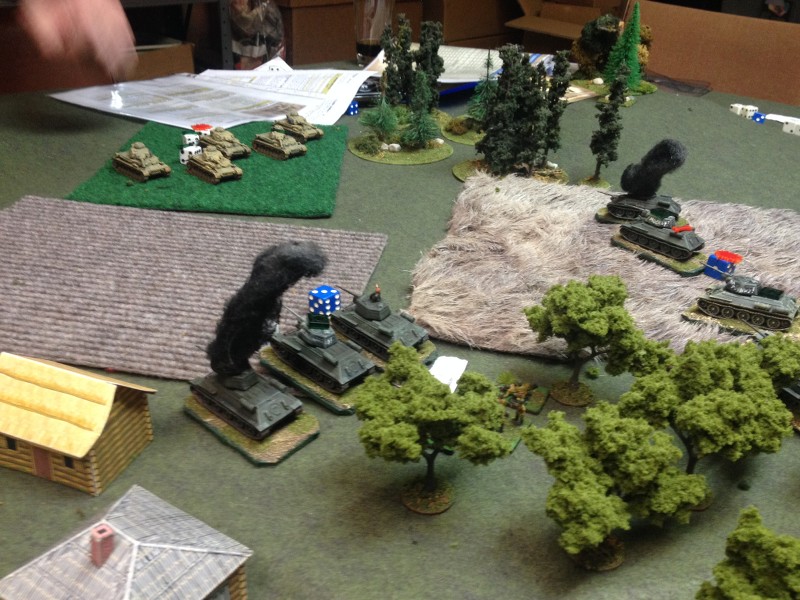
Here @MarshalLuigi, having inspected the village and found it acceptable, demonstrates correct roadblock and delaying action procedure.   The road to Moscow is secure for now.  There may be too many trees on that backdrop for the steppes!


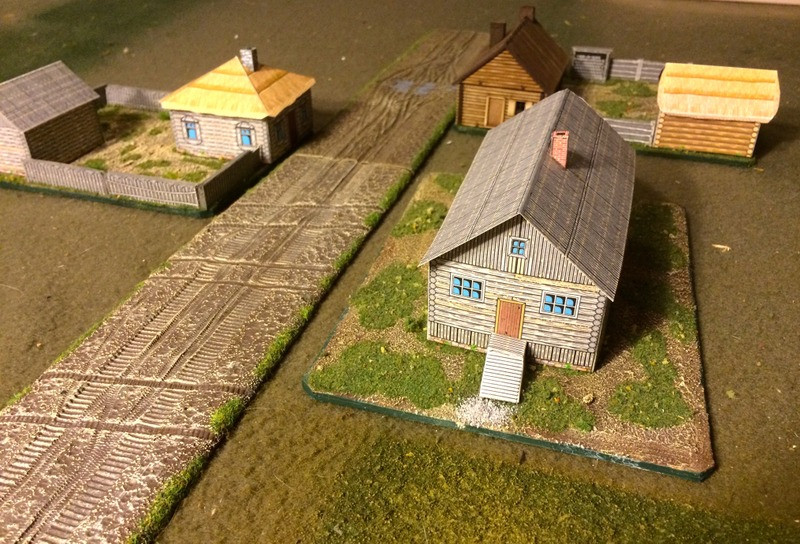
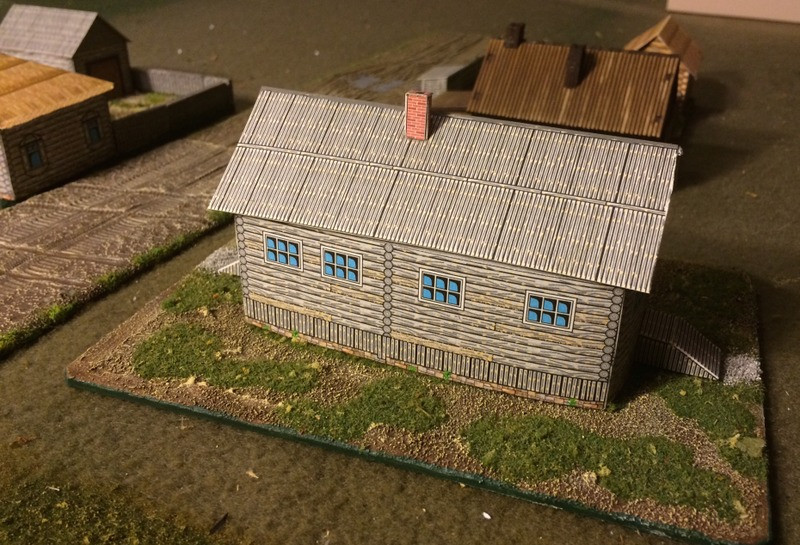
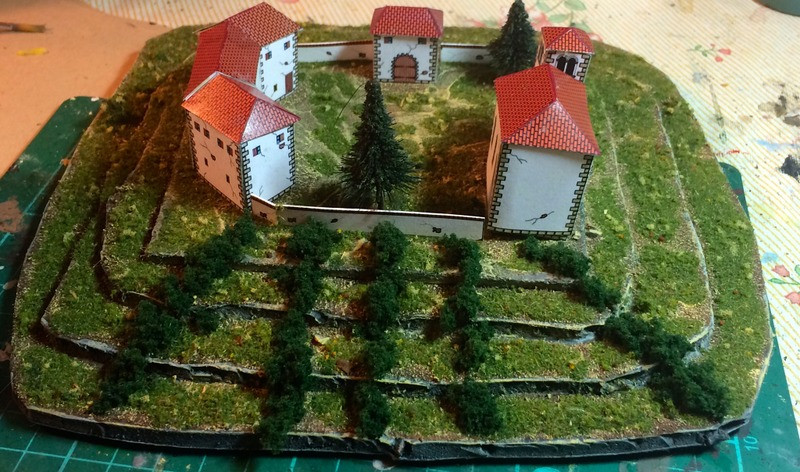
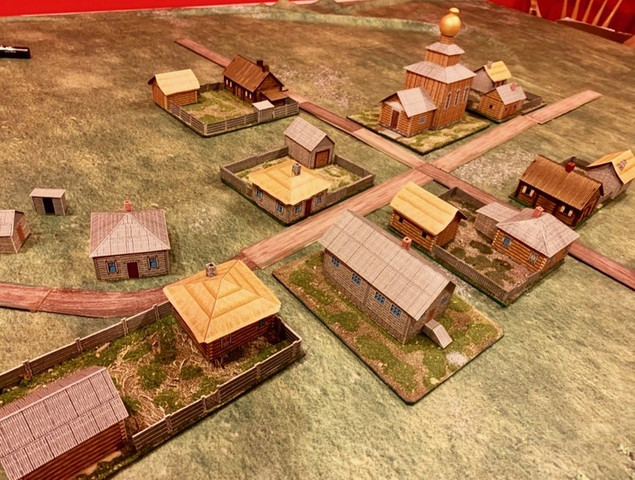
Here is the village of Paperskoye almost complete, just a few more buildings to base.


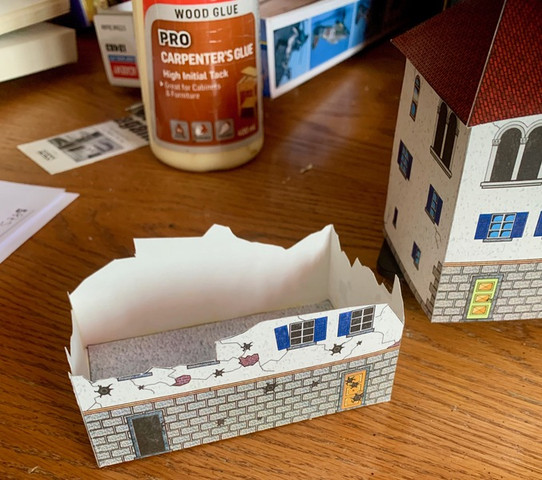
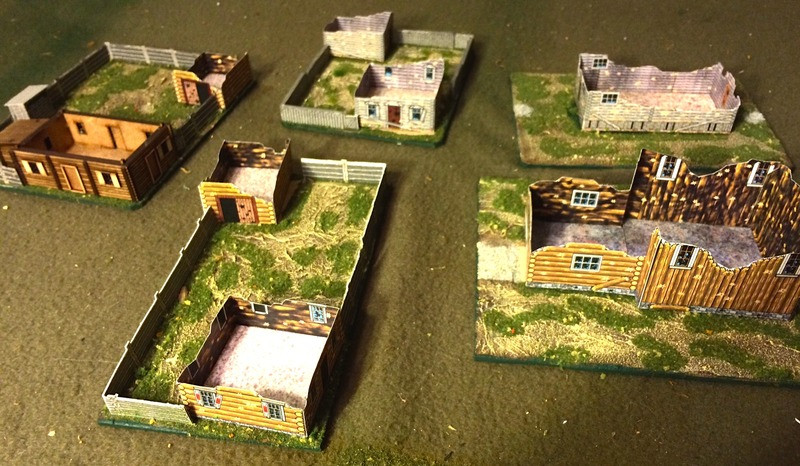
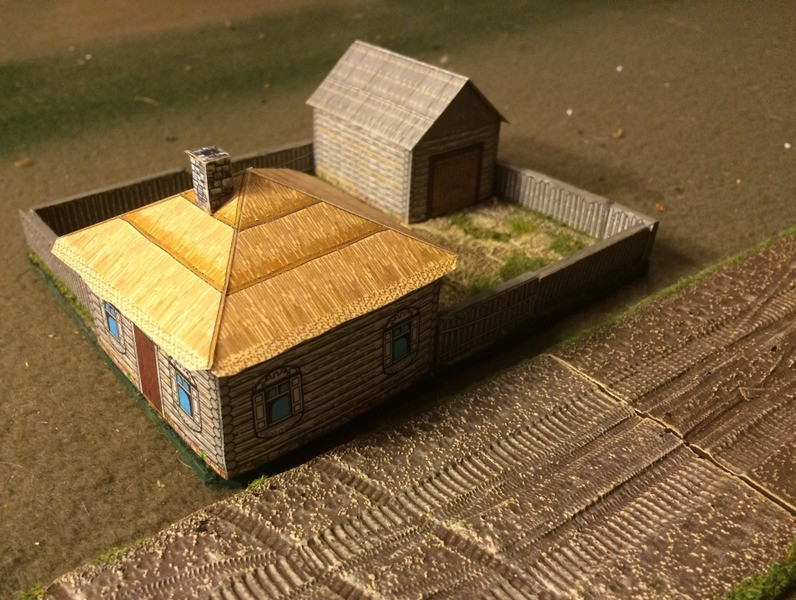
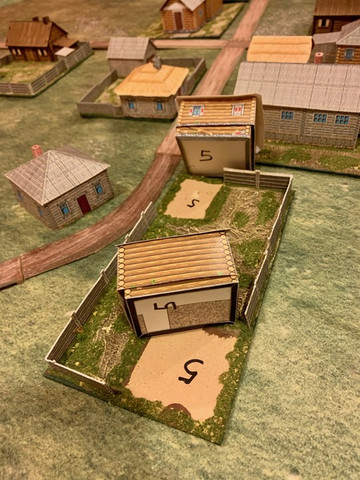
I use a numbering system to help me remember which buildings go on which bases.   I thought about gluing the ruined interior shells to the bases, but decided against it.  Having the bases in one tote and the paper buildings in another makes for safer storage and transport, I find.

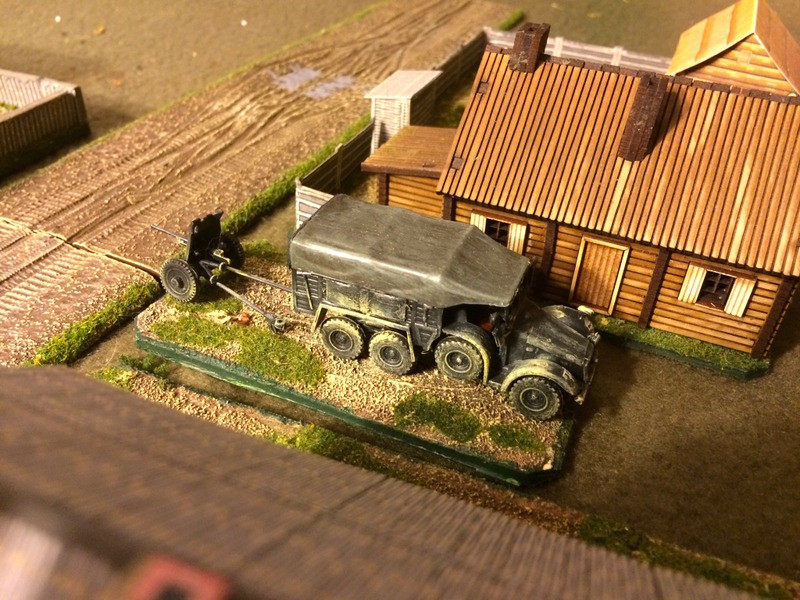
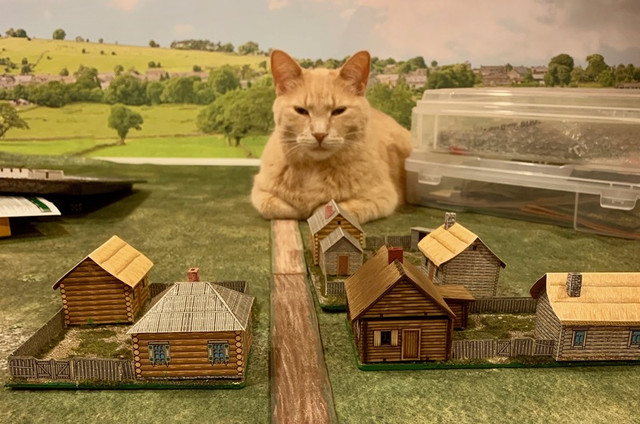
Luigi, aka the Cossack Catbeast, appears to have lost interest in the project.  The road to Moscow may not be so secure now.  Wasn’t a giant cat mentioned in the Al Stewart song?

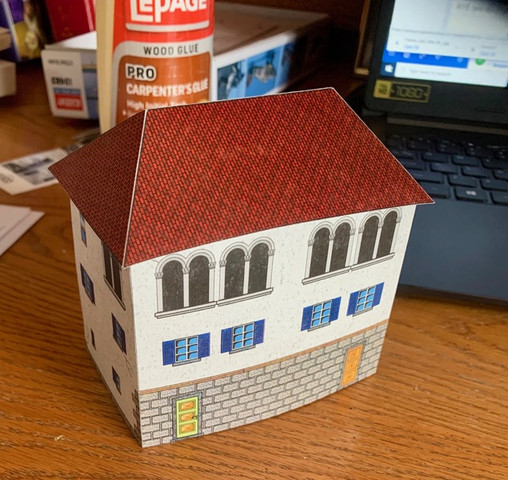
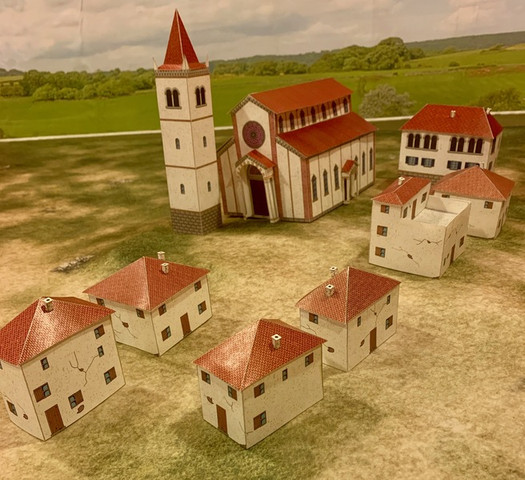
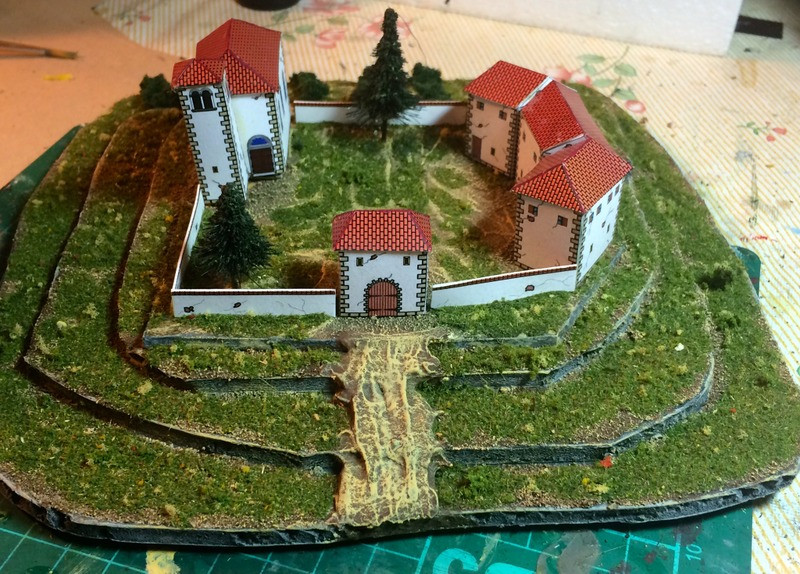
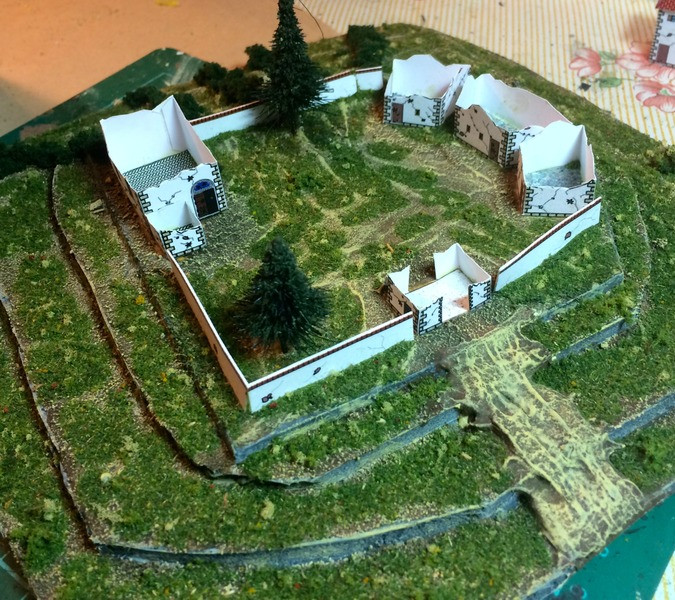
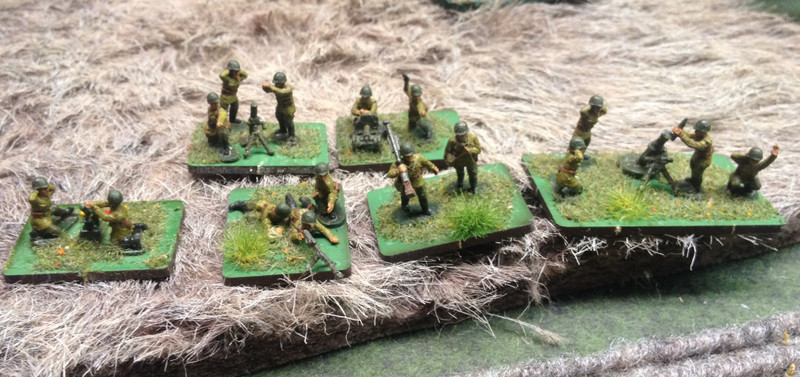
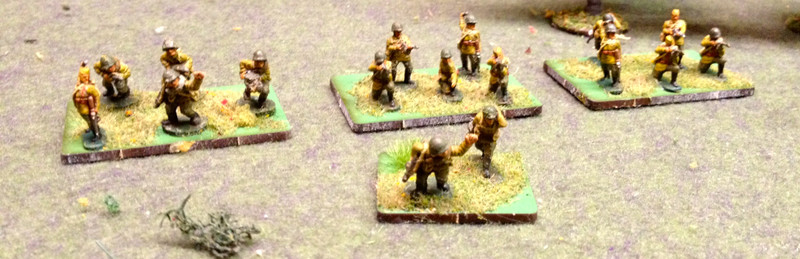
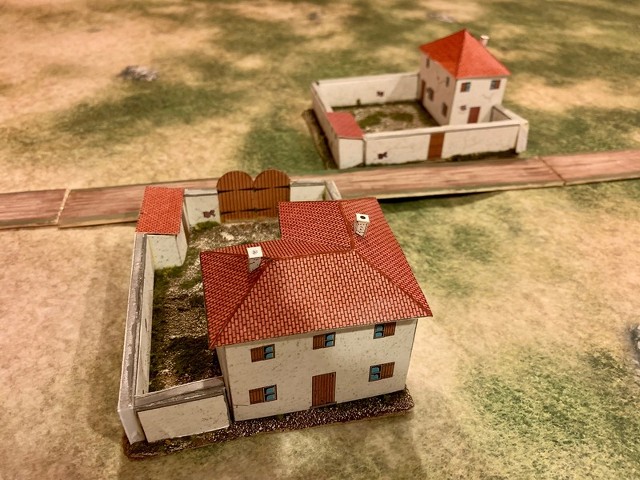
Moving to the sunny Mediterranean, we take you to a small village in Sicily.  the fist fruits of my basing efforts for my Sicily 1943 project.   These would make a nice pair of strongpoints for the defending Germans.  As with the Russian buildings, my basing technique is the same.    I handout a piece of MDF from the hardware store, texture it with a wood builder’s putty for sealing gaps, base coat it dark brown, then dry brush in two lighter colours (Yellow Ochre and then Desert Tan), and finally flock, but only in patches to suggest an arid climate, which is in keeping with this new Sicily gaming mat from Geek Villain.  I also used some brick red craft paint to go over the roof ridge lines, which were left white after the scoring and folding.  A little effort for a great improvement, I think.

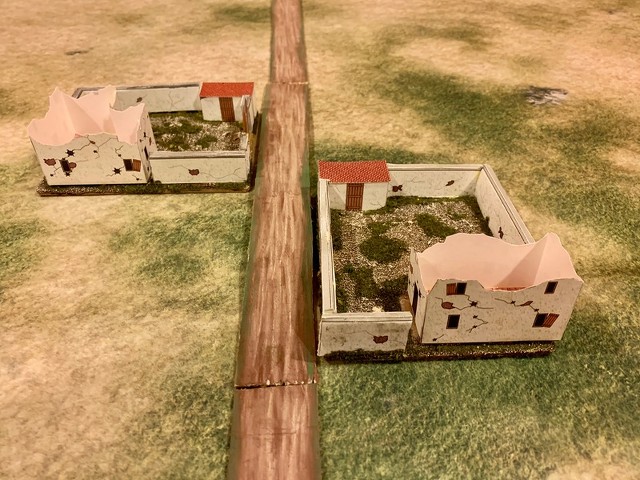
 The same buildings, having been thoroughly liberated.   

I have some British/Commonwealth troops in the queue to paint, but somehow some 6mm Napoleonics figures have used their superior mobility and stealthy size to get ahead of them.

Until next time, blessings to your basing!   MP+

Monday, April 5, 2021

In Praise of Paper (Terrain)

Reading the Canadian historian Mark Zuelkhe’s book on Operation Husky, the Canadians in the Sicilian Campaign of 1943, got me thinking of using some of my 15mm kit to explore that campaign, and to do so I would need some Italianate buildings, enough for a small town.   So I turned to a tried and true source, Paper Terrain, run by Scott Washburn, and ordered his Italian Village pack and his Town Expansion set.  Here’s an example of one of the sixteen buildings that came promptly in a flat manilla envelope.

 It may look daunting, but all you need is a steady hand, some patience, a decent pair of scissors and a craft knife, and a patient partner who can put up with the myriad bits of paper that are the byproduct of the assembly process.   I used a metal ruler and craft knife to lightly score the fold lines, and while the buildings are printed on sturdy cardstock, you need to learn not to score the lines too deeply.   Once cut and scored, you fold them together carefully and glue them.  I use white carpenter’s glue.

 As they say, some assembly required.   Putting the roofs on is perhaps the trickiest part but you soon get the hang of it.

 Each building includes a ruined shell which nests in the completed building like a Russian doll set.  Very useful once the HE starts flying.  I suppose you could dress the interior with rubble, but keeping it clean makes it easier to place stands of occupying troops.


Some of the completed buildings, laid out on my Sicily fabric terrain sheet from Geek Villain, which is a nice piece of kit in its own right.  The church is stunning and large.

The buildings look good on their own, but they look even better when based.  I am working on two Italian building bases now, using the garden walls and sheds that Scott includes with his terrain sets, and I will show the finished results in another post.   

I have several sets of PT products - a Western European town set suitable for France in 1944-45, a Northern Russian village set suitable for the Ostfront or even the black powder era, and now these Italian buildings.  I’ve found Scott to be easy to deal with, and quick to answer questions about tricky points of assembly (which are rare in my experience).  In my last email exchange, he mentioned that he keeps expecting resin and 3D printed terrain to put him out of business, but demand remains strong.   For me the advantage of his product is that it’s relatively sturdy if carefully stored and handled, comes in a variety of scales, does not require painting, and provides an affordable mass of terrain in relatively little prep time.

Blessings to you scissors!

MP+r


Wednesday, July 1, 2015

Turnipograd Rises

In yesterday’s post on a Russian front battle there were some 15mm buildings featured.   Almost of them are from the Northern Russian Village set published by Paper Terrain.  As I’ve said here before, I am a fan of Paper Terrain.  This company provides a cheap and cheerful way to get decent looking terrain on the table in quantity.

I’ve gotten pretty good at assembling this stuff.    All you need is a good pair of scissors, a sharp knife for scoring the folds, glue (I prefer white carpenter’s glue, slightly diluted) and patience.   I can assemble one of these sheets in an hour while keeping one eye on Netflix, and that’s allowing time for the glue to dry between stages.

As I mentioned a few posts back, I’ve been on a basing blitz of late.   I have all but one of the buildings assembled in the PT Village set, but only five based so far. The bases show off the buildings well and allow me to use the nice little fences that come with each building.  Here is Turnipograd in happier times. 

And a sad dystopian vision of what will happen should Turnipograd ever fall into the bloodstained hands of the fascist invader.  The ruined versions of the buildings are quite useful.  Sadly, for the 4Ground models, I would have to purchase the ruined versions, which for now is an expense too far.

Of course a Mad Padre model village has to have a church.


Presumably this church has been repurposed by the Party as a granary or something.   Scott W includes a gold-painted wooden knob for the onion dome, which is a nice touch.  There is also a proper Orthodox cross to put on the top of the dome, though I don’t think such a cross would be approved of by Comrade Stalin.

A street view in Turnipograd.


A tidy little farm on a busy (Battlefront resin) road.  Judging from those tank tracks leading right up to the window, it looks like someone applied the brakes just in time.


That’s a 4Ground laser-cut MDF Russian house mixed with a Paper Terrain outbuilding, fence and woodpile.   They work well together, I think.

I’m thinking this is either a school or a party headquarters?  Or possibly a community hall where the Junior Pioneers can stage their children’s pageant, “Comrade Stalin’s Glorious Fiver Year Plan for Increased Agricultural Production”?

Defenders of Turnipograd.  These buildings work well with my 15mm models.


They also work well with 20mm models, or at least, with 1/76 scale.  These fascist invaders will soon be crushed by the Red Army, don’t worry.

So that’s the lot.  All now boxed and packed away - movers come in a week!  Very little time left for wargaming projects.  Hopefully Turnipograd will see some use in the fall or whenever I cross swords with the dastardly Kampfgruppe Manto.


These figures bring my 2015 totals to:

28mm:  Foot Figures: 19; Mounted Figures: 10

20mm:  Vehicles: 1; Artillery: 1 

15mm: Armour/Vehicles: 5; 15mm Scenic Pieces: 5

6mm:  Scenic pieces:  7

Kilometres Run: 252


Wednesday, June 3, 2015

Some More 6mm Napoleonic Scenery and the Monastery of Silence

It's not quite time to pack up the painting table yet.  Movers won't be here for another month.  I've been cracking on with a few more terrain projects for 6mm Napoleonics.

Here's a GHQ house which I thought might work as a manor for the country gentry, seeing as it looks rather genteel.


The manor ground's walls are balsa, painted, I hope, to look like stone.


One minor goof was to have the main door with the little roof over it at the back.   I only realized that after I had glued it to the base.


Like my other 6mm scale bases, this is designed to hold a stand of infantry to show a village being garrisoned.  I hope these chaps don't pilfer the gentry's silverware.


Here's another terrain project finished.  This monastery is included in the micro-scale Mediterranean village kit produced by Scott Washburn's Paper Terrain company.


I wanted a hilltop for the base, and cut a series of terraces out of foam board.  My friend Mike B recommended that I take a little red paint and touch up the white marks left from scoring the roofs with a knife before folding them.  That was good advice, they look much better.


Of course, a monastery requires a vineyard for the Abbot's table.


A difficult place to capture, especially when held by grenadiers!


Like all Paper Terrain kits, it comes with ruined versions of each building. Useful to have.  Ruined monasteries are always good for inspiring poets and romantic composers.


This reminds me of my favourite monastery joke.   There was a monastery of an order with a strict rule of silence.  It was the custom that each monk was allowed to say two words to the Abbot each year.
After his first year, a novice was brought to the Abbot.
"Brother Johan, what would you say to me?"
"Bad food."

The second year, Brother Johan again appeared before the Abbot.
This time he said, "Hard beds."

The third year, Brother Johan stood before the Abbot and said, "I quit."
The Abbot replied, "It's just as well.  All you've done is bitch and complain since you got here."

These figures bring my 2015 totals to:
28mm:  Foot Figures: 19; Mounted Figures: 10
20mm 
15mm: Armour/Vehicles: 5
6mm:  Scenic pieces:  7

Kilometres Run: 240

Monday, December 29, 2014

More 15mm Soviets For My Year End Totals

Glory to the little miniatures representing the Red Army!

Here’s another completed project as 2014 draws to a close.   Here are 81 figures (65 infantry plus 16 crew for various heavy weapons) for a substantial reinforcement to my 15mm Soviet WW2 army. I’ve been working on these fellows on and off throughout December and it’s possibly the largest batch of figures I’ve done at one time.  Very satisfying when completed.  The figures are mostly Plastic Soldier Company with a handful of Peter Pig and Battlefront thrown in.  All were done using the speed painting technique I’ve described earlier, using a base of Vallejo German Panzer Yellow applied by airbrush which becomes the tunic, and other colours applied for trousers, weapons, webbing, etc, and all finished with Army Painter dip.

Technically I shouldn’t be showing these pictures, as some of these figures (I won’t say which ones) are eligible for the Analogue Hobbies Challenge, and others were painted before the deadline, but I want to include the lot in the VisLardica challenge totals, so here we go.  Curt, pray forgive me.

Heavy weapons detachment - all figures and weapons are from one of the four sprues in the PSC Russian Heavy Weapons box.  A sprue gives you one heavy, one medium and one light mortar, a Maxim MMG, and a moving and firing anti-tank rifle - the number two figure for the moving ATR comes from the PSC infantry box.  I need to get the rest of these guys done for some more firepower.

Battlefront metal castings, kindly given to me by blogger Chris Stoesen a year or so back.  They don’t mix quite so well with the PSC and Peter Pig figures, so for the most part I kept them on their own bases.  The bases are 4Ground’s line of bases cut to Flames of War standard sizes, which is what the rest of my WW2 collection is based on.

PSC and Peter Pig figures mixed together - quite compatible, I think.

SMG armed troops.  I need to paint up a few more and I’ll have a complete SMG platoon, useful in close quarters work.  The leader on the small base at the front with hand raised is a BF figure.


These fellows had their debut on Saturday night in the battle of Turnipograd, at my mate James Manto's (aka Rabbitman) place.  This was in between him stuffing me with trifle, turkey sandwiches, ginger bread pudding, and delicious stout.  You can read his AAR here, and also see me in my very cool “I Heart CCCP” Tshirt, worn to honour my glorious Red Army soldiers.  Below you can see the opening stages of the meeting engagement, as the Soviets push into Turnipograd (The Turnip Capital of Belorussia) from the bottom and the evil fascist kitten eaters from the top.  The buildings are mine, a mix of 4Ground and Paper Terrain, also making their wargaming debut.  I have quite a few more Paper Terrain buildings to finish, from their Southern Russian Village set.


As the Germans were threatening my understrength HQ platoon in the large building, I ordered Lt. Nobsky’s platoon to make a glorious charge to oust the invaders.  Sadly, the attach was thrown back, and many posthumous martyrs of the People were made that day, but they did inflict enough casualties to check the German advance.


My T34s (also PSC models) advance on a platoon of PzIVs, and are doing some damage, just before a zug of Marders (visible top left) announce themselves.  The T34s were commanded by Comrade Mikey Barratt. 


Comrade Mikey drives off the Marders, but between their fire and the Panzer IVs, he gets messed up badly while revealing his hand too slowly.  It would have been better if the whole Soviet tank company had advanced and fired together.  I must have Comrade Mikey shot.  Some of the T34s in this shot were painted earlier this year, and some will be in a forthcoming Analogue Painting Challenge entry, but again I won’t say which ones.

It wasn’t a very serious fight but it was fun to get these figures on the table.  


These figures bring my 2014 totals to:

28mm Mounted: 13, 28mm Foot: 85, 28mm Artillery: 2; 28mm terrain pieces: 10 (counting that woods base from a recent post).

20mm Foot: 33, 20mm Artillery: 2, 20mm Vehicles: 2, 20mm Terrain Pieces: 2

15mm Vehicles: 7, 15mm Foot: 119, 15mm Terrain Pieces: 3

6mm Foot:  120, 6mm vehicles: 4, 6mm Terrain Pieces: 2

Kilometres Run: 1100

Thesis Pages Written:  24

Blog Archive

Followers