Showing posts with label Miniature Wargaming - Terrain. Show all posts

Tuesday, April 11, 2023

#Terrain Tuesday: Warbases MDF Fields and Ponds

Hello friends:  

I’ve been quiet here last week, which, as you might expect, was a busy one for my day job as a wargaming vicar, but time to catch up now that Holy Week is concluded.

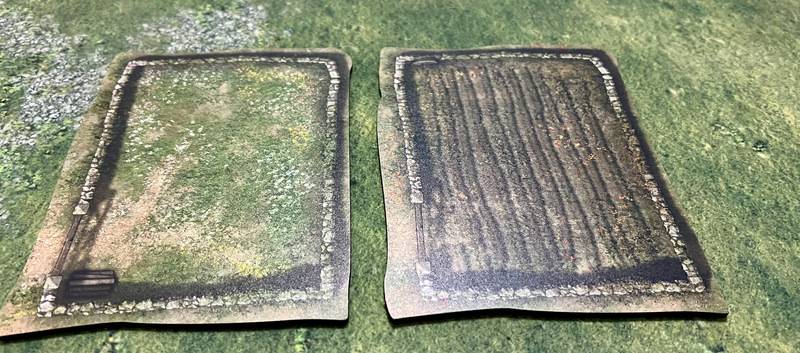
Recently I needed some custom-made MDF bases and ordered them from Warbases in the UK, as my Canadian supplier didn’t seem to need the business.   While I was on the Warbases webstore, I saw that they offered fields and ponds, in a part of the store called Terrain Bases   It wasn’t clear to me that these were 2D images printed onto MDF, I had formed the mistaken idea that they were somehow 3D, which was my own misperception.

There wasn’t a full range in stock, but I ordered two field sets, one in spring (left) and one in autumn (right).  Here are the large pieces from each set, each with a stone wall and gate around the edges.  They blend nicely against my Geek Villain game cloth.  

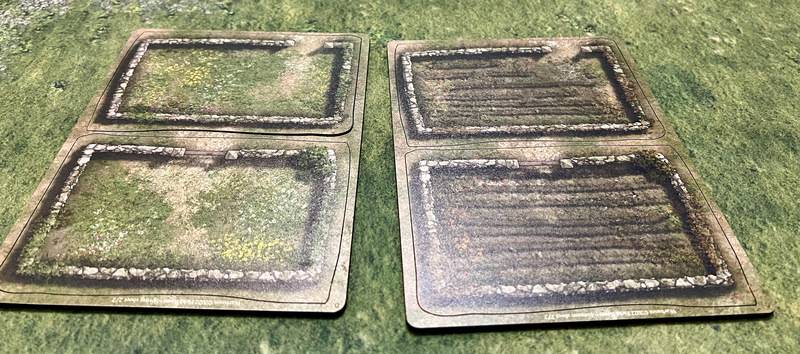
And two small fields in each set, again, spring (left) and autumn (right).

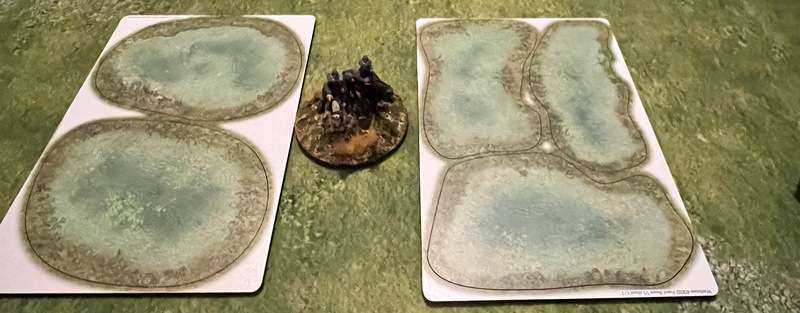
And I bought a set of ponds, which includes a generous five separate ponds.

28mm figure stand for scale.

And a 6mm stand for scale.  In 6mm, depending on the game scale (eg, Blucher where this one stand would represent a brigade), these would be decent sized lakes!

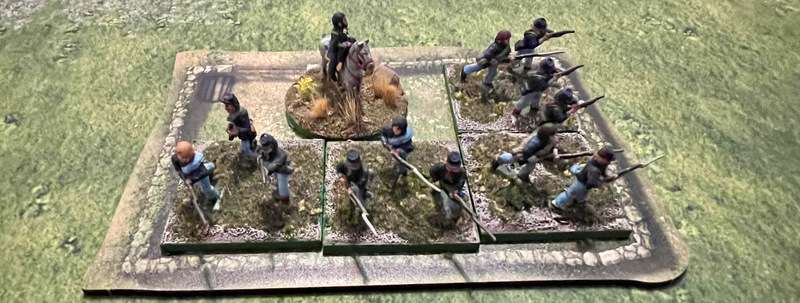
In 28mm, the large stand would accommodate a four or five based unit quite nicely to represent a terrain objective or a defensible terrain feature, such as a walled field.  Useful if one didn’t have enough actual wall section models.

Some folks might balk at the idea of putting 2D terrain representations on the table, which is fine, but for a fast game or if one is travelling light to a club or convention, these models might well be fit for purpose.   The quality of the printed images of the field and pond sections is pleasing, so they are a definite step up from fields and ponds of cut felt.

Cheers and blessings to your tabletops.

MP+


Tuesday, January 10, 2023

#Terrain Tuesday: Warbases Prussian Barn WIP

Hello friends:

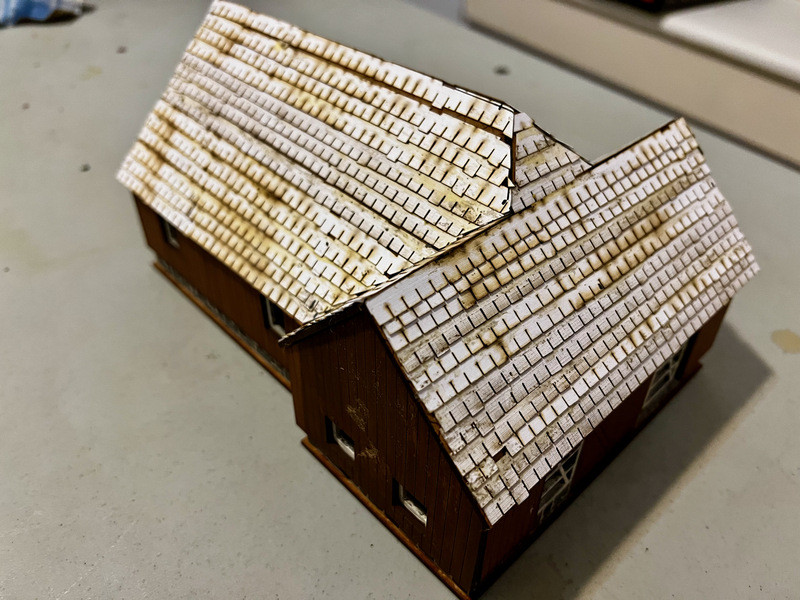
I’m reviving a feature here which I’ve called Terrain Tuesday.   Here’s a bit of progress on a project carried over from last year, this 28mm Warbases T-Shaped Barn from their Napoleonic Prussia series.   I can use these in a variety of horse and musket settings, and this particular model could possibly be used in a North American setting, assuming the barn was built by settlers of German origin.

I wasn’t happy with the MDF roof, so I ordered some of the Warbases cardboard roof tiles sets and laboriously glued them on.

Now I have to decide how to paint the roof.   I was thinking a brown base coat, and then a dry brush of red, as most German roofs I’ve seen in paintings of the period seem to have red roofs.   Any advice?

Blessings to your modelling.  MP+

Tuesday, June 28, 2022

#Terrain Tuesday: Visiting Old Russia

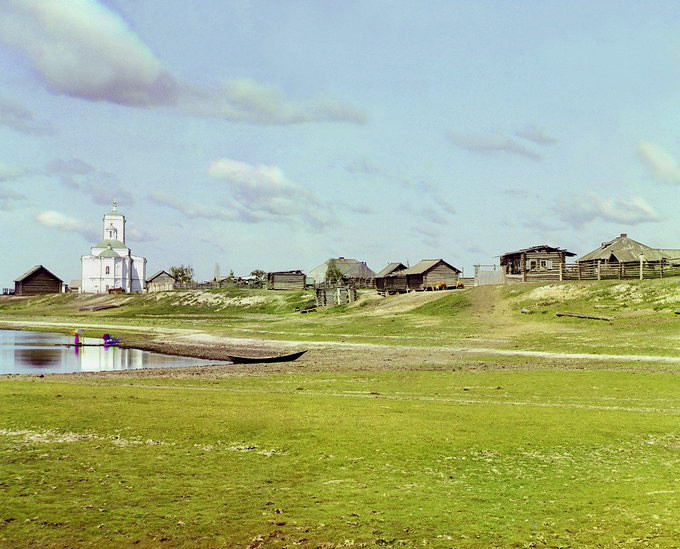
I saw this photo recently on Twitter, courtesy of one @nickfshort, and found it slightly haunting as a glimpse of a lost world, though the houses aren’t much different from some of the humble buildings seen on the front lines of the current Ukraine war.  

The caption reads:

"The village of Pokrovskoe in Siberia. An original colour photograph from, astonishingly, 1912. When Nicholas II was on the throne, and one year before the Romanov tercentenary.” Pokrovskoe was the birthplace of Rasputin, which is cool, but what interests me most here is the white painted church.

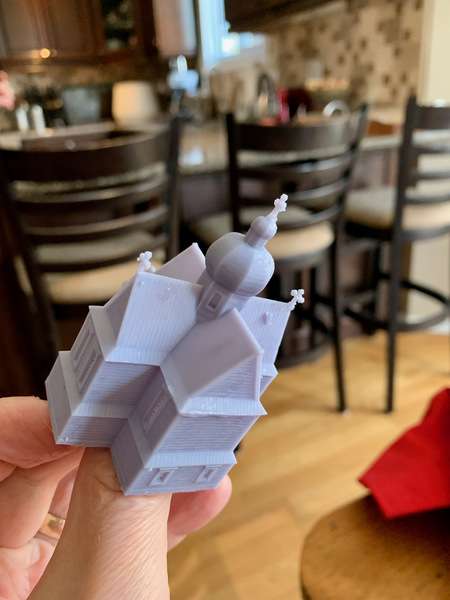
I’m wondering if it should be a guide for this lovely little 6mm model, which I bought as an .STL file from a German published called 3D Print Terrain. I have to say that this gave me fits, and it took multiple attempts on my Elegoo Mars printer before I had a successful print. Much trial and error with angling the building, adding supports, cursing and praying.

A Google search, “Rural Russian churches”, produced varying results, such as this one. 

 I suppose I could paint it a heavily weathered brown if it was some tiny village on the way to Borodino, with perhaps a bronze onion dome, but it could also be a white one if it’s a more impressive and prosperous town.   Hmmm, good thing I printed two.

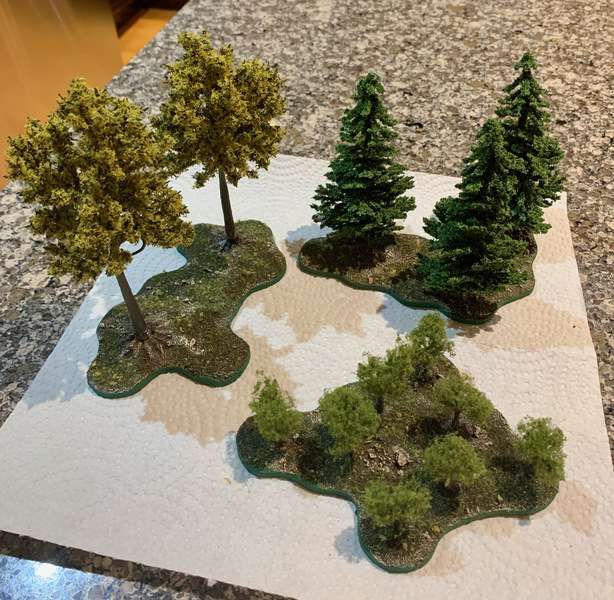
Finally, on the terrain and scenery front, tonight I finished the three tree stands featured in last week’s post.  Two for 28mm gaming and one for 6mm.

Blessings to your hobby endeavours!

M+ 

Tuesday, June 14, 2022

#Terrain Tuesday: Trees in Various Scales

Today I’m reviving an occasional feature on this blog/diary, Terrain Tuesday, a chance to talk about tabletop terrain projects I’m working on.   

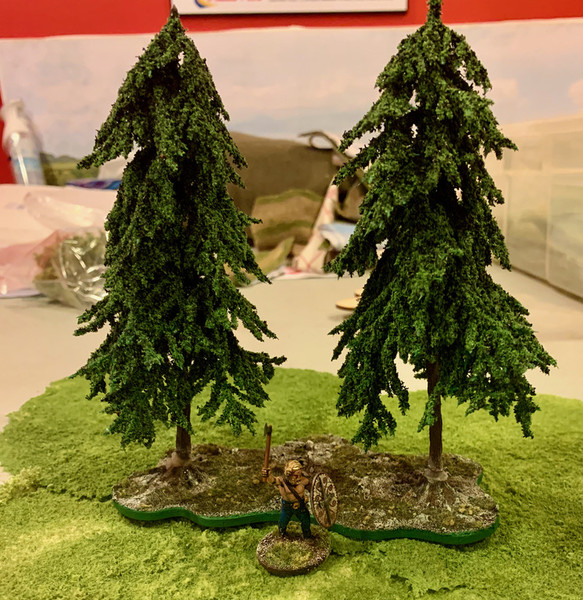
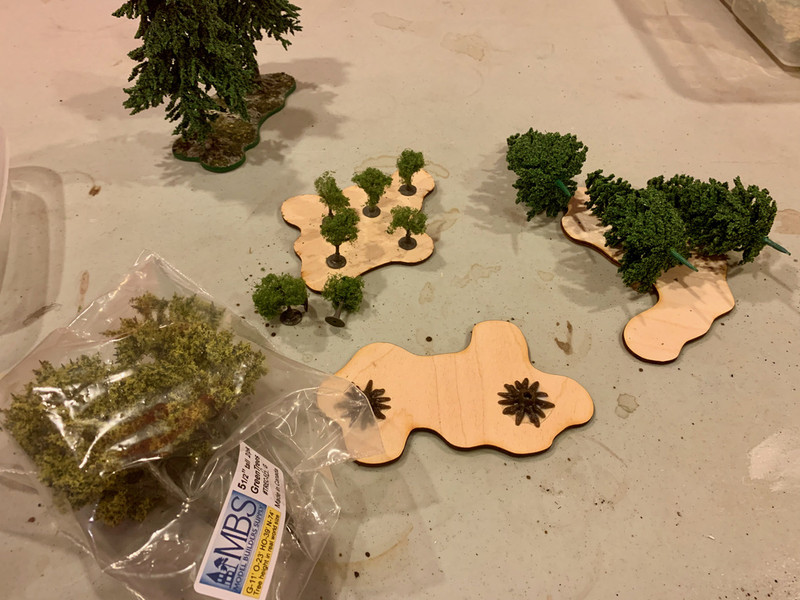
I don’t think we can ever have enough trees on most battlefields, unless it’s the Western Desert, perhaps.    Lately I’ve been trying to find the odd few minutes here and there to base trees, using some irregularly shaped bases I bought from the Litko website, and trees that I found for sale at Hot Lead in March courtesy of Model Builders Supply, a local company specializing in architectural and hobby scenics.  

 Two newly based large conifers shown with a 28mm Victrix figure for scale.


My friend Joe Saunders from Miniature Landscape Hobbies   has a wise saying, that irregularly shaped bases work well for nature, whereas human-made structures tend to look better on geometrically shaped bases.  I’m keeping that in mind as I use up the rest of these nice Litko bases for trees in various scales, including a small 6mm forest (top left).    Hopefully I’ll have that ready to show this time next week.

What terrain are you currently working on?

Cheers and blessings to your modelling!
MP+ 

Tuesday, March 29, 2022

Terrain Tuesday: Adventures in Basing and Building

Recently I mentioned that our guest on Canadian Wargamer Podcast #11 was Joe Saunders, who runs a small but mighty enterprise called Miniature Landscape Hobbies.  I was so impressed with his method for large scenic bases that I tried it, and here’s the result.

To back up a bit, my previous method was to cut a piece of MDF purchased from a DIY store.  This was never very pleasant or satisfactory because I used a craft knife and could never get the lines straight enough, and it was also very taxing on my hands and wrists.  There was also the very real worry that I might inadvertantly cut myself.  Once the MDF was cut, I would texture it with plastic wood (usually from Lepage), use diluted white carpenter’s glue to apply texture (usually model railroad ballast) and then once dry paint brown, two successive drybrushes (yellow ochre first, then maple tan) and then apply flock and seal with a matte spray.

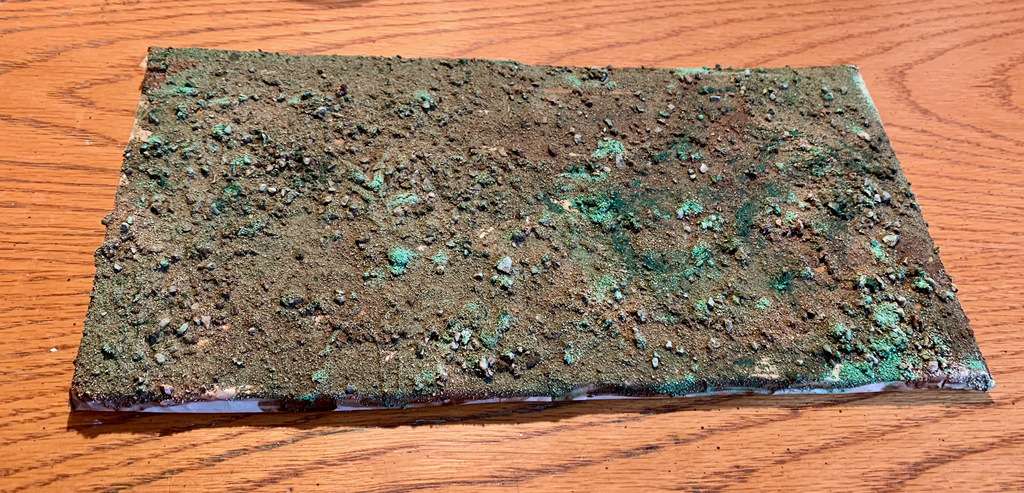
Joe’s technique is explained in this video.  Not to describe the whole method, but in brief I used two sheets of cut boxboard with the corrugations going in opposite directions.   I them coated it with diluted matte Mod Podge mixed with brown umber craft paint, and while it was wet I applied the grit (ballast mixed with some clean cat litter).   The next step according to Joe is to mix rubbing alcohol with brown acrylic ink and then use a pipette and apply the ink mixture while holding the base at an incline to allow the mixture to run freely. 

I didn’t have brown ink but I had some green ink, so I thought I’d experiment.  What I got was a pleasant greenish hue and in a few places the green ink turned the grit a bright green, suggesting clumps of foliage.  I showed this image below to Joe and he thought it was a “happy accident” and suggested a tan dry brush before adding flock. 


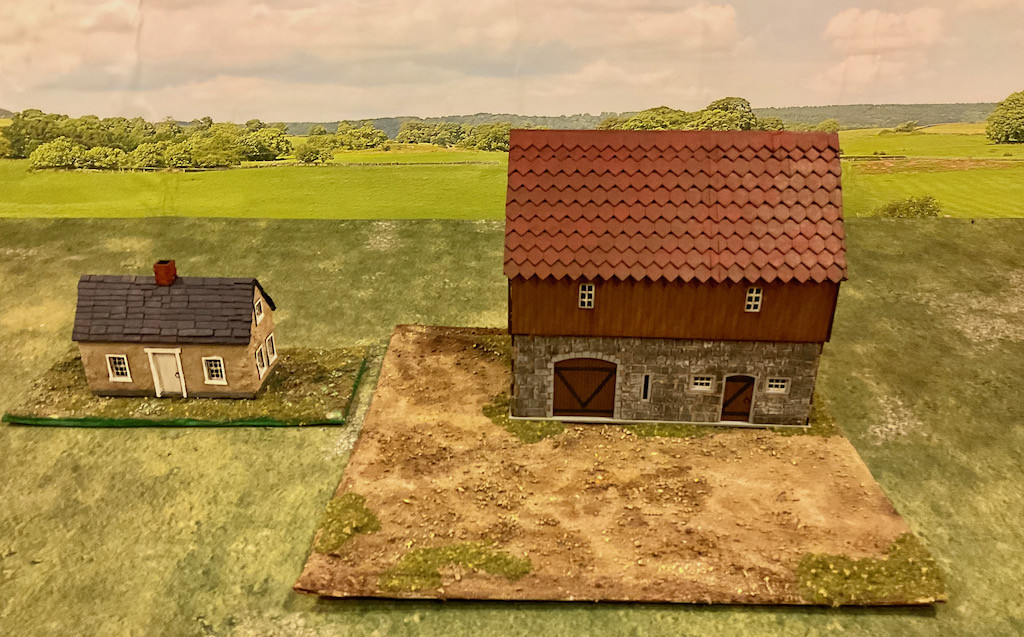
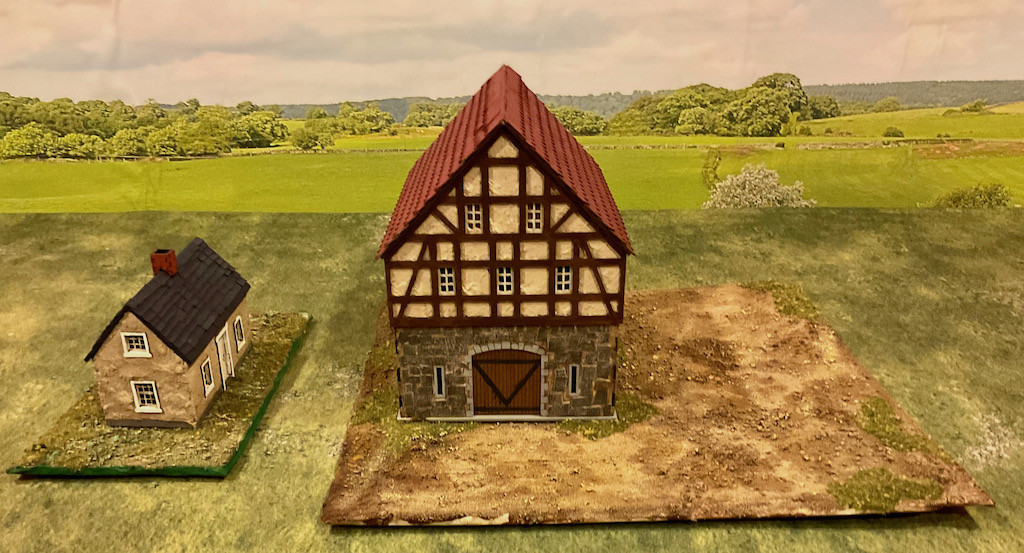
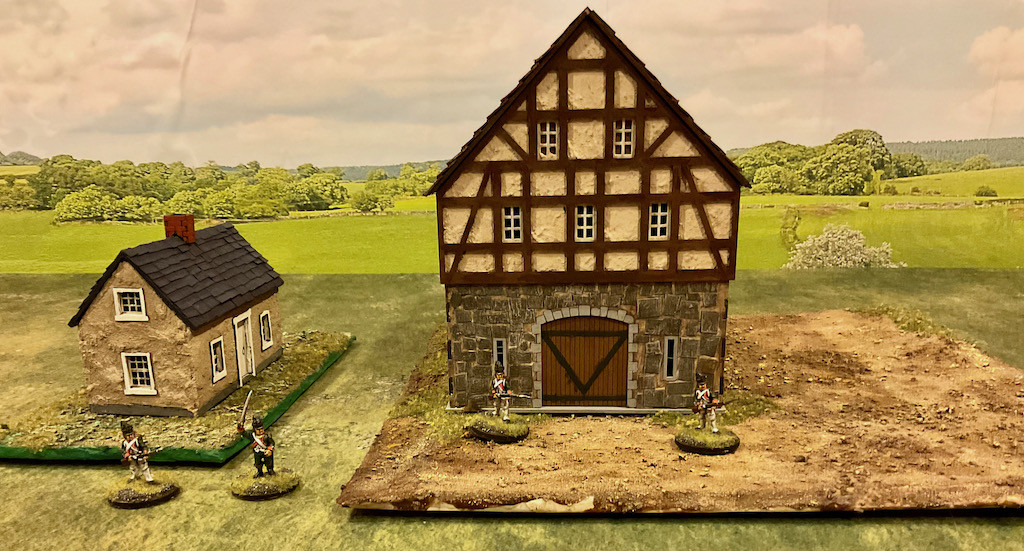
Here’s the finished base on the left, with the Warbases cottage from their Prussian Napoleonics range of buildings.   I spent much of the winter cutting up cereal boxes to make the tiles on the roof of the cottage, until some bright chap told me to by the pre-cut roof tiles from Sarissa.  I did that for the Warbases Prussian barn on the right, but couldn’t resist the allure of the cereal box and also cut out the stones for the first floor of the barn walls.  The base of the barnyard was also made according to Joe’s recipe.

I wanted some texture on the walls of the cottage, which were plain MDF sheets, so smeared them with carpenter’s plastic wood filler to give the impression of stucco.    I did the same with the wall section on the barn beneath the wood timbers.  Thankfully the wood timbers were all one laser cut piece so quite simple to apply onto the plastic wood before it dried.

Some 28mm figures shown for scale.  The barn is a beast!  It won’t be hogging a standard sized table for a big battle, but it will wok for a skirmish game such as Sharp Practice, with Prussian jaegers defending against marauding cossacks, I think.

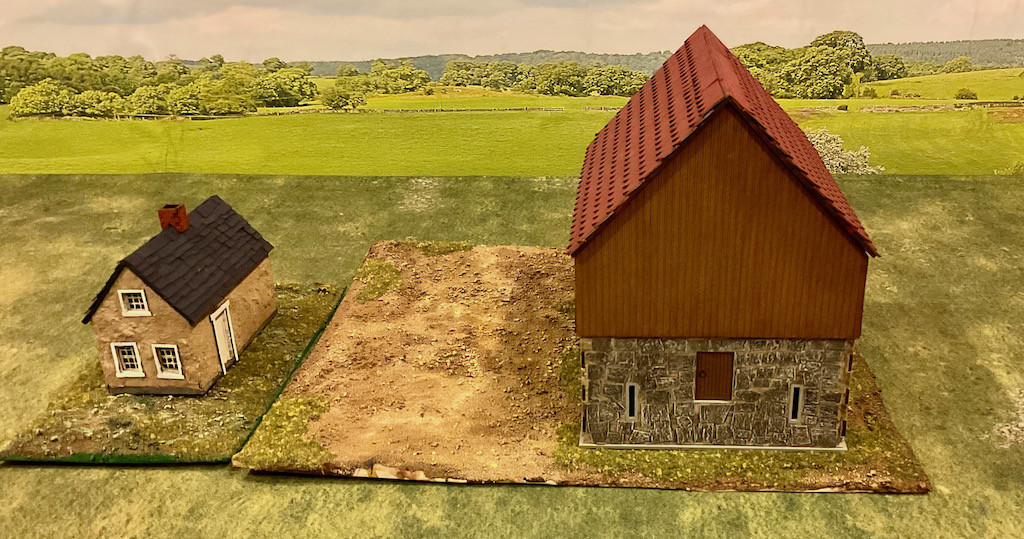
Another view of the stone wall on the ground floor of the barn.  Not sure what door halfway up is all about.  In my part of Ontario you sometimes see barns with an earthen ramp leading up to a doorway which I am guessing is for transporting hay bales and fodder.   I should consider constructing something similar out of styrofoam.

Tuesday, May 25, 2021

Terrain Tuesday: In Praise of Backdrops

Hello friends and welcome to another Terrain Tuesday feature, which today looks at how model railroad backdrops can enhance your gaming table.

If you’ve followed some of my recent AARs since I moved the painting table into a strategic corner of the basement, you will have noticed that the walls are painted a bright orangey-red of the hue beloved of interior decorators in the 1990s.   Sometimes that gave the photos from my games a bit of an SF vibe, as if they were being fought on some planet with a reddish atmosphere, like the sets in the original Star Trek.  This effect may not matter to those of a philosophical frame of mind, who think, “So what, they’re just toy soldiers, right, who really cares?” but I think you’ll agree that we do this hobby for its aesthetics; otherwise, why not just play paper and counter wargames?
For my self-selected Christmas present last year, I decided to try some model railroad backdrops (back scenes as they seem to be known in the UK), and I ordered them from an English company called New Modeller’s Shop, which gave quite good service.  I wasn’t exactly sure what I was looking for, but settled on to OO (1/76 scale) rural/village back scenes, here and here - which I felt would do for generic rural settings in the Eastern US (ACW), as well as western Europe (WW2, SYW).  The two codes I ordered each gave me two rolls printed on touch heavyweight paper - each backdrop set consists of two 5 foot long rolls, each 15” high - the rolls in each code are designed to be put together.  Here’s what I got.
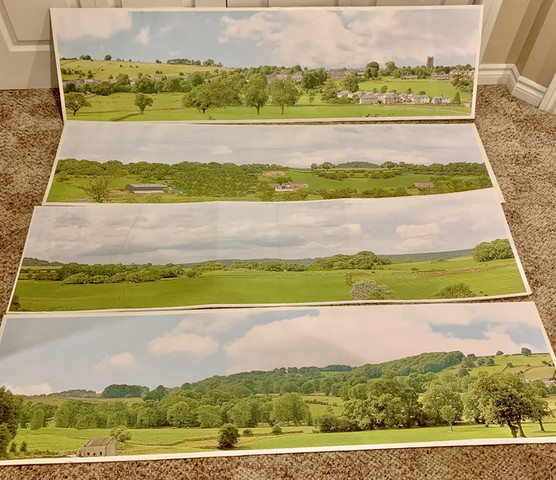
To mount them I bought four large sheets of white foamcore board and used duct tape to glue the two halves together to get the requisite ten feet length.    The first one I mounted (second from bottom above) taught me that glue is a terrible way to proceed, as despite my best efforts I got wrinkles and bubbles.  They aren’t visible from a distance, as the camera generally focuses on the figures, but they annoyed me, so I went to an artists’ supply sore and purchased a roll of white mounting tape, which proved surprisingly tough and strong.  Working very carefully, I applied the bottom of the tape to cover the white border printed on the backdrops, and had enough width of tape remaining to secure the backdrops to the foam core board.   The end result was much neater and didn’t buckle the foam core exceedingly.
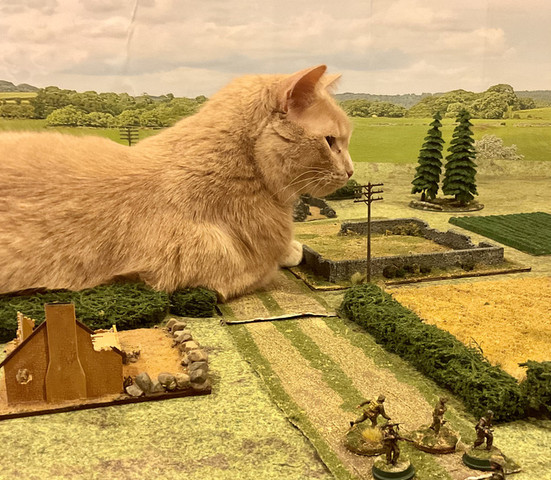
@MarshalLuigi highly approves, as you can see.  The camera focuses on the figures, so the backdrop is just a pleasant visual effect, but not distractingly so.   The OO scale seems to work with 20mm and 28mm figures.   I haven’t tried it yet with smaller scales.

The next problem was how to effectively keep the backdrops in place.   Butting the long table edge against a wall and propping the backdrop leaning slightly against the wall mostly worked, except that the white bottom edge of the backdrop was distracting in the photos, though I could cover it if I scrunched the table mat up against it like so:
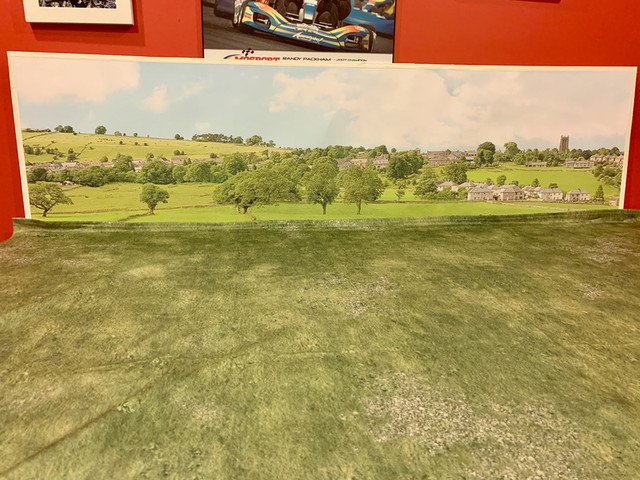
The other problem I faced was the weight of the backing board causing the backdrop to slip down behind the table, which happened with annoying frequency.   I wracked my brains, and ended up using small metal angle brackets drilled and screwed into the side of table, about one foot in from either long end, at a height sufficient to hide the white edging on the bottom of the backdrop.
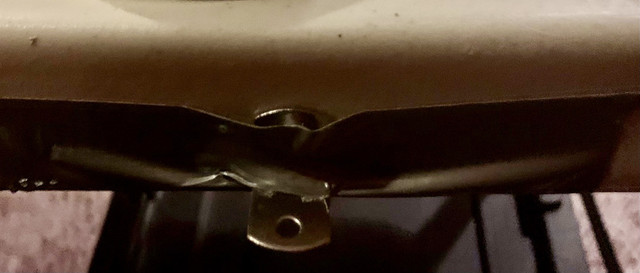
Then another angle bracket, to be bolted and taped (because extra duct tape never hurts) to securely hold the backdrop in place.

I’ll finish securing the angle brackets tonight, and I think that will solve the problem neatly.  Of course, if I want to use the backdrops, one long table edge has to be against the wall, making it somewhat problematic for reach if I want to use a second table, but I think that’s a small price to pay for the visual enhancement in the edited and cropped photos, and really, isn’t that what’s terrain is for in our hobby?

Cheers and thanks for looking,

MP+
Tuesday, May 18, 2021

Terrain Tuesday: WIP Timecast 6mm Napoleonic Buildings


I’m ridiculously happy that this is the SIXTH!!!! consecutive week I’ve done a Terrain Tuesday post here.    HOORAY! <waves hands in the air like Kermit the Frog on the Muppet Show>.   Making this a blogging goal and a painting goal has been good for my productivity, and I’m also happy that it’s lead to a few other semi-regular features (Fantasy Friday, Napoleonics Thursday) starting to appear on this blog.  So hurrah for me and thanks to YOU for reading.   Have a drink.

What have I to show you today?  Not much in the shop window, a semi-gestated terrain project for my 15mm Sicily 1943 project that needs more work before I can show it off, but <looks around wildly>  yes, these two things on the painting bench will do!

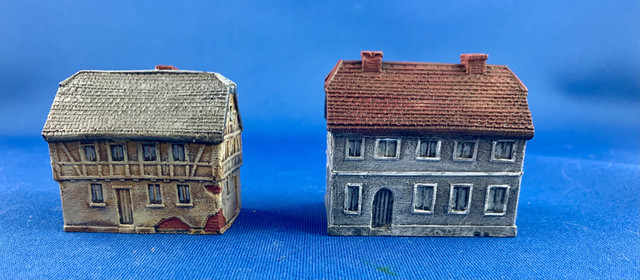
Timecast (I think!) resin 6mm Napoleonic style buildings, almost finished the painting.  Still have to do the timbering on one and think of some imaginative colour to paint the doors (other than wood - were people in the early 1800s whimsical about door painting?   Green?  Blue?  Well, they're my buildings, and if the Home Owners’ Association complains, I’ll give them a whiff of grapeshot.

Will probably base these together to suggest a Built Up Area.   I have some more trees and scenic things on order from Timecast, so the finished stand will have to wait until they arrive.

What terrain are you working on?

Cheers and blessings to your brushes!

MP+
Tuesday, May 11, 2021

Terrain Tuesday: Winter Terrain for My Canadian Pulp Project 3 and Done

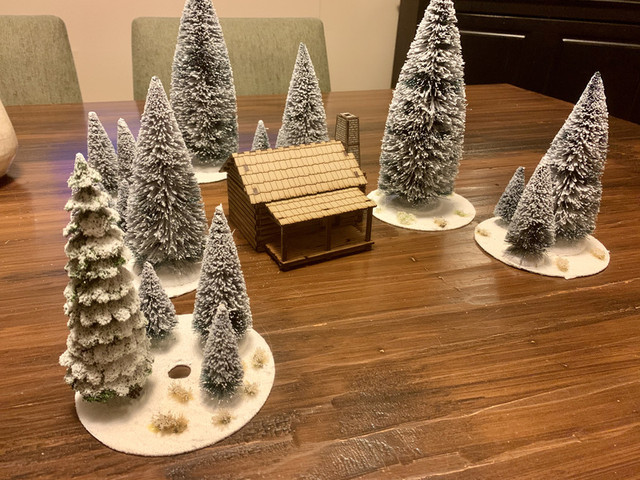
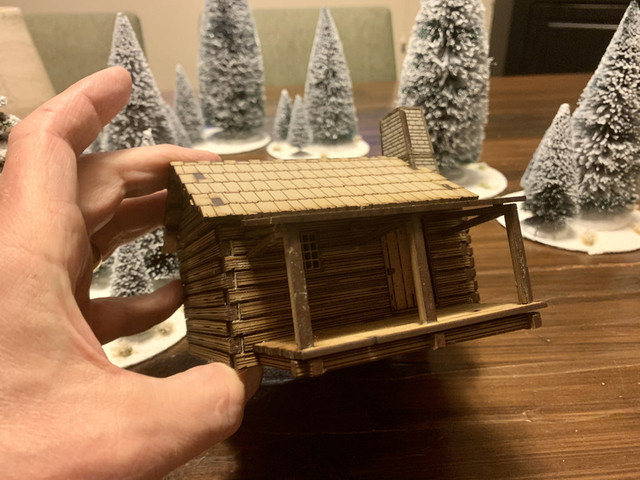
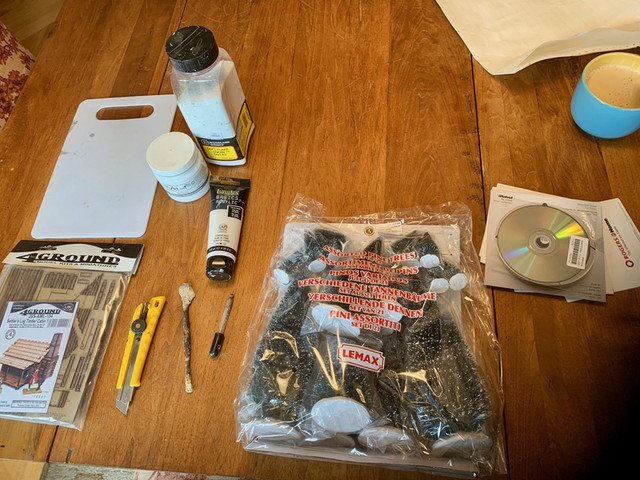
Quick post to make it under the wire for Terrain Tuesday, and calling it a wrap on my Lemax Christmas village trees and 4Ground rustic cabin. 

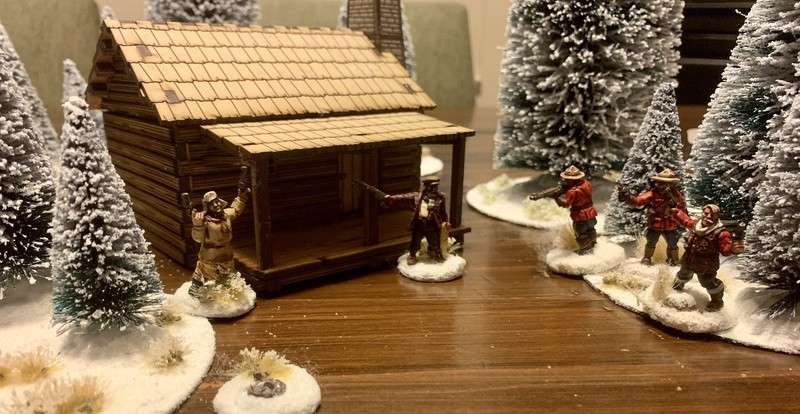
The cabin has a wonderful little porch with removable roof, which is handy as there isn’t quite room to fit a 28mm figure on the porch otherwise, let alone to see it.  I haven’t painted the cabin and not sure if I will.   There are other more important projects queuing on the bench. 

A dangerous standoff!

I’m hoping to tell the next instalment in The Rockies Ablaze soon, and this cabin will feature prominently, in which case I will dress the set with some Christmas village glitter snow.

Next on the Terrain Bench are some 6mm TImecast buildings for my Napoleonics project, and hope to have them done soon.

Cheers and blessings to your world building!

MP

Tuesday, April 27, 2021

Terrain Tuesday: Winter Terrain for My Canadian Pulp Project

I’m happy that I’ve posted on this subject three Tuesdays in a row!   

Yes, this is for my The Rockies Ablaze Project, which I am taking off the back burner for a while.    I need some more scenery and a cabin before I introduce a new character.

These craft store trees will need more snow than this!

Check in again next Tuesday to see the final result.  Check in again earlier than that for the start of a 28mm ACW project, The Battle of Seven Pines.

 In the meantime, blessings to your tiny landscapes.

MP+
Tuesday, April 20, 2021

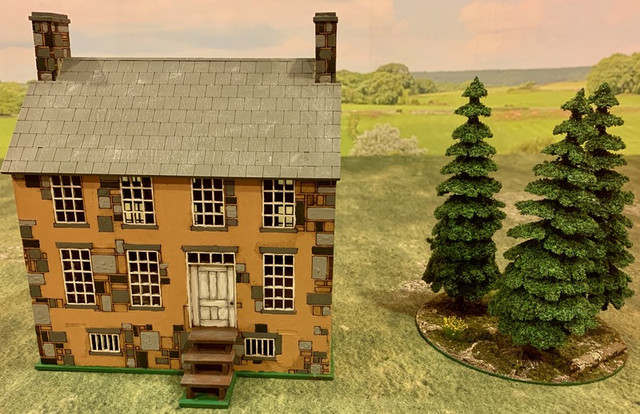
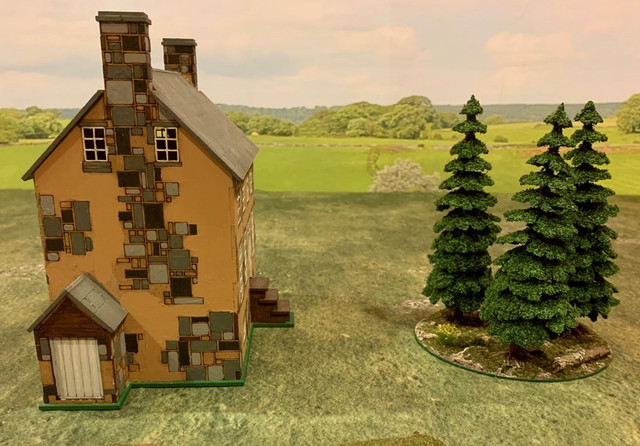
Terrain Tuesday: 28mm Sarissa Manassas Stone House

It’s Tuesday again and time to show off another piece of scenery for the war-games table.   This is the Sarissa Manassas Stone House in 28mm which was a fairly easy build from the flat-pack, though I did manage to get the root cellar door on the wrong side wall and only discovered that when the glue had set.   One overestimates MDF kits at one’s peril!   It sits beside a stand of pre-made trees which I bought at a show and glued onto an old Windows CD with some ground texture and flocking, so perhaps this counts as two terrain pieces.  Hooray! 

 The house will work for my ACW and alt-ACW battles.  It has a big footprint on the table, so perhaps more suited for skirmish games.   I didn’t apply any texture to the walls.  Rather, I focused on the laborious task of picking out the stonework in every shade of grey at my disposal, to give the impression of an old field-stone farmhouse that one still sees in my part of SW Ontario.

Having the self-imposed deadline of a blog post on terrain gave me the incentive I needed to finish this piece and get it off the work desk.  Hopefully it will feature here soon, as an ACW battle is next in the gaming schedule.

Blessings to your projects!  

MP+
Tuesday, April 13, 2021

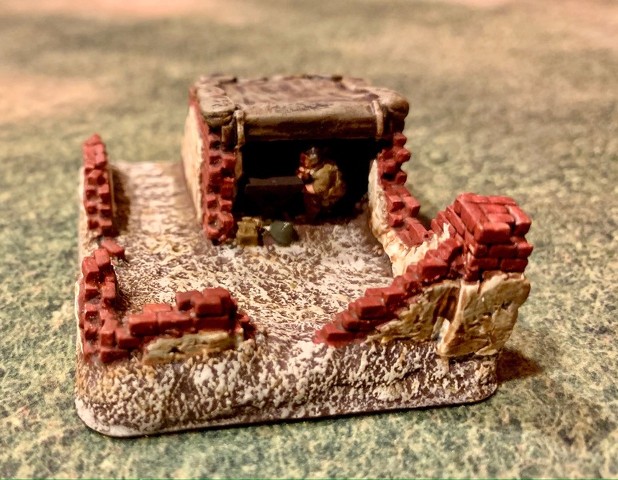
Terrain Tuesday: Battlefront 15mm Command Post

It’s always a struggle for me to allot my painting time to figures vice terrain, but as my friend Mr Hot Lead (formerly the artist known as Rabbit Man) likes to say, any time invested in making the war-games table look better is time well spent.  Thus, I’m starting a new blog feature designed to motivate me to better efforts, so every week on Tuesday I’ll post some piece of terrain that I’ve either finished or am working on, and you, dear readers, can help keep me accountable to this goal.  I hope you’re ok with this weighty responsibility I’ve dumped on your shoulders.

To start this feature, here’s a resin command post from Battlefront that was included in a British WW2 mid-war rifle company set, back when BF made metal figures.   Since the new TFL/Reisswitz Press rules O-Group place a large emphasis on command and control at the battalion level, it seemed worth moving this piece into the painting queue. 

Not much more to say, really.  It will work for any setting in Europe, but I’ve dry-brushed the ground to suggest lots of dust, making it appropriate for my Sicily 1943 project.    I’ve pained the half-profile signaller in Vallejo British Uniform since it is supposed to be a British HQ - now I need something like this for the Germans/Italians.


Speaking of terrain, I’m still shaking my head at the quality of work displayed in this video from @Joe_Wargamer, it’s stunning and clever.    I may try something like it the next time I buy some MDF buildings.

Blessings to your tabletops!

MP+


Friday, April 9, 2021

In Praise of Paper (Terrain) 2 - Basing the Buildings

Hello again friends:

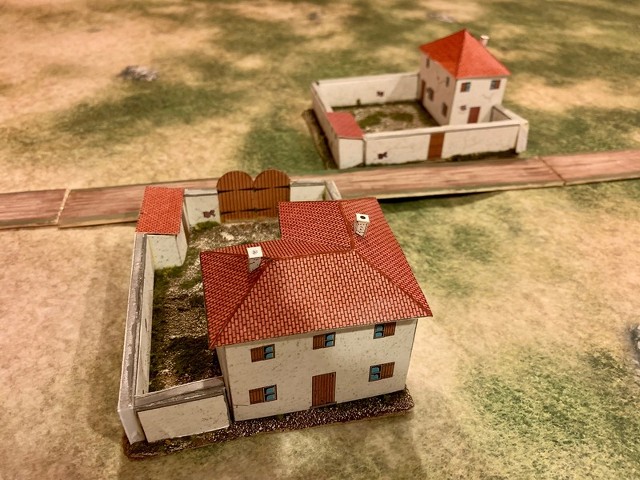
It’s me to preach the gospel of paper again, and specifically to illustrate the basing technique that I use for Paper Terrain products.   With these three 15mm Russian village buildings (including the one odd man out, the MDF building in the righ foreground) I put two paper buildings (plus a small woodshed/outspace) on a single base to represent either a farm or an entire village, depending on the scale of the game (platoon vs battalion).

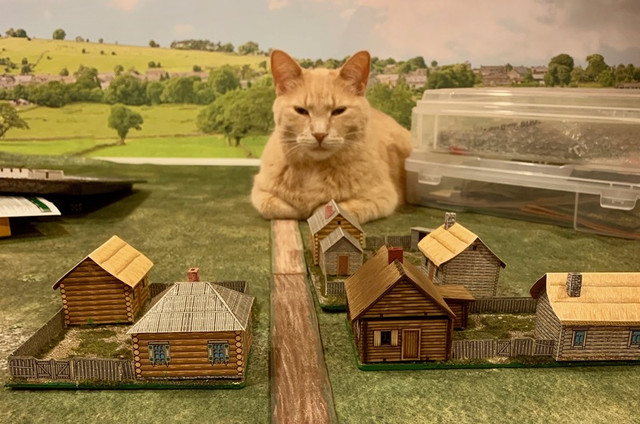
Here @MarshalLuigi, having inspected the village and found it acceptable, demonstrates correct roadblock and delaying action procedure.   The road to Moscow is secure for now.  There may be too many trees on that backdrop for the steppes!


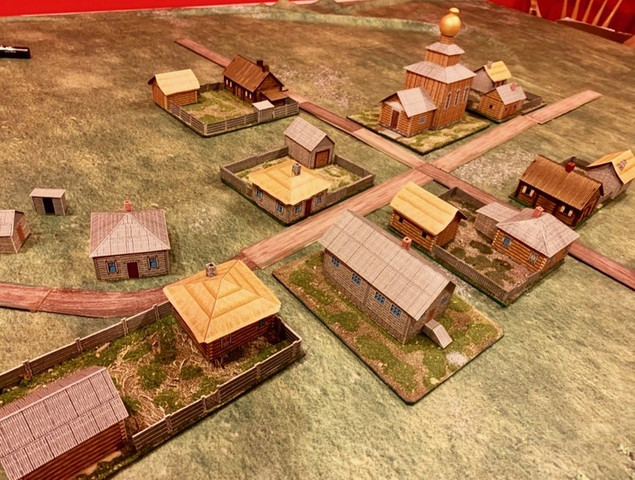
Here is the village of Paperskoye almost complete, just a few more buildings to base.


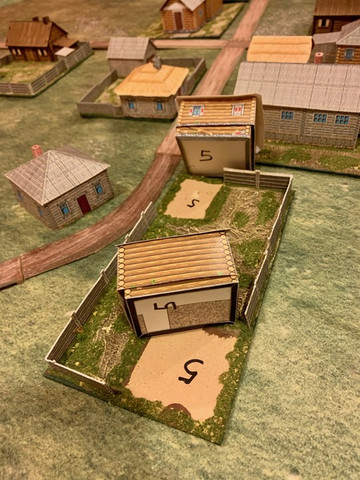
I use a numbering system to help me remember which buildings go on which bases.   I thought about gluing the ruined interior shells to the bases, but decided against it.  Having the bases in one tote and the paper buildings in another makes for safer storage and transport, I find.

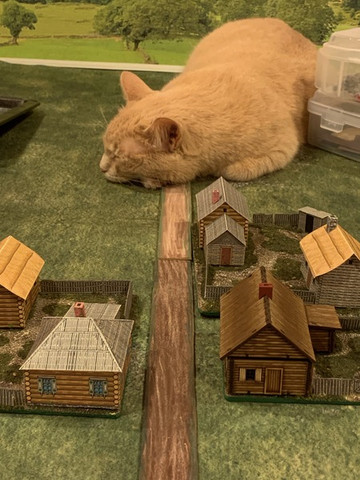
Luigi, aka the Cossack Catbeast, appears to have lost interest in the project.  The road to Moscow may not be so secure now.  Wasn’t a giant cat mentioned in the Al Stewart song?

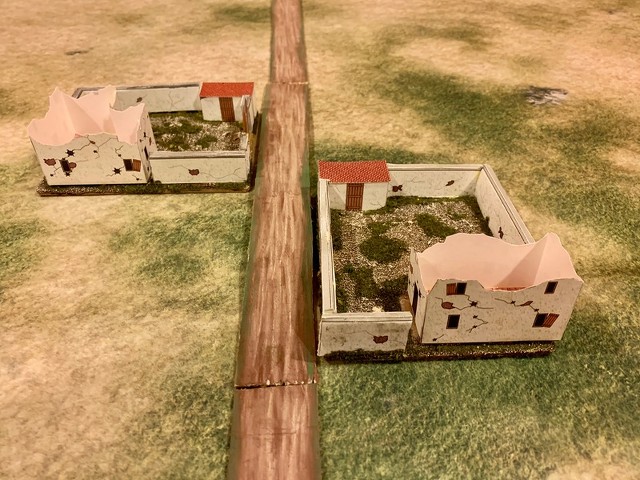
Moving to the sunny Mediterranean, we take you to a small village in Sicily.  the fist fruits of my basing efforts for my Sicily 1943 project.   These would make a nice pair of strongpoints for the defending Germans.  As with the Russian buildings, my basing technique is the same.    I handout a piece of MDF from the hardware store, texture it with a wood builder’s putty for sealing gaps, base coat it dark brown, then dry brush in two lighter colours (Yellow Ochre and then Desert Tan), and finally flock, but only in patches to suggest an arid climate, which is in keeping with this new Sicily gaming mat from Geek Villain.  I also used some brick red craft paint to go over the roof ridge lines, which were left white after the scoring and folding.  A little effort for a great improvement, I think.

 The same buildings, having been thoroughly liberated.   

I have some British/Commonwealth troops in the queue to paint, but somehow some 6mm Napoleonics figures have used their superior mobility and stealthy size to get ahead of them.

Until next time, blessings to your basing!   MP+

Thursday, November 28, 2019

A Dangerous Duo for The Rockies Ablaze

Hello friends.

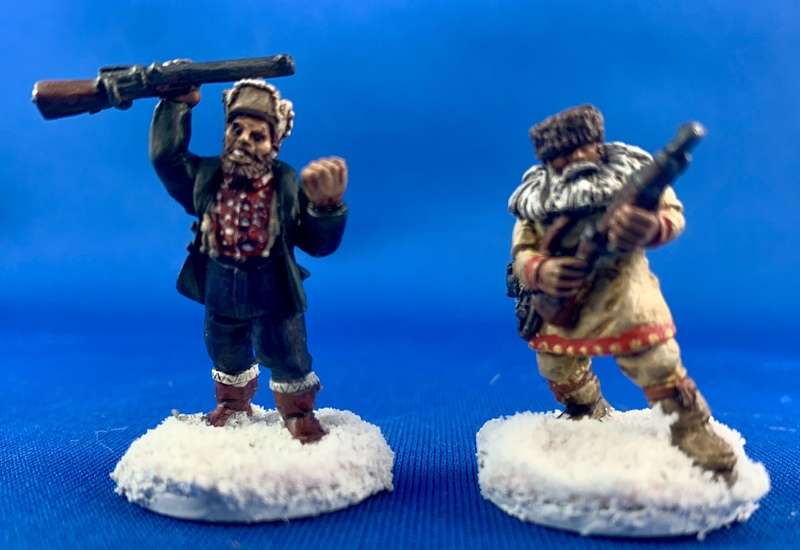
My pulp project set in Western Canada in the 1930s needs some baddies, and I found the perfect pair in two of Bob Murch's Pulp Figures sculpts, from his "Mad Trappers of Rat River" set from the Yukon Peril range.

On the left, Phil Turcotte was never the same when he got home from Passchendaele, and doesn't say much except "Get off my land!"    On the right, Sven "The Hatchet" Olsen shows up in the trading post once every three months with a sack of furs and a baleful stare.  According to local legend, he once killed a man in Pincher Creek for suggesting he needed a bath and a haircut.


As always with Bob's figures, these were a delight to paint.  As I see it, besides being ornery, smelly, armed and barking mad, they will have some special abilities, like possibly being able to turn into wolves or bears, which is why the German zeppelin might be looking for specimens.   I am sure there will be wild doings afoot.


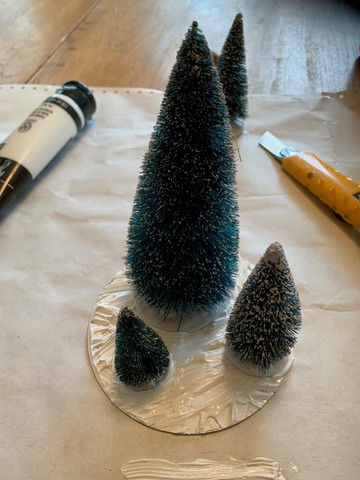
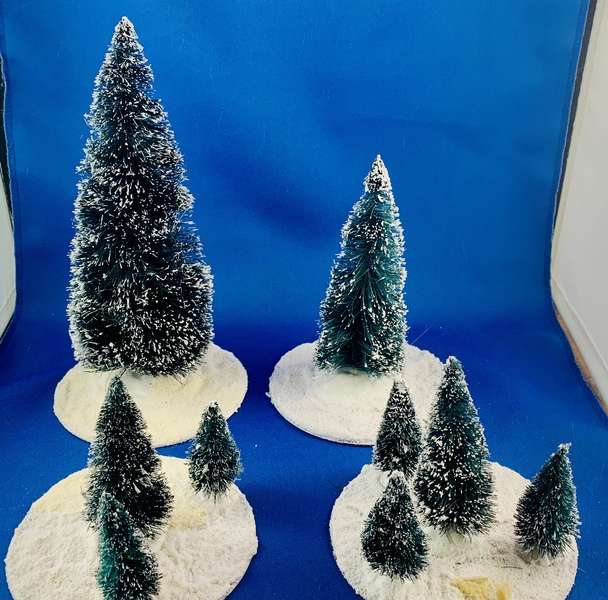
The frozen Canadian north needs as much scenery as a table will hold, so here are four terrain stands made of Christmas village trees on old CDRs (remember them?).


I discovered this white texture gel at a local art supply shop, which being white, takes paint and Woodlands Scenics snow quite well, for a pleasing final effect.


They look like trouble.

Fortunately there are some good guys to show off soon.  Thanks for looking.  Blessings to your brushes and stay vigilant, chaps.

Thursday, March 9, 2017

For You, Secret Santa

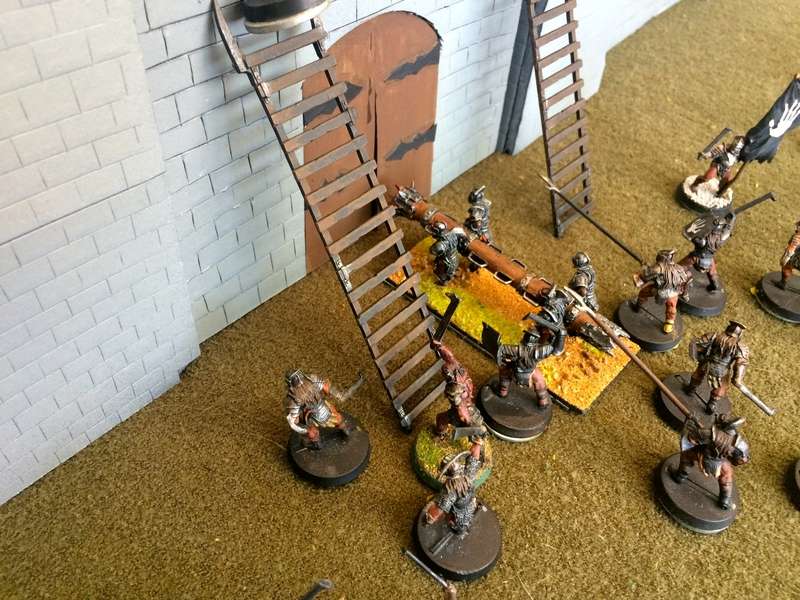
Just after Christmas, I reported on an amazingly kind gift that my Secret Santa had sent me as part of the gift exchange run by the estimable Ian and Cath Willey.   I received two Games Workshop kits suitable to my LOTR project, a battering ram wielded by fearsome Isengard Uruks, and a bolt thrower, the pride of Saruman's artillery.

I said at the time,  "I guess I had better start making something for them to batter."


Well, Secret Santa, I hope this makes you proud of me.


What are those orcs knocking on, you may ask?

This.


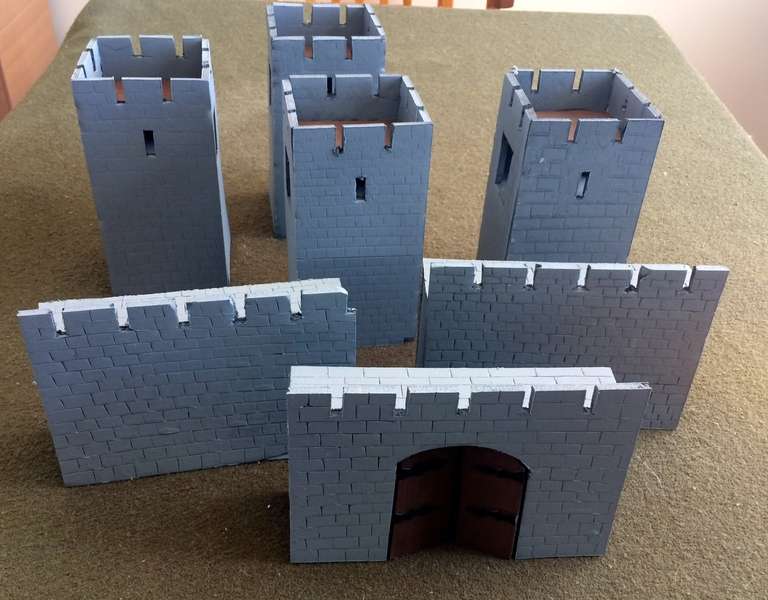
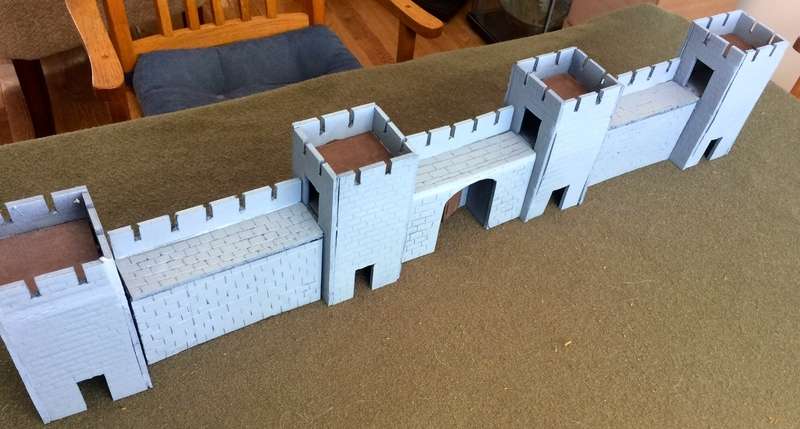
Back in November, about the time that Kay went into hospital for her long stay, I was going through some GW rule books for their LOTR Strategy Battle Game rules, and found a simple recipe to build your own castle sections.   I duly bought a couple of sheets of foamcore from the local art supply store and started at it.  I would do a small piece at a time, usually at night after visiting the hospital, while I was still too wired to go to bed.  It was very therapeutic.


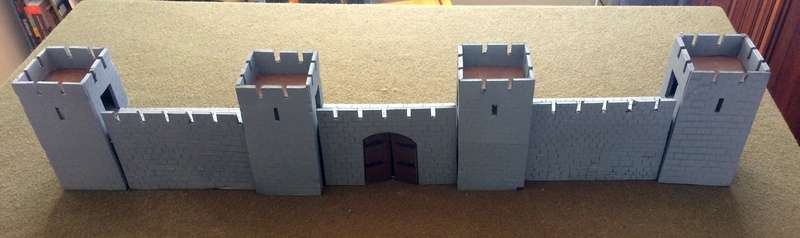
With three wall sections and four towers, the pieces measure almost three feet in length when laid out together.  I am still waiting for Mordor to agree to pay for it.


I am not the most talented chap when it comes to scratchbuilding.  As Ross M put it recently, I find the art of drawing lines using a ruler, cutting, and finding that things line up evenly is nothng short of sorcery.  If you look at it up close, the joins are quite rough and the whole thing is rather dodgy, but from a small distance it looks ok.    Once the components were glued together, I sprayed them with a gray art paint by Liquitex.  It tended to obscure the scoring I had done in some sections to suggest the stonework, so I have to go over everything again with a craft knife to make sure the stonework comes through.

I got enough of this done to provide me with an entry for the "scene from a book or film" contest on this year's Painting Challenge.  When I started the project, I thought I would have time to use the wall for a scene from the siege of Gondor in the Return of the King.  However, I didn't have enough Gondorians completed for that, so decided that I could call this Helm's Deep and be done with it.


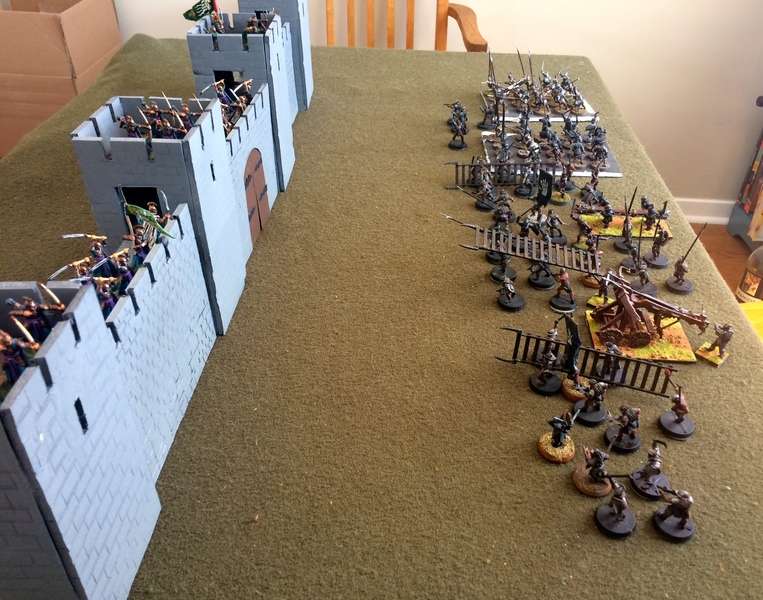
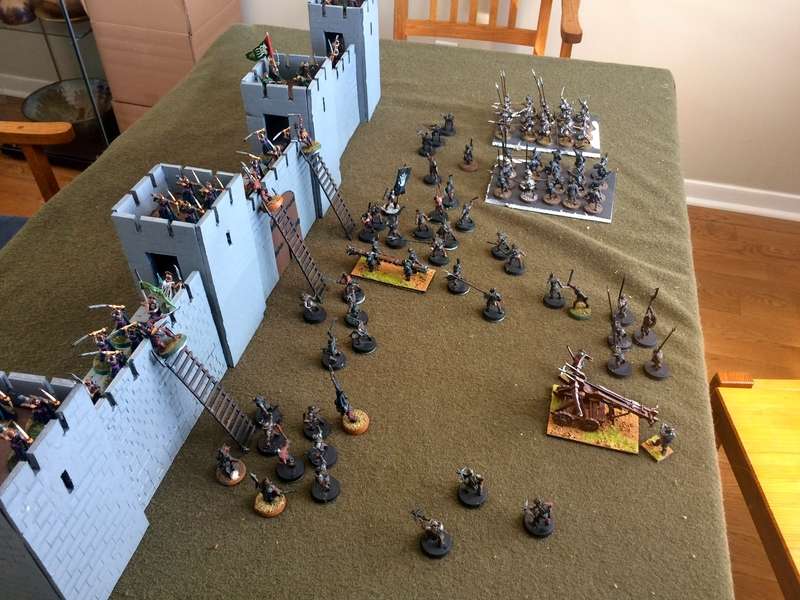
Bad chaps roll up to the wall.


Elves and men desperately defend themselves.


This project amused me and gave me the chance to acquire some lessons learned about scratchbuilding fortifications.   Thirty bucks for two sheets of foamcore and a can of gray spray paint was a lot less expensive than buying a resin model from the likes of Hudson and Allen.  


When the spirit moves me I may add a few more sections, enough for a game simulating an assault on one portion of a fortress, where the attacker wins by getting up and over in strength.   There are siege rules in the GW LOTR rules, and there may be some homebrew siege rules for Dragon Rampant, I shall have to see.


At any rate, Secret Santa, my orcs have something to shoot at and batter down.  They are happy, as am I.  Thank you for the inspiration.


Blog Archive

Followers