Showing posts with label Blucher. Show all posts

Friday, May 20, 2016

More Thoughts On Blucher: The Battle of Karlseck - Kaltenbach concludes

I had forgotten that back in February I was blogging, somewhat fitfully and tediously, about an experiment to set up a solo Napoleonics battle using the battle generator, Scharnhorst, included in Sam Mustafa’s Blucher rules.   You can see the prelude to the battle here.  

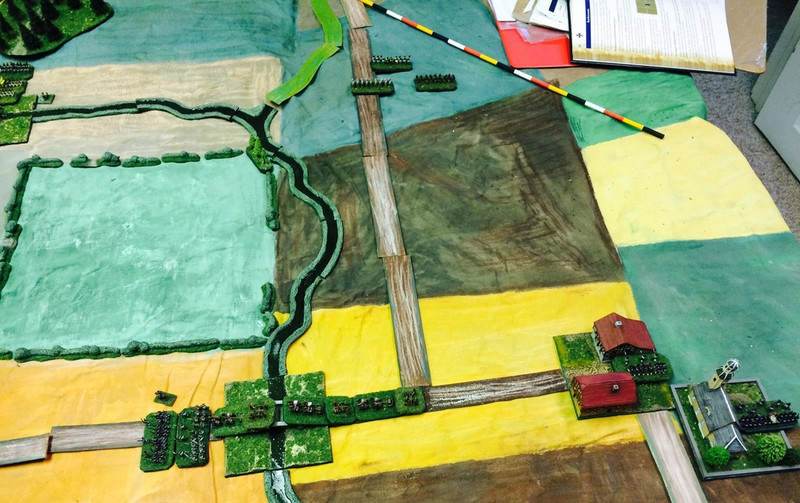
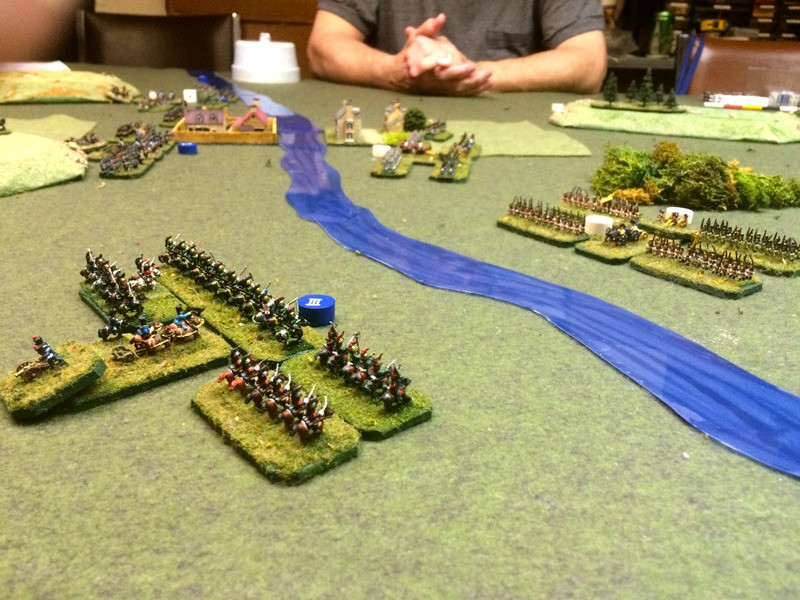
In brief, a larger Austrian force of four divisions of infantry and three of cavalry caught a smaller French army of three infantry divisions (as well as a detachment of the Imperial Guard) and one cavalry division.  Archduke Luigi considers the opening attack.  He is famous for his aggressiveness and for his short attention span.  A division of Grenzers is visible on the right, on the way to attach the town of Karseck.   My mistake with this game was making the table too big - I had to lengthen the time scale during the battle once I realized that nobody would be in contact until noon.  In future games of Blucher I will allow all units to move 12 Base Widths a turn until they come within 8 BWs of an enemy unit (the max range of artillery).

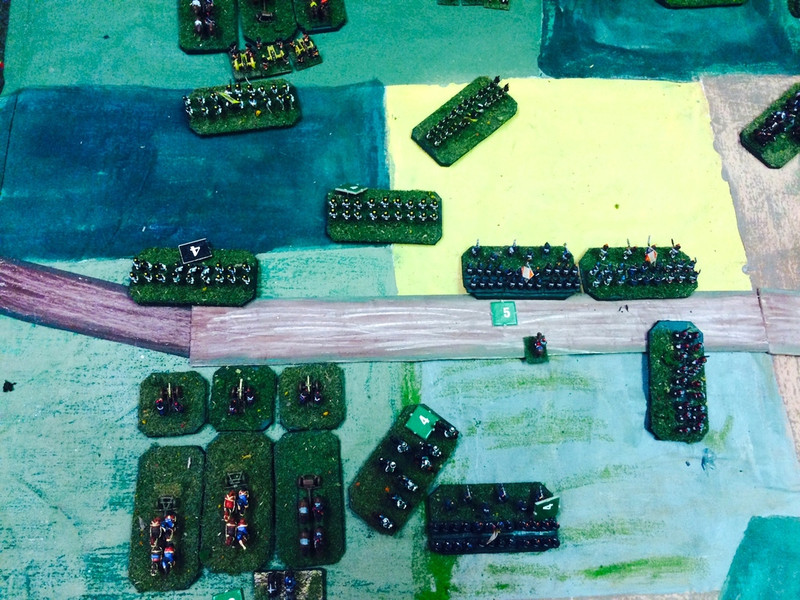
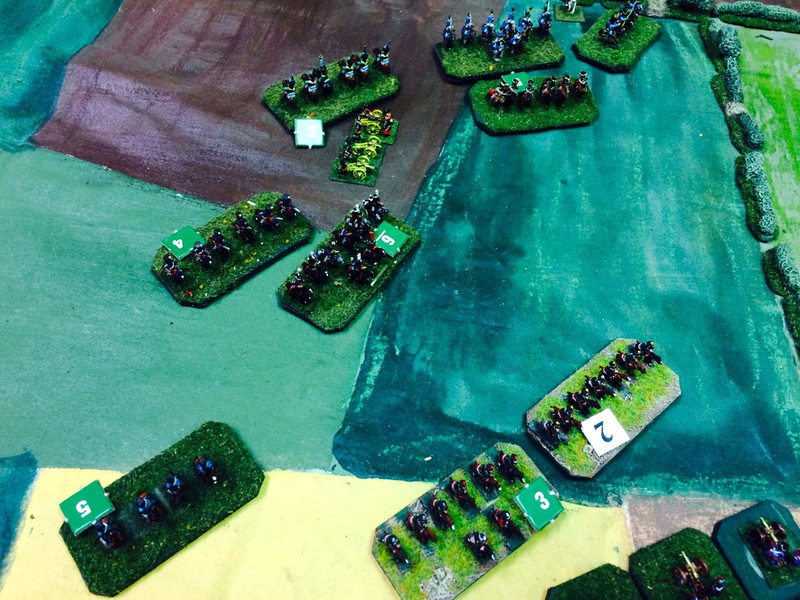
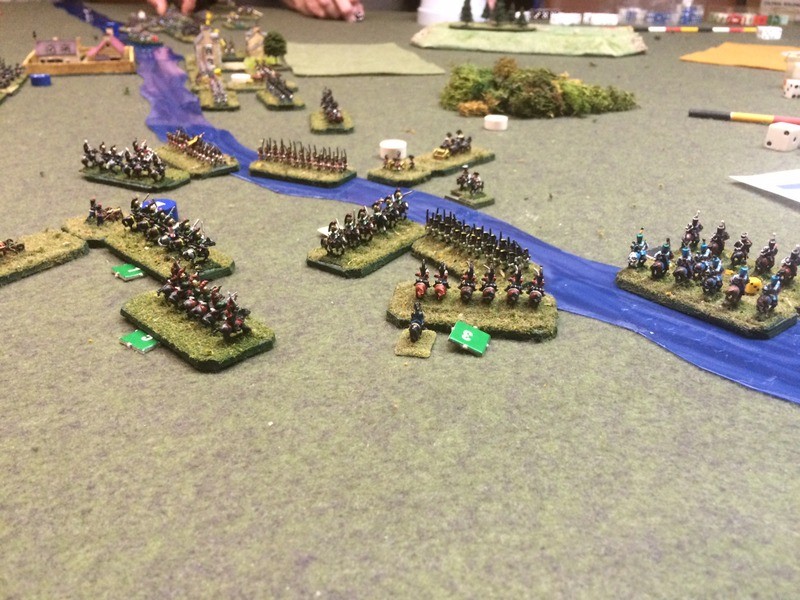
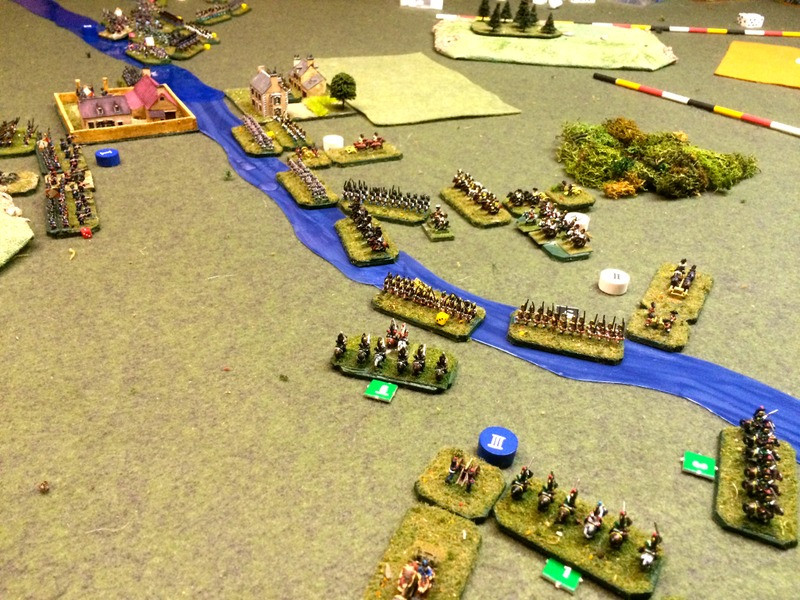
Much of the battle happened on the French left.   The French cavalry was committed to delay the Austrian advance until the French infantry could stabilize the line.  They mostly succeeded, but three of the four French cavalry brigades were reduced to 1 Strength Point each and were withdrawn from the battle.  It quickly became obvious to me that an advantage in numbers in Blucher can be at least partially negated by poor initiative dice, leaving some formations sitting idle.  The attacker has some difficult choices to make about which units to activate and where to keep the focus of the attack going.

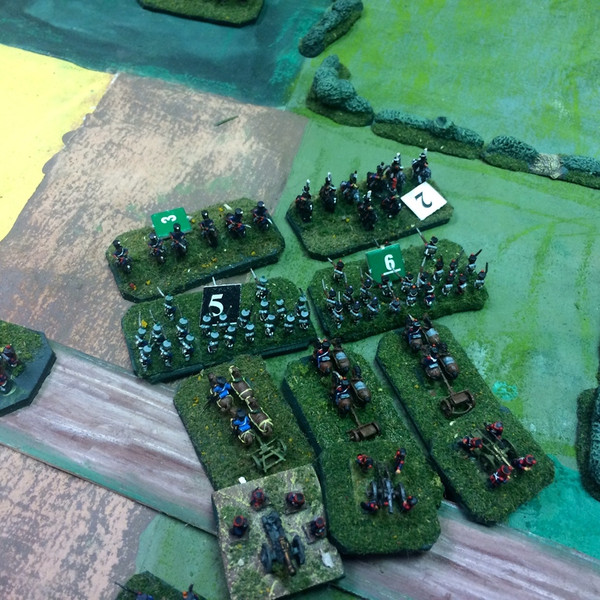
The Austrians overran and captured the French horse artillery.  Note the miss-mash of numbered chits I am using to track unit strength.   Originally I planned to use the unit rosters that are on the Sam Mustafa Honour website for download, but I found the problem was that I hadn’t identified which units were which.   I will need to make up unit IDs of some sort to go on the units in some way if I want to use the rosters, and keep the number chits off the table.

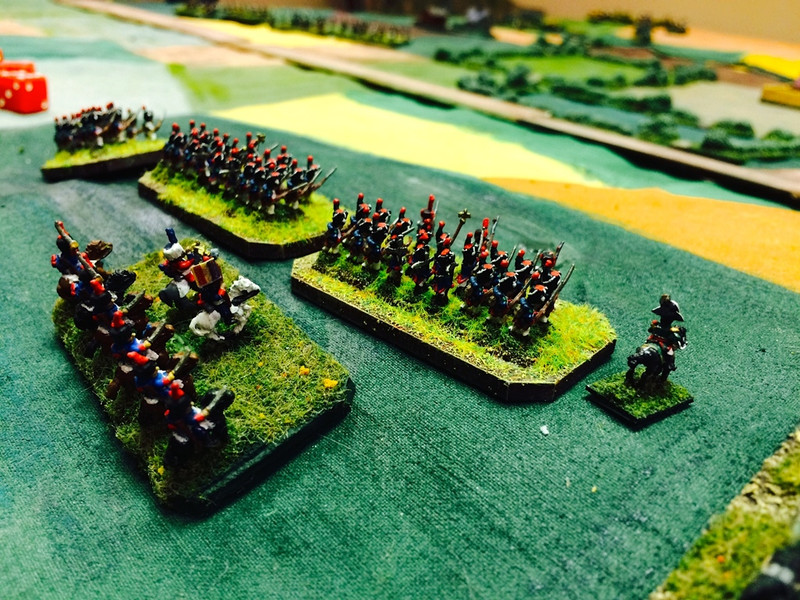
But the French infantry were able to hold them at bay while their division’s artillery came into action.

Austrian breakthrough seems imminent on the French right wing. 

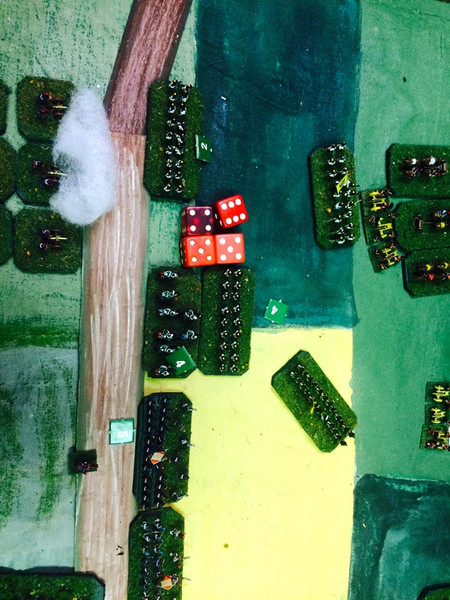
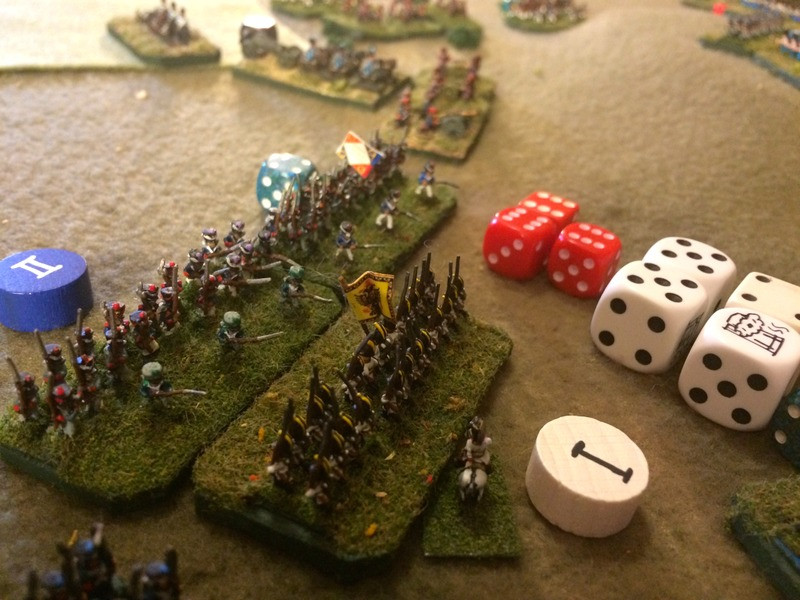
But artillery and a charge of the last effective French cavalry brigade on the fight saves the flank.  Those four dice you see show a Combat score of 4 - 0 over the Austrian infantry brigade, which started the combat at 4 SPs and was thus destroyed. 


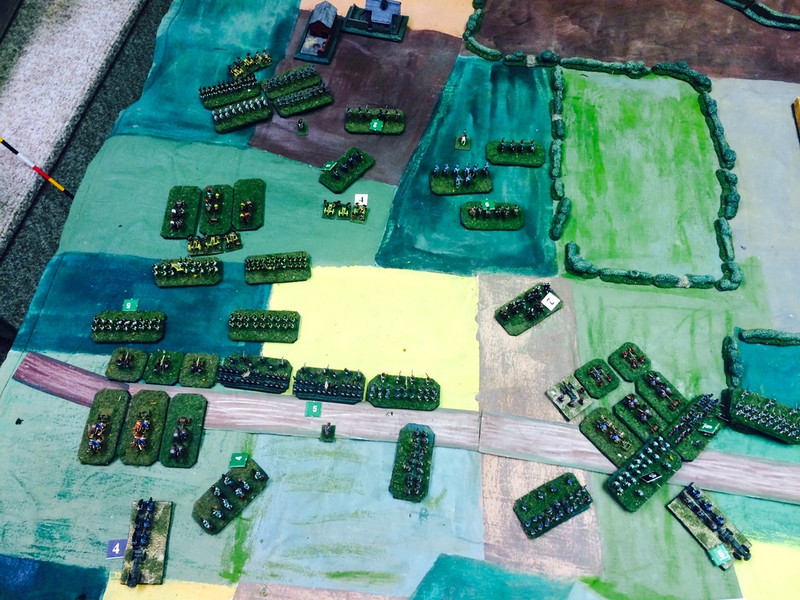
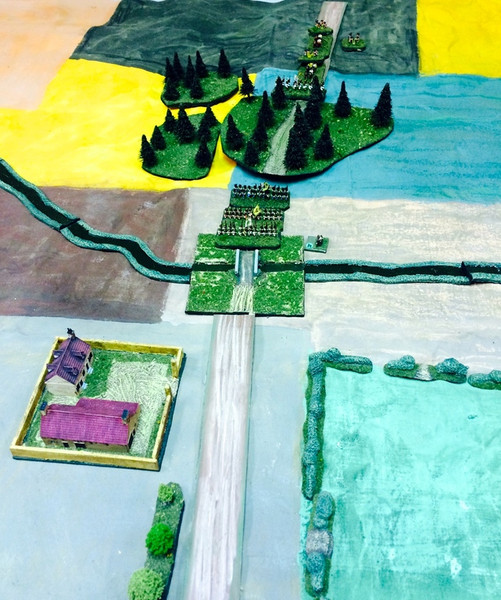
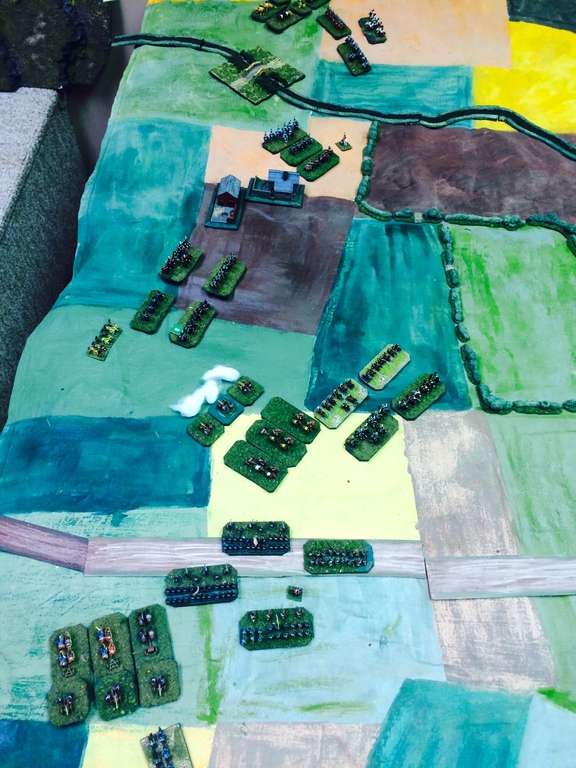
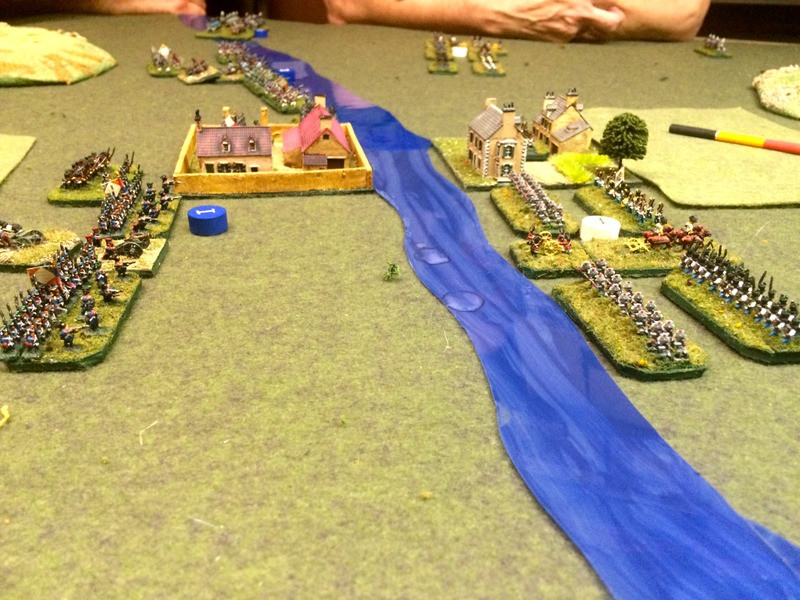
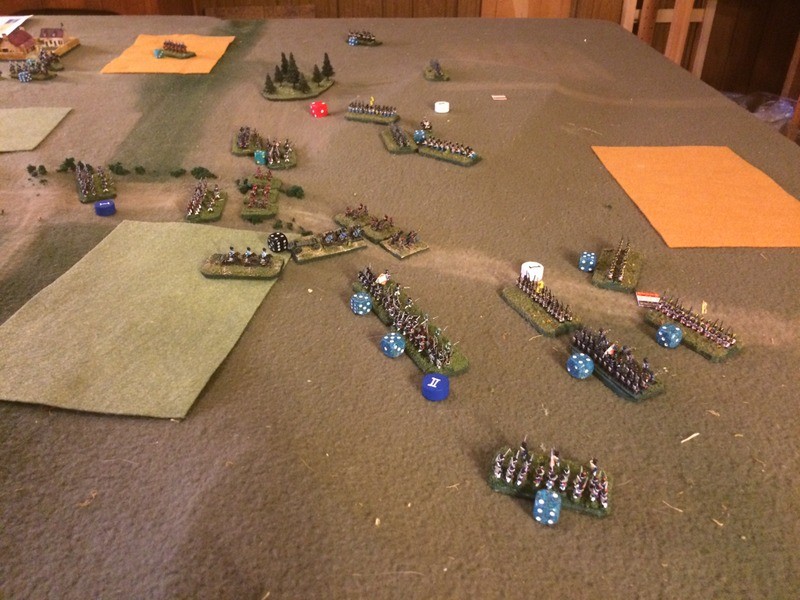
A view of the final battle.   An Austrian division has pushed through half a division of French (the other half were committed to hold Karlseck against the Grenzers) but the Imperial Guard are drawn up on the hill in the French centre.  One of the Advanced Rules I liked very much was that by the time the battle gets to the late Afternoon turns, you can reduce the number of dice thrown to generate initiative points from 3 per turn to 2 per turn.  That reduction simulates the onset of fatigue and the difficulties of keeping things moving as the light starts to fail.  By this point, it was proving impossible to bring the full weight of the Austrian army to bear and it became clear that the French would live to fight another day.


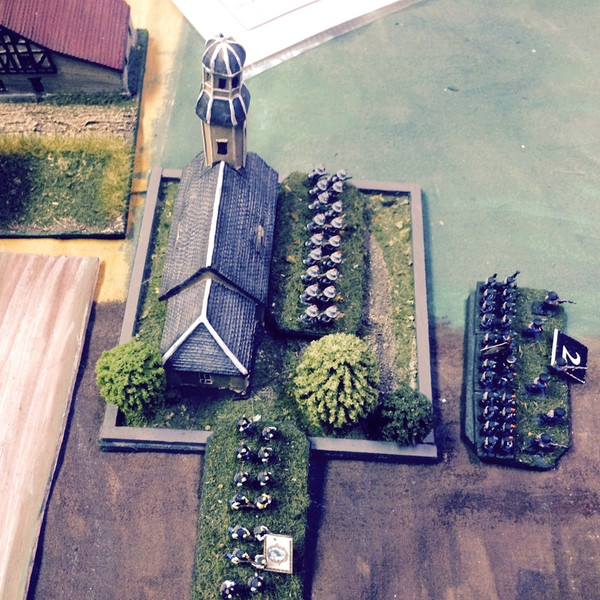
Last turn of the game, the Austrian Grenzers push the depleted French defenders out of Karlseck.   Grenzers can count 1 of the “5”s that they roll as a “6” in fire combat against troops in built up areas, and used their firepower to whittle down the French garrison until they had a decent chance of a successful Combat.

It took me a while but I was able to use Shcarnhorst to set up a battle and play it to a conclusion.   Had this been a battle in a campaign or a linked series of battles, Napoleon would have been forced to retreat.  Even though the casualties were relatively low and equal on both sides, it would be very problematic to resume the fight the next day, though there was a division of heavy French cavalry that never made it to the battlefield.  The smart thing to do would be to abandon the attempt to seize Karlseck, link up with the heavy cavalry, and try to sideslip the Austrian force and keep moving north, which was the objective all along.

One of the things about Scharnhorst that I really enjoyed was the random entry of reinforcements by both sides.   The Austrians got substantial reinforcements of two divisions) in late morning, but they never got into the fight, even if was very worrisome, when I put my French hat on, to see those numbers stacking up on the French left.

I continue to enjoy Blucher for its playability, though I find in a large battle that there is a certain generic feel to it, a trading of Strength Points in a contest of attrition.  It has an abstract feel to it, with very little of the Grand Tactical layers of rules that some other rules have or strive for.


Monday, March 14, 2016

Solo Scharnhorst 4 - The Battle of Karlseck - Kaltenbach Begins

Back in February I posted a lot of guff about an experiment using Sam Mustafa’s battle generator for Blucher, Scharnhorst to play a solo Napoleonics mini-campaign.  I ended with the two sides having blundered into each other for the climactic battle of Karlseck-Kaltenbach, in which Napoleon and some fictitious Marshals, named after some innocent colleagues of mine, took on Napoleon’s equally fictitious Austrian nemesis, Duke Kurvi-Tasch, to battle for the strategic town of Kaltenbach.

You can find the account of the final maneuvers to the battlefield  here.

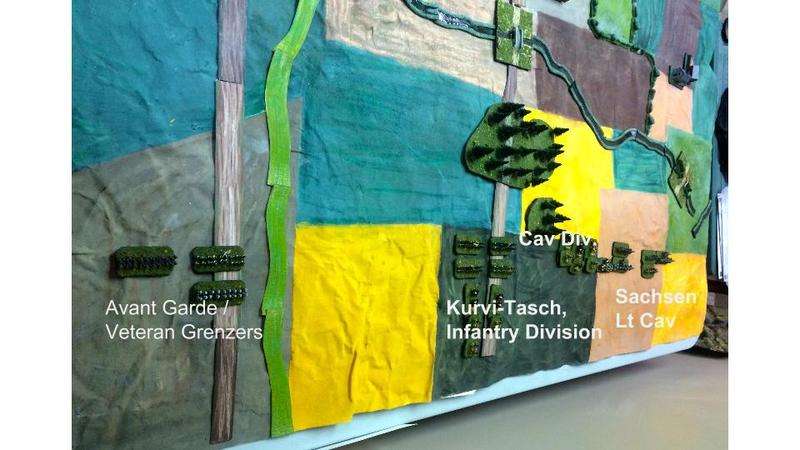
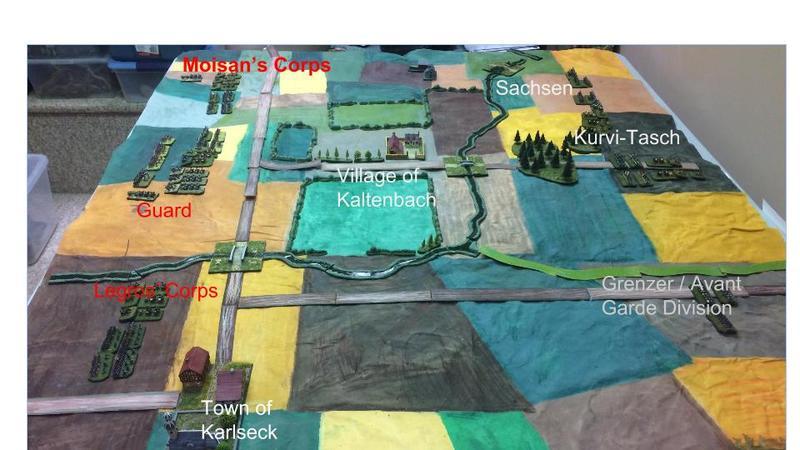
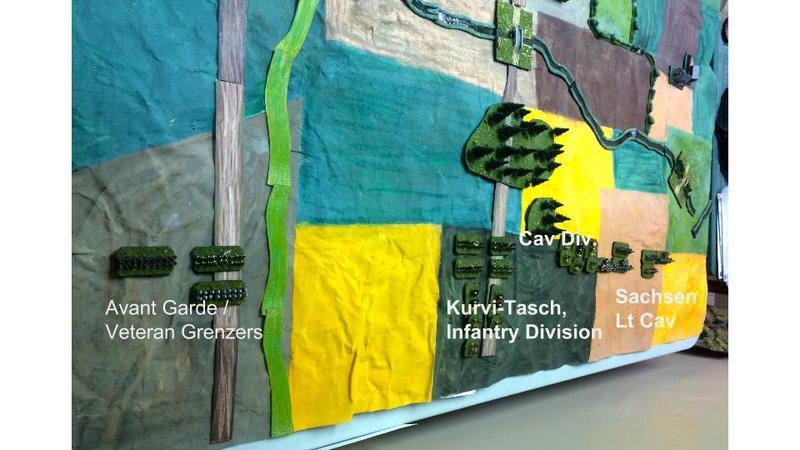
A reminder of the dispositions.  Austrian’s left to right:  I Korps:  Grenzer Division, Infantry Division w. Kurvi-GTasch, Cavalry Division;   Independent: Sachsen’s Lt Cavalry Division on the far righ

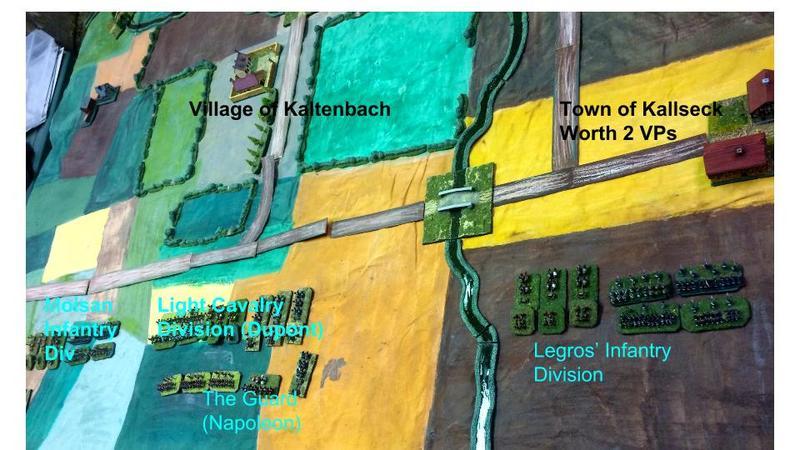
French right: Legros’ Infantry Division

Centre: Napoleon with the Guard and Dupont’s Light Cavalry Division

Left: Moisan’s Infantry Division

Napoleon is expecting one more division, the infantry of Lafreniere, at some time, but does not know when.  Lafreniere is one square south of Karlseck n the map.


Initial moves.  Sachsen’s cavalry cross the stream and move on the French left, while the cavalry division with its horse artillery from K-T’s Korps move in support.  Napoleon orders Dupont’s cavalry division, three light and one dragoon brigades, to move to intercept them.

In the centre, K-T marches south towards Napoleon’s position,  His plan is to pin the French centre and allow Groll’s Korps, when it arrives, to roll up the French left.  K-T’s division is very solid, a grenadier brigade and three veteran infantry brigades, supported by heavy artillery, so Napoleon has something to worry about.

On the Austrian left, K-T sends his division of three Grenzer brigades straight south to threaten Karlseck and hopefully pin some of the French there.    Moisan leaves two brigades to hold the town, and moves his other two, with his heavy artillery regiment, to support Napoleon in the centre.  Breaking Moisan’s corps up means that if I want to use the two brigades left behind in Karselck, I have to roll for them separately towards my random points cost each turn.  I hope i won’t have to move them much.

Napoleon calmly awaits in the centre.  He has three brigades of the Guard, and a brigade of Guard cavalry, as the last reserve.  The Emperor hopes he won’t have to use them, and watches events unfold calmly.  I need a better staff marker/diorama for Napoleon.  Incidentally, in a points game, Napoleon is a good investment.  As I understand the rules, he always allows a Corps to move for only two command points ut of the random total rolled each turn, which is useful.

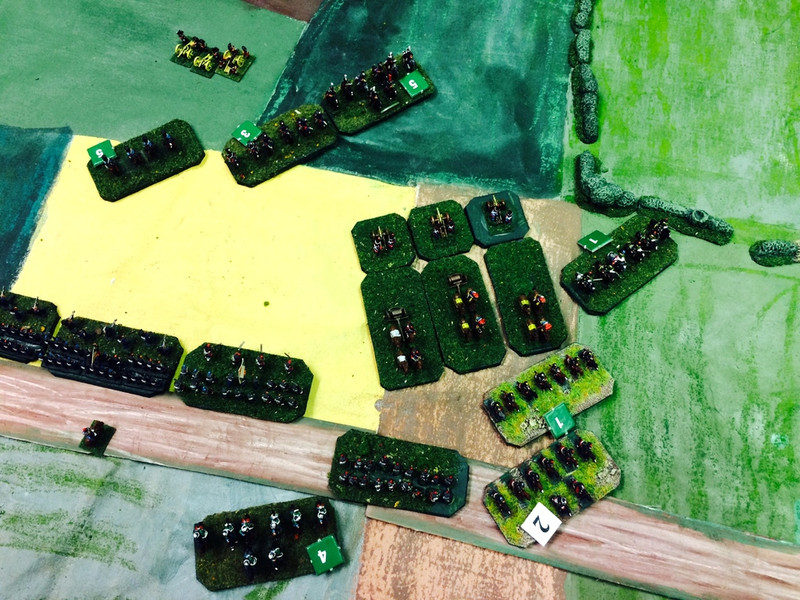
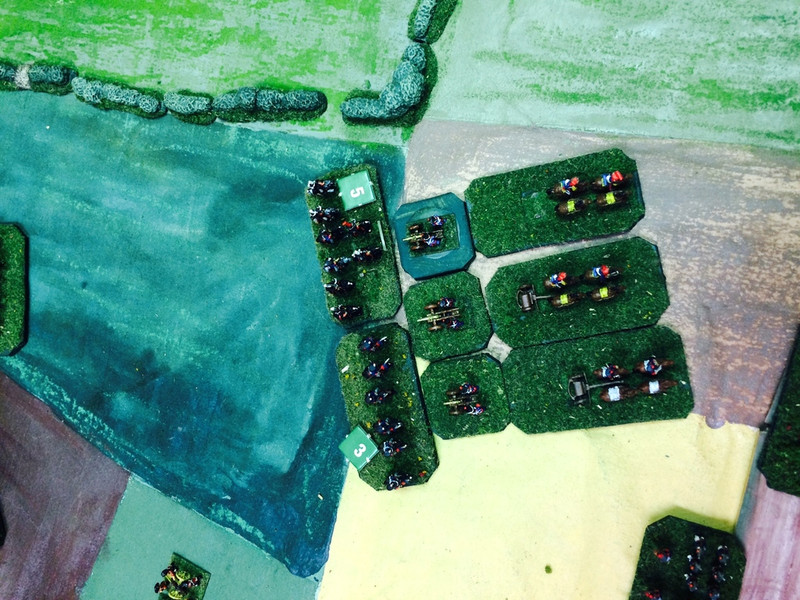
By about 10:00hrs, things take a nasty turn for the French as Groll’s Korps arrives on their left flank.   Here Groll’s lead division of cavalry (mostly average troops) surges forward while Sachsen’s and K-T’s divisions of horse move up behind them.   Dupont braces for the onslaught and orders his horse artillery to start banging away.   His four cavalry brigades must face eleven Austrian brigades, but fortunately not all at once.  Notice that in the bottom right, my recently painted stands of Cahsseurs a Cheval are retreating to pass through their supports, to force the Austrians to come on and buy some time.

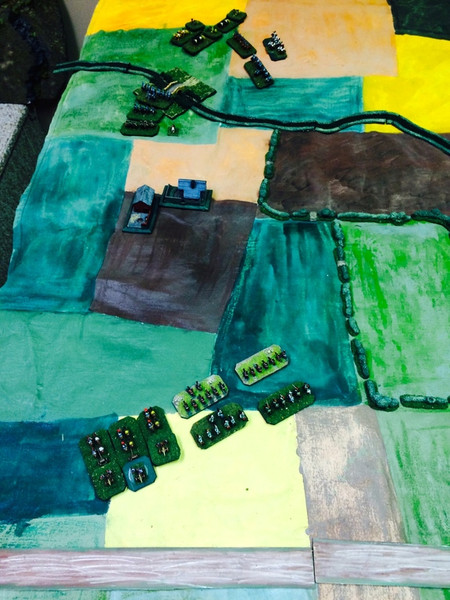
A wider view of the French left flank, showing Moisan trying to get his infantry division and guns ready to support Dupont’s horse and block Groll’s infantry which have yet to arrive.

Slowly but surely, Dupont’s cavalry brigades are asked onto the ballroom floor and begin to dance with the Austrians.  On the far left you can see the first of Groll’s two infantry divisions arriving.

Casualties mount on both sides.  One Austrian brigade is broken and several battered, but Dupont’s troopers are getting mauled and begin to reach their break points.  

Dupont’s weary brigades fall back behind their horse artillery and are withdrawn, meaning that they are removed from the game but do not count as broken units  towards the French break point.  By now Moisan’s four infantry brigades are in a line, their left anchored by artillery, and can take up the slack until help arrives.  Will help arrive?


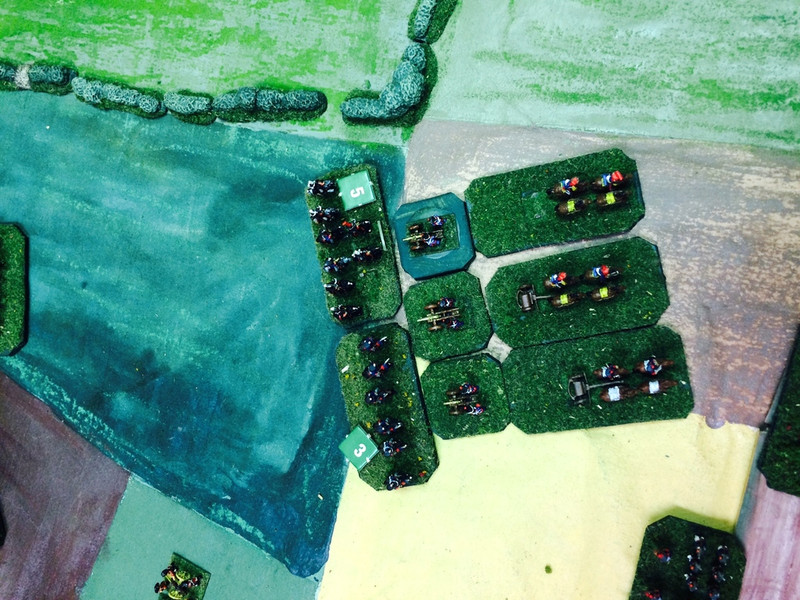
The French pay the price for leaving Dupont’s horse artillery unsupported.  They are overrun by two brigades of Austrian horse and eliminated.  Dupont’s division has now been ruined.  

As an aside, I need to rethink my use of artillery in Blucher.  I like using the limber and cassion stands I have, but they aren’t required by the rules and don’t seem to add much to game play.  With them on the table, an artillery regiment (three batteries combined together in Blucher terms) takes up an awful lot of space.  Other Blucher players have advised me to get rid of them and just add batteries to individual brigades, thus giving them an extra dice, which would probably work well but would seem rather abstract to me.  Hmmmm.

By now it is around 14:00.  On the left, the first of Groll’s infantry divisions has arrived behind his cavalry, but the Austrian die rolls for command points are not always large, and so not every part of the Austrian plan can be implemented each turn.  That, plus the size of the table, s really keeping the Austrians from getting into the game.   Either I use a smaller table, or I give the rules a tweak and allow units that end their turn out of range (more than 6 base widths from artillery, two from infantry) of enemy units to move twice their normal movement rate - this would be a variation of the Blucher rule where units basically get a first free move of 12 BWs since they are usually considered to start hidden.   

It’s getting on for mid afternoon and Napoleon catches a break.  Lafreniere’s infantry division marches onto the table, and is ordered to move left to support Moisan.  Moisan’s artillery regiment and two brigades of infantry will have to block Kurvi-Tasch’s oncoming division by themselves.


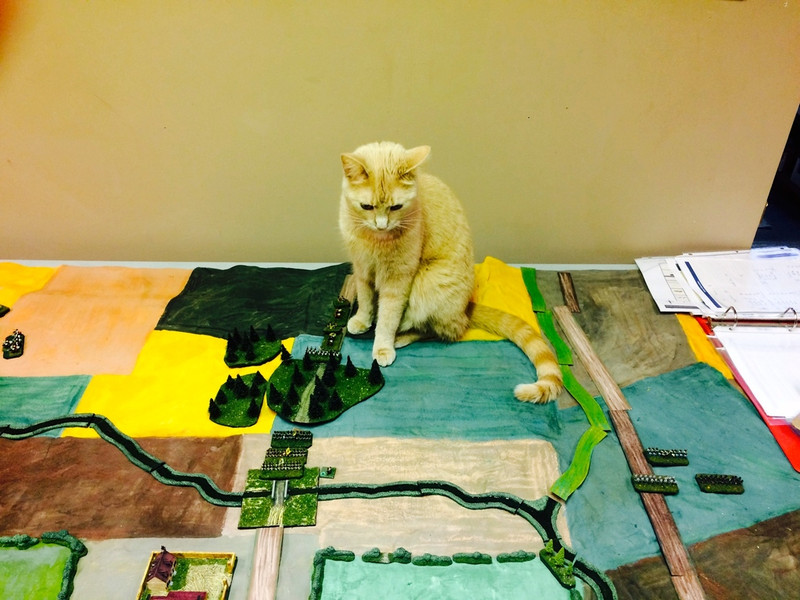
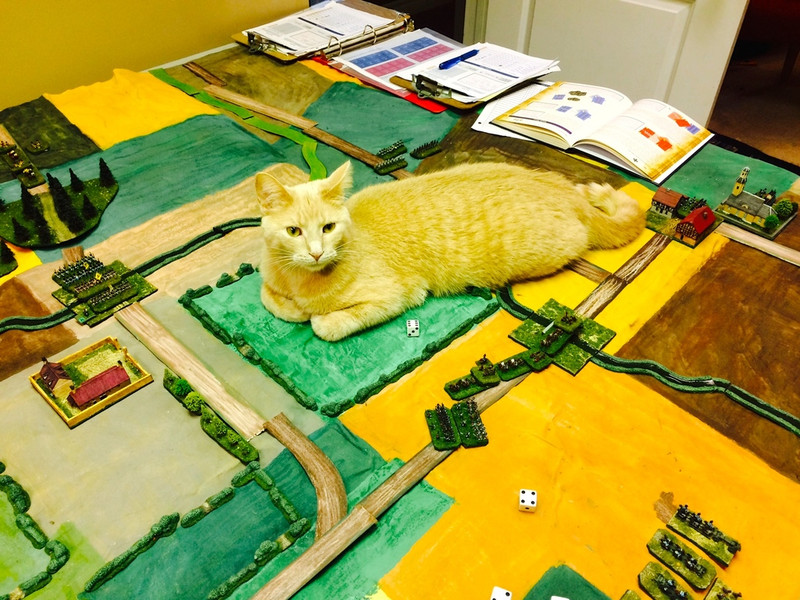
Marshall Luigi, master of the battlefield.  He is a very social fellow, and I find that I am never stern enough to shoo him off the table.  He just wants to keep me company, I think.  Weirdly, he also hops on the bathroom counter when I am shaving and watches the water go down the sink with great fascination.  Odd little cat.


Hopefully by the end of the week I can tell you how it all ended.

Blessings to your die rolls!  MP+

Monday, February 22, 2016

Solo Scharnhorst 3 - The Battle of Karseck-Kaltenbach Begins

On Day 2 of the campaign, Marshall Kurvi-Tasch, the Austrian CinC, had identified, with a high degree of probability, the presence of Napoleon and his Guard in the town of Karlseck.  With Groll’s report of a French corps some distance to the West, the Marshall felt that he could concentrate his forces and crush Napoleon, outfoxing the fox at his own game.

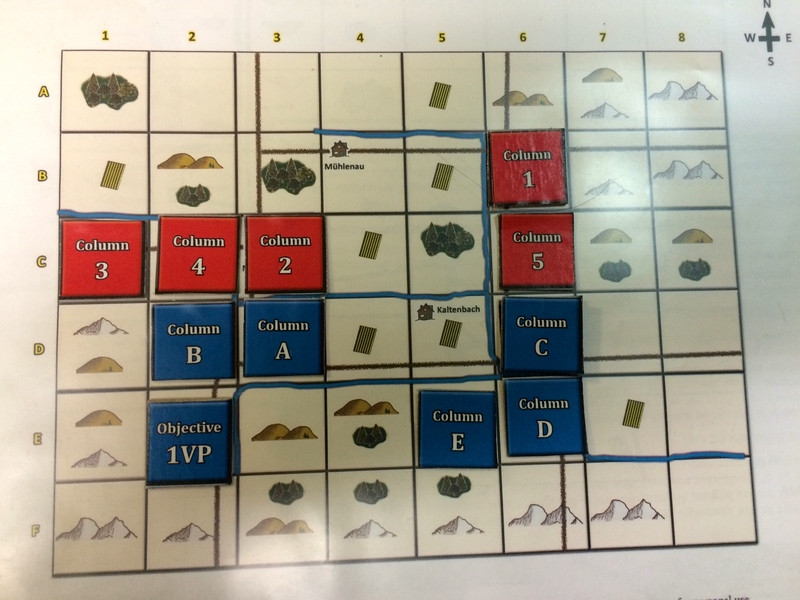
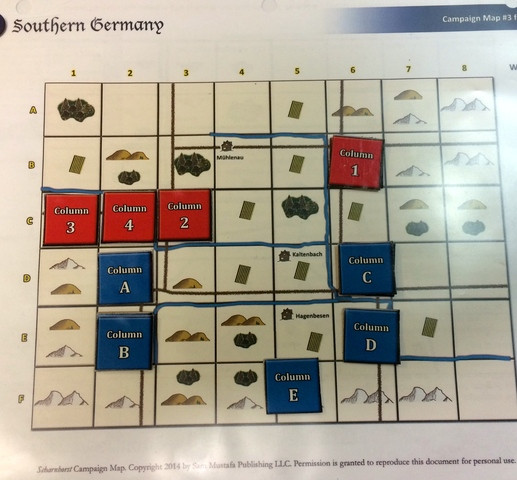
To that end, he gave orders that the light infantry division detached from his own force and shown below as Col 5, would remain in front of Karsleck while he shifted his own Corps (1 infantry and 1 cavalry division) W following the road to B5 and then south to C5, to allow Groll (Col 2) to link up with him.   The Austrians won the initiative on Day 3 and Col 1 executed these orders.  It discovered Col C (Napoleon with the Guard and a cav division) at D5 while the Grenzers of Col 5 reported that another French Corps was moving into Karseck.   That was all the information K-T needed.  Stroking his luxuriant whiskers with satisfaction, the Marshall declared a Battle, since he occupied the centre position at C5.  The squares for the battle, meaning the landscape of the tabletop, would be C4-6 and D4-6. Austrian Cols 1,5 and French Cols C,D will be frozen if Napoleon accepts the battle (he has one chance during the 5 days of Scharnhorst to refuse a battle, at a cost of Victory Points).  The Emperor accepts the battle.

All Columns not frozen now have a chance to reach the battle.   The French turn is next, and Col A (Moisan’s Corps, an infantry division) marches E from D3 to D4.  It has to pay one if its 6 movement points to disengage from the Zone of Control of Col 2, but that leaves it more than enough MPs to arrive on the battlefield and take up position on Napoleon’s left wing.

Now it’s the Austrian’s turn to move unfrozen columns.  Groll (Col 2) and his substantial Corps (2 infantry and 1 cavalry division) know that there is French cavalry (Col B) in D2.  He then orders his Corps to move one square south to D2.  This has two results.  First, Groll will be able to arrive, at some point, on the battlefield as a reinforcement.  However, it poses a problem for Col B.  In Scharnhorst, Columns may not move diagonally.  Col B, which is the best of the French cavalry units, four brigades of heavy cavalry under Marshall Noel, is now cut off from the battlefield.  It doesn’t have the MPs to disengage from the ZOCs of Cols 4 and 2 and reach square E4 to arrive as a reinforcement.  It is out of the battle.

The best French move now is to leave ColB in place.  Col 4, the light cavalry division under Sachsen, does have the MPs to disengage from Col B’s ZOC and march C3 C4 to reach the battlefield, across from Moisan (Col A).  However, the Austrian Col 3 (an infantry division of 4 brigades under Von Lunenburg) will also miss the battle because it doesn’t have the MPs to reach C3 as a possible reinforcement.  Being south of the minor river at C1 really hurts C3.

Here is one satisfying aspect of the Scharnhorst system, in that one can draw up two armies using a points system and, if the points are equal, one can expect an equal contest,  However, with this battle, of the 400 points allotted to both sides, not all of those troops are guaranteed to make it on to the table, so one has a good chance of an asymmetrical result, if one likes that sort of thing.


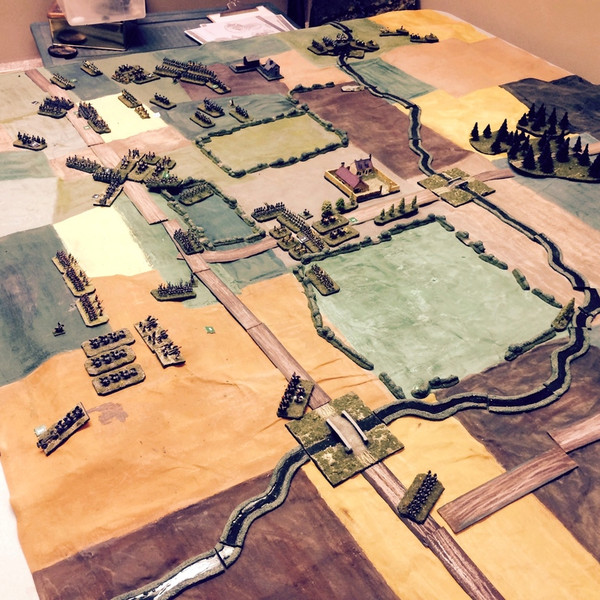
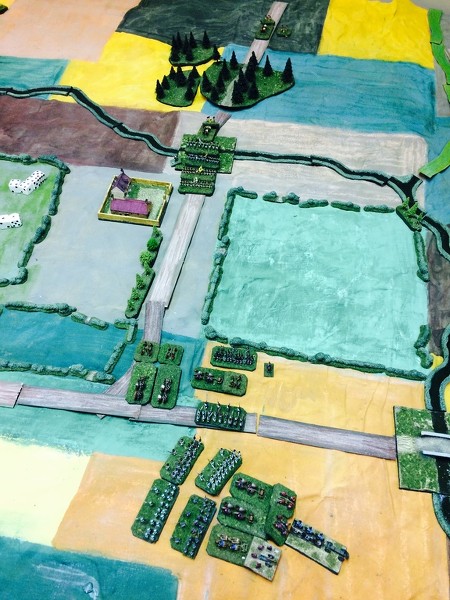
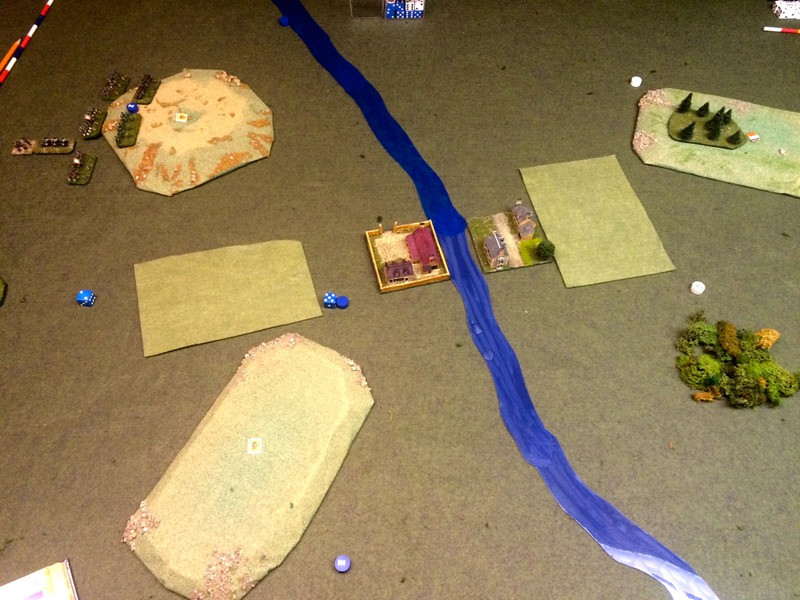
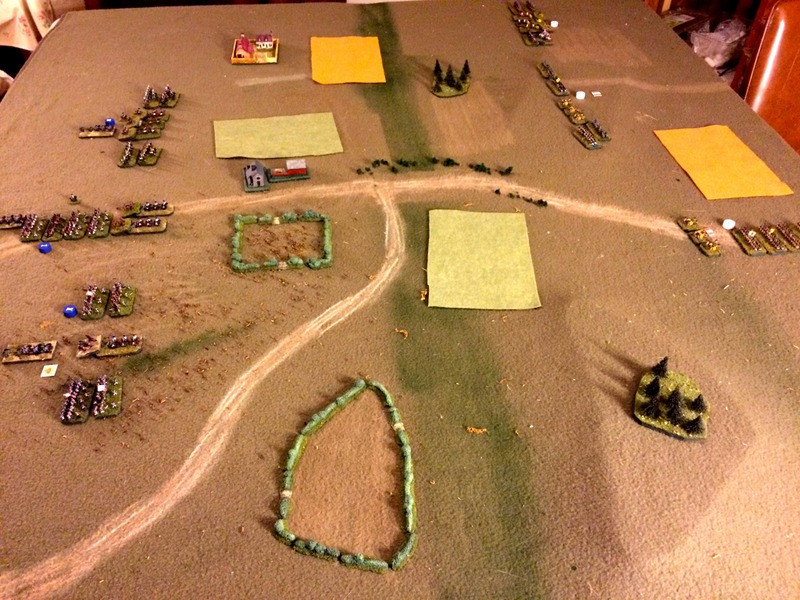
The battle commences on the dawn of day 4.  Here is the deadly field of Karlseck-Kaltenbach.  This battle marks the first official use of my groundsheet, a mix of acrylic craft store paint and artist’s pastel crayons, treated afterwards with artist’s fixative.  The roads are all handmade, using balsa or cardboard coloured with pastels.   At the bottom left is Karsleck, and the village of Kaltenbach is in the centre.   This battlefield corresponds to the six squares of the Scharnhorst map of S Germany mentioned above, with some randomized hills thrown in.

I need more trees.  As you can see, I had to quickly make some river sections (more cardboard coloured by pastel) to provide the rivers required by the Scharnhorst map.    The hedge sections are resin, from Timecast.

 A view of the French side.  Players of Blucher will notice that I am using my batteries to form units, despite the advice of some wise readers, such as Kaptain Kobolod, to fold them into individual brigades.  However, if I did that, I wouldn’t really be able to use my artillery and limber models, would I?  

I forgot to note that Kaltenbach is worth 1 VP.   It was a bit laborious labelling these photos on my Mac.  I had to use Google Slides to caption the photos, and then export them to my laptop so I could upload them to Imageshack.  I need to research better photo-editing tools for the Mac.


View from the Austrian side.   Kurvi-Tasch has lots of cavalry, and he has three more divisions that at some point will show up on Napoleon’s left flank, so he’s in a pretty good spot.   He doesn’t know yet what the French have in the way of reinforcements, or that Napoleon can only count on one infantry division possibly coming to his aid.  The Emperor has a very real chance of his flank being rolled up from left to right.

We shall see what transpires.  It may be a bad day for the French, if the Austrians get lucky and Groll’s II Corps enters the table early on. Will the Emperor try to refuse his left flank, or will he seek to savage Kurvi-Tasch’s I Korps before it can be reinforced? 

Tuesday, February 16, 2016

Solo Scharnhorst Day 2

The courier from General Kroll finds Kurvi-Tasch with relatively little trouble, and clatters into the courtyard of the courthouse where  the bewhiskered Marshall has made his headquarters. 

  “A French Corps southwest of Niederheim?  Szplug!  So where is the Corsican, eh?”  He strokes his luxuriant moustache.  He turns to his Chief of Staff.  “How much of the Korps is already on the march?"

“The Avant Gard and Grenzers marched out before dawn, Excellency.  Your orders are to be in Kallseck by noon.  It will take at least an hour to turn them around."

“Szplug! " exclaims the Marshall and drums his fingers on the table in thought.

What sort of man is K-T?  I roll a d6 and get a 3, so that suggests a fairly even of the road temperament, neither rash nor cautions.  I decide that K-T has four basic decisions: 

1) order Groll to attack and keep his own 1 Korps marching south
2) Order Groll to keep an eye on the French and keep 1 Korps marching south
3) Turn 1 Korps E and march to support Groll
4) Keep 1 Korps where it is and scout for the French, while ordering Groll to scout - more information is needed.
Given his temperament, I award each option a 25% chance of likelihood.  

Meanwhile, the French courier from General Moisan has also had little trouble finding Napoleon’s HQ.   Uncharacteristically, the French are still in bivouac, due to uncertainty in orders about the order of march (I roll a 15% on 1d100 to determine the French readiness.  Napoleon is still eating his breakfast and frowns as he wipes his lips with a starched napkin.  “Stopped in his tracks by a handful of Uhlans?  I expected more of Moisan. “  He stares at the map hastily placed before him.

 With his Guard in Karlseck, Belisle’s II Corps just to the south, and Lafreniere’s V Corps still struggling through the mountains at F5, he knows he is not as concentrated as he would like.   His options:

1) Remain in the Karlseck area as planned, and allow Lafreniere to move north to Hagenbesen and take his promised rest in that village after it’s arduous march.
2) Move the Guard W to Kaltenbach in D5 and bring Belisle up beside him in Karleseck, while allowing Lafreniere forest in Hangenbesen as promised.
3) March W with the Guard and Belisle, giving Lafreniere orders to come up to Karlseck and guard the road south.

Options 1 and 2 seem the most likely, so I award each a 40% chance of happening, but I give option 3 a 20% chance, just in case Napoleon has an attack of intuition.

Here’s what happens.  For K-T, I roll a 97%, meaning that he sits tight and scouts.  For Napoleon, I roll a 70%, meaning option 2. The only thing that might work in K-T’s favour is that one of his divisions, the Avant-Garde and Grenz, will move one square south and will make contact with the French at Karlseck.


Here’s the situation at midmorning of Day 2.   Col 5 is the division which Marshal K-T couldn’t stop, consisting of an Avant-Garde brigade, two veteran Grenz brigades.   They roll a 03 on a scout of Karlseck, and get a very clear picture of the French in Karlseck.  It is still taking a while for Napoleon to give his troops new directions, so Col C (the Guard) have not moved W to Kaltenbach yet.  Lafreniere’s Corps (Col E) has marched out of the mountains into E5 but since they took bad roads and had trouble with their supply columns, they are planning on spending the day in Hagenbesen to recover stragglers and forage.  Meanwhile, Moisan (Col A) has shifted E and Noel (Col B) has moved N to take Moisan’s place.


Moisan’s cavalry (Col B) roll very well at scouting, and identify Sachsen’s cavalry division in Col 4, whereas the Austrian horse are overpowered.  All they know is that whereas they had infantry to their front late yesterday, now they have French cavalry, hussars stiffened by dragoons, to their front.   Von Lunenburg’s Korps (Col 3) learns that there is no French presence to their front in D1, while Groll’s troops in Col 2 are not able to determine where exactly Moisan (Col A) is.  The French horse screening Moisan are earning their pay today.

By late noon, Kurvi-Tasch knows from some breathless Grenzers that Karlseck is held by elite French infantry, maybe even the Guard.  Where they are, Napoleon must be.  Meanwhile. Napoleon has shifted W to Kaltenbach and Belisle has marched into Karlseck.  Napoleon has learned that some Austrian light infantry are in front of Kaltenbach, but knows little more.   Couriers from Moisan won’t reach Napoleon till mid afternoon to report that the Austrians to the W are still in place.


Now K-T decides to act.  He orders the Grenz to remain in front of Karsleck and watch the French.  He orders his powerful Korps to march W to D5 and S to C5.  His troops are on the road by early afternoon, but it will take them the rest of the day to move into place.   Before he marches, he sends a courier to Groll with orders to shift his three Columns one square E, even if they have to march into the night.  


I suspect that there will be a battle tomorrow.

Saturday, February 13, 2016

Solo Scharnhorst: Day 1

Following my musings a few days ago on I might play Scharnhorst, the Blucher battle generator, solo.      I decided to play an ahistorical campaign, so apologies to historical purists.  As with the Scharnhorst rules, it is a five day campaign, though it can end before then if a battle occurs.  

What follows is pure war-game wonkery.  You may think it a crazy amount of thinking and writing in order to dump some toy soldiers on a table, but it amused me.  So here goes.

I drew up two 400 point armies, Austrian and French.   Without going into the details, here are the OOBs;

Austrian Army

CinC:  Marshall Kurvi-Tasch

Col 1 I Korps , Kurvi-Tasch (1 infantry division, 1 cavalry division, 1 Avant Garde/Grenz division)

Col 2 II Korps Groll  (2 infantry divisions, 1 cavalry division)

Col 3 III Korps  Grosbeeren (1 infantry division)

Col 4 IV Korps Sachsen (1 cavalry division)

French Army

CinC Napoleon

Col A Moisan II Corps (i infantry division)

Col B Noel Cav Res (1 cavalry division)

Col C Napoleon I Corps (Guard infantry div), IV Corps (cavalry division)

Col D LeGros III Corps (Infantry Division)

Col E Marsan V Corps (Infantry Division)


I started by plotting some basic orders for the French, who would advance from S to N along the two parallel roads, Cols A and B on the left and Cols C, D and E on the right.  The basic idea was that the two wings would be close enough to support each other using the E-W road on Row D, and would concentrate to destroy the Austrians.

I then wrote three sets of orders for the Austrians, with different entry points on the N, E and W sides of the map, and the basic idea of the Austrians moving N to S, with different areas of concentration on the south part of the map. I then rolled to see which of those three plans the Austrians would follow.

The plan I rolled had the following result.  As per the Scharnhorst rules, on the first day, columns only have 3 movement points, rising to 5 mps on the subsequent 4 days.

Austrian  4th column entered the map from the left hand edge, with orders to proceed C1, C2, D2, but did not have enough movement this turn to move south without a road from C2 to D2.  Col 3, following behind it on the road, ended its move on C1.

Meanwhile, Austrian Col 2 moved A3, B3, C3, while Austrian Col moved A6, B6, with orders to leave a brigade as a garrison in the village of Wunsberg.  Its orders for the following day are to press on south C6 D6 to the town of Karlseck and then turn west along the road running through Kaltenbeck towards Frischbach in the SW.  The Austrian objective is to mass and exit the map using the road on the W side of the S edge.

The French orders are for Col A (II Corps) and Col B (Cav Res) to march north F2, E2, D2.  Col C  (I Corps) marches north F6, E6, D6 to Karlseck for the first day, with Col D (V Corps) marching behind (F6, E6).  Col E (III Corps) is to march off road through the mountains F5, and then rest and forage in E5 the village of Hagenbesen.  It only has the movement to enter F5 this turn.  

As evening falls at the end of Day 1, Fr Col A (III Corps, General Moisan) has blundered into Austrian Col 4 (IV Cav Corps) under General Sachsen).  III Corps is all infantry but has the benefit of the three cav brigades allotted to recon before the game started.  I give a 10% chance percentage per cav brigade of gaining useful information but the French roll high and learn nothing.  All they know is that there is a screen of cavalry blocking them at C2.  The Austrians have three cavalry brigades allotted to recon, plus the two uncommitted light cav brigades of IV Corps, and they roll low enough to ascertain that French Col A is an infantry corps,   With the alert passed from Austrian IV Korps to the adjacent Austrian columns, I give them a chance of scouting the squares in front of them.  Col 3 has no idea what may be in D1, but Col 1 learns that there is no French presence to the E of Col A in D3.  So, as night falls, the senior Austrian commander, Groll, commanding II Korps in Col 2, knows that he faces a French infantry corps (Col A) which is unsupported on its right flank.

Groll sends a courier off to his superior, Marshall Kurvi-Tasch, who is with 1 Korps in Col 1.  The courier has to travel four road squares, B3, B4, B5, B6 to reach K-T at Col 1.  That’s four squares at night.   I decide that it will take the courrierand escort all night to travel and they will reach KT early morning.   In the meantime,General Groll has a decision to make, which I decide is as follows.

1) Attack the French Corps with his three Korps and try to crush it, even though he has no idea what supports might be behind the French Corps. (1-20% chance of doing this)

2) Push Cols 3 and 2 forward and try to envelope Col A.  This will be easy for Col 2 because it has the road south from Niederhelm and once across the river in D3, the Austrians block the road E, a likely source of reinforcements. (21-50% chance of doing this)

3) Keep his three Cols on line and block the French road north, while waiting for K-T to march W and bring the weight of I Korps to bear on the French.(51-100% chance of doing this)

What sort of man is Groll?  I roll 1d6 and get a 4, which suggests he is of normal temperament, neither rash nor timid.  

Meanwhile, at III Corps HQ, General Moisan has some hard choices to make.  All he knows is that he has Austrian horse to his front.  They could be scouts, nothing more.  Or they could be the first sign of the whole bloody Austrian army to his front.   Typical of our own cavalry to swan off and leave me blind, he thinks.  Moisan also knows that he has the Cavalry Reserve of General Noel  (Col B) behind him.   He knows that the Emperor and the rest of the army are some miles to his E, advancing N on the parallel road.  That is all.   He knows his infantry can block the road south should this be the main Austria advance, so he feels fairly secure for now.  More information would help.   The easiest thing would be to shift III Corps E along the road to D3 and ask Noel to bring up the Cav Res to take his place.  Noel’s heavy cavalry and horse artillery can see of the pesky Austrian light horse, if that is all they are, and he can keep his LOC open to the east.   Unfortunately, Moisan does not have the best relationship with Noel, and neither is superior to the other.   Moisan dashes off a dispatch informing the Emperor of his plan, and sends it off along the road to the east.  The courier has to travel four road squares E to Karlbeck, where he suspects the main army will be.   Once that dispatch is sent off, he decides to ride south with his staff to Noel’s HQ, to discuss the matter in person.  Before he gets in the saddle, he speaks to Col. Codina, his Chief of Staff.  “Prepare the Corps to march east at first light for D3.  I”ll be back before then.  Let us hope that blockhead Noel sees sense."

Arriving in Frischbach near midnight, he rousts Noel from his comfortable billet and explains the situation.  It’s a chilly conversation at first, but Noel warms to the chance at glory and agrees to the plan (I roll 1d6 and get a 5,  Even with a -1 mod for their bad relationship, that seems enough for the two commanders to be in accord).

So, what decision will General Groll make?  I roll a 51 on percentile dice.   That means Groll, like an unimaginative Austrian commander, will hold fast and wait for his boss to come up.   There will be no battle in the morning.

The situation now gets more complicated.   More to follow.


Wednesday, February 10, 2016

First Thoughts On Playing "Scharnhorst: Campaigning With Blucher" Solo

 I have been a big fan of Sam Mustafa’s Blucher since it came out last year.   I know there are more complex Napoleonics rules out there, but for where I am right now they work for me.
One part of Blucher I haven’t yet explored is the Scharhorst campaign system.   Here’s what I’ve managed to figure out so far.  

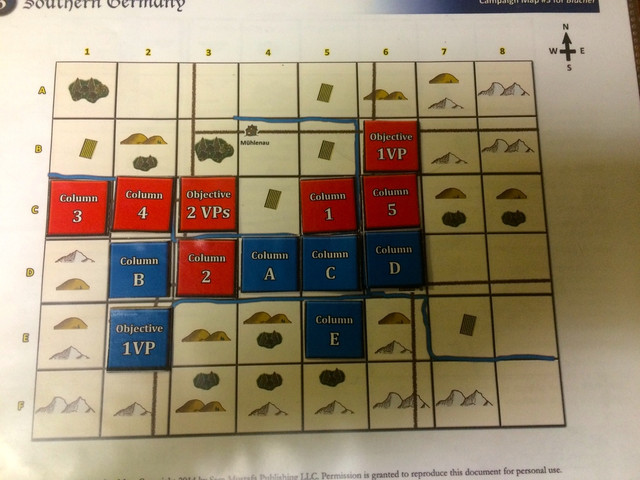
If they are not playing an historical campaign, players draw up armies using the Blucher points system and then choose one of the maps provided on Sam’s Honour website, such as this one of a fictive bit of Southern Germany (the other maps as I recall them are Northern Germany, Poland/Russia, Italy, and the Penninsula).  Players then secretly determine how many of their cavalry units they will allocate to scouting, giving them an intelligence score.  The player with the higher score gets to choose the map edge they will enter on.


After dividing their purchased armies into groups called Columns, players then take turns pay movement points to maneuvre their columns on the map, seeking Victory Points for capturing villages, towns and cities.   Some of these can be captured during any of the five days of the campaign, and others are controlled when a battle is decided on the tabletop.


Scharnhorst is not so much a game as a battle generator for the tabletop. Under certain conditions, a player can declare a battle when he has a column in contact with an opposing column. The area of the battle is a 2 X 3 block of six squares. If columns have the movement to reach one of those squares, they are part of the battle. If they have the movement to reach a square adjacent to the battle, they may enter as reinforcements.

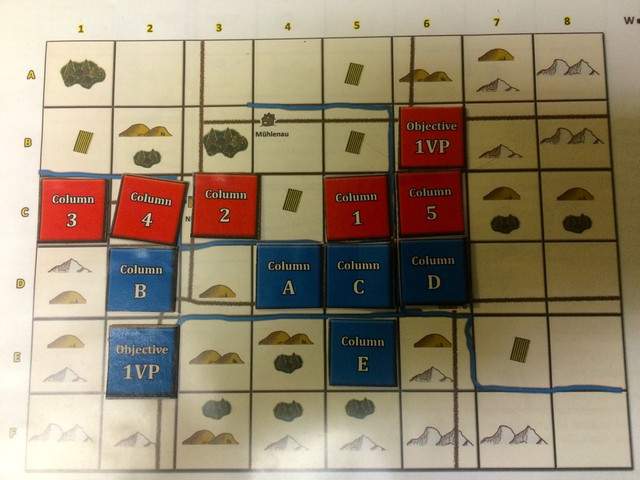
 So for example, in this instance, Blue Column B has declared the battle and the area runs from Blue Col A to red Col 4 and the three squares below them, of which Blue Col B is in the middle.  Red Col 2 and Blue Col C may possibly enter as reinforcements, but the other two blue columns can’t reach the battle in time.


The only problem with all this is that Scharnhorst it isn’t great for solo play, since I know exactly which units are allotted to which columns.  Playing solo,  am pretty much guaranteed a big, relatively even battle, since I can move as many units as possible into the melee using my omniscient vantage point.

 I crave the idea of grand operational level Napoleonic actions, with corps blundering into the enemy, or probing to discover him, then couriers riding frantically to reach supporting corps, orders hastily drawn up, and troops set in motion for the great collision of arms.  How can I capture that by myself?

It occurred to me that I could start by writing orders for one side, let’s say for Blue.  These orders would specify the entrance square, the route of march, and the objectives for each Column.  The orders might also specify the posture of a column, ranging from act cautiously to act boldly and seek an engagement.

I would them write a set of programmed orders for Red.  Perhaps I write three sets of orders:  1) Mass 3 of 4 columns on left side of map and advance towards opposite left edge.  2) Mass 3 of 4 columns on right side of map and advance towards opposite right edge.   3) Divide force evenly into 4 columns, no more than three squares apart, and advance on the centre. Then I mightroll to see which of these three orders Red adopts.  

As columns came into contact with one another, I could use the Scouting the Enemy rule on p. 144 of the Blucher rulebook to determine if one side or another learns how many units are in an enemy column.  Perhaps a scouting table could specify various levels of knowledge to be determined by die roll with various modifiers, depending on the number of cavalry units present in each column, type of terrain, etc.  Once in contact with an enemy column that is successfully scouted, I could send couriers to neighbouring friendly columns, dicing randomly for their speed, safe arrival, and accuracy of their information.   A further roll might determine if the commander of the supporting column is willing to abandon his initial orders to march in support and thus arrive at the battle.  

It’s late and I am getting tired, but I think I have something to think about and experiment with.
If you have any experience on playing Scharnhorst solo in a satisfying way, please say something about it in the comments.

Maybe another approach would be to recruit some players, run the Scarnhorst game double blind using this blog, and once the battle is figured out, move it to the tabletop?  Hmmmm.

Blessings to your die rolls!
MP+

Sunday, May 3, 2015

Back to Blucher: Trouble Along The Pukenbruch

-0Last night I tried my second game of Blucher, only this time, instead of playing it solo, I took it to the lads in our group.  Marshall Patrick took the French, while James and Mike spilt the Austrians and I helped everyone through it, though sadly, as noted below, made some mistakes.

We used the random terrain setup from the basic rules, with each side having a dozen terrain choices.    For some reason the chaps decided to put a stream in the middle of the table, forcing us to play from end to end.   I chose the armies since we didn’t want to waste time explaining the army builder rules.  I rolled a random spread of numbers, giving the Austrians a small advantage, 300 points to the French 260, or 22 Austrian units to the French 19.  The Austrians had three corps of infantry (one grenadier, one line, one mostly conscript), a corps of heavy cavalry, and four unattached units of hussars.  The French had two corps of infantry (elite and line mixed), a corps of heavy cavalry, and a corps of light cavalry.    

All corps entered the game on blinds.   I adapted the recon rules from the Scharnhorst campaign rules at the back of the Blucher book, allowing both sides to choose how many light cavalry brigades they will allot to pre game recon.  The Austrians put 4 to the French 2, for which I allowed them to spot two French blinds.  One was the infantry corps at the top left of this photo, the other was a dummy.  In retrospect it would have been more interesting if I had allowed the Austrians to use this advantage to try and bring one or two corps onto another table edge to represent a grand flanking manoeuvre.Austrian objectives are the two hills shown on the left side of the river, which was christened the Pukenbruch.  The towns on either side of the river were Fahrtompuken (right) and Neuefahrtompuken (left) and the key hills behind were the Klompenbergen.  Yes, we are easily amused in our little gaming circle. 

We took units off blinds when they came within 8 Base Widths of enemy.  Here the French heavy cavalry (three brigades of dragoons, two of cuirassier, with horse artillery) face off against the Austrian grenadier corps (four brigades of grenadiers and heavy artillery).   The river was fordable but difficult terrain, and would prove a hard barrier for the Austrians to cross in the face of opposition.  I chose to put the artillery into units rather than parcelling it out among the brigades, to give the players a sense of how artillery works.

Opposing infantry corps square off in the centre, each putting one brigade into respective halves of the town as garrisons.   Not much happened on this front.   One of the French brigades got chewed on by artillery but both sides made their main efforts on the flank.  At the top you can see Patrick’s hussars and infantry crossing the stream to fight the Austrian conscripts, who would give a surprisingly good account of themselves.

A furball at the bottom of the table, as Patrick’s heavy cavalry kept pushing the grenadiers back across the river.   Since they were crossing the stream they were unable to go into square (Prepared in Blucher terms) and would be at a significant disadvantage in combat with the French horse.

The final battle.   The Austrian heavy cavalry corps push across the stream, and the French heavy horse are too depleted to oppose them as the Grenadiers continue to batter them.   By this point it was after midnight and we were on the last Austrian turn.  Hey, look at those sexy measuring sticks!

We declared the game a French victory, but that may have been an injustice to the Austrians.  After checking the rules and the Blucher rules section of the Honour Forum, which is an excellent resource, I found five rules that we were not using properly.

 
1) All infantry units can employ skirmish fire.  Units with the skirmish trait just do it better (getting the count one 5 as a 6 bonus).  Unfortunately, we weren’t allowing the Austrian line and grenadier units to use skirmish fire.   Only two units in the Austrian list, Veteran Grenz and Avant-Garde Brigade (a mix of light artillery, infantry, grenz and cavalry) have the Skirmish trait, but all Austrian infantry units can use skirmish fire (dice = 1/2 of élan rounded up) at 2 BWs.
 
2) Any attacking unit that loses a melee combat to a defending unit that does not break loses 2 fatigues (meaning it drops 2 élan levels).  We were playing it last night that attackers which lose a melee and have to retreat only lost 1 fatigue.   This would have been true in the event of a tie, but not if the attacker loses.   Both players actually benefitted from this misunderstanding, though it may have worked to the French advantage in that their heavy cavalry were pushed back several times by the Austrian grenadiers but took fewer fatigues than they should have.  
 
3) Infantry in combat with cavalry NEVER retreat, provided the infantry does not break.  Sam’s rationale for this is as follows: “Infantry either holds, or it dies.  But it doesn’t retreat or fall back in good order after being charged by cavalry, because that would be an invitation to be slaughtered.” http://www.sammustafa.com/honour-forums/rules-questions-32/infantry-vs-cavalry-no-retreat/?PHPSESSID=9b289e8d65980185091a4320c3bb2cc0  This misunderstanding probably worked more against the Austrians last night.
 
4) In the comments on my last Blucher post here, I got some terrific advice on how to handle the MO dice when playing solo.  I confess though I hadn’t really thought it through when we were playing face to face.  What developed during our game was a dynamic where the Active players were asking the Passive player if they still had MOs left to move certain units.  That was wrong.  I hadn’t realized that it is permissible to move more units than you have unit MOs left, but that ends your turn.  So, say the Active player activates a Corps with 6 MOs.  After this move, he only has 2 MOs left.   The Active player then wants to activate another Corps with 5 MOs. He CAN do this, but that’s it. The Passive player would note that he only has two MOs left, and allow the Active player to move his corps with 5 MOs, but then he would lift the cup and say, “you’re done”.  This means that the Passive player NEVER tells the Active player how many MOs are left.   Provided that the Active player has even 1 MO left, he can activate a Corps of any size or activate an individual unit, but upon finishing either of those Moves, he is told by the Passive player that he is done.   I was wondering why this process was proving so difficult, resulting in several partial Corps activations, and this explains why.  This error no doubt hurt the Austrians more since they were the attacker.  I apologize to those who tried to explain this to me in comments to a previous post here.  I’m a bit of a thick sometimes.
 
5) Finally, here’s a use for the CinC that didn’t occur to me to tell the players.  The CinC can move ANY friendly units within 2BWs of his stand REGARDLESS of how many MOs the active player as left.  However, once the CinC moves these units, the Active Player’s turn ends, EVEN IF the active player still has MOs left.  So, using the CinC figure is a bit of an insurance policy if you think that you might not have enough MOs left to accomplish your goals.  
 
Even with these errors we had a good game played to a conclusion, and I think everyone felt that Blucher has a lot of promise.  My chum James has already posted his thoughts on last night here.  With two games under my belt, I think I understand the basics pretty well, and see tons of potential.   Hopefully soon we can try the Scharnhorst campaign system, on one of the campaign maps available here, and then graduating to a larger project I am just starting to pencil out.
 
That’s all for now.  Blessings to your die rolls, mes braves!
MP+
 

Saturday, April 25, 2015

First Game, First Thoughts on Blucher

Last Tuesday I posted the start of my first game of Blucher, the Napoleonic rules from Sam Mustafa.   I had gotten as far as the initial setup, which is shown here in the first photo.  Two equal forces of 200 points, French on the left, Austrian on the right.  Both armies are organized into three corps each, two of infantry (four brigades plus an artillery unit) and one of cavalry (two light and two heavy brigades plus a horse artillery unit).  Both sides have one commander and one sub-commander.  The Austrians have to hold the road towards their table edge, plus the hill on the top of the picture.  The Austrians have one quality corps of four grenadier brigades (I Korps on the road) and one of two line brigades and two Grenz conscript brigades (II Korps on the hill).

 Both forces were generated from the Army Builder lists in the Blucher rulebook.   I could have created an historical battle but will save that for another day when I have more time for research.

I used the standard game clock of 30 turns.  Blucher is played in alternating turns, so each side gets 15 turns to achieve its goals.
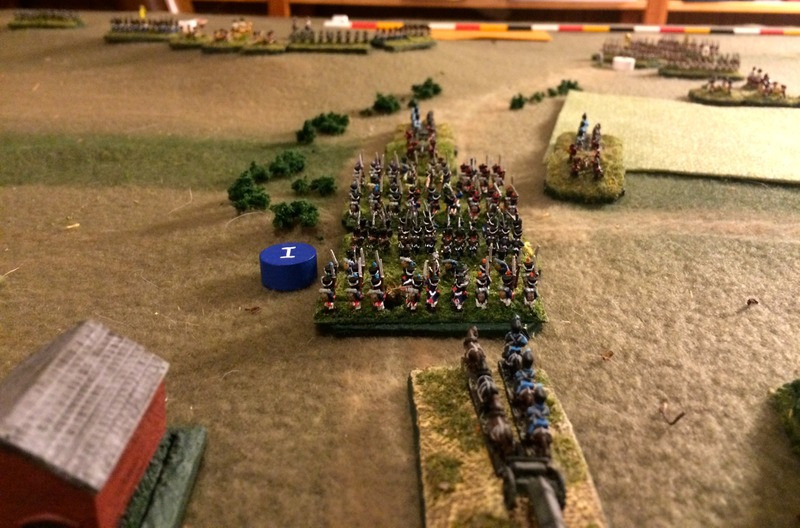
And we’re off.   The French i Corps in the centre gets most of the initiatives for the first turn and marches at the Austrian centre.   What I quickly discovered is that even with a relatively small force, it’s hard to achieve your goals each turn.   Blucher uses a system of Momentums or MOs, which are generated by rolling 3d6 to generate the number of MOs a side gets per turn.  In a two player game, the passive player rolls the dice and keeps the total number of MOs secret from the active player.  The active player has to decide first which units in his Corps he will move (it costs one MO per unit in a Corps that wishes to move or fire), then decides if he will move or fire any units not part of a Corps (2 MOs per unit), then which units he will activate with his Army Commander, something you would only want to do if you had units from several Corps that were intermixed and you wanted to be sure of moving them in a single turn.  The problem for the active player is that he doesn’t know how many MOs he has at the start of a turn.  The passive player keeps track of the MOs being spent and then informs the active player when he’s done, which might come as a shock.  This means that in a two player game the phasing player can never be sure if he has enough MOs to achieve his goals for a turn, which could be quite suspenseful.

For a solitaire game, the problem is figuring out how to achieve a similar effect.  After a few turns of just rolling all the dice and the portioning out the total to my units as I wanted, I decided I was going to allocate dice to corps before rolling them.  For independent units (the French had one independent artillery unit) I would allocate the pips to that unit from whatever the total rolled would be.  This way, if I rolled a dice and had more pips than a corps needed, too bad, they were wasted for the rest of the army.  If I had less pips than the corps needed, also too bad.  If I wanted to be sure a corps got to act, I allocated it two dice knowing that that would sacrifice the actions of the other corps for that turn.
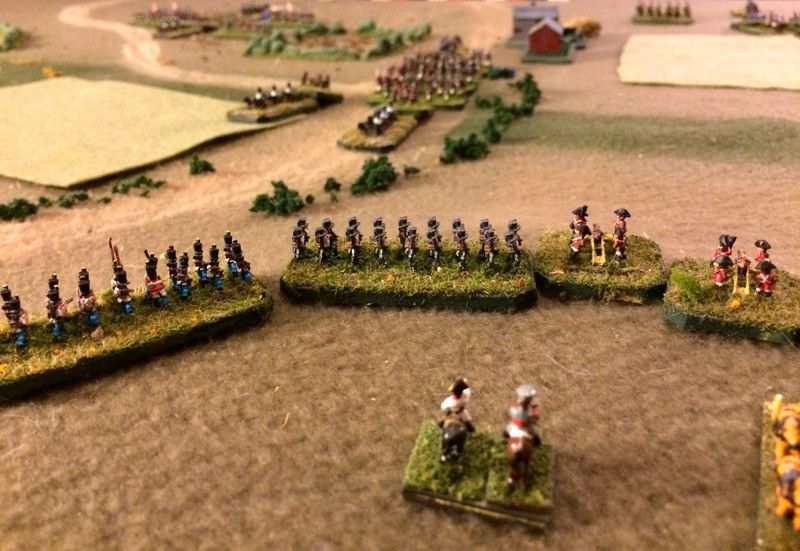
General Kurvi-Tasch watches from the II Korps position in the Austrian centre on the Plotzen Heights.    At this point I realized that I was using a table 6 foot wide by 5 foot deep, with 6mm figures.  Given that an infantry move using my base width system was 60mm a turn, that would take a long time to get into contact.   I decided that I would adapt the Blucher rule for Reserve Moves, which allows units that begin while Concealed to move 12 BW, provided that they do not come within 4BW or are observed by an enemy unit.  I decided I would borrow from other rules that allow for some sot of enhanced grand tactical move provided that they do not come within range of the enemy.  I allowed all units to use Reserve Movement provided that they did not come within artillery range (8 BWs) of the enemy.  Once units came within 8BWs of the enemy, they had to stop and used normal movement from then on.
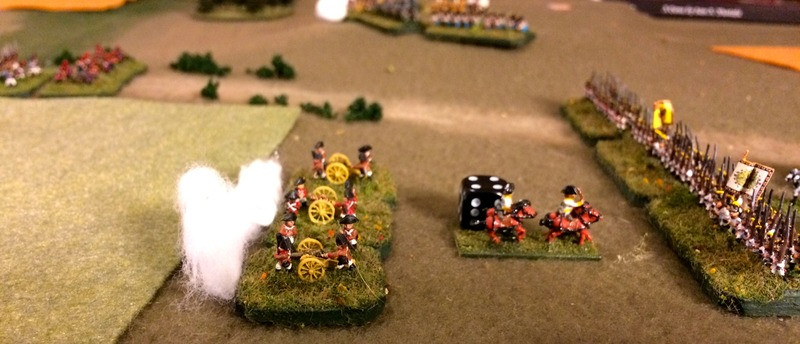
Guns of 1 Korps on the Austrian left open fire.  Here I quickly discovered that counter battery fire in Blucher is a vain hope.   The number of dice artillery get to fire depends on their ammo level.  Most artillery units (which are the same as grand batteries) start with 5 dice, then get two turns of 4 dice, then 1 of 3 dice, then 2 of 2 dice, at which point they are out of ammo and leave the table.  Artillery dice are halved firing against other artillery.  As with all fire combat, only sixes hit, though heavy artillery get to count one 5 as a hit.   It takes two hits to drive an artillery unit off the table, while only one hit forces artillery to retreat.   Here the 1 Korps guns waste their best dice shooting at the advancing French artillery, while the grenadier brigades deploy behind the guns.
I Korps guns score a hit on the advancing French infantry of 1 Corps.   I used blue micro dice to indicate hits on infantry and cavalry units.   As Mustafa writes in the rules, casualties in Blucher are attritional.  Units are rated by élan, ranging from a starting score of 7 (elite) to 5 (conscript).  Once a unit falls to 0 élan, it breaks and is removed from the table.   Broken units count towards an army’s demoralization level, which is one third of the starting total of cavalry and artillery units.
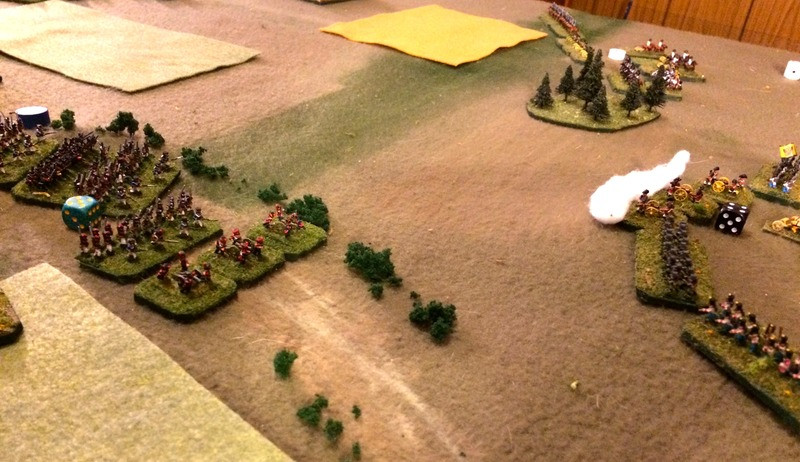
The situation at midmorning.  The French have had some very poor MO roles,  so the 1 Corps attack on the centre has not really advanced.   The two cavalry corps face each other at the top of the picture.  By leaving the southern hill of the Plotzen heights unoccupied, the Austrians may have given the French an opportunity.
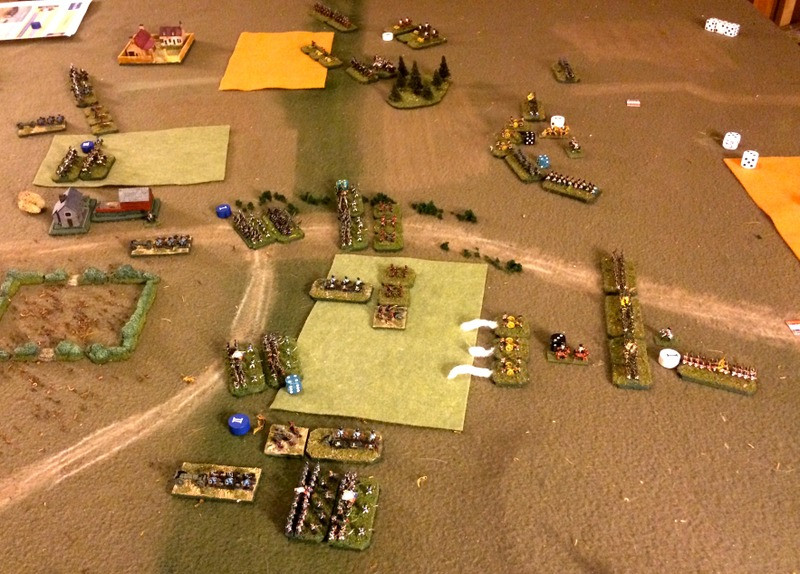
By noon the French attack is developing.   All four French artillery units fire in the same turn.  Two of the Austrian brigades holding the Plotzen Heights have been battered by artillery, and withdraw behind the crest   The French have gotten I Corp’s artillery onto the southern hill, before the Austrian grenadiers can get there, and fire a blast of canister into the oncoming Kaiserlichs.  Meanwhile, the Austrian cuirassiers advance and take some damage from the French horse artillery as they do.
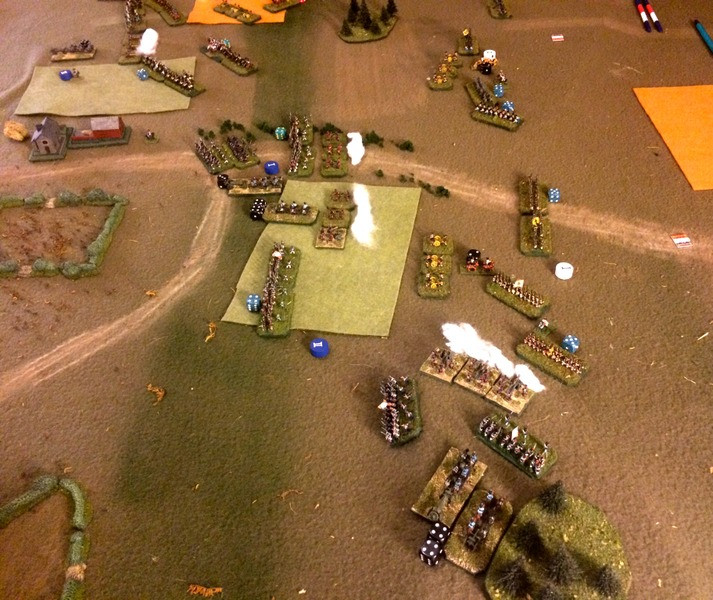
Ouch.  Poor grenadiers have fallen to five élan and haven’t even gotten to the top of the hill.
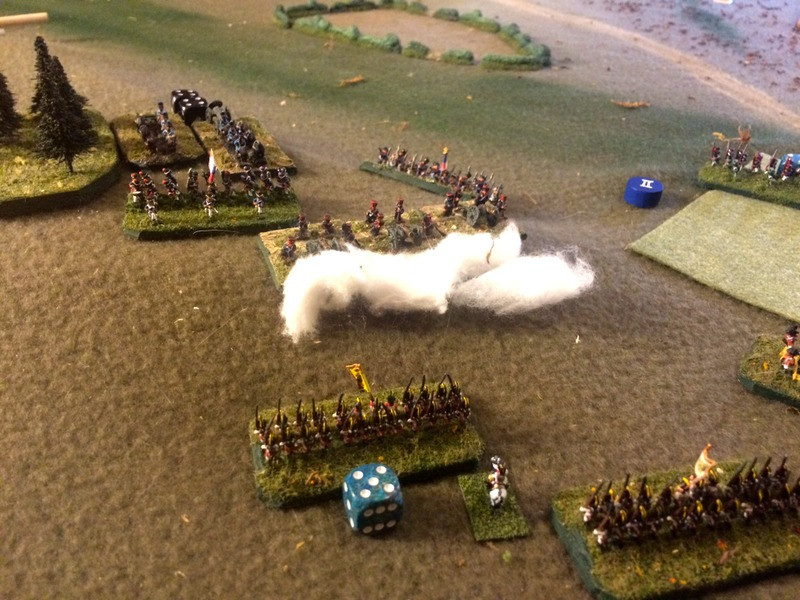
The grenadiers press forward for the melee combat.  Melee, like fire combat, depends on the élan level of the attacking and defending units, which determine how many dice they get to roll.   Since artillery units don’t have élan, their dice in combat depends on their ammo level.   Here the 1 Corps artillery has ammo level four, so they will get 4 dice in the coming melee.

A bad outcome for the Kaiserlichs.   Normally the Austrians would get an extra dice for being a shock unit as grenadiers, but since they are attacking uphill they lose a dice.  The result is a tie, which means they lose and will have to retreat.   All attacking units, win or lose, drop an élan level because they have attacked.  Defending artillery in melee combat lose an ammo level.
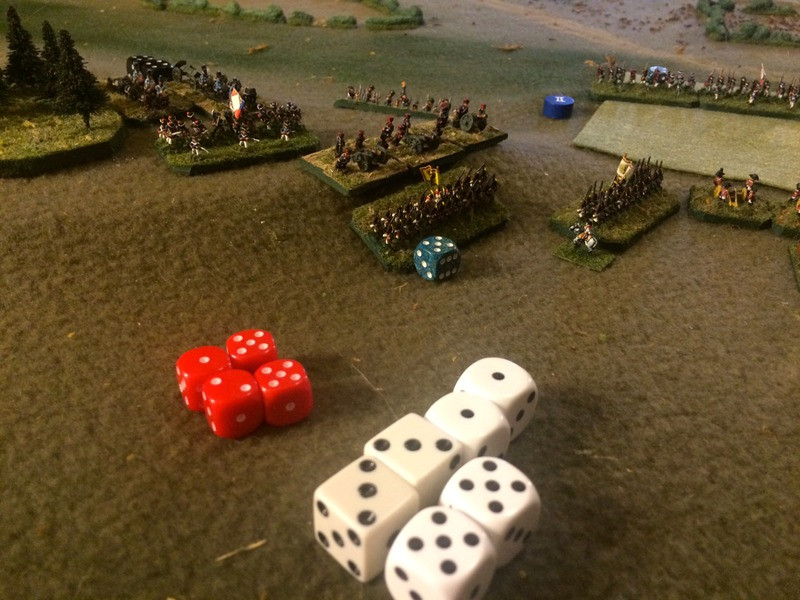
Another example of melee combat in the developing cavalry duel.  The Austrian hussars are rated as elite (7 dice) against the French hussars’ six, but the Austrian roll isn’t that great (only 4s, 5s and 6s count in melee combat).  Both sides lose en élan level (defenders lose élan levels equal to the difference between the attacker’s and defender’s score).
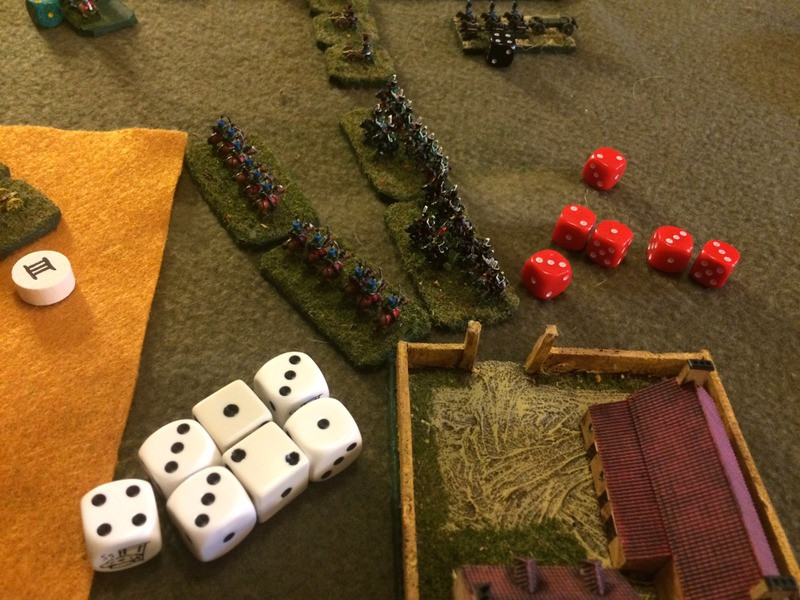
Cavalry battle develops.   It hasn’t gone well for the two brigades of Austrian cuirassiers, one of which (bottom left of photo) is down to 2 élan and is retreating in the hopes of retiring from the battle.   In Blucher units can be retired voluntarily from the table if they are more than 2 BWs from an enemy unit, which means that depleted troops can be removed from play before they break and count against your demoralization total.  The downside is that you lose if you have more voluntarily retired units than you have units left in play.  I hope you all go oohhh and errr at that incredibly sexy measuring stick in the top left of the photo!
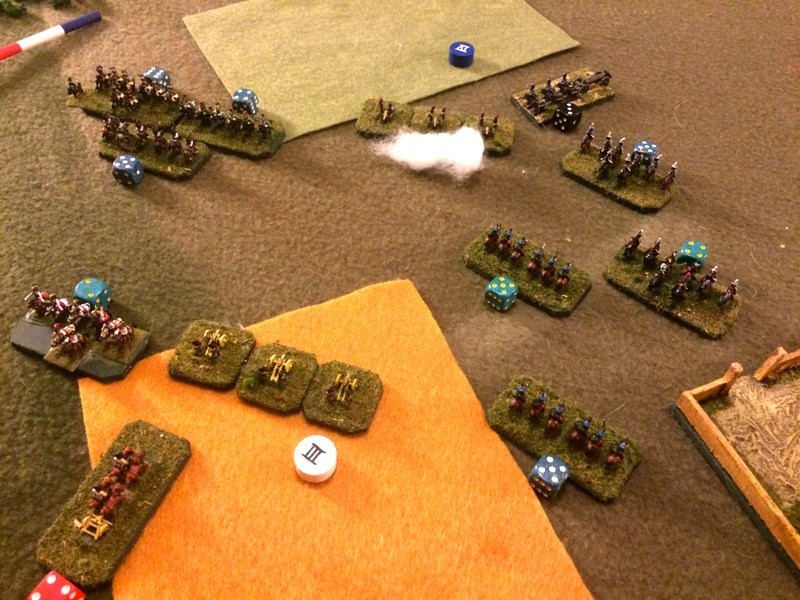
In Blucher horse artillery has the mobile quality, which means it can move and fire in the same turn at the cost of two MOs,  Horse artillery units can be quite lethal if protected, which doesn’t always happen if there aren’t sufficient MOs.  Here a depleted French dragoon unit (centre) charges the Austrian horse artillery, which loses the fight and is broken.  Meanwhile the French horse artillery torments the Austrian hussars.  At the bottom right I’ve used one of my cassion stands with a black micro dice to indicate the ammo level of the French guns.
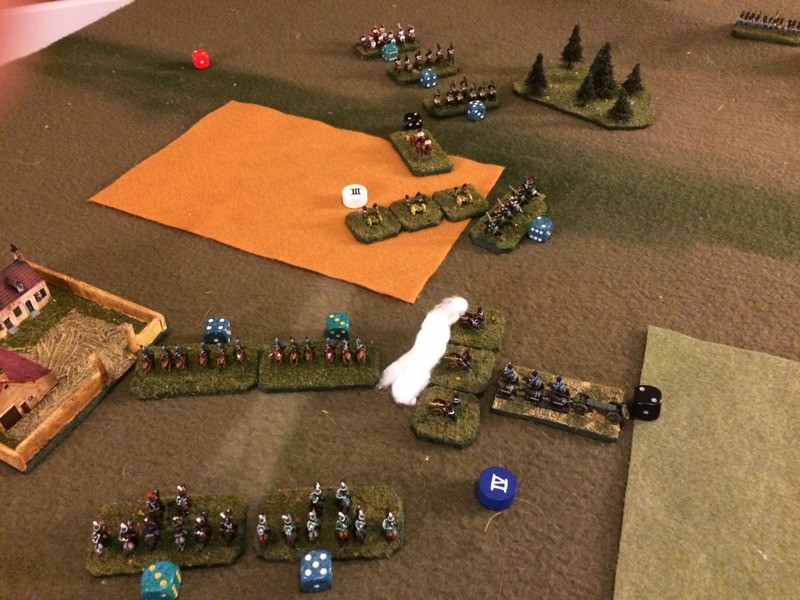
 

In the last few turns of the game night is falling and the Austrian cavalry have been swept from the table.   On the Austrian left, the proud grenadiers of 1 Korps still stand firm.  One of their four brigades has been broken, but they still protect one of the two objective markers that the French need for victory.   Here two French brigades charge into a full strength Austrian grenadier brigade.  The French get ten combat dice, while the Austrians get seven, plus one for the Steady trait of grenadiers plus one for the Steadfast quality of the 1 Korps sub commander, General Brodzky.   In the final combat of the game, the Austrians have rolled four scoring dice against the French three, forcing the two French units to retreat.   With night falling fast, the grenadiers have successfully blocked the road to Szhod.  Brodzky is wounded in the battle, but he will survive and be handsomely decorated.
A view of the final positions at the end of the game.    The Austrians have three broken units, one short of the four required to demoralize them, while the French have only one broken unit.  However, the Austrians hold both the French objective markers, so it looks like an Austrian victory.   While the cavalry duel was won by the French, it cost them valuable MOs that could have better been spent assailing the Austrian centre, where the Austrian infantry was weakest, so the sacrifice of the Kaiserlich horse was not in vain.  General Turandotte will have to explain to the Emperor why he has not broken the Austrians and opened the road to Szhod.
In conclusion, I have to say that I am a fan of Blucher.   Some might prefer a more detailed, granular game.  For example, there are no morale tests for receiving fire or for being charged, and the command and control rules are almost entirely abstracted into the system of MO dice.  Other than having useful qualities which might bring sub commanders and commanders into combats (the French cavalry sub commander brought an extra dice to each melee he was in, and miraculously he was never killed or wounded), there is no point in having leader figures on the table.  However, as with Longstreet, the other Sam Mustafa rules system I’ve discussed on my blog, some might say that this abstraction gains a high level of playability.   Once I got the hang of the basic systems the game moved quickly.  I think with another game of this size, i could get through it in 3-5 hours, which is doable for evening with friends or at a club.

Also, as you can see from the last photo, there are some bookkeeping issues I need to resolve.  I’m not happy about the micro dice cluttering the table to indicate élan and ammo levels.   This bookkeeping could be moved to paper, but then I would need labels or tags to identify individual units, which I suppose could be developed and printed and then just tucked underneath the units, or glued to the back base edge, but I am loath to permanently assign unit identities to my stands - I would rather keep them generic for different battles and OOBs.  I would welcome your ideas.

There are some advanced rules with Blucher I haven’t tried yet, and as I said above, the dynamic of the MO dice in a two player game would be a whole different level of suspense and challenge.   However, I’m quite favourably impressed with my first look at Blucher and I’m sure I’ll have more adventures with these rules to describe here in future.   I think the next set of rules I try for this period will the Polemos General de Division rules from Baccus, once I clear the table and try something else for a palate cleanser.

In the meantime, mes brave soldats, blessings to your die rolls!

MP+
 

Blog Archive

Followers