Showing posts with label Solitaire Gaming. Show all posts

Thursday, August 19, 2021

#ThursdayNapoleonics: SPI's Wellington's Victory at 14:00hrs

My ongoing Naps project is my boardgame: SPI’s Wellington’s Victory, their Waterloo monster game from the late 1970s. It’s going very slowly.  Here’s the overall map at the conclusion of the 13:45 turn.


Close up of the centre position.  

The ridge anchoring the Allied line to the left of La Haye Sainte is starting to look at little porous as the Belgian/Dutch units give way under the bombardment of I Corps’ cannons.   LHS itself is holding out as the defenders exchange ineffectual musketry with the French skirmishers.   If Napoleon wants to take the position, he will have to send in men to take it with the bayonet, and that will be bloody.  However, with the Imperial Guard drawing close now, LHS will need to be taken.  Between LHS and Hougomont, elements of Reille’s II Corps are moving forward to give the Imperial Guard some space to deploy if Napoleon decides to send it in that direction.

Most worrisome for Wellington now has to be his left flank, which is slowly but inexorably being turned by I Corps, supported by Milhaud’s heavy cavalry, which so far have proved the French stars of the game.  

The British cavalry has had very poor luck stopping them.   In the last 15 minutes, Ponsonby was killed leading his troopers in a desperate charge to slow the French advance, but was countercharged and routed by Vial’s cuirassiers.  Hanoverian landwehr are streaming to the rear, and over 1500 of them have already exited the map, a terrible and permanent loss to Allied morale.   Wellington has ordered Lambert’s British infantry brigade and the entire Brunswick division to shore up his left wing, hopefully they will be enough to hold the wing.  It’s an hour before the first Prussian units enter the map.

Cheers,  MP+


Wednesday, August 11, 2021

Trouble On The Border: A Sharpe Practice Skirmish

Having laid out this table to see what my Barrage Miniatures Kickstarter modular terrain looked like, it seemed a shame not to use it, and the obvious candidates were the Perry Brothers figures I’ve just finished for my alt-ACW project.  So, inspired by the battles of Ross McFarlane’s Red on Blue battles (Oberhilse … boo!), I decided to lay out a generic solo fight as a force of Republican troops crossed the border to test the Dominion’s defences and try to seize a key crossroads.

I don’t have photos to illustrate the entire action, but hopefully can convey a sense of what happened.  Here’s the table.  I allowed the Red forces to set up first.  The Blue forces enter from a deployment point on their table edge.


First Republican skirmishers appear on the table, led by Sergeant Quigley.   I thought it would be a nice aesthetic to use my ACW Iron Brigade figures in their Hardee hats for this skirmish.  The Republican jump off point is in the background.

Overview of the table showing the Dominion’s positions.  The Republican infantry, in slightly larger numbers, are now all deployed on the table.   The Dominion forces, all militia infantry, are supported by a Royal Artillery gun with a Regular crew.

The largest group of militia squander their first volley on the skirmishers facing them, to little effect.

Republican gun and limber enter the table.

A group of Dominion militia cavalry, led by Sergeant Boscombe, probes the right flank.   Since the Republican cavalry is otherwise engaged and not at this fight, these eight riders will tie up the largest group of enemy foot for most of the game.


The Royal Artillery opens up on the advancing enemy limber team.

As the Sharpe Practice rules are vague on hits to limbered artillery, I rule that the two kills apply to the lead horses.  I add 2 extra actions per casualty to clear the dead horses from the traces and unlimber the gun - it will thus take four extra actions to bring the Republican gun into action.

“Well done, lads!”  says Bombardier Boyle.  “Now load up and ‘it ‘em again!”  Capt. Travers, commanding the militia colour party, holds in reserve on the right of the artillery.


A large group of Republican infantry now unleash a devastating volley on the militia group holding a small copse on a hill above them.   They kill Cpl. Hodges and four of his redcoats, leaving the remaining four to retreat with excess shock.  

The victorious Republican troops advance, only to be blasted with canister by Bdr. Boyle’s gun crew.  They fall back to rally, their lieutenant temporarily knocked unconscious.

Sgt. Boscombe decides that a short and glorious life is a soldier’s destiny. He uses a pile of command tokens to spur his group in a charge with extra movement, but the Republican troops are regulars and form line, with time to present and fire a first volley, which is taken into account in their extra melee dice.  The result is that the Canadian riders are all killed save for one and the wounded Sgt. Boscombe, but the bluecoats are badly hit with casualties and shock and fall back to lick their wounds.  

The Republican cannon now makes its presence felt.   With the Queen’s gunners have chosen to shoot canister at the closest enemy foot rather than the opposing gun, and thus take a bad hit, killing two of the crew.  Boyle and the surviving gunner now take part in an unequal artillery duel, but the next hit kills the remaining gunner and Bdr. Boyle retreats off the table with shock, one arm hanging uselessly at his side.  With his Militia slowly being picked off by skirmishers and no way to reply to the enemy cannon, Capt. Travers orders four of his men to haul the gun off the table, and concedes the fight.  

Here’s a funny thing about how characters can sometimes come to life.  To give the Dominion defenders a bit of an offset from their militia status, I gave them a Level Four Big Man officer, one of my newly painted bossy Victorians.   Incredibly, his chit only came up once, allowing him to rally the four surviving men of Cpl.Hodge’s group as they fled down their side of the hill.  After that, he did nothing, except once, when I incredibly rolled two “1”s for his movement to go somewhere and be useful.  I thus concluded that he was hopelessly drunk, and was staggering around the battlefield, being a positive nuisance and drawling nonsense in an upper class English accent.  Thus, Maj. Clive Whicker-Basquet, an incompetent but well-connected sot, is born, and will doubtless feature again in other battles.

“Have a care and hold your fire, lads, that … gentleman is in front of you!"

A pleasant bit of solitaire gaming and lovely to get some newly painted troops on the table with my new terrain.  The Republican side won on points, and while the defender’s force morale had not collapsed, clearly it was in their best interest to disengage and fight another day.   In a campaign game, I wouldn’t have thrown the cavalry group away, but I was curious to see how they fared against infantry.   It would have been smarter to keep them as a force in being, checking or at least slowing an advance by three times their number.

Thursday, July 22, 2021

#ThursdayNapoleonics, SPI's Wellington's Victory at 1:00pm

Wanting to finish the latest batch of minis has taken my eyes off the game lately, but the monster awaits, in the cat-proof gaming room, and so we have started the 1pm turn.  Here’s the overall view:

D’Erlon’s I Corps took a bit of a beating in the last half hour.  Three of his four divisions are battered and intermixed, but are continuing to put heavy pressure on Wellington’s left wing.   Currently the British cavalry of Vivian, Vandaleur and Ponsonby are buying time.  Two of Ponsonby’s three regiments charged successfully, routing 1600 French troops and dispatching the crew of D’Erlon’s 3d Div artillery, which was rashly pushed forward.  However, the French have managed to capture Papelotte, and have just cued up three cavalry charges in a bid to turn Wellington’s flank.   About to do the morale checks for the Allied units within the triangles of the blue charge markers.

In the centre, bands of French skirmishers are starting to lap around La Haye Sainte and have evicted the King’s German Legion from part of the orchard.   French cannon have started to bombard the Sandpit.  At 1pm, Napoleon commits the Old and Middle Guard and orders them to move forward.


Thursday, July 8, 2021

#ThursdayNapoleonics: SPI'S Wellington's Victory, the Battle of Waterloo at 12:45pm.

Hello friends:

It’s Thursday and time for the weekly Napoleonic update.   

I took a chance on these new Osprey rules, hoping they’d be to Naps gaming what Dragon Rampant has proved for quick and easy (an earlier generation of grognards would have said beer and pretzels) gaming.

Boyd Bruce, the author, promises in his forward that these rules will indeed be simple and fast playing.   It is agnostic to scales and bases, and while the game’s smallest unit is called a division, grouped as corps, the rules still allow for tactical formations (square, column, line) which seems odd to me.   I’ve had to wade through with a highlighter to understand the mechanics, as there is no index or any QR charts, but I think I grasp the mechanics and hope to try it with some 6mm units soon.  More to follow.

Currently in my bedside reading is this book, obtained from a recent Hellion Press sale.

The authors have done a brilliant job of combing the archives and pulling together letters from a wide variety of soldiers - rankers and the odd junior officer - and  they are generally grim reading.    A typical letter might read:  “Dear Mother and Father, I am tired of war.  Please send me money as I lost my equipment and need to buy more.  I am hungry, cold, have no shoes.  I send my love.”   Many of the letters focus on conscription, trying to obtain release from the army or exemption for younger brothers, and most are very simple, as the letter writers were not all that literate.  Sometimes men from the same village or town would pull together and have someone write a letter  for them, in all their voices.   There are notes for each letter explaining what is known of the soldier writing it, and sadly, many never came home.   Grim reading that inspires respect for the hardships these men endured.

Now, down to the basement and the gaming room, which thus far has remained cat proof.   Here is the Battle of Waterloo having just finished the 12:30pm turn.


On the right, a token force of French light infantry has forced their way into the orchard of Hougoumont, but show no signs of going any further.  Foy’s and Bachelu’s divisions of II Corps are now committed and appear to be moving towards La Haye Sainte??

Pressure building on La Haye Sainte and on the Allied centre.  Galling fire from French skirmishers has caused some 300 casualties to the KGL and Rifles holding the farm this last turn.  Allied musketry in response was unlucky.  French I Corps artillery is now unlimbered and ready to fire at long range.

Fighting has been fiercest on the French right.  D’Erlon’s I Corps has been pushing hard, but a company of Dutch/Belgian skirmishers amazingly still hold Papelotte and have already seen off an attack by ten times their number.    Some of the Dutch battalions have broken but the Hanoverians are holding steady and Pack’s redcoats are in line behind the ridge waiting for their moment.   There have been charges and countercharges - Vivian and Vandaleur’s brigades have pushed back Jacqunot’s chasseurs, with losses on both sides.  Of the commanders, Perponcher and Vivian on the Allied side are hors de combat, and Bruno likewise.  Shock combat has proven deadly to chaps in lace coats.

French infantry attacks are proving fragile, as seems right, but the pressure on Wellington’s left is growing and it is a long time before the first Prussian columns appear on the map.

Any advice for Wellington or Napoleon?

Blessings to your die rolls!

MP+

Thursday, July 1, 2021

Thursday Napoleonics: SPI's BIG Waterloo Game, Wellington's Victory, to 12:15pm

For my June project, I am revisiting a game I first played in high school, against a much older and patient opponent, who methodically dismembered me, though if you’re reading this, Dave, you got some key rules wrong!

This is Wellington’s Victory, one of SPI’s monster games of the 1970s, and in my opinion there is no lovelier paper, hex and counter game, though the colour choices for the elevations seem quite arid for the rain-soaked spring landscape of Belgium.   Certainly the national colours for the various units are lovely.   Here is the complete setup for the complete Battle of Waterloo, which commences at 11:45 on the turn track.

Any Waterloo game has to assume that Napoleon knows that Grouchy will not come, otherwise it doesn’t make much sense.   So, in this solo game, my object as the French is to throw as much of my weight as possible against the Anglo-Dutch, though the drain of committed brigades on the Army Morale total (let it drop to zero and bad things happen) mean that I have to decide carefully how much of my force to commit at the outset.

Opening Moves:  French commit Bauduin’s brigade of Jerome Bonaparte’s 6/II Div.  These light infantry battalions will deploy as skirmishers and move against the Hougoumont orchard to keep the British honest.

On the right, me/Napoleon commits all 8 brigades of D’Erlon’s I Corps, as well as the Corps light cavalry division of Jacquinot.  The French plan is to threaten Wellington’s left without getting sucked into the Hougoumont trap while punching hard  against the Anglo-Dutch left.


British throw the 1/95th Rifles and a battalion of KGL lights as skirmishers into La Haye Sainte to reinforce the position.  Meanwhile a regiment of British Guards deploys as skirmishers and moves to reinforce Hougoumont, but no more reinforcements there for now.


D’Erlon’s Corps begins its advance.

French light infantry skirmishers begin to press into Hougoumont’s orchard at bayonet point, both sides taking some casualties.  I begin to feel the magnetic pull of  chateau.  Must Resist!

Close up of the action as the French press against the Belgians and Dutch holding Papelotte.  

Just after this photo was taken in the Allied fire phase, the French columns started coming under cannon fire and three battalions were disordered with casualties.  Meanwhile, Milhaud’s 3rd HvyCav Div is committed and moving up.  Allies responded by committing Vivian and Vanderleur’s two cavalry brigades on the A-D left flank.

More to follow as I play it!   Who knows if I’ll finish the game this calendar year!

Blessings to your die rolls, 

MP+

Saturday, December 26, 2020

Review of White Dog Games' The Mission

The Mission by White Dog Games is one of those rare games where you genuinely feel like you are learning as you play.   Designed by the highly prolific Ben Madison, The Mission is a solitaire game covering the whole of Christian history from the death of Jesus to the beginning of the First Crusades.   During that time your job is to spread the Christian gospel throughout the known world, establish the church, and then defend it from enemies within and without.   At games’ end, in the 12th century, your score will determine whether Christianity survives as a world religion or as a small cult practiced in some backwards region.

The Mission is a 4X game with emphasis on the first three Xs: Explore, Expand, Exploit.  The fourth X, Exterminate, is something you try to avoid.   At first things seem easy, as the original apostles move out from Jerusalem with the gospel of Jesus.   Soon they will die and their bones will become relics, which may help you financially later in the game, but before they pass away they have, hopefully, won a foothold in each of the six geographic tracks of the game board. 

In the first phase of the game, you move further out on each of these tracks, attempting to convert regions which in turn give you revenue to fund missionaries and bishops, build key infrastructure (hospitals, monasteries, and universities), and translate the bible into regional languages (Latin, Greek, Armenian, Coptic, and Syriac).  Before Constantine, the Roman Empire can hinder or tolerate you, depending on the policies of various Caesars.   After the Empire becomes Christian, you make hay while the sun shines, because it gets tougher later on when the Empire collapses.   

In the Dark Ages stage of the game, you now try to defend the five tracks against various hordes of people pushing towards the centre over 28 turns, each covering a varying number of decades.   After the fall of Rome, some of these encroaching peoples can be converted if you work at it (always convert the Saxons if you can), and others have to be resisted as best you can.  Good luck with North Africa, you’ll need it.    Later on, when you’ve hopefully got the hordes under control, the rise of Islam means that various jihads emanate from Jerusalem in the centre and try to conquer their way outwards. so you’re always fighting fires and trying to keep regions from being conquered and slipping into apostasy.   Translating the bible helps, as do various great theologians, but at the same time you’ll face challenges from local despots, schisms where various regions choose their own popes and stop talking to you or sending you money, and that perpetual annoyance, heretics.    As regions fall into heresy, you can either sweet talk them back into the orthodox faith or ruthlessly suppress them, though cruelty can work against you in the long run.

I’ve taught church history in my profession as a vicar so I thrive on this sort of thing, and don’t think there’s been a game on this subject so good since Jim Dunnigan’s venerable SPI title Empires of the Middle Ages, though the two games are only roughly comparable.  If your worldview is secular but you’re interested in the ancient or medieval histories, this game does a good job of showing you the transition from the first to the second.  

White Dog Games uses a print on demand business model.  The components are attractively designed and presented, and the counters are on thick laser cut cardboard.   You’ll need four mugs or containers to hold various sets of random chits, and the game board gets more crowded as the centuries proceed.  My first game went fairly well.  The rules and player aid charts are well laid out and the rules explain themselves as you go along.

I did reasonably well for Christianity in my first game, and look forward to trying it again.  Highly recommended.  The Mission gets the Mad Padre blessing.

MP+


At f

Tuesday, October 30, 2018

First Look at A Wing And A Prayer (Lock and Load Games)

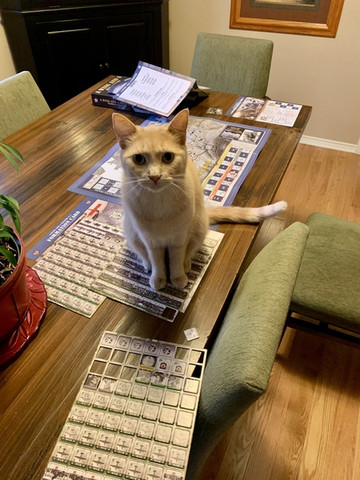
“OK, fellas, I’m Luigi, and I’m hear to give you a rousing welcome as we get ready to take off and go bomb the Krauts, so listen up, because Uncle Sam put a lot of dough into training you apes, and if you want to ever want to see Tonawanda again, you better fly a tight formation and stay alert.  It’s a good game, and the box is fun to sit in. OK, let’s go."

Thanks, Luigi, I’ll take it from here.   Readers of this blog will know that I have a fondness for the air war over Germany in World War Two, so A Wing and A Prayer: Bombing The Reich by Lock and Load Games isa  2016 release.   It’s a solitaire game, though it can be played with a second player as the German defenders, and is simple enough to play.    The US/solo player is given a squadron B17 bombers, and has to make it through a series of missions in campaigns of various lengths.    There is also an option to play a squadron of B24s.

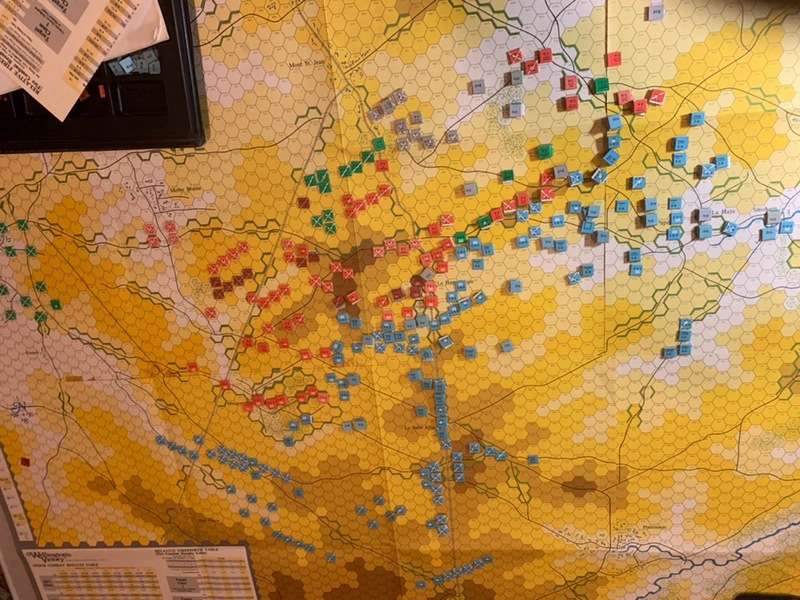
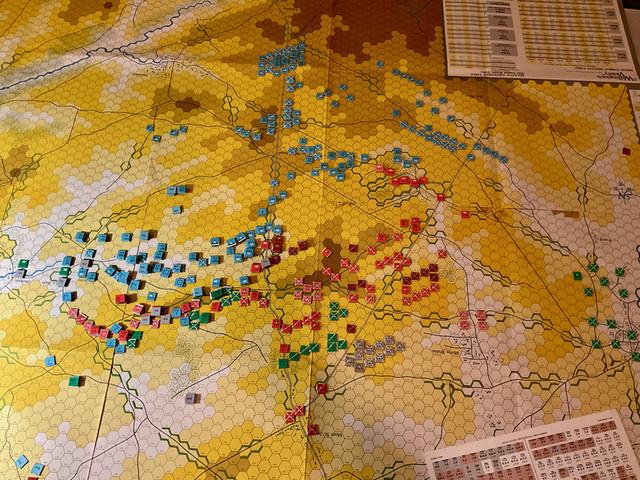
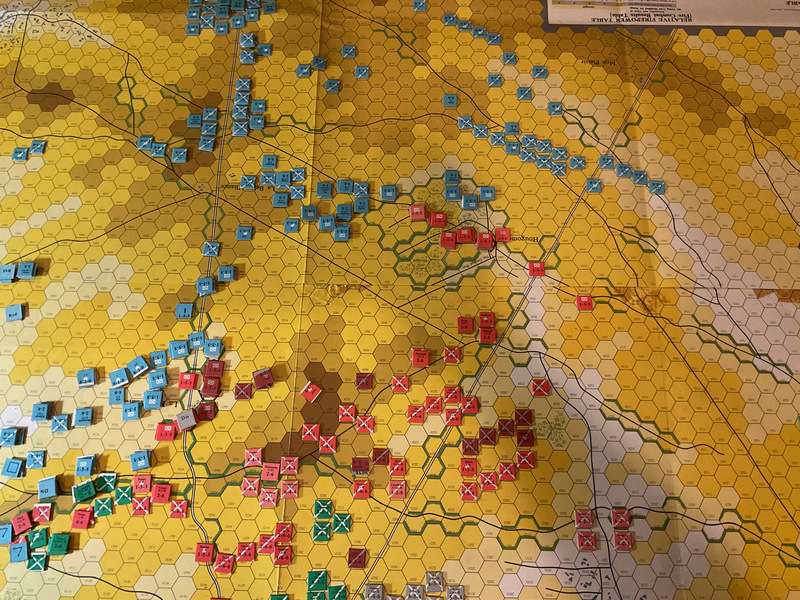
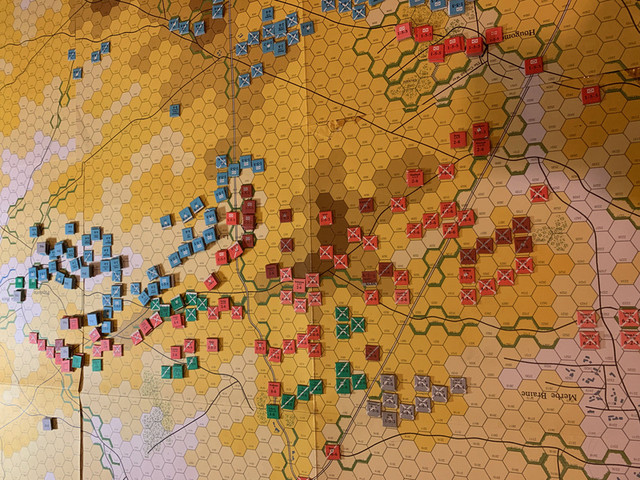
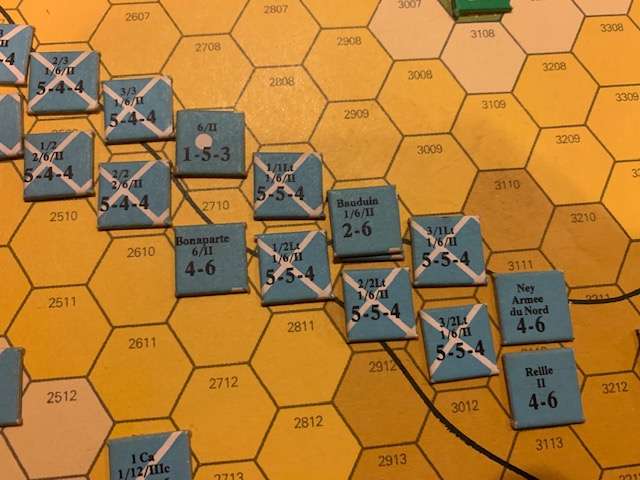
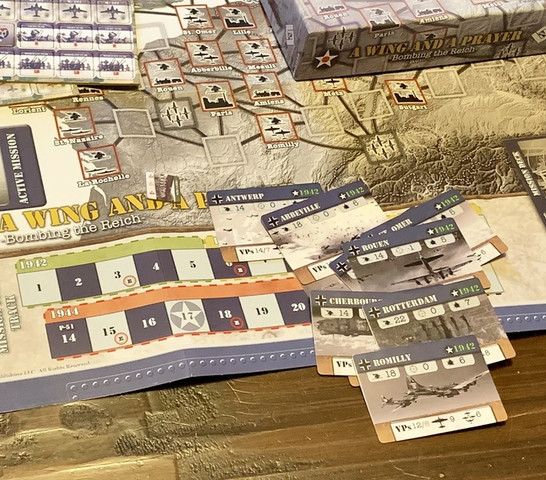
As you can see from the map, movement is point to point, with Occupied Europe divided into boxes containing various targets and flak hazards.   Each campaign has a variety of targets, each represented by one of the cards seen below.   The early war campaign features targets mostly in France and the Low Countries, and the later campaigns get much more hairy.   Each target is rated for its flak defence, difficulty to bomb, and the amount of bomb damage it requires to reduce and/or eliminate.   You get Victory Points by successfully bombing targets and shooting down enemy fighters while avoiding bomber losses.

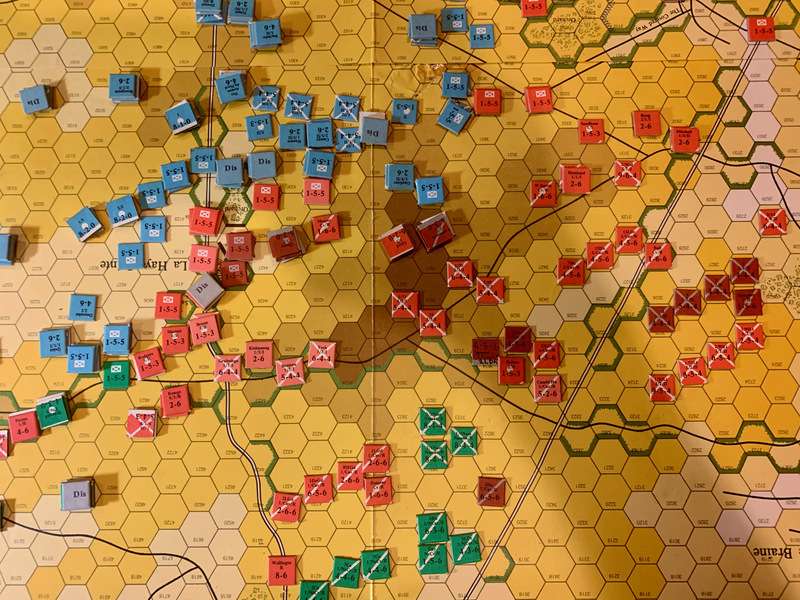
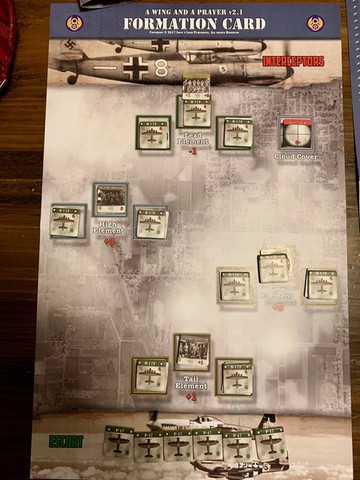
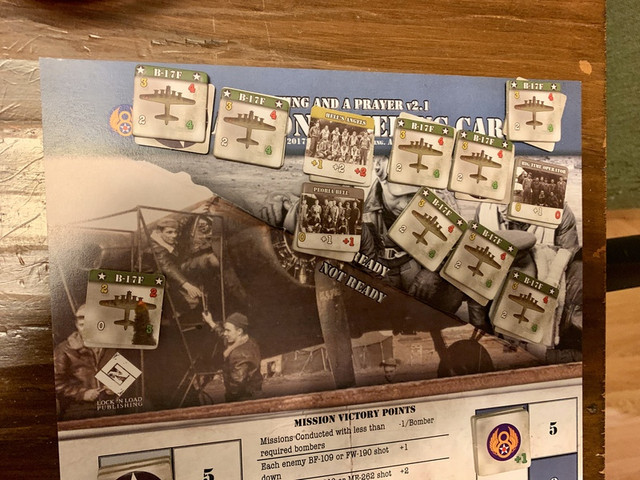
Once you get your target, then it’s time to get after it.   For the very first mission of the short 1942 campaign, I drew Lille as a target, which seemed quite easy, only three squares away from England.   I could employ all twelve of my B17Fs, and laid them out in the standard box formation of Lead, High, Low and Tail elements.  Unfortunately, I rolled badly for cloud cover, so my bomb aimers would have to squint through the clouds to see the target.  Luckily for me, I rolled well for escorts.  As you can see at the bottom of the formation card below, I have an escort of 6 P47 Thunderbolts, which have the range to accompany me all the way to the target.  


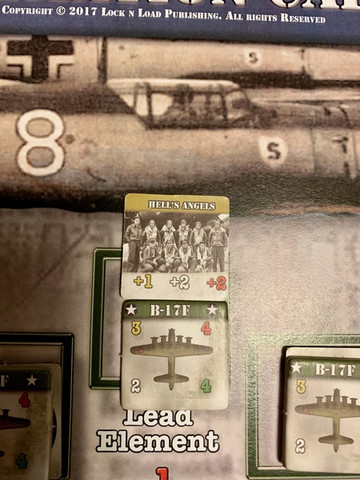
One of the features which gives the game its quality is varying bomber crew quality.   You start off by getting one crack crew, two good crews, and nine green crews, all rated for flying, air combat, and bomb accuracy.   I employed my crack crew, “Hells Angels”, to fly the lead plane in the formation.  If they make it to the target, the formation benefits from their accuracy bonus when bombing.

Once your squadron is in the air, there is an events table to check, possibly leading to enemy fighters, a mechanical malfunction in one of your bombers, or something positive such as a visit from Lady Luck.  The chances of an event increase the further out you are from your home base in England.  In my case, my lead bomber had to check for a mechanical problem just before the bombing run at Lille, but the crew of Hell’s Angels were fortunate.   Once over the target, there was flak to check for, using a combat results table which distributes the attack factors (in this case the flak) over the number of bombers.   Since my squadron was at its full strength of 12, the distribution was very favourable, so that each bomber had to roll “12” on two D6 for something bad to happen.   Everyone got through the flak in and out with no damage to any aircraft.

A similar process happens for the bombing.  Each plane has a bombing, which is multiplied on the same Combat Results Table with possible column shifts for the difficulty of the target, skill of the lead crew, etc.   With the bad clouds over Lille, I got nine chances to roll a 6 on 1D6, with each hit counting for so many damage factors against the target.   I only got 1 hit, which was not nearly enough to significantly damage the target.   Lille will have to wait for another day.

Once your squadron gets home, you can automatically land them, or using an optional rule, check to see who makes it carefully.  Damaged planes, and/or planes with green crews, have a worse chance of landing.  Using the advanced rule, one of my B17s suffered light damage on landing, and had to be placed in the Not Ready box.   For the squadron’s next mission, I will have to check to see of the plane can be repaired in time to go again.    Fewer bombers will increase the risk to the remainder if its not read


If there is a flaw with A Wing and A Prayer, I suppose it is repeated die rolling for all these steps.   To complete the raid on Lille, with flak going in and out, and the bombing, I had to roll a total of 1D6 X 57 which, along with checking multiple charts over three separate sheets, seems like a lot of work.   Also, the game is abstract enough that there doesn’t feel like there is much emotional investment in the fate of individual crews.   Perhaps that will change as I run multiple missions, but for now these boys seem rather expendable.   Perhaps that was how the bombers’ commanders really viewed them.

So, an agreeable enough game, which took me about an hour to play.     Hopefully we will revisit Generic Squadron soon for its next mission.

Blessings to your die rolls!

MP+


Thursday, September 20, 2018

Office War-game Thursday: Red Vengeance

I’m a fortunate chap in that I have my own office at work, with space to layout a small game to noodle away at during my lunch hour.   Somedays I’m too busy, but some days I get to push some cardboard and roll some dice.
Currently I’m playing an OOP Avalanche Press title, Red Vengeance, which is a little gem I found in an estate sale purchase I made this spring.
Red Vengeance is a simple, high-level (armies and corps) operational game focusing on the Eastern Front 1944-45, a “Bagration to Berlin” approach .  The designer is William Sariego, not exactly a household name in wargaming circles but he has a respectable CV posted at Boardgame Geek.  Sariego designed a Barbarossa game, Defiant Russia, using the same system, which is still in print.
Turn 1: June 1944.  Here’s the opening setup, with the Germans opposing the Russians on a solid line running from the Baltic to the Black Sea.  This is a mandatory setup, with the German infantry deploying first along an indicated line of hexes, then the Russians, then finally the German armour.    Armour units have a higher combat value and movement, and also get to move and attack again during an Exploitation Phase, along with certain other types of units such as Soviet Guards.  The logical setup for both sides is to mass the armour in the centre, either north of south of the Pripet Marshes.
The game mechanics require Soviet units to attack Axis units in adjacent ZOCs.  German units do not have to attack units in adjacent ZOCs in their turn.   This rule means that on Turn 1, all hell breaks loose as the Soviets attack every single hex on the German front line, guaranteeing a huge bloodletting for both sides. One Turn 1, the German defensive rolls were generally poorer than the attackers, so the Wehrmacht was roughly handled and it has been going badly ever since.  When my son and I tried the game, we found that the first turn went slowly as it was a LOT of die rolling, but the game picks up speed thereafter.
Three months later, here’s the situation at the end of Turn 3, August 1944.   Not good for the Germans.   Warsaw is threatened, and the Germans are practically broken into northern and southern pockets with little linking the two.
Army Group North is in falling back and is in serious trouble if Warsaw gets taken.   The Panzer reserve was thrown against the two Soviet Shock Armies at 0708 but that fight ended with no casualties on either side.  A reduced SS Corps grimly hangs on to Riga as a distraction, Combat in this game is very simple.  Each unit throws a number of device equal to its combat victory and each 6 causes a step loss on the opponent.  It’s that simple.   The number of dice can be slightly modified by terrain, or goosed upwards if leaders, air or naval support are present.   Provided that a stack takes as many hits as it has steps, it can lose one step and retreat a number of hexes equal to the remaining number of hits.  If the hits are one or more above the number of steps, the stack is eliminated.   Attackers and defenders shoot simultaneously.   

Meanwhile Army Group South is falling back on Bucharest, leaving that one poor Hungarian unit at 2313 to hold the mountains against the Red Horde.  On the southern flank there are two hexes with oil wells which are quite strategic.   For each one that the Axis hold, they get one additional armour step replacement.   It is possible to build up and even reconstitute lost units in this game, but there are never enough step replacements, generally just 4-6 per turn, and the armour step replacements dry up in 1945.  There are some reinforcement units that arrive, so the German strategy as I can see it is to counterattack where possible, fall back, trade land for time and hope that the reduced movement in the winter turns slows the Soviet juggernaut.  
Red Vengeance is a small game that is well suited for solitaire play.   There are a few chrome and optional rules to experiment with, but the joy of the game is how simply it plays.     It certainly keeps my mind diverted on those rare days when I have a free lunch hour.
I’ll check in again next Thursday and see whose flag is flying over Berlin.
Blessings to your die rolls!
MP

Saturday, September 23, 2017

Gaming By Tweet: A Social Media Experiment

Back in July I posted a review here about Target for Today, a solitaire game by Legion Wargames, about the US daylight bombing campaign in WW2.   For now it suits my gaming lifestyle, which has largely had to adapt itself to my primary role as my wife’s caregiver.

In the last few months, a social media project has taken on a life of its own as I have been “live tweeting” missions using my Twitter account (@madpadre1).   It started by putting my Twitter friends into crew positions on “Foxtrot”, our fictitious B17, and seeing if they would survive each mission.   A few folks (Tweeps) seem to quite enjoy the experience, which I have gradually thickened by adding GIFs and period photos to illustrate various phases of the mission.    The cumulative effect is a kind of storytelling by gaming, but it has also fuelled my desire to learn more about the US 8th Air Force in Britain and the daylight precision bombing campaign in general.

This particular project is set in the fall of 1942, following one of the first operational USAAF bombardment groups in England.  It is the same period depicted in the film Twelve OClock High, when the daylight campaign was still very experimental.

I have started collecting the various tweets for each mission into narratives using the online tool Storify.   You can see the results for Missions Five, Six, and Seven if you like.   Now the interesting thing abut the project is to see if Foxtrot can make it through the war, which is no small thing given the high casualty rates among Allied bomber crews.   Already we have had two crew members set home to the States with serious, war-ending wounds, and on our last mission the Bombardier, who had flown six missions already, was killed by a cannon shell from an ME 110.  

In this respect the project has started to incorporate elements of role-playing, and a strong emotional investment from some of the regular players in their fates.  There is also a lot of humour and joking, so it is not a terribly serious venture, but serious enough in its own way.

After our last mission there was some talk on Twitter about adapting the Target For Today game engine to the night campaign of Bomber Command.    Such a project could be done easily enough, but the game would have a different feel, more cat and mouse as opposed to the stoic endurance of waves of fighters by the B17s, which is more like a British square facing repeated attacks in Napoleonic or colonial warfare.   It might be done using some existing titles, such as GMT’s Nightfighter

There are also possibilities for using social media platforms such as Twitter in other games, such as putting people into various roles in a skirmish miniatures game and illustrating the action with photos to explain the action as the game goes along.  This would not be a true gaming experience online, such as tools like VASSAL allow, but rather a type of storytelling.

At any rate, Foxtrot is scheduled to fly more missions, and you are welcome to follow me on Twitter and even fly along.  I look forward to hearing about your own experiments with gaming via social media.

Blessings to your die rolls and watch your arcs!

MP+

Blog Archive

Followers