Showing posts with label Miniature Wargames - Battle Reports. Show all posts

Tuesday, January 3, 2023

Resisting (?) The Allure of Big Napoleonics

Hello and Happy New Year.

One of the last two games of 2022 for me was a game of Sharp Practice with my friend and podcast partner James at his place.   Besides the pleasure of spending time with an old friend, there was the thrill of playing with James’ 28mm kit, which he has been assiduously assembling and painting for the last two years along with our mutual friend Scott.   While Scott has been focusing on the French, James has done Bavarians, Russians, and is now working on Austrians and Prussians.

Here is the force of invading Bavarians that we assembled for this skirmish on the steppes of Russia.  The figures are a mix of metal (including Front Rank) and various plastics including HAT.

And the defending Russians, which I took.

It’s hard not to be tempted by how attractive these units are. James is a decent, workmanlike painter who has a knack for turning out figures that are wargaming standard, in large numbers, and in fairly short time.   When he wants to he can kick it up a notch, as with the Russian officer in the centre, on his prancing horse waving his expensive hat.  The overall effect is very impressive.

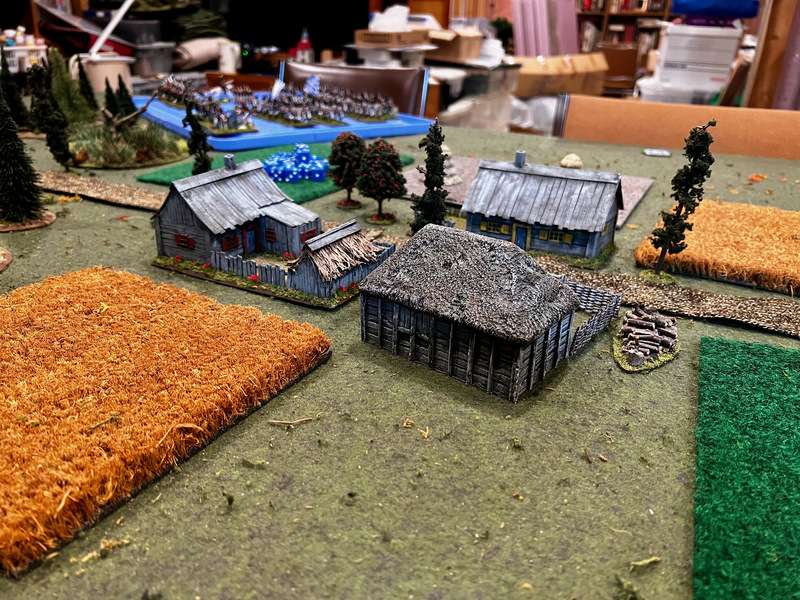
On the tabletop, these figures are paired with some fine scenery.   As with the figures, James aims for a wargaming standard with his scenics, but the overall effect, as with these Russian houses, is quite pleasant.   


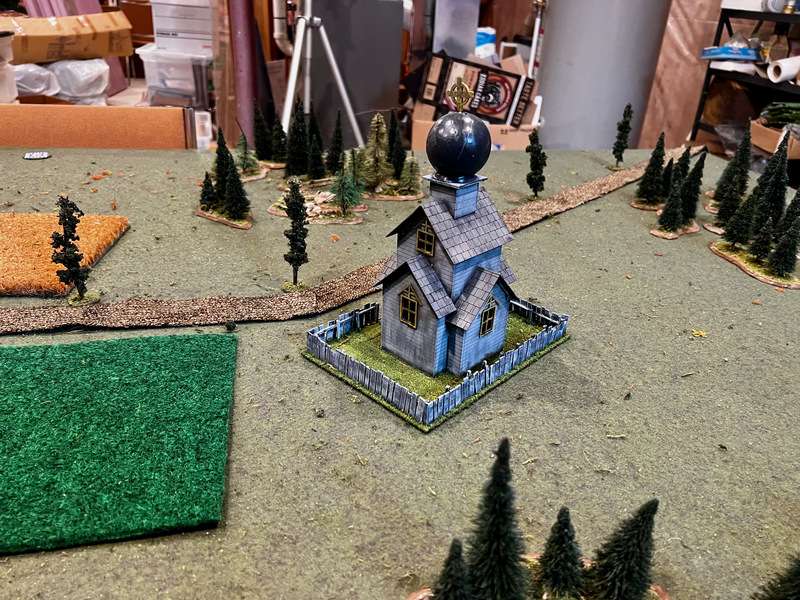
Likewise this MDF church (Our Lady of Cabbages) is nicely presented with a scratch built fence, and the unfortunate billiard ball dome will be replaced by a nice 3D printed spire for future battles.

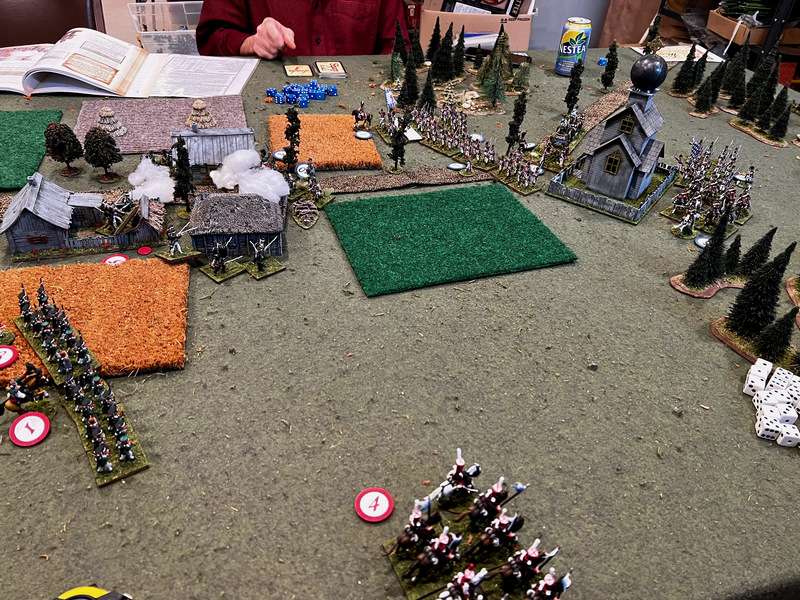
Here’s one shot of the battle, which went badly for me.   We advanced from the long ends of the table, and spilt the village, where my light infantry was slowly evicted by the better fire of the Bavarian rifle-armed jaegers.   I foolishly led with my weakest infantry formation (bottom left) which were ripped apart by James’ grenadiers.   James has an intuitive grasp of Sharp Practice and used the order cards to best effect, seizing several extra moves/volleys for his grenadiers.  The only real success I had was a cavalry victory as our light horse basically cancelled each other’s out of the game.

As readers of this blog now, I made the decision a decade ago to do Napoleonics in 6mm and I have not regretted that decision.  However, all this is building up to the confession that this period in 25/28mm is hopelessly infectious.  The figures are just so much more dramatic in the larger scales, which reward painting and uniform details in ways that 6mm can’t.  It’s like comparing an impressionist painting (6mm) with a romantic but realist painting such as Lady Butler (28mm).  The big scale wins in the close ups.    That being said, I am firmly convinced that 28mm for Napoleonics works best with larger skirmish games.    For battles of a brigade on up, I’ll take 6mm any day.   

But, I still feel the need to paint a force in 28mm!    So here’s the likely solution.   Piano Wargames, a very clever fellow named Lucas, has been labouring away for some years now on the troops of minor German states, and has just wrapped up a very successful Kickstarter focusing on the Tyrolean Revolt, which will feature rebels, Bavarians, and Austrians.   The KS offers .STL files as well as metal figures, and I’ve decided that it will be a good opportunity to use my limited 3D printing prowess to do some of these rarer figures for James (and I get to play with them from time to time, so win win).  

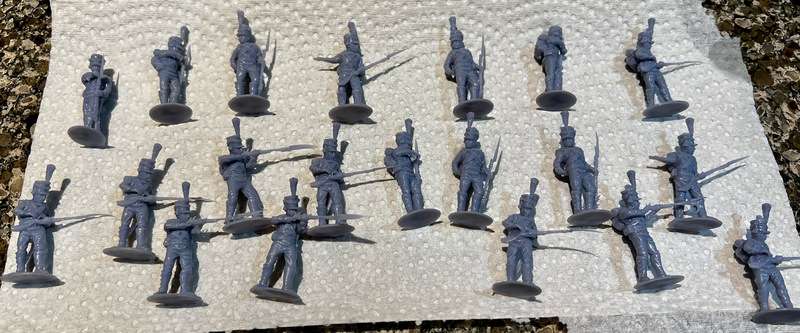
Since my experience with printing 28mm figures is minor, I thought I’d practice by ordering some of Lucas’ files already on his webstore, in this case, six light infantry figures from the Duchy of Wurttemberg, which would themselves be the basis of a nice little Sharp Practice force, since they can fight as French against Russians or Austrians until, as invariably happened, they turn coats and fight against the French towards the end of the Napoleonic period.

I had a devil of a time getting the pre-supported files to print, for some reason known only to my Elegoo Mars2 printer, but when I decided to print the unsupported figures, I was fairly successful, though there are some minor flaws in some prints.   Still, I now have enough to print and to see if 28mm is as seductive as it appears to be.  Wish me luck.

Thursday, December 29, 2022

Carnage In Middle Earth, an End of the Year Battle Report

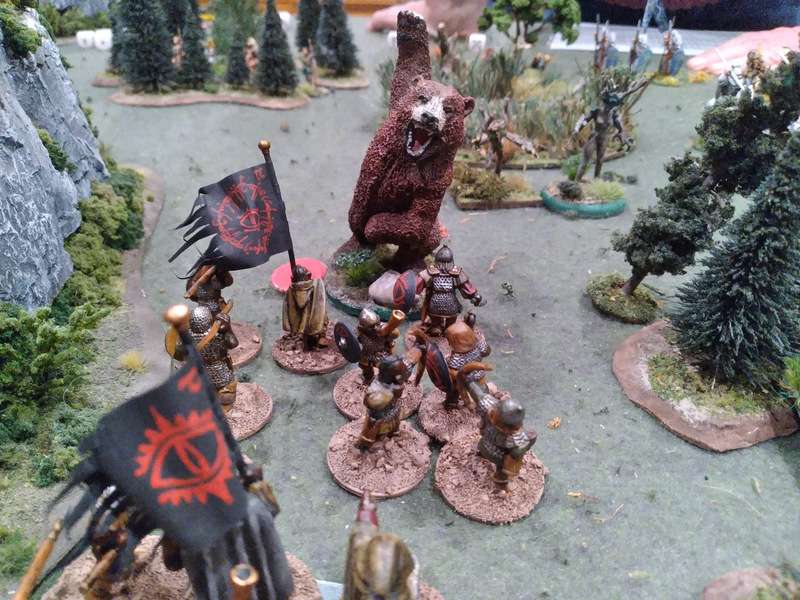
Sylvan Angodnil sat uneasily on his spotless white charger (and it was spotless because be and his whole troop spent long hours grooming them when off duty) watching the dark hosts approach.    Aglardor, their troop captain, laughed like silvery bells in a high tower, which Sylvan found annoyingly pretentious, and said coldly “The more of them, the more glory for us, am I right, lads?”   The laughter of the troopers sounded a little forced and just slightly nervous, because there were a LOT of them.   Sylvan counted four armoured trolls on the right flank, anchoring at least six bands of orcs and goblins marching towards them, and how many more on the left, or behind the tall trees which screened their centre.

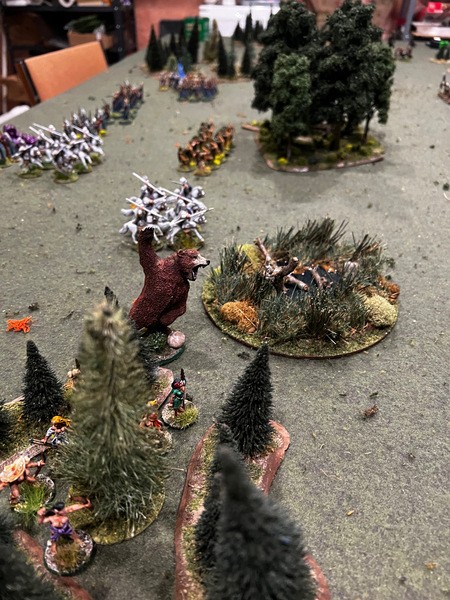
The elven host was divided into two wings, that of King Cuildil on the left, and the right wing under the command of The Lady.    A band of her nymph scouts had passed by earlier, taking up position in the woods on the right, only pausing to pet the horses of the Evenstar Hussars.   “Pretty ponies!”  they giggled, before flitting off into the foliage.  Sylvan thought them underdressed and insubstantial.   And then there was that damned giant bear, Bjork or Bjorn or something, one of the Lady’s pets, and his smell got the horses whinnying every time he ambled by, muttering loudly about how many goblins he would eat before the day was done.    Sylvan wished he’d also wander off into the woods, as if you could tell which were woods and which were the tree spirits ambling about, more of The Lady’s friends.

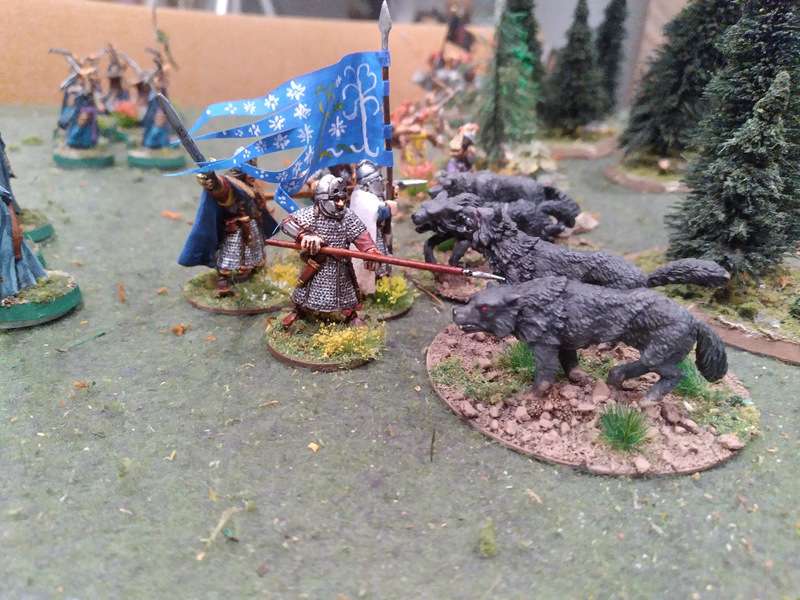
Now the horns were sounding on the left, as Cuidil began shifting some of his reserves to that wing.   Sylvan could hear the howls of wolves, rather a lot of them.    That also made the horses nervous.    Next, a company of light archers, their gray green cloaks flowing, trotted in front of the troop and took up positions.   Felanor, the trooper on Sylvan’s left, looked at them critically.    “Oh, that they were not in front of us, to steal our glory!”   Sylvan scowled and thought, “What a birk.   As far as I’m concerned, they can stand in front of us for the whole battle."

Soon battle was joined across the whole front.   Elven horns, the deep voices of the treefolk, the brazen trumpets of the orc hosts, and the howls of countless wolves came from the left.   A messenger from the king came and told Aglardor to be ready as the reserve.   Aglador acknowledged curtly, watching enviously as Lindor’s troop of Hussars trotted towards the right wing, while ahead of them Bjork the Bear raged forward, bellowing in his uncouth and monosyllabic tongue.  “BEAR SMASH!” , Sylvan thought he was shouting.   

Both companies of elven archers were now continuously drawing and loosing, their bowstrings emitting a continuous thrumming sound, and as the battle lines shifted, Sylvan could see black orc and goblin bodies piling up before them like windblown leaves.  “Good," he thought, "keep it up”.

With silver horns braying, Lindor’s troop of horse smashed into a goblin regiment and scattered them.  “See them ride like the furies!” Aglardor cried to his men.  “Oh, that we were with them!”  “Oh that you’d shut up” thought Sylvan.

From their reserve position, Sylvan could see that the pressure on their right wing was easing.   There were fewer orc and goblin trumpets sounding, and through a break in the trees he thought he saw goblin bodies flying into the air as the bear ripped their ranks apart.

On the left, though, things were still dire.  A regiment of armoured foot trotted left to seal a gap on the flank, struggling to hold off a surge of goblin wolf riders.   A bloodied nymph came running past them, clearly done with fighting.  “Those wolves were REALLY MEAN!” she complained to no one in particular.   More wolves were surging against the King’s bodyguard.

“See how the king staggers!”  cried a trooper, and in horror, they saw Cuildil wander aimlessly, clearly under some sort of enchantment, while the few of his guard left standing struggled to protect him.   Aglador drew his long and expensive sword.  “Trumpeter, sound the advance!  We ride to the king’s rescue”.     But, scarcely did the troop begin to move before cries of triumph began to rise through the elven ranks.   “They flee!  The day is ours!"

Sure enough, the dark hosts, now much reduced in number, were streaming to safety, while the Nazgul leading them shook his fist at his fleeing minions before turning about and himself galloping away.   Elves ran to steady the king, who, recovered, beamed in triumph and summoned a minstrel for a first draft of the victory lay.

Aglador sheathed his sword in disgust.  “Never you mind, sir”, said Sylvan consolingly, “I’m sure we’ll get to charge one of these days.”  

“Shut up, and go wash my horse.”  

So ended another big game of Dragon Rampant fought just before the end of the year in James’ Basement of Quondam Rabbits.   As is our tradition, we try to get together at least annually for a big Lord of the Rings themed game, using our preferred rules, Dragon Rampant.  Almost all the figures in these photos are from James’ exquisite collection of old school figures from Vendel (now Thistle and Rose), though I brought a mix of my own, some GW, some Foundry.   We put about 100 points aside on the table.  I don’t mind saying that I was quite pessimistic at first, as I didn’t see any clear way of stopping James’ hordes, but my archers did yeoman’s work, and James had some bad dice luck with the morale roles in response to their volleys, so the archers bought me the time I needed to counter attack and gradually break James’ army morale.  Some of my reserves, like poor Aglador’s riders, never got into battle.

It was a good lesson for me as a player in keeping my nerve, as I’d lost the first (Napoleonic) game we played that day and I was feeling a little pessimistic.  As is our custom, the winner of our big Dragon Rampant game gets to keep Smoochy, the plush dragon, so he will remain with me until our next match up.

James has already put some of these photos up on the Wargaming in Middle Earth Facebook page, here.  I hope everyone else’s gaming year is ending on a similar high note.

Cheers and blessings to your dice rolls.

MP+

Sunday, May 22, 2022

Further Down the DBA Rabbit Hole: Chariot-era Battle With Howard


I’m picking up the ancients gaming theme of my last post today, which I finished by saying that I’ve been enjoying my discovery of small-scale ancients and learning to play DBA (De Bellis Antiquitatis), Phil Barker's small battles rules from WRG that have been around longer than many games today have been alive.  I’ve been aware of DBA for years, and was familiar with the usual potted descriptions - “like chess, very stylized, ok if you like fast games, it’s about how many sixes you can rol, etcl”.  I wasn’t prepared for just how entertaining it could be.

Charles, one of the regulars at the Barrie group, has played it for years and was kind enough to introduce me to it, using several of his well-used and much loved armies.  I found that I enjoyed it’s almost zen-like simplicity.  With just twelve units, a few pages of simple yet subtle rules, and sudden death if I lose four units, DBA provides interesting tactical challenges and a clear cut result in an hour.  It’s also a fairly simply gateway into what is, for me, complicated and unfamiliar world of ancients gaming.   Pick a period, pick an army (or borrow one, I’ve found that veteran DBA players have lots of armies and are very generous with them), learn the basic troop types, paint between 30 to 40 figures, and you have an army!

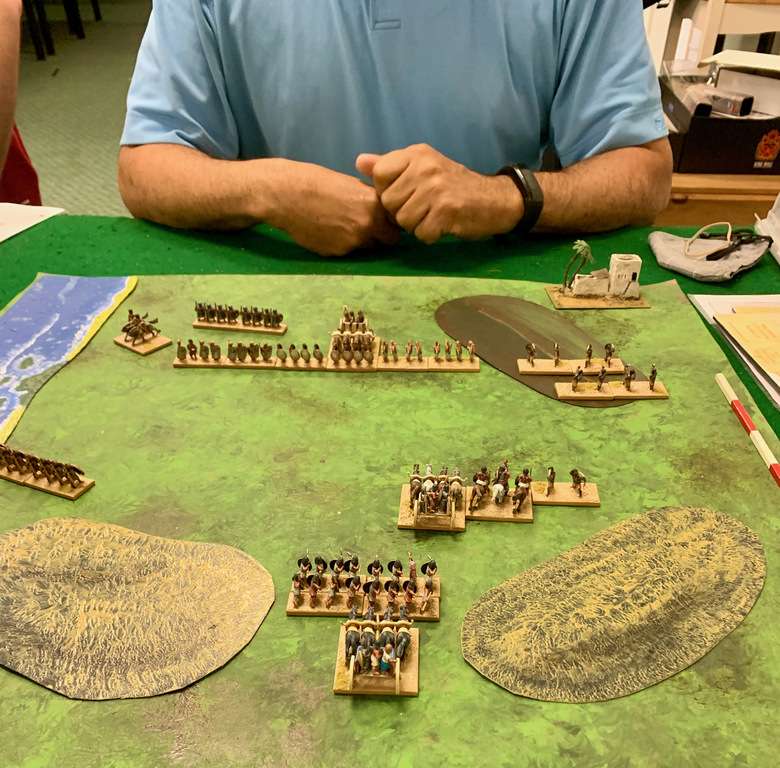
Last Thursday I was fortunate enough to play a game with an experienced player, Howard Tulloch, who has organized DBA tournaments in the southern Ontario area for years.  Knowing that I am interested in the biblical period, he brought two chariot-era armies, Cypriot-Phoenician (1/35) and Kushite Egyptian (1/46), both beautifully painted.    I took the Phoenicans, since I have an earlier Sea Peoples army on order from Essex and wanted to see how the Phoenicians as descendants of the Sea Peoples handled.  

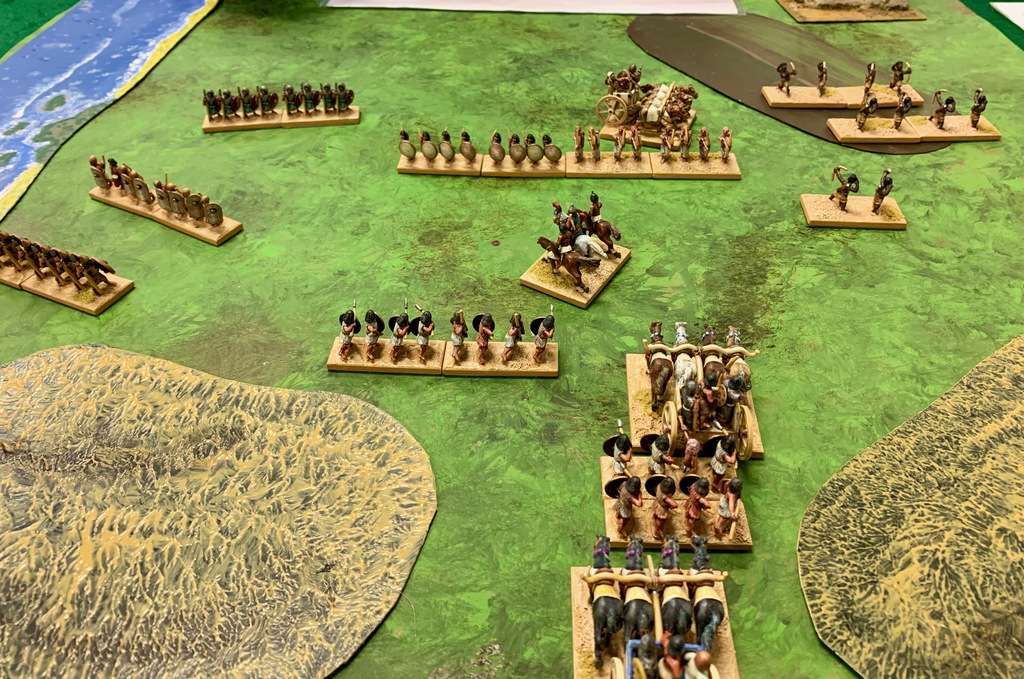
I had a bad run of luck with the terrain setup.   Howard placed two dunes in my deployment area, which along with the sea coast really hemmed me in before I could get out the gate.   The only saving grace for me was that, as a Littoral army, the Phoenicians can deploy up to three elements anywhere along the water board edge.  I chose to place my two best Auxiliary infantry units in the middle of the table on the left edge, as a bit of a check on the Egyptians to keep them from swarming me as I emerged from between the two dunes.

Initial rounds saw my getting a lucky victory over the Egyptian light cavalry, but then Howard’s royal archers shot my own cavalry off their horses, tying the score at 1 to 1.    Our psiloi (light infantry) faced off on the hill to the right, but never actually exchanged blows, while Howard checked my Aux infantry with two stands of his own.    One of the things I’ve learned about DBA thus far is that when the odds are basically even, as they were on our flanks, battles can easily go either way and leave one in the hole on the lost unit count.  Better to seek a win where you can mass more units against you opponent and thus stack the odds in you favour.

Which was exactly what happened.  In the centre left, you can see two units from each side facing in a kind of “Z” shape, with each side having a unit on the other’s flanks, known as “closing the door” in DBA terms.    Once a unit is flanked, if it loses a combat and has to retreat, it is destroyed.   Thus, whoever would win this fight was almost certain to win the game, and it stayed locked that way for FOUR TURNS, with both of us rolling the same numbers to tie, forcing the battle into extra rounds.  Finally I was able to get my chariots into Howard’s archers, and with two lucky die rolls I managed a 4-1 victory, though it could easily have gone either way.

Moved up in the painting queue as a result of these games is a clutch of 15mm figures, which when finished should allow me to field an Early Hebrew or Syro-Canaanite army for DBA.  I was originally intending these figures for an ADLG army, but I think I’ll go the DBA route to get armies on the table sooner, which makes sense, as there are DBA players to hand and no one in our group plays ADLG.

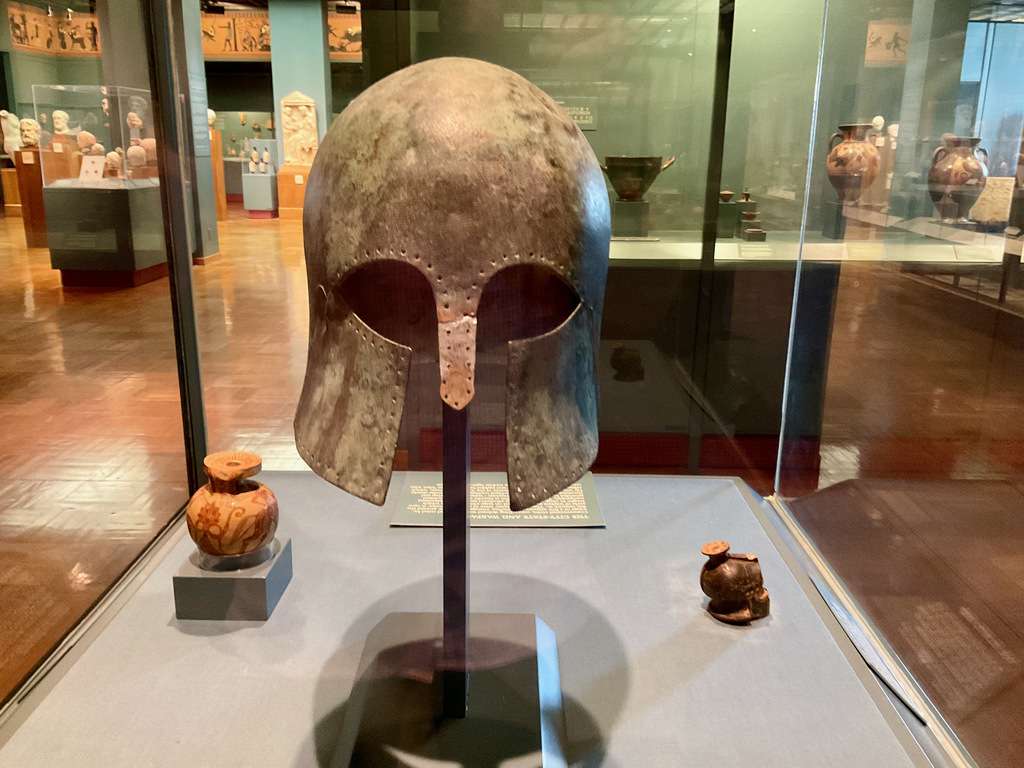
For extra ancients inspiration, Joy and I visited the Royal Ontario Museum yesterday, where we had the classics section to ourselves for a brief while before the parents and kids arrived.  Here’s a lovely Corinthian style helmet for you to admire, supposedly found at Marathon and dating to about 500 BC, though there is some uncertainty about its provenance .

\

Blessings to your die rolls!

MP

Wednesday, August 11, 2021

Trouble On The Border: A Sharpe Practice Skirmish

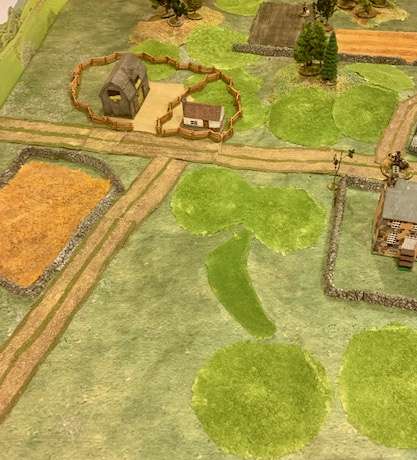
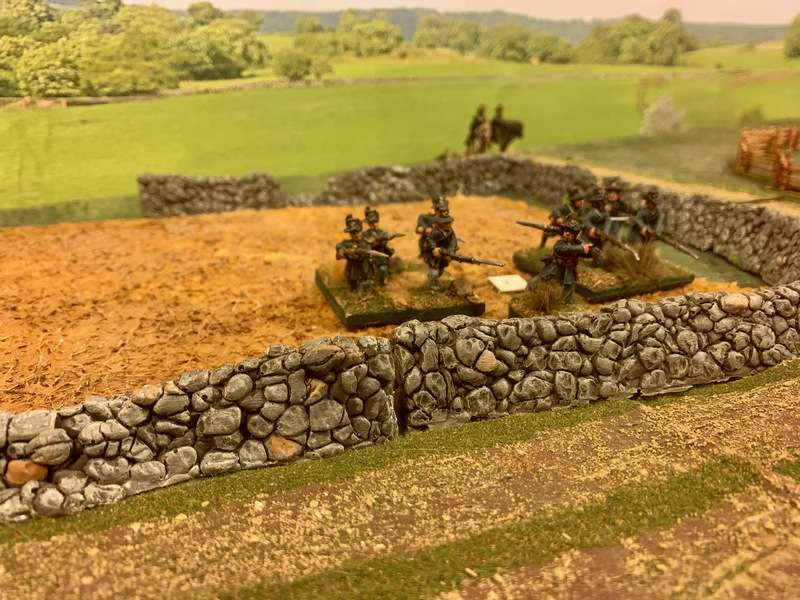
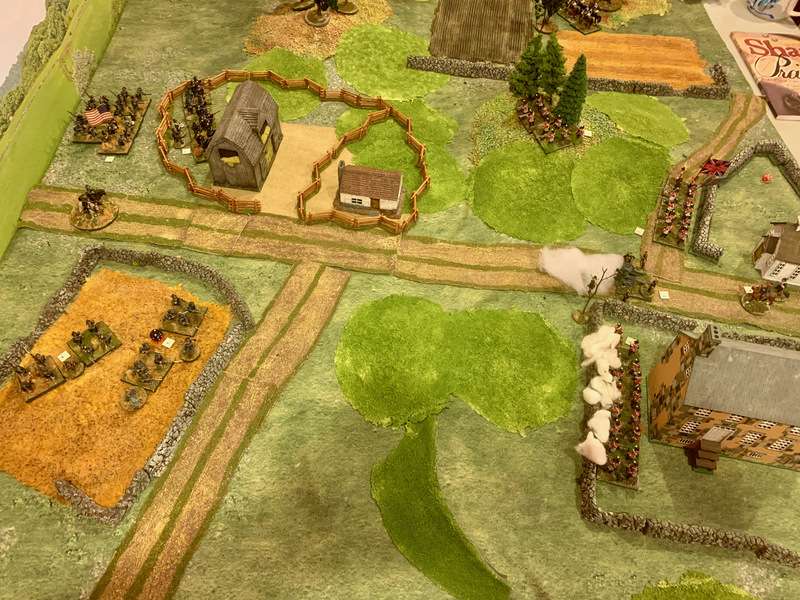
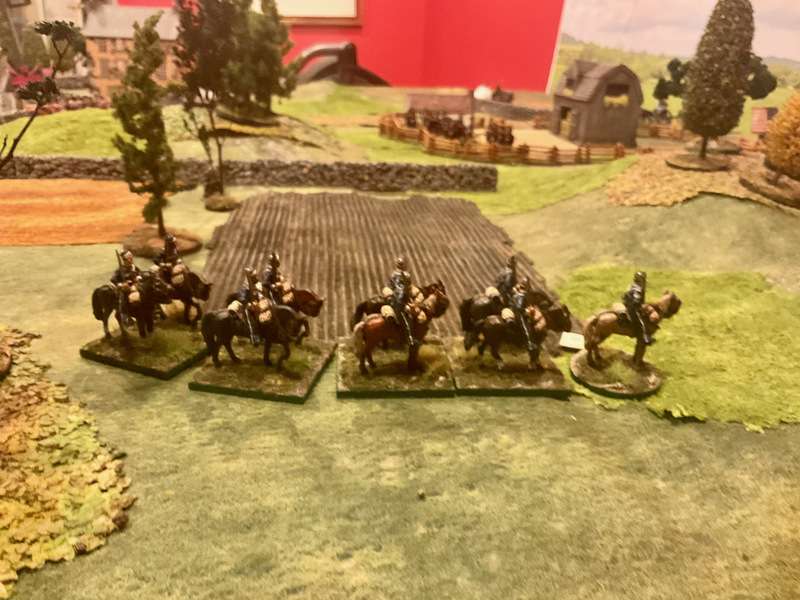
Having laid out this table to see what my Barrage Miniatures Kickstarter modular terrain looked like, it seemed a shame not to use it, and the obvious candidates were the Perry Brothers figures I’ve just finished for my alt-ACW project.  So, inspired by the battles of Ross McFarlane’s Red on Blue battles (Oberhilse … boo!), I decided to lay out a generic solo fight as a force of Republican troops crossed the border to test the Dominion’s defences and try to seize a key crossroads.

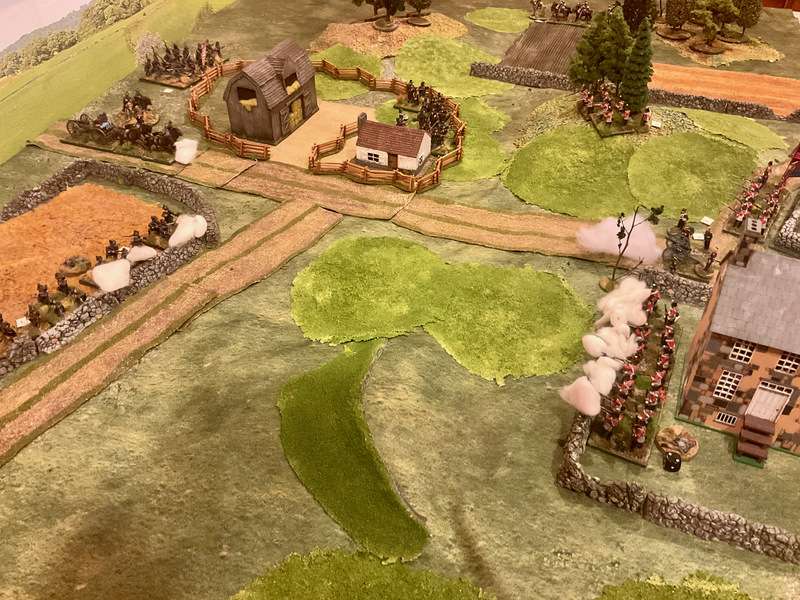
I don’t have photos to illustrate the entire action, but hopefully can convey a sense of what happened.  Here’s the table.  I allowed the Red forces to set up first.  The Blue forces enter from a deployment point on their table edge.


First Republican skirmishers appear on the table, led by Sergeant Quigley.   I thought it would be a nice aesthetic to use my ACW Iron Brigade figures in their Hardee hats for this skirmish.  The Republican jump off point is in the background.

Overview of the table showing the Dominion’s positions.  The Republican infantry, in slightly larger numbers, are now all deployed on the table.   The Dominion forces, all militia infantry, are supported by a Royal Artillery gun with a Regular crew.

The largest group of militia squander their first volley on the skirmishers facing them, to little effect.

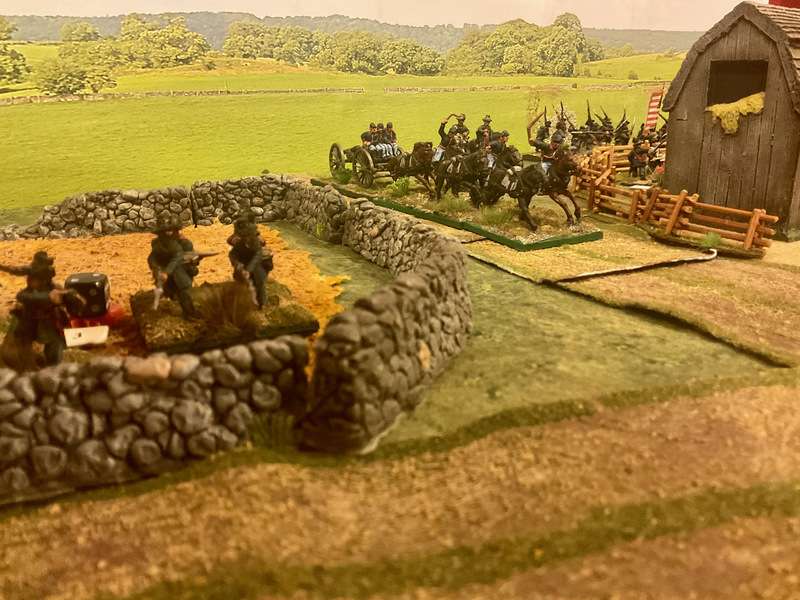
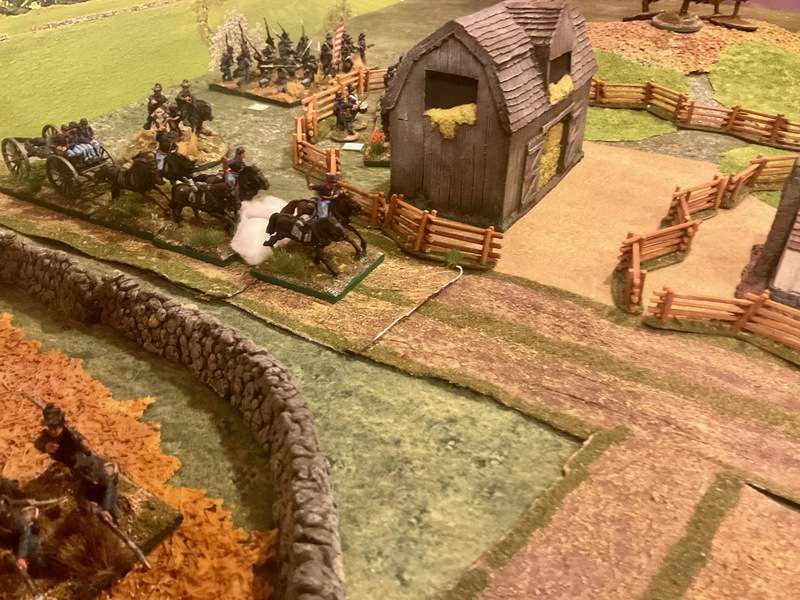
Republican gun and limber enter the table.

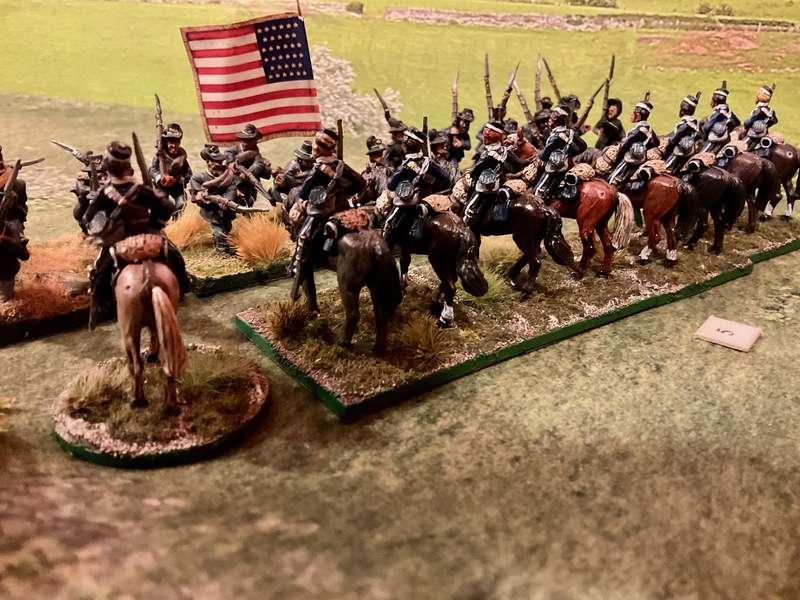
A group of Dominion militia cavalry, led by Sergeant Boscombe, probes the right flank.   Since the Republican cavalry is otherwise engaged and not at this fight, these eight riders will tie up the largest group of enemy foot for most of the game.


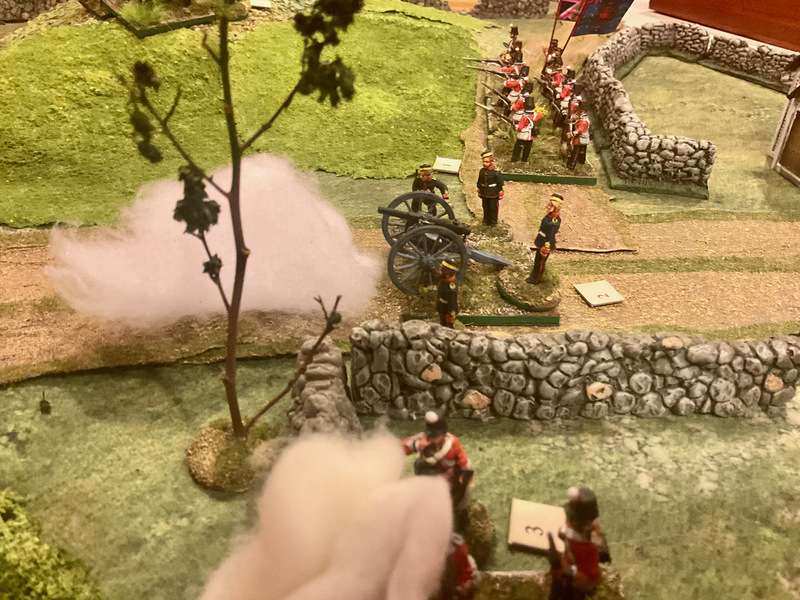
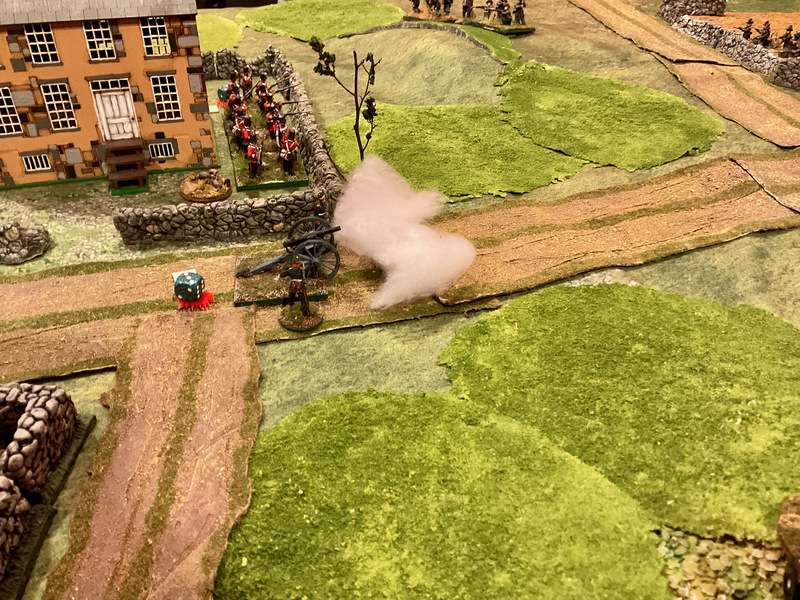
The Royal Artillery opens up on the advancing enemy limber team.

As the Sharpe Practice rules are vague on hits to limbered artillery, I rule that the two kills apply to the lead horses.  I add 2 extra actions per casualty to clear the dead horses from the traces and unlimber the gun - it will thus take four extra actions to bring the Republican gun into action.

“Well done, lads!”  says Bombardier Boyle.  “Now load up and ‘it ‘em again!”  Capt. Travers, commanding the militia colour party, holds in reserve on the right of the artillery.


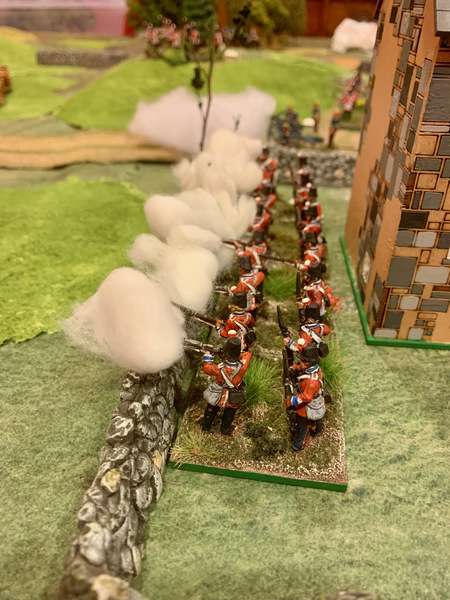
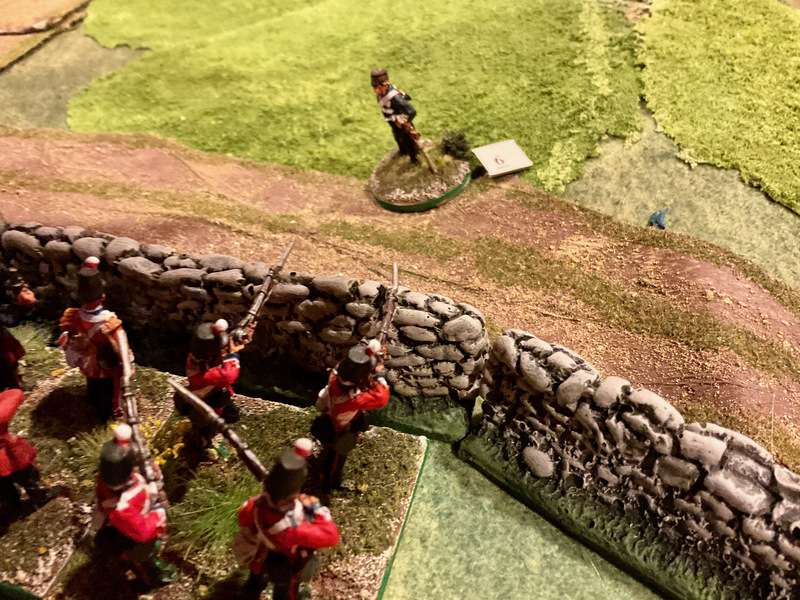
A large group of Republican infantry now unleash a devastating volley on the militia group holding a small copse on a hill above them.   They kill Cpl. Hodges and four of his redcoats, leaving the remaining four to retreat with excess shock.  

The victorious Republican troops advance, only to be blasted with canister by Bdr. Boyle’s gun crew.  They fall back to rally, their lieutenant temporarily knocked unconscious.

Sgt. Boscombe decides that a short and glorious life is a soldier’s destiny. He uses a pile of command tokens to spur his group in a charge with extra movement, but the Republican troops are regulars and form line, with time to present and fire a first volley, which is taken into account in their extra melee dice.  The result is that the Canadian riders are all killed save for one and the wounded Sgt. Boscombe, but the bluecoats are badly hit with casualties and shock and fall back to lick their wounds.  

The Republican cannon now makes its presence felt.   With the Queen’s gunners have chosen to shoot canister at the closest enemy foot rather than the opposing gun, and thus take a bad hit, killing two of the crew.  Boyle and the surviving gunner now take part in an unequal artillery duel, but the next hit kills the remaining gunner and Bdr. Boyle retreats off the table with shock, one arm hanging uselessly at his side.  With his Militia slowly being picked off by skirmishers and no way to reply to the enemy cannon, Capt. Travers orders four of his men to haul the gun off the table, and concedes the fight.  

Here’s a funny thing about how characters can sometimes come to life.  To give the Dominion defenders a bit of an offset from their militia status, I gave them a Level Four Big Man officer, one of my newly painted bossy Victorians.   Incredibly, his chit only came up once, allowing him to rally the four surviving men of Cpl.Hodge’s group as they fled down their side of the hill.  After that, he did nothing, except once, when I incredibly rolled two “1”s for his movement to go somewhere and be useful.  I thus concluded that he was hopelessly drunk, and was staggering around the battlefield, being a positive nuisance and drawling nonsense in an upper class English accent.  Thus, Maj. Clive Whicker-Basquet, an incompetent but well-connected sot, is born, and will doubtless feature again in other battles.

“Have a care and hold your fire, lads, that … gentleman is in front of you!"

A pleasant bit of solitaire gaming and lovely to get some newly painted troops on the table with my new terrain.  The Republican side won on points, and while the defender’s force morale had not collapsed, clearly it was in their best interest to disengage and fight another day.   In a campaign game, I wouldn’t have thrown the cavalry group away, but I was curious to see how they fared against infantry.   It would have been smarter to keep them as a force in being, checking or at least slowing an advance by three times their number.

Wednesday, May 12, 2021

Battle of Seven Pines (ACW): Gaming the Battle, Piece by Piece (2)

 Towards the end of April I described here my intention to try and game the American Civil War battle of Seven Pines (1862), the battle fought within earshot of Richmond and which marked the high water mark of US General George McClellan’s advance up the Peninsula.    I’ve now fought the first phase of the battle, the initial attack by D.H. Hill’s division, and will offer a brief play by play for those interested in battle narratives, and will end with some thoughts on how this scenario could be better tweaked as the first in a series of linked engagements.

The rules used are Dave Brown’s Pickett’s Charge (Reisswitz Press/Too Fat Lardies).  Having just finished a fight using Dave’s General d’Armee Napoleonic rules, I found it relatively easy to try his ACW rules for the second time, as the mechanics are quite similar.

The scenario assumes that the Union picket line has already been driven in, as happened historically.  The fight begins with Garland’s brigade running into the furthest formed unit, the 103rd Pennsylvania of Wessel’s brigade of Casey’s Division.    Why the green 103rd had been pushed so far forward, on the far side of the Union’s abatis defences, is a bit of a mystery, but they do their job, stopping the initial charge of two rebel regiments. 
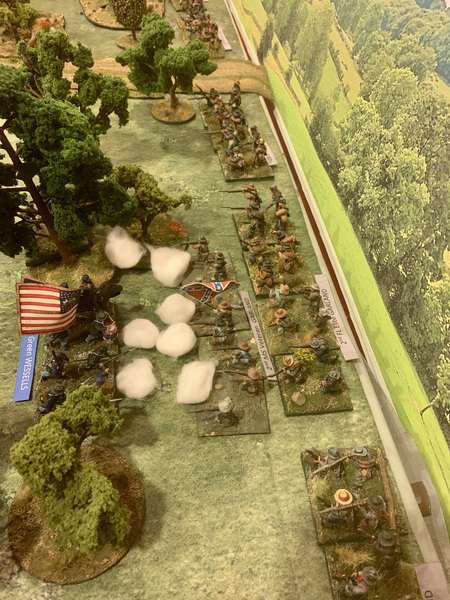
1st NY Light Battery, stationed between Palmer’s and Naglee’s brigade, has a line of sight on one of Garland’s regiments and draws first blood for the Union.  There were two other batteries stationed further back in Casey’s main line, and the accounts say that they also fired on the advancing rebels, but given the rules and the lack of any discernible elevation on this part of the battlefield, I didn’t see how that could be simulated.
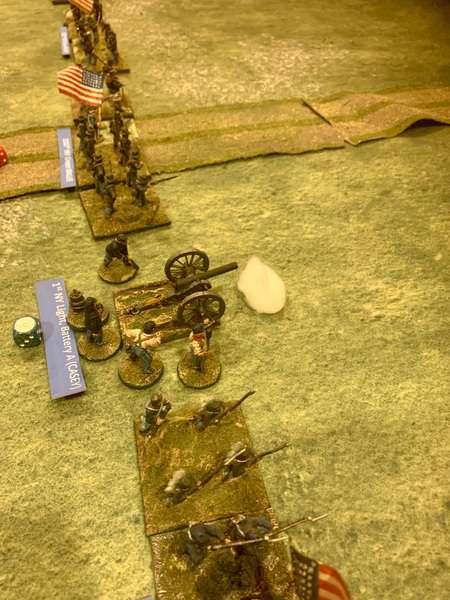
 Sheer numbers make themselves felt.  On Turn 2 the rebels win the initiative and Garland’s 23rd NC flank charges the green Pennsylvanians.
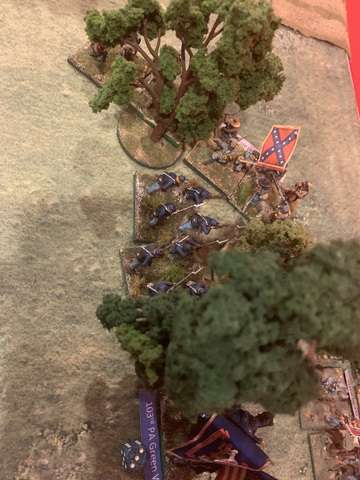
The 103rd are Whipped and fall back 18”, crossing the abatis like white tailed deer.   I couldn’t resist giving them a mounted commander, as the regimental history reports that their OC, a Major Gazzam, found his horse a problem in the dense woods:  “In retiring under the heavy fire of the enemy in the woods, Maj Gazzam was swept from his horse by a limb of a tree, and in the fall his head striking a log, was momentarily stunned.  He remounted almost instantly and succeeded in reaching the Williamsburg Road, to find the Regiment scattered into fragments and the batteries of Casey’s artillery shelling the woods from which it had fled (16-17)"
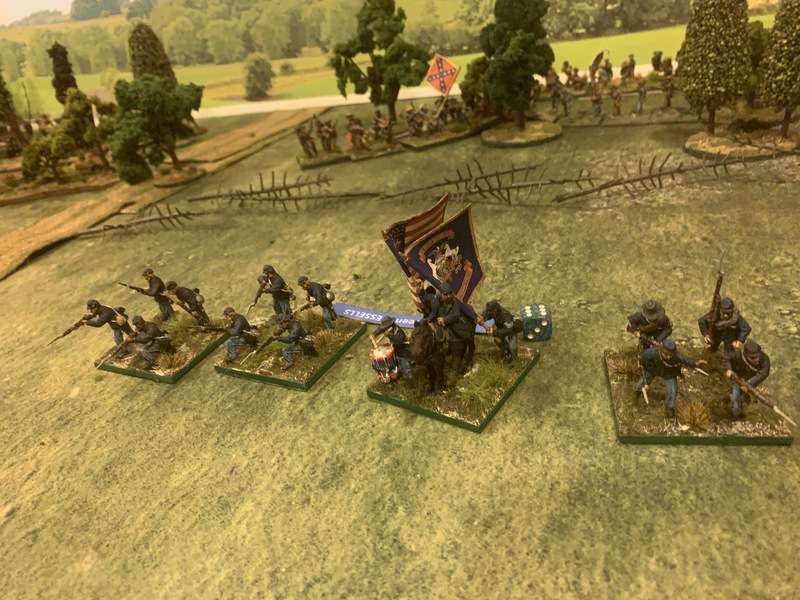
Once the rebels emerge from the woods, the tactical problem for the Union seems to be:  How best to employ the four green infantry regiments and one battery stationed in advance of the redoubt and fortified positions?   One solution would simply be to concede this part of the battle altogether and fall back behind the redoubt.   However, Casey had no idea how many rebels he was facing or how much time he had to buy.   It’s also quite possible that the sight of their peers falling back with rebels on their heels might have panicked his green division.    So it seems like the best thing for the Union to do here is to use the troops on the table to try and blunt the rebel advance, inflict as many casualties as possible, and buy time for the rest of the army to organizes and reinforce (see the comments on victory conditions below).

The 104th PA of Naglee’s brigade are advanced on the right to cover the withdrawal of the 103rd PA.  The rest of the line braces as Garland’s brigade emerges from the woods.
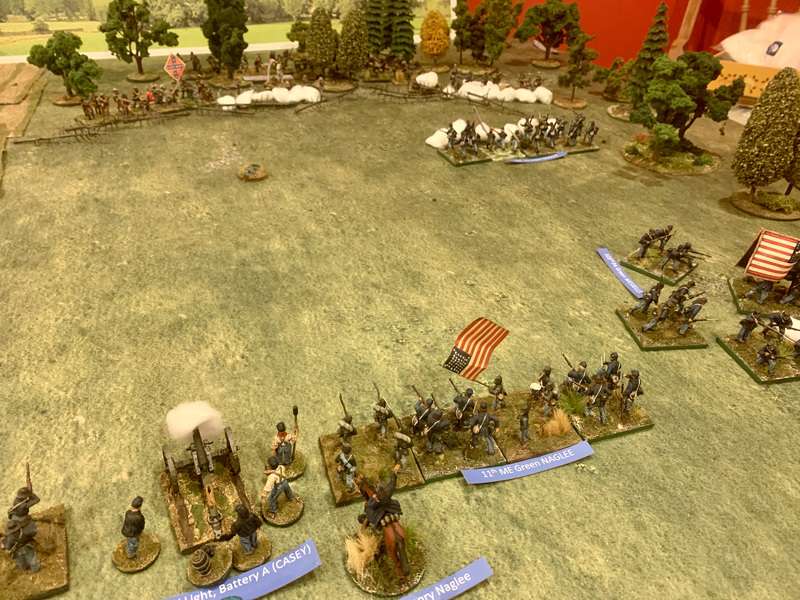
Casey direct’s Hazzam’s 104th PA to fall back behind the redoubt and reorganize.  They exit the table.
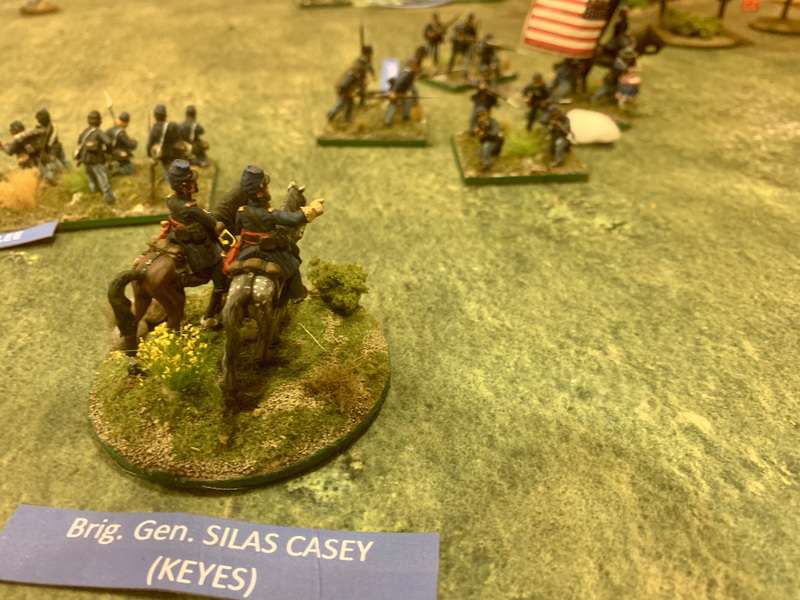
 Garland’s brigade is slowly crossing the abatis, most of its regiments having to reform themselves afterwards, while Rodes’ men begin to emerge from the swampy woods.
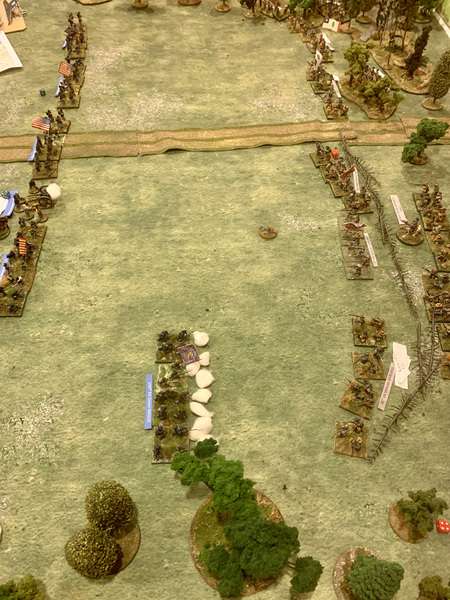
 Disaster threatens as the Union artillery throws snake eyes and runs low on ammunition.   They also incur a fatigue casualty for working their guns so hard (and mostly ineffectively.
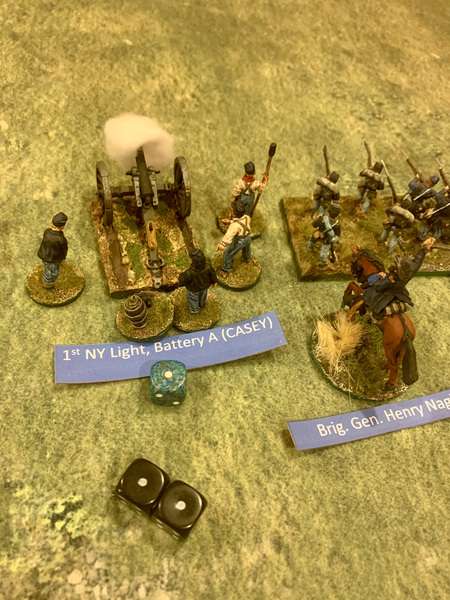
 

 With Garland’s men pressing ever closer, Casey makes a bold move.  He uses his two available staff officers to send for ammo to resupply the guns.   This move has risks, because if Naglee’s brigade fails is roll to obey orders this turn, then the staff officers are wasted, but the Union is fortunate, Naglee’s brigade obeys orders and the ammo is rushed up in the nick of time.
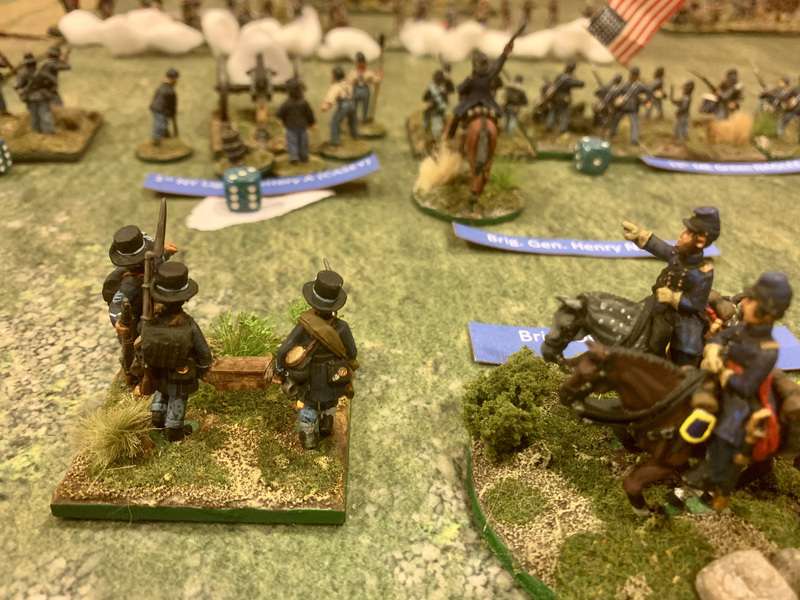
 Furious firing between Naglee’s and Garland’s brigade as the 104th PA slowly retire to tie in with their comrades.
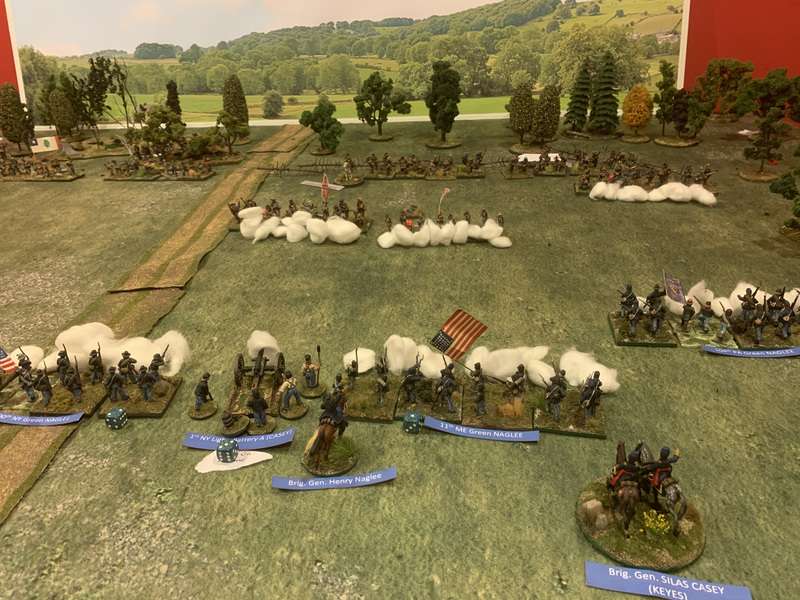
 

 Shockingly good shooting by the resupplied New York gunners unleashes a blast of canister into the 23rd North Carolina! 
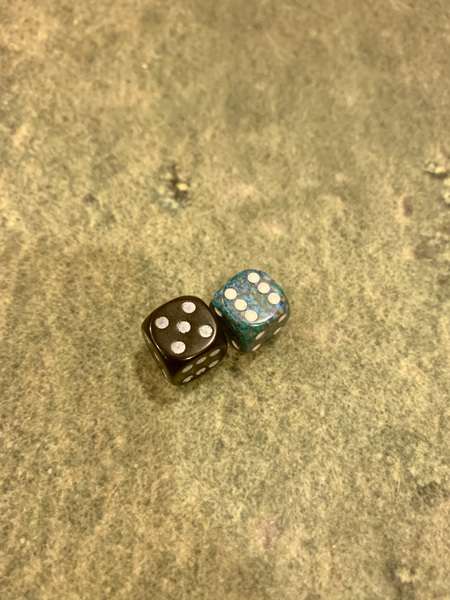
 The tar heels take 5(!) casualties, fail their Elephant Test, and fall back Whipped, bursting though and un-forming the 2nd FL behind them.
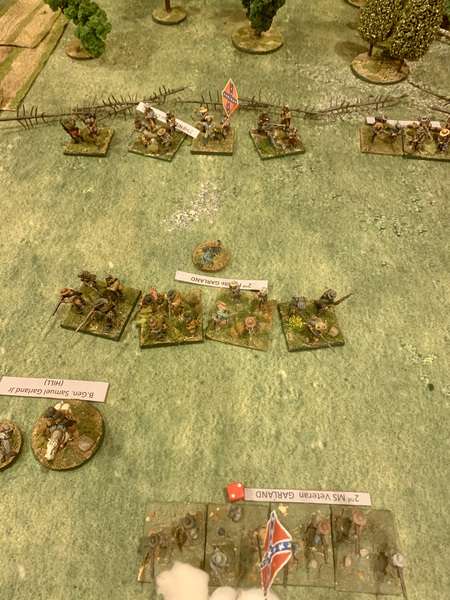
 Union now has the initiative.  With Rodes’ brigade hesitating and still emerging from the woods, General Casey sees an opportunity.  If he doesn’t take it, it’s just a matter of time before the Confederates tee up multiple supported charges and then his green boys are done.  “Charge them, by God!” is his order to BGen Naglee.
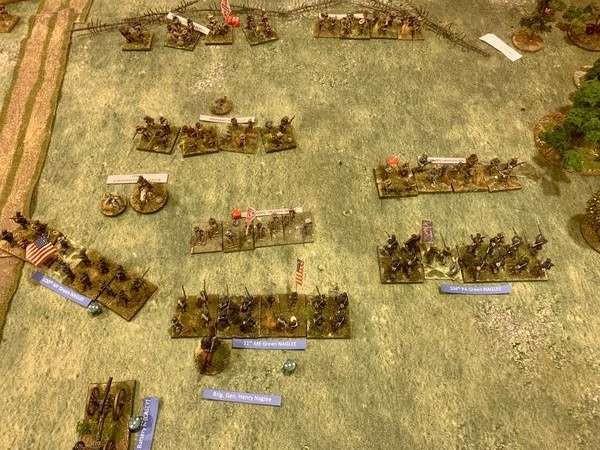
 On the right, the 104th PA takes only light casualties from the 34th VA, so the charge goes home, but the Virginians hold steady and after a brief tussle the Keystone State boys grimly retire.
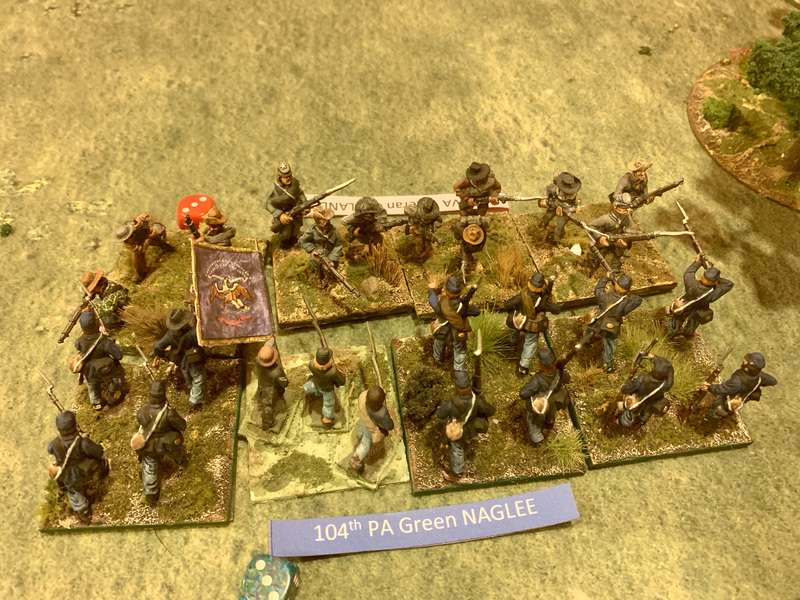
 Unfortunately the 11th Maine take hits from the 2nd MS and flunk their Elephant Test.  Even with their Brigadier attached, they are Whipped and fall back like geese.  Their flank supports, the 100th NY, have no choice to retire and Garland can breathe easier. The New York gunners are grateful that the mayhem is enough to cover their limbering and falling back to new firing positions.  It was a bold move by the Union and could have caused significant confusion and delay to Garland, so no regrets in ordering the charges.
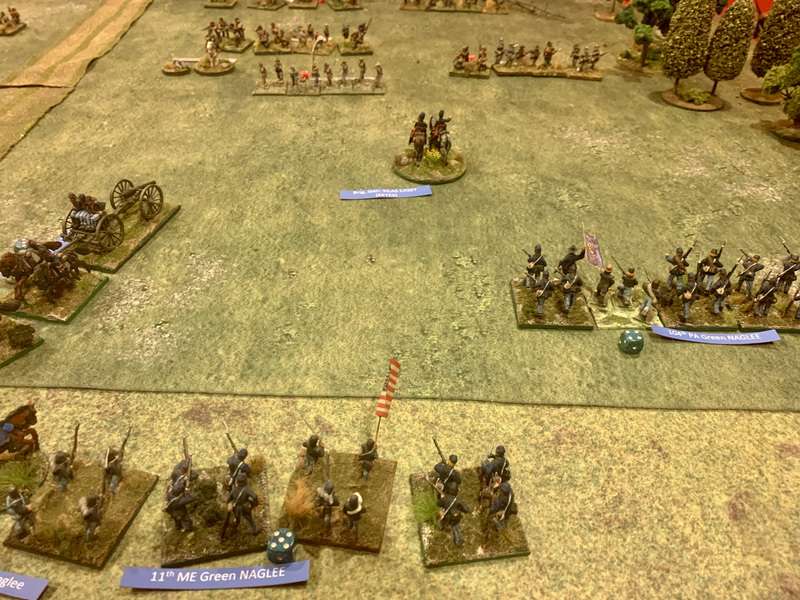
On the Union left, Palmer’s two New York regiments watch nervously as Rodes’ brigade slowly sorts itself out.
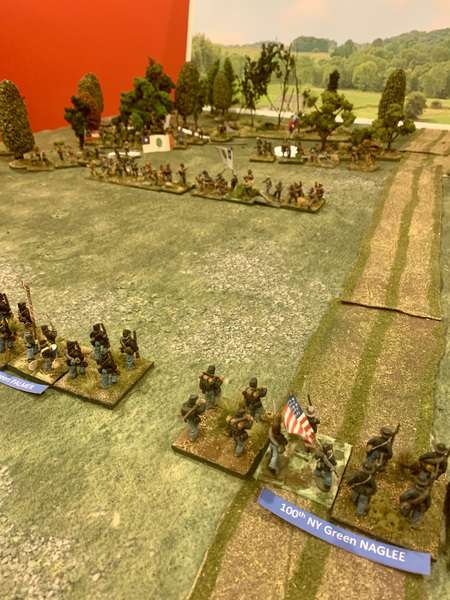
 Both Confederate brigades are now in motion with volleys being exchanged as they come.   Casey buys the time to steady the 11th ME while the New York Light Btty moves behind the reforming 100th NY to support Palmer.
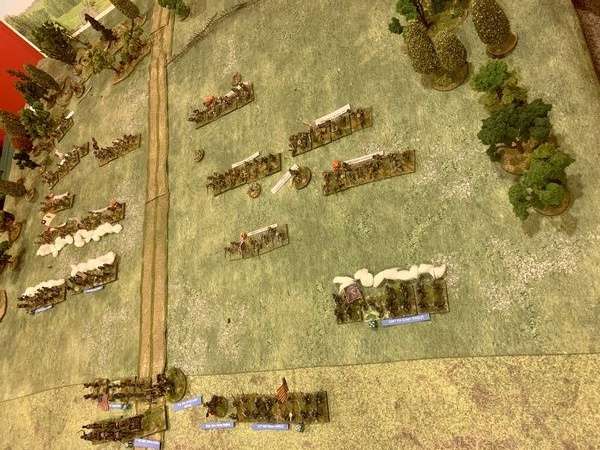
 Palmer’s green boys are smelling the powder now.   Mild casualties on both sides.   Rodes is itching to charge.  He knows Hill is somewhere behind him, bringing up the rest of the division, and that he will expect results.
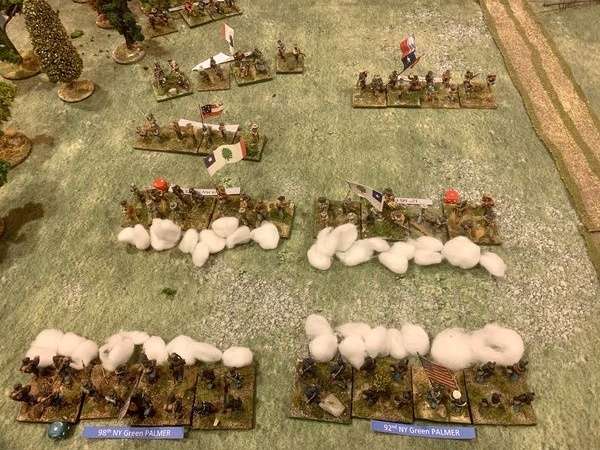
 Rodes throws three regiments forward.   The 12th MS (unsupported) charges the 92nd NY while the 4th VA, supported by an Alabama regiment, charge the 98th NY.  The results were interesting.   The 92nd unleashed a blistering volley which staggered the 12th MS, and then easily bested them in the charge rolls, thus sending the Missippians Whipped backwards, while the 98th NY’s defensive fire was risibly ineffective, and they fled the field as the Virginians howled in with the rebel yell.    Moral of the story in these rules:  NEVER CHARGE UNSUPPORTED IF YOU CAN HELP IT.  TAKE THE TIME TO TEE UP YOU SUPPORTS BEFORE COMMITTING.
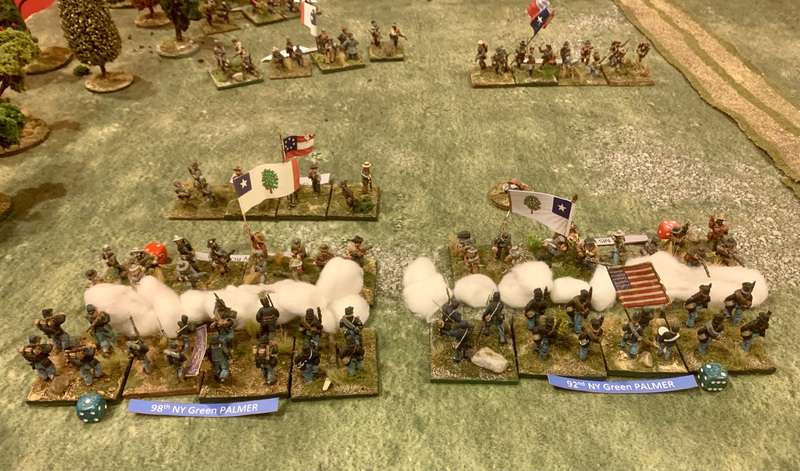
 An awkward silence as the 4th VA looks left and the 92nd NY looks right.
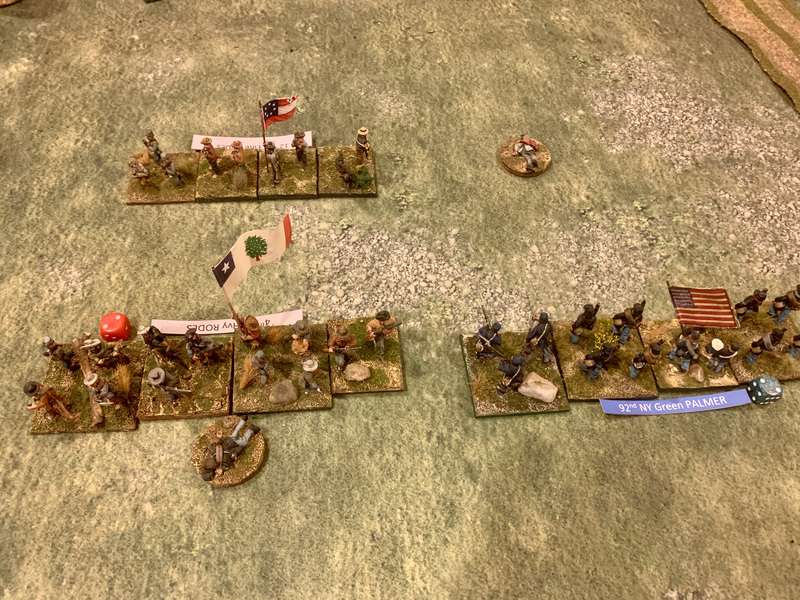
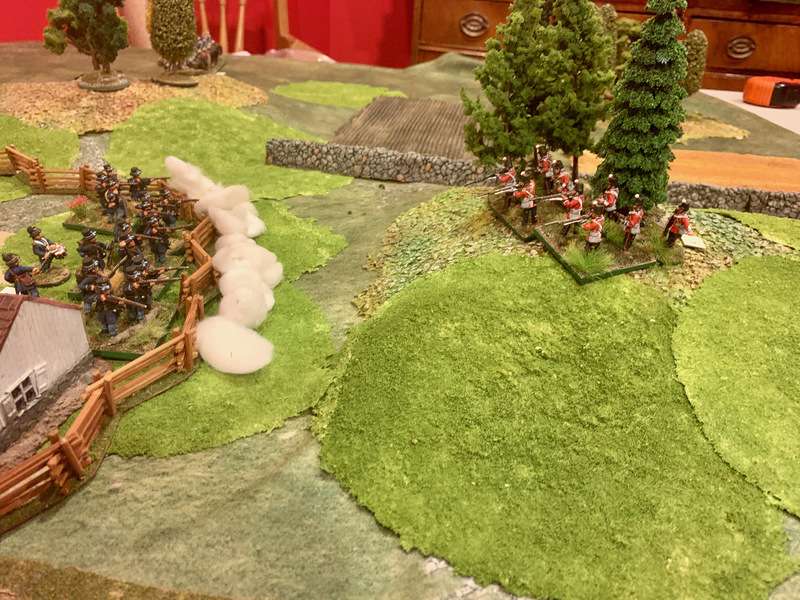
 Meanwhile on the rebel left, Garland personally joins the 38th VA, who, supported by the 24th VA (ignore the Texas flag in the photo) hurl themselves on the 104th PA, with BGen Naglee himself directing them.  Who will win?
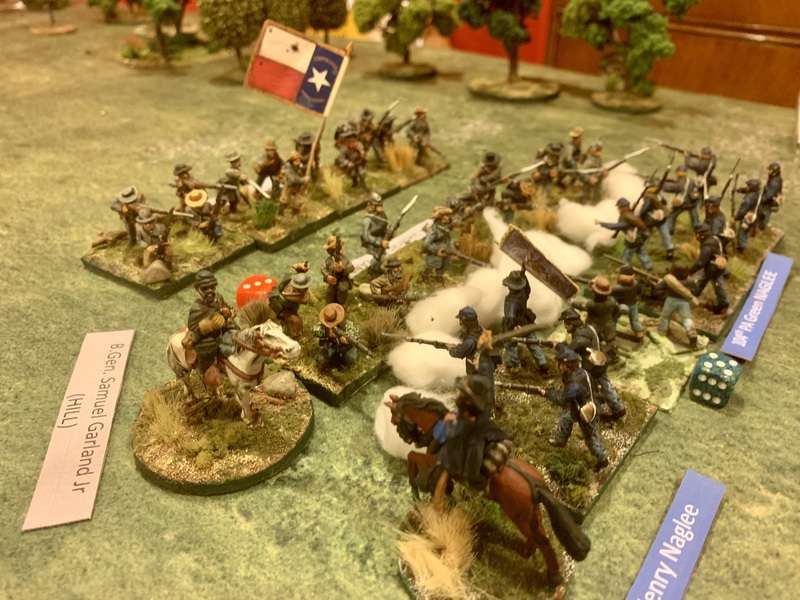
 Even Luigi the Cat appears and watches this fight.   The result is shocking.   The green Pennsylvanians stand and force both regiments of Garland’s Virginians to retire!   Shockingly bad dice rolls by the rebels that the one dice Support re-roll could not substantially improve.
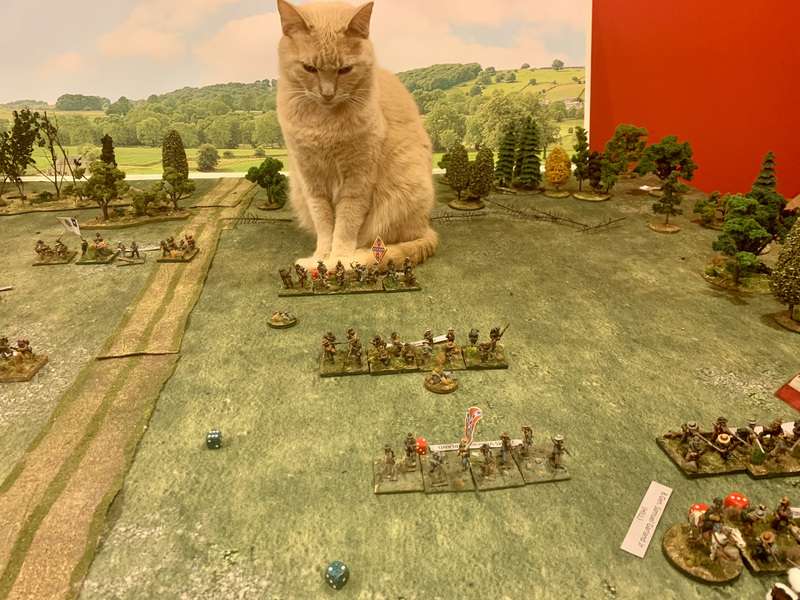
 On the Union left, another astonishing coup for the New York Light Artillery.  Having unlimbered, they do they bit to support the heroic 92nd NY, unleashing a round of canister and rolling a 12(!) on 2d6!  That’s five casualties for one of Rodes’ best regiments, the Elite 12th MS, and that’s a Serendipity roll, meaning that the regiment’s colonel is killed and the unit automatically Retires 18”.   
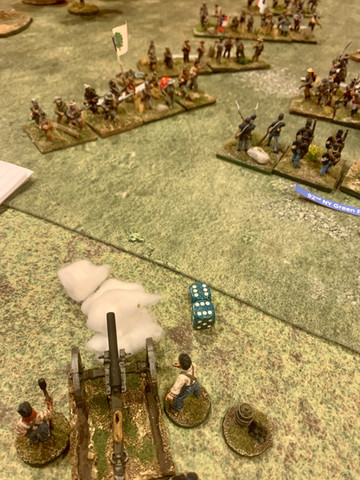
 Sadly though, the superior numbers of Hill’s Division make themselves felt.  Because a unit involved in a charge which fires defensively can neither move nor shoot during the rest of the turn, the uncommitted 2nd MS wheels and fires a deadly volley into the flank of the gallant 104th PA, sending them Whipped from the table, busting through the 11th ME behind them and disordering them.
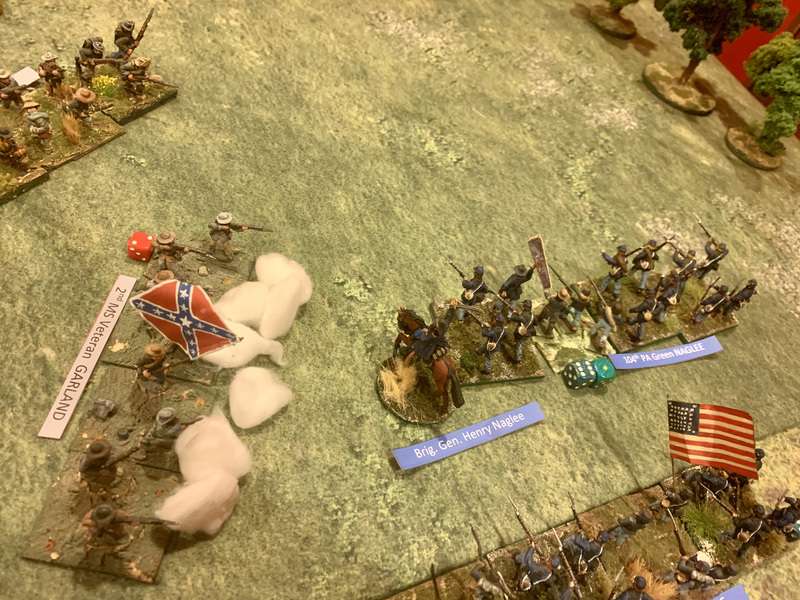
 In the following turn, the 12th MS, supported by the 2nd FL,  charge the un-formed 11th ME and send them Whipped off the table as well.  Casey sees that enough is enough, and voluntarily withdraws the 100th NY and the NY Light Artillery.     The poor 92nd NY catches a heavy volley as they try to withdraw and are also sent Whipped off the table.
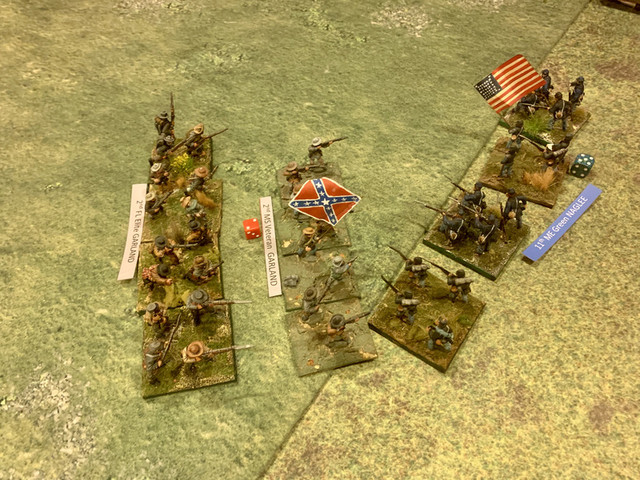
 Final Confederate positions.
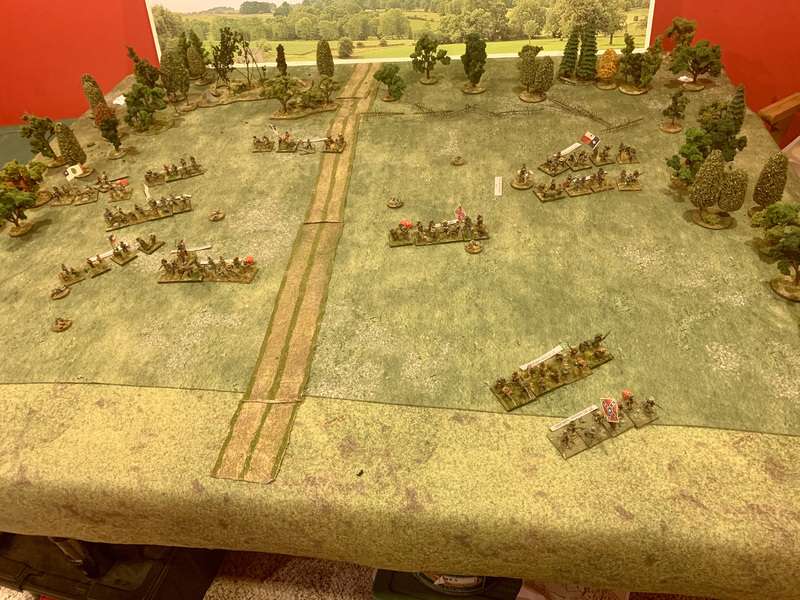
 

CONCLUSIONS AND SCENARIO OBSERVATIONS

1) I continue to enjoy these rules.   As mentioned above, I was reminded that unsupported charges should be avoided, even if the differences in troop quality is stark.   A green unit can do significant damage with its defensive fire, generating a high hurdle in negative modifiers that one roll of the Charge Dice might not clear, which is when you you need a supporting unit, or preferably two, for those re-rolls.    Is a regimental-scale set of rules right for a battle like this, which could be fought at smaller scales at brigade (15mm) or even divisional (6mm) scale?  Depends on how much you like the actions of individual units.   I enjoy a regimental level battle narrative, and it allows me to become attached to a unit like the star of this game, the 1st NY Light Arty, which redeemed itself with new ammo and HAMMERED the rebs thereafter.

2) Staff Officers.   I only gave both sides two SOs, the rationale being that the Confederate army at Seven Pines was woefully bad at coordinating, and Hill’s division was separated by the terrible terrain, so Garland and Rodes are basically fighting their own battle.   Maybe when Hill arrives on the table in the second scenario, he might add a third SO.   The Union only get two because only two of Casey’s brigades are present (Wessell, apart from the 103rd PA, was off in the woods to the right) and in any case it was one of the weakest divisions in the Union Army, all green, and probably not an effective staff at this point in the war.   Two SOs for both sides seems about right.

3) Victory Conditions.   I should have been tracking the number of turns this battle took.  I suspect it was at least ten.   I think you want to give the Union an incentive to stand and fight, and so I would suggest giving the Union 1 VP a turn for every turn after the sixth (or perhaps 8th?) turn where there are still at least two formed Union regiments on the table.   That also gives the Confederate player an incentive to be aggressive and drive hard on the Union.  Casualties are also a factor, as in this game the Union lost 41 casualties while the Confederates lost 31.  However, all the Union units are Green whereas most of the Confederate units are Veteran and a few are Elite.  Thus, perhaps award the Union 1 VP for every 5 CSA casualties are the CSA 1 VP for every 10 CSA casualties?  Something like that.   Also maybe give the CSA .5 VP for every Union unit that is Dispersed (dissolves because of excess casualties) and the Union 1 VP for every CSA Veteran unit dispersed and 2 VP for every CSA Elite unit dispersed.

Based on these VP totals, I would say that based on the casualty totals and the time it took for the rebs to clear the table, the Union won this round of the battle.

4) Where Do We Go From Here?

The battle accounts agree that a significant number of Union troops piled up behind the redoubt and the twin houses as skulkers, and had to be rounded up and reorganized.  I would therefore think that any Union unit that exits the table Whipped in this scenario is not immediately available in the second scenario.   Perhaps a die roll every turn to see if it can be rallied, with whatever casualty levels it had when leaving the table, or even a bit worse.
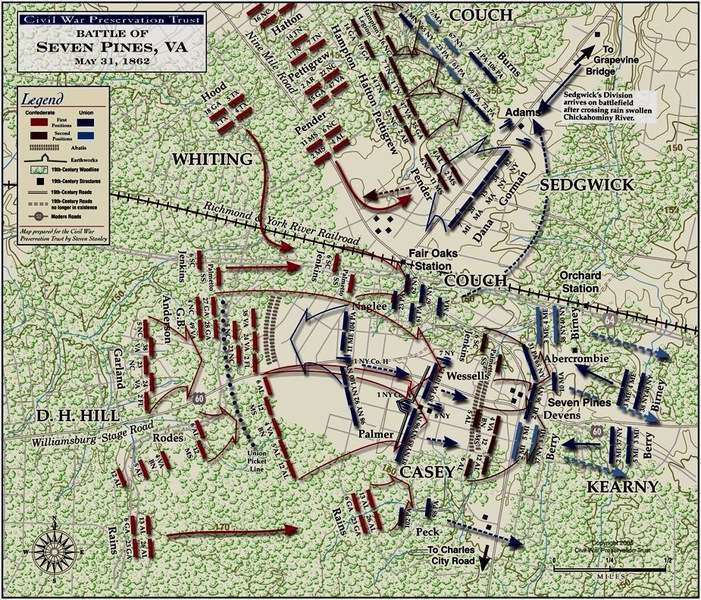
The table for Scenario Two should have the Union fortifications (above) in the centre of the the table, with the twin houses just behind them.   The Confederates will enter from their table edge, with each CSA unit at the casualty levels it incurred in the first scenario.   From the very first turn, the Union artillery will be able to fire, as it is finally unmasked as the Union first line is pushed back.

Rodes and Garland’s brigades will need to assault and clear the Union positions, with the hope at some point (perhaps after six turns) that Rains’ brigade will complete is movement and flank the Yanks out of their positions (perhaps this would entail Hill sending his staff officers in search of Rains).   Also the CSA will have the benefit of two batteries of artillery (Bondourant’s and Carter’s).    

Eventually the third phase of the battle will be the action at Seven Pines, with elements of Couch’s (Keyes Corps) and Kearney’s (Heintzelman’s corps) divisions arriving to counterattack and throw back the rebs.


Unit Standing at the End of Scenario One showing casualties in brackets and W for Whipped Union unit:

Rodes:  6th AL (1), 12th AL (0), 5th NC (0), 4th VA (7), 12th MS (7)

Garland:  23rd NC (7), 2nd MS (3), 2nd FL (0), 38th VA (6), 24h VA (0)


Palmer: 98th NY (4), 92nd NY (7W)

Naglee: 104th PA (7W), 11th ME (7W), 100th NY (3)

Wessels: 103rd PA (10W)

1st NY Buy A (3)


Thanks very kindly if you read this far and if you have any thoughts on how this scenario might be improved, please do let me know.  I have some printed fortifications on order, and once they are received and painted, I will try the second scenario.    In the meantime, thanks for reading and blessings to your battles.   MP+

Blog Archive

Followers