Showing posts with label Command and Colors Napoleonics. Show all posts

Wednesday, March 29, 2023

Wednesday Boardgame: C&C Napoleonics Battle of Gunzburg

I decided to give my Command and Colours Napoleonics some love, as a fast way of getting acquainted with some of the more obscure battles of the period.  I chose the second scenario from the Austrian expansion, Gunzburg.  This was one of the actions of the Ulm campaign, when General Mack ordered General D'Aspre to find a way across the Danube so that Mack might extricate his forces from Ulm.  At the same time, Ney had ordered his Third Division under Malher to seize the bridges. The battle is brilliantly described by Jeff Berry on his Obscure Battles blog here.

It’s an interesting battle because the two forces were evenly matched, about 7500 per side, and faced each other across a stretch of the Danube with four bridges, two of them leading on and off a small island in the centre.    There is also a ford near the left most bridge, though I just noticed that when I set up the board I mispositioned the ford tile closer to the centre, which may have disadvantaged the French.

Here’s the board set up.  As you can see, the ford should have been two hexes to the left, screened by the woods.  As it was, it was covered by Austrian troops on the hills, and the one attempt of the French to cross there was badly shot up.

It’s an interesting tactical problem for both sides.  The scenario gives the Austrians a temporary victory banner for holding three of the four towns, but both sides get temporary banners for holding bridges and for pushing troops across the Danube (not counting the island).  Either side can win the game if they choose to attack, though the more tempting approach is to let the other side try to cross and then punch them hard when they reach a bridge or ford.ave 

In the game I played solo, the French tried to advance, but a big (5 block!) Austrian line infantry unit smashed into the French light infantry on the right most bridge and threw them back.  That was pretty much how it went from then on as the battle became attritional.

The game ended with a 7-3 Austrian win and the French bled white after chasing an illusory success on the left wing.   In retrospect I should have tried to mass troops at several crossing points before committing to an assault.

Sharp-eyed CCN players will have noticed that I was using the Tacticians cards from Expansion 5, Generals, Marshals, and Tacticians.    I like extra opportunities that these cards provide, though I suppose some purists might complain that they make the game a little too “gamey”, like the cards in Sam Mustafa’s Longstreet.  Throwing down the “Break the Square” card when you charge with your cavalry might be gamey, but it is very satisfying.

Death of Colonel Gérard Lacuée at the battle of Günzburg, on October 9, 1805. Oil painting by Georges Moreau de Tours.

“They rolled two sabres for Leader Kill!  Damn them!”

I knew nothing about this battle before playing the game, so I learned something, and would consider lifting the victory conditions from this scenario to apply to a 6mm miniatures version, since my collection is mostly French/Austrian, though I would need to improvise to get enough river sections.  It would be a fun project.  Visiting Gunzburg and seeing the Legoland there would also be a fun project.

Thanks for reading and blessings to your die rolls! MP+


Wednesday, June 1, 2022

My Napoleonic Game at LardEh - Wertingen1805

Following on the heels of my last post, about the LardEh games day in Hamilton, here’s a report on the Napoleonics game I ran in he afternoon.  It was the first time I’ve stepped into the role of Games Master at an event, so I was quite nervous and wanted to have the game right, balanced, fun, and looking good.   The rules I chose were Too Fat Lardies’ large battle Napoleonics rules, General d’Armee (GdA), by Dave Brown and published by TFL’s Reisswitz Press imprint.

My first challenge was to finish the French ADC chits, to go with the Austrian ADC chits I made last year.   In GdA, ADCs are like command or initiative points in other rules sets.  They are a finite number of opportunities for the player as the CinC to influence the battle by giving orders to his brigades, and hopefully getting them to overcome the friction of the battlefield and actually do what he the commander wants.   Here are eight French officer caricatures, shouting at the player or giving looks of disdain at their lack of battlefield prowess.  I wanted something to add period colour and a little humour to the game.

 Now to decide on the battle.  I have been thinking about Wertingen, the opening fight of the Ulm campaign, which in turn led to Austerlitz and Napoleon’s stunning defeat of the Third Coalition of Russia and Austria.   As the Grande Army advanced through Bavaria, two French corps (Murat’s Cavalry Reserve and Lannes’ III Corps) ran into an Austrian infantry corps under Auffenburg that Mack rashly sent swanning about on an ill-conceived reconnaissance in force.   Historically the French made short work of the Austrians, but in the GMT Command and Colors scenario which introduced me to the battle, it seemed like an even and manageable fight.  

Here’s the playlets table, kept fairly simple as I didn’t want the players interacting with terrain pieces when they could be fighting.   I find that for 6mm games with lots of troops on the table, simple is better.  The cloth mat and roads are from Geek Villain (UK), the fields are latex from Barrage Miniatures (Sp), the buildings are Timecast and the hills are scratch built.


Here is the order of battle, printed on individual unit markers that will be fixed onto 3D printed unit markers courtesy of Aaron at Project Wargaming.   Each marker is for a regiment or for an individual commander.  There were some mistakes that I caught when I took a closer look at the rules.  In GdA only Guards units are Elite, whereas good units like your typical Grenadier unit would be rated as Veteran.  Thus I told the players that for Elite, read Veteran, and for Heavy Cavalry, unless marked Cuirassier in the case of the two Aus units, the French cavalry are considered Battle Cavalry, which in GdA is most well horsed line cavalry (Hussars, Chasseurs, Dragoons).   The French still outnumber the Austrians 2-1 in cavalry units, with two of the Aus regiments being Small or understrength.

All is quite in the village of Wertingen.

A view of the dispositions early on.    That’s one of the voices of the Canadian Wargamer Podcast, James, setting up the Austrians at top left.  The Austrians have to hold on the road intersection for 12 turns to win.  In all the photos that follow, two bases placed together indicate a single cavalry or infantry regiment or battalion.

The two French players put both of Murat’s cavalry divisions and both his batteries of horse artillery on their left, with Lanne’s corps on the right.   The French tried to get off to a fast start, realizing the clock was against them, but had trouble coordinating their advance in the centre.

One of the Austrian players sees a chance when the French rashly push their horse artillery forward and attack with a regiment of hussars, still in column.   The Austrians suffer terribly from canister, but remarkably the survivors close, and in the melee that follows, the French gunners manfully stood by their guns and saw off the chargers.  It was one of several remarkable upset results.  Charging is always a bit of an uncertain business in GdA, it’s a two-edged sword indeed. 


In another case of a surprise result, the Austrians throw their horse at Lasalle’s hussar brigade that is holding Lanne’s right flank, and despite their advantage of having one regiment of cuirassiers, they are thrown back.

James realized that the key to survival was aggression, and pushed his infantry forward.   A fortunate volley drove the French light foot out of the north half of the village (the church square) and that reversal seemed to perplex the French players, who never used their four veteran grenadier regiments to full advantage after that.

On the Austrian right, Murat’s two dragoon brigades are slowly and relentlessly pushing forward, but they are too far away from the intersection and it is too late in the day for this to be a disaster.

With the Austrians firmly holding the centre of the table, and only a few turns remaining, the French players conceded defeat.

I had worried that the game would be a one-sided affair, with the French cruising to an easy victory, but in fact it was a close battle and the Austrians, ably and aggressively handled, had a convincing victory.   Most importantly, the players had fun, I gained enough confidence to run another game at another event, and I got to know the rules much better.

Perhaps I’ve made the same fudge that the designers of the Command and Colors Wertingen scenario did by giving the Austrians more units on the table than the historical battle would suggest - from what I’ve been able to gather, the French had a 3-1 advantage.  Perhaps I could adjust that by taking away one of the Austrian cavalry regiments, but I’d like to play this though again with some other players to see if there’s a different encounter.    Hopefully I’ll write up this scenario for one of the magazine.

Cheers, thanks for reading, and blessings to you die rolls!

MP+

Thursday, April 15, 2021

Command and Colours Napoleonics and the Battle of Wertingen: A Test Fight

So now that I’ve resurrected my French and Austrian 6mm miniatures and am frantically painting more while the mini-mojo courses through my bloodstream, what to do with them?   I could just fight some more random battles using points or whatever forces catch my fancy, but that seems somewhat below the noble historical calling of Napoleonic wargaming (said slightly tongue in cheek).  I invested in GMT’s Command and Colours Napoleonics for precisely this reason, as a simple wargaming guide to the campaigns and battles of the era.

I had spent a long evening putting stickers on the blocks for the CCN Austrian expansion (I have every CCN set and have gotten quite good at it), so I started at the beginning of the scenarios in this set with Wertingen.   The Battle of Wertingen, a town in Bavaria south of Augsburg, was the opening of the 1805 Ulm campaign.  It looks like a modestly sized fight ideal to recreate in 6mm.   

Here’s the initial setup, mirroring the historical situation.  Murat and Lannes arrived with several divisions of light and heavy cavalry, and Oudinot’s grenadier division was coming up on the right.    This was bad news for the Austrian commander, von Auffenberg, who had been told to take his infantry division, with two small battalions of horse, and go scouting.   Given the rock/paper/scissors nature of the horse and musket period, running into a cavalry heavy opponent when all your guys are on foot is not a strong omen of success.  Here the Austrian infantry is divided into three wings - most are the large, five-block Austrian foot, which are one of the Austrian advantages in CCN, along with several unit of grenadiers.  The Austrians have a light cavalry regiment on their right, and a heavy (cuirassier) regiment in their rear centre.  Historically the Austrian guns were lighter than the French and so were outmatched in range by Murat’s horse artillery, but in CCN terms Foot Artillery is Foot Artillery so that unit is one of the stronger cards in the Austrian hand.

Speaking of cards, I was using the Tactician cards and the new Command deck which are in the CCN 5th edition.  This was my first outing with hem, and I found that they add much more period flavour and choice to the game.  There is a video on YouTube showing how the system for card-driven games devised by Stuka Joe can be used to make solo play in CCN more interesting, and I shall try that next time I play CCN.

The opening went as the battle started, with the French horse getting stuck into the Austrians and causing some grief.  However, the Austrian line infantry in CCN can form Battalion Mass, which ineffectively a square but does not require the Austrian player to sacrifice a command card for each unit in square.   The rule reflects the Austrian tactics’ favouring of the defensive, and requires the French player to use horse, horse artillery and infantry in Combined Arms attacks.

Mid game.  The Austrian light horse have caught the French horse artillery and obliterated it.   Also, the French have lost a general (two sabres came up on the casualty dice when his unit lost a block) so at mid game the Austrians are up 3-1.


 By the end game the tide was turning French as Oudinot’s grenadiers came up on the right.   The Austrian foot was in a protective crouch, using the defence advantages of the terrain, but a terrible run of cards left the defenders unable to answer the French weight moving to the right wing, and a series of persistent attacks, always with the terrible weight of French horse in reserve, took their toll.  Result, 5-4 French win, much closer than the actual battle, which augurs well for a more interesting miniatures game, perhaps. 

Next steps, do some background reading (I’m currently going through F.N. Maude’s book The Ulm Campaign 1805: Napoleon and the Defeat of the Austrian Army, which is an old chestnut but very readable and dead cheap as a Kindle version.   There’s also a very helpful entry on Wertingen in the invaluable Obscure Battles website which gives a detailed OOB for both sides that will be invaluable when I try to translate the battle to either General d’Armee (battalion level) or Blucher (brigade level).   One thing I noticed immediately in the OOB is how CCN fudges the numbers to create a more even contest:  the Austrians have a LOT of blocks for their 5500 men whereas the French should, one would think, have more blocks for their 20,000 men. It may look much more one-sided as a miniature battle.   

However, CCN proved its worth as a useful overview of a battle and an incentive to learn the wider context (I am still very much a newbie at Napoleonic history), so hopefully by the end of April I’ll have tried Wertingen as a tabletop battle.

Blessings to your die rolls!

MP+


Tuesday, April 23, 2019

Donnybrook in Dublin

For years I have admired the Napoleonic battle reports posted on Joy and Forgetfulness, the blog of the mysterious and erudite author and wargamer, Conrad Kinch.   Between elegantly presented tables, port and cheeseboards, and the witty and dashing cast of characters brought to life there, wargaming has seldom looked so genteel and appealing as it does on young Kinch’s blog.   Last week I finally had the chance to make it over the sea to Ireland.  I had planned to go to Dublin two years ago for the baptism of the young Kinch twins, but sadly that never worked out, so it was a delight to finally arrive there, where CK and his lovely wife Lizzy showered us with warmth and hospitality.  Minutes after entering their house, my fiancee Joy was snuggling with the young and handsome Master Kinch.

After four days in the West of Ireland, we returned to Dublin, where Kinch had arranged a refight of Waterloo.  After dinner, the gentlemen withdrew to Kinch’s war-games room, a place of wonders - and silly hats.  

 The splendid table.  Note the wine glass used as an objective marker.  “Why do you have to refight Waterloo?”  asked Joy, innocently.  “I mean, you know what happened, why redo it?”   Some things will have to be explained over time in this relationship.

As you can see from the dice, we were playing Command and Colours Napoleonics, with 20mm figures.  Very posh.

Some of the Dublin gaming brain trust assembled.   I couldn’t have wanted to have enjoyed better company.   Marshall DeGourmand, second from right, tries to persuade the English team that they should just give up now.

 Since I am something of a Bonapartist, I volunteered for the French side, commanding the French right flank.  As I recall, DeGourmand is saying something like “Go and die there.   There, sir!”  His order were shockingly simple and to the point, though slurred somewhat by the fearful amounts of drink (note the bottle on the table).

With furrowed brow, I watched as my brave chaps threw themselves on Plancenoit, drawing the entire English left into a vicious meat grinder.   As you can see, I am propping myself unsteadily on the table, praying that I can get this done before my troops all die and before the Prussians arrive, but it wasn’t looking good.

 They weren’t giving up Plancenoit without a fight.

 Bantering with my opposite number, General Oisin, who seems confident that the Prussian sausage-munchers will arrive and bail him out of his predicament (they did).

Sadly we called it a night when the port ran out and the English had managed to fend off our fine French fellows, thus making Joy’s question, “Why bother”, uncomfortably acute.  


Also sadly, I don’t have a photo of CK himself, but he was a grand host and it was a gaming night for the books, though I’m blessed if I know how I walked back to my hotel.

Thanks, old chap, for a splendid time of it.

MP

Sunday, October 22, 2017

Quick Update On Madame Padre


A quick update and word of thanks to those of you on social media who continue to reach out and offer their support and encouragement.   As longtime readers of this blog will know, Madame Padre has been fighting cancer for two and a half years now, and has been giving ground grudgingly.   Unfortunately, her cancer has advanced and we and her oncologist are now hoping that we will have some good months remaining.  She continues to inspire me with her resilience and peacefulness, and with her total absence of self-pity.  Our parish friends sometimes speak of her as a living saint, which causes her to gently roll her eyes, but I see their point.


Friends and family are amazing with their support and kindness.  My brother Chris flow out from Vancouver, a five hour flight, just to spend the weekend with me and to help construct this wheelchair ramp which we hope will assist Madame when she comes home from the hospital.


Knowing my interest in all things related to the B17 and to the airwar over Germany in WW2, the kind and eclectic Edwin King put together this B17 gift for me, which arrived in my mailbox last week.  It includes a guide to old USAAF airfields in Norwich, and I hope to tour them with Edwin one day.  


The wargaming hobby is pretty much on hold for me at present.   The only accomplishment I can point to is that I snickered the blocks for the Command and Colors Napoleonic Epic expansion.  Lord knows when I will play it.


I'll leave you with this photo of happier times last August, when Madame was well enough to come to work and be present at my promotion to Major.   We were joined by my ecclesiastical boss, the Anglican bishop ordinary to the Armed Forces.   He used to play Avalon Hill games as a boy, and I've encouraged him to visit this blog and see what a mad padre does.

Please keep Kay and I in your thoughts and prayers and accept my apologies for not visiting your own blogs and projects as they deserve.   Thank you for all your support and encouragement in this hard journey.

Blessings,

MP+


Tuesday, May 5, 2015

Tuesday Night Boardgame: Berlin '85 Update, CCN Napoleonics Wertingen, And A New ACW Game

Hello all!

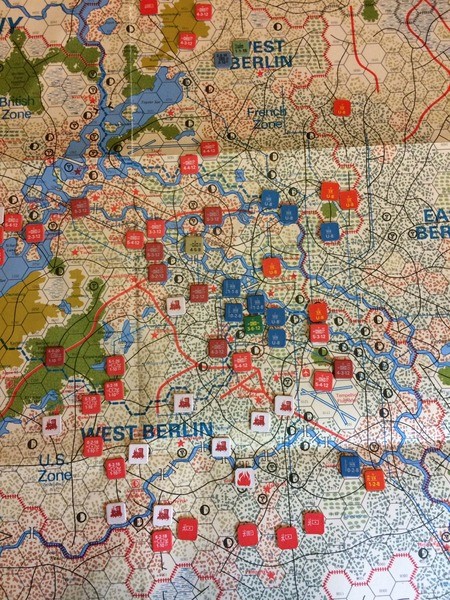
It’s Tuesday and that means, in my fitful, irregular sort of way, a board game update.   First, an update on the SPI Berlin ’85 game I mentioned here a month ago.  Sorry to those who were awaiting more updates.  That game ended on Day 3 of World War Three as a NATO marginal victory.   Most of the US and British units had been eliminated and the survivors, along with a handful of remaining WG police and militia, were pushed back to the city centre.  The British suffered badly when the American flank collapsed and the East German division got behind them, cutting off their retreat routes.  The lavish amounts of Soviet artillery in the south make it very hard the for Yanks to hold their ground, but they did it long enough for a tiny US battery to shell the key rail line at the south end of the map.  As long as that unit is protected by NATO Zones of Control, it can rack up an impressive score of victory points by interdicting the Soviet supply line to the main front, so it did its job beautifully until finally hunted down and eliminated.  The Soviets never committed their Airborne division, since that comes with a steep cost in VPs.   Berlin ’85 has some interesting optional rules, including the use of Soviet chemical weapons, which would make it much harder for NATO.  The design notes admit that this is a pretty dire advantage for the Soviets, but speculates that the USSR would likely not use chemical weapons in an urban context, given the terrible toll on civilians and resulting propaganda costs.  Fortunately this was never tested.  I’ll put Berlin 85 back on the shelf,as it was one of the better games to appear in Strategy and Tactics in the late 1970s (and there were some bad ones - remember Armada?), and it would be fun to use the unknown strength counter sides of the units in a two player game.

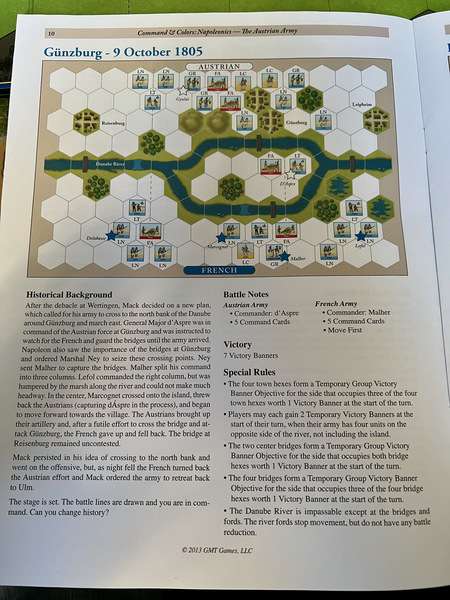
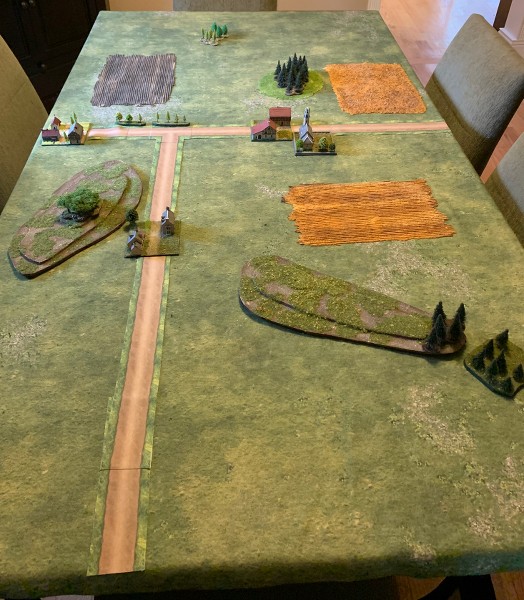
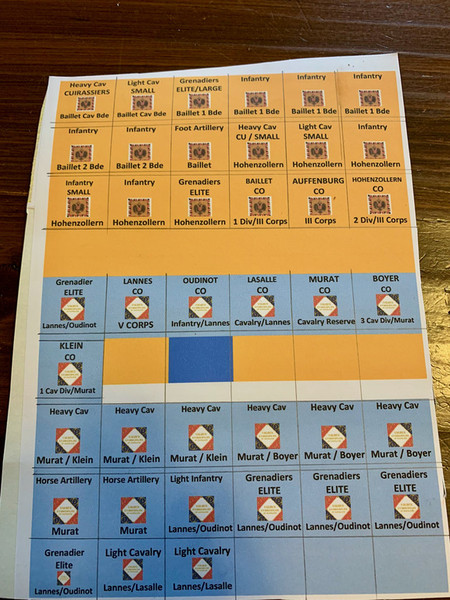
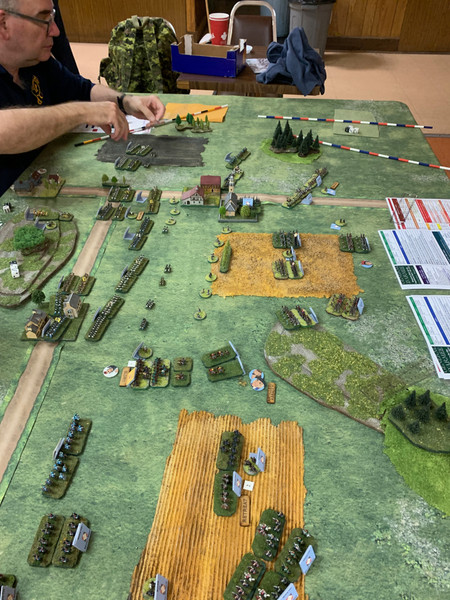
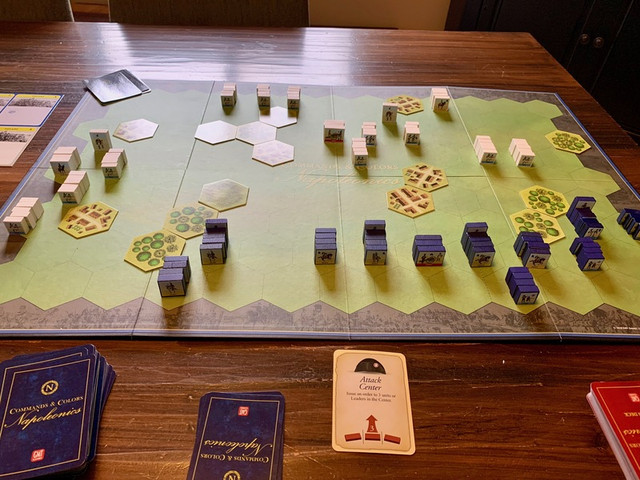
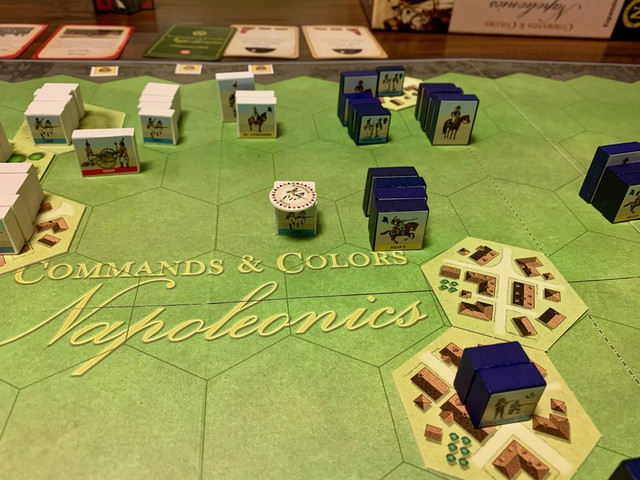
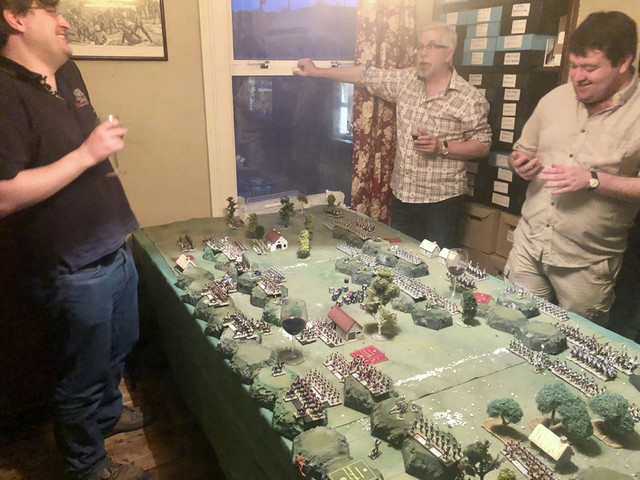
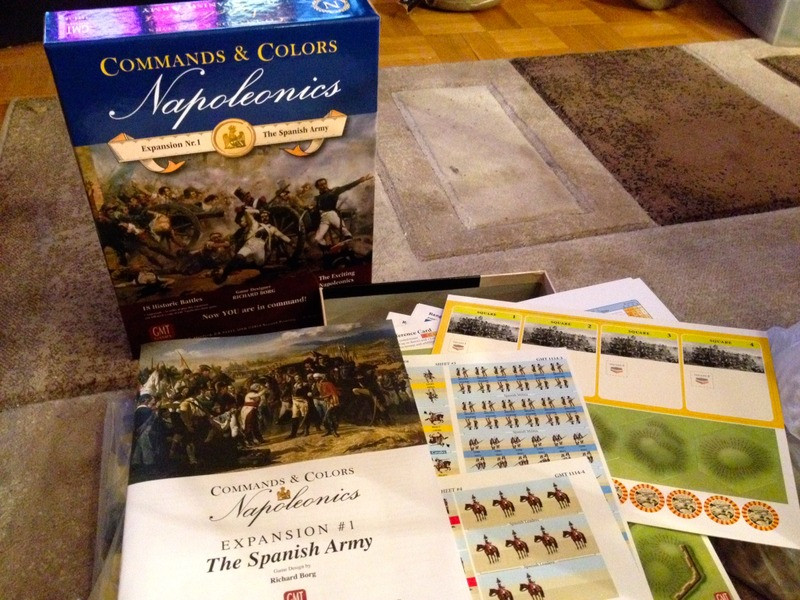
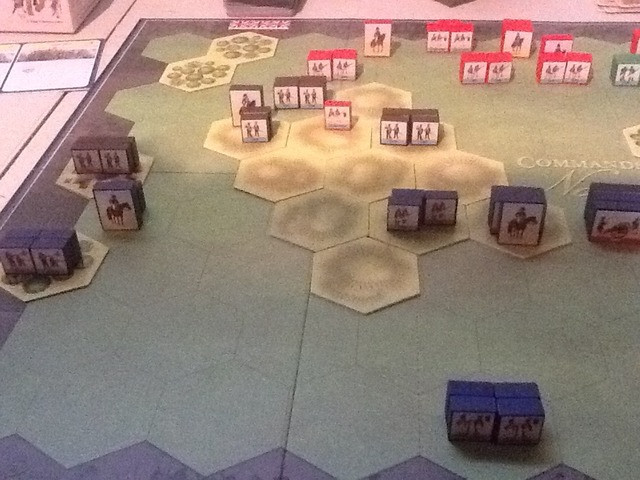
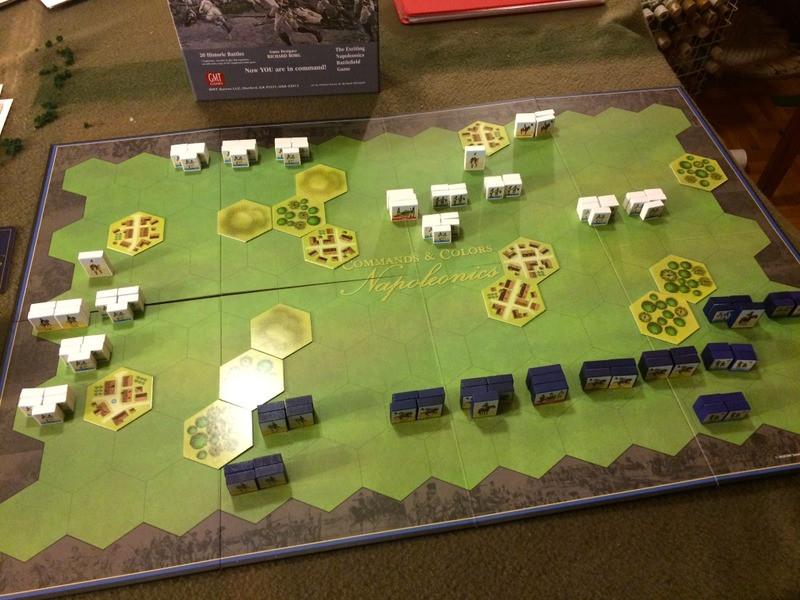
 Last week I had Command and Colors Napoleonics set up on the games table.  I chose the first official scenario from the Austrian Army expansion,  Wertingen.  This battle (8 Oct 1805) came in the opening phase of the Ulm campaign, and saw Murat’s cavalry and Oudinot’s grenadiers crush an isolated Austrian force.  I played it solo and the French won it easily, 5-2.   

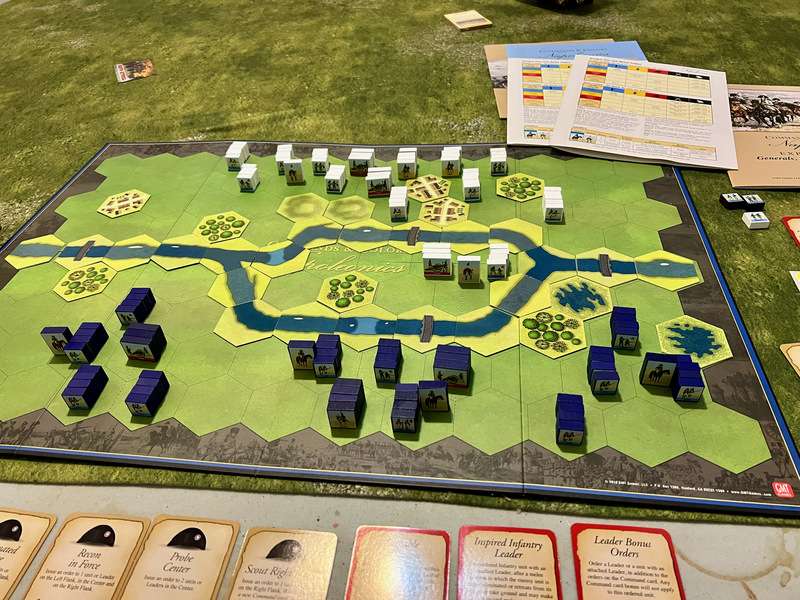
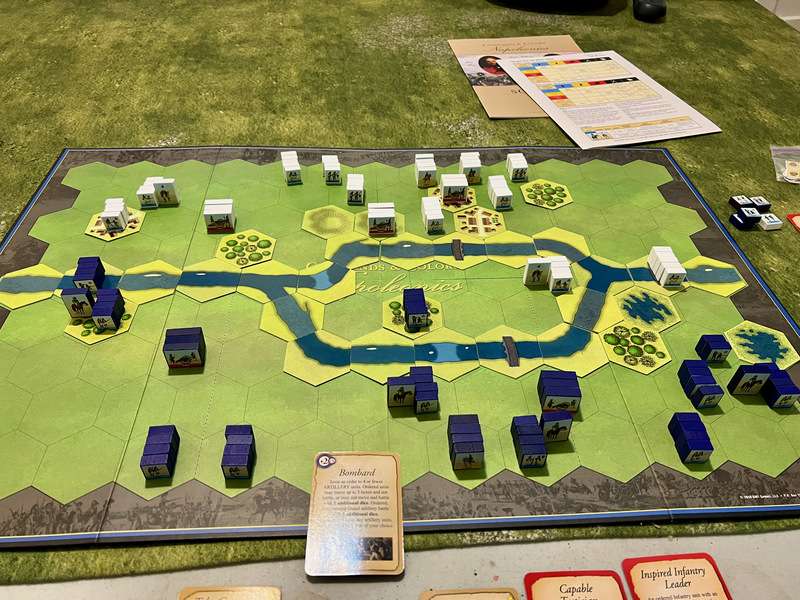
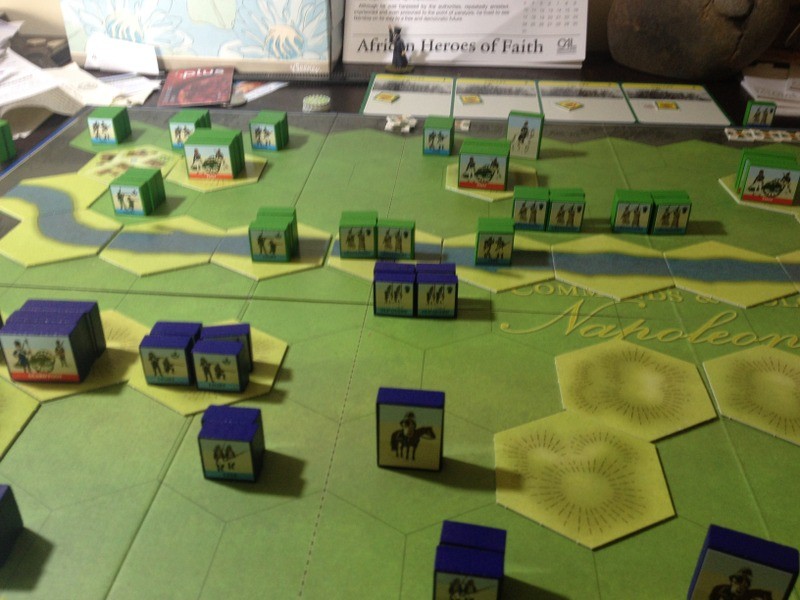
Starting positions (sorry for those of you bored by photos of blocks.  Not very sexy, I know).  The Austrians outnumber the French, but the French have 2.5 times as many cavalry units, and a big chunk of the Austrian army is sitting on the right wing, whereas the French are massed against the weaker Austrian left.  

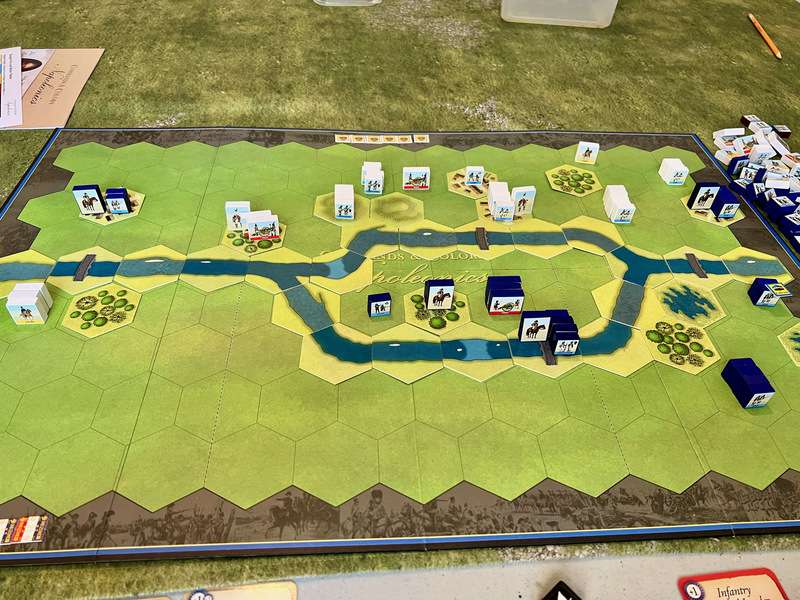
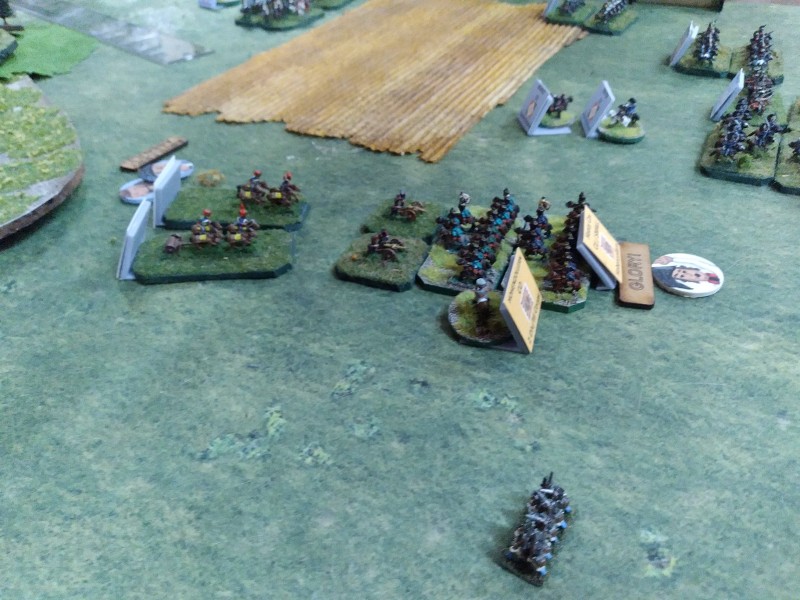
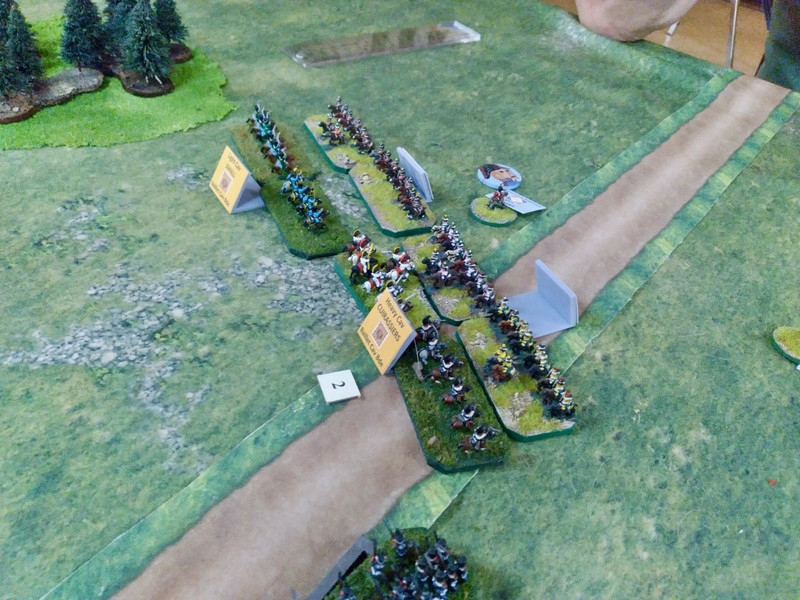
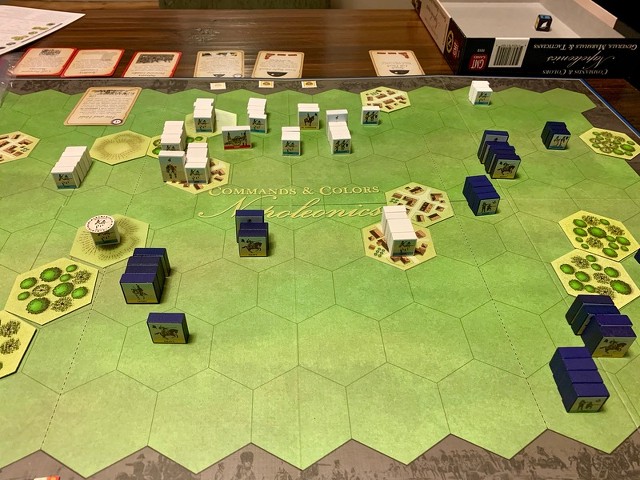
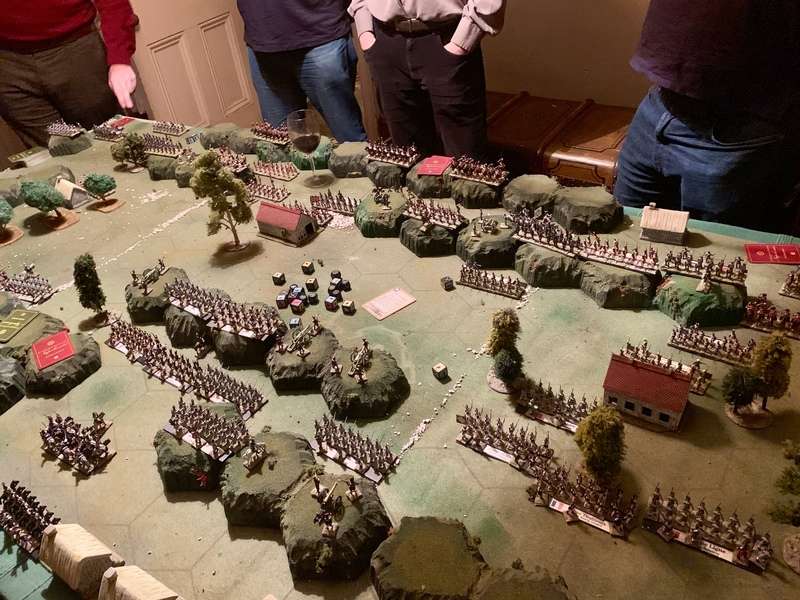
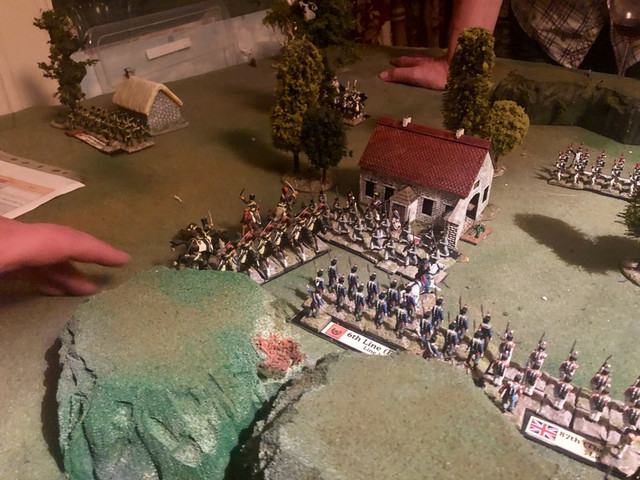
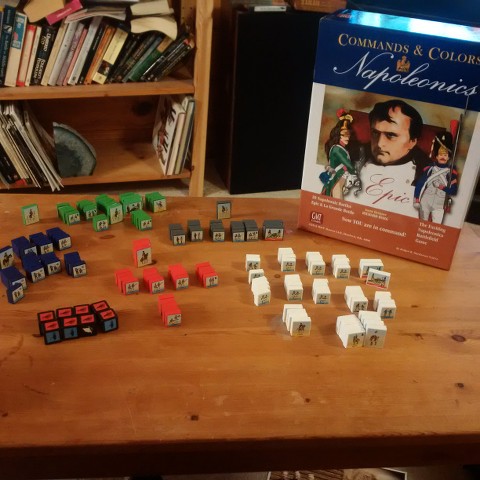
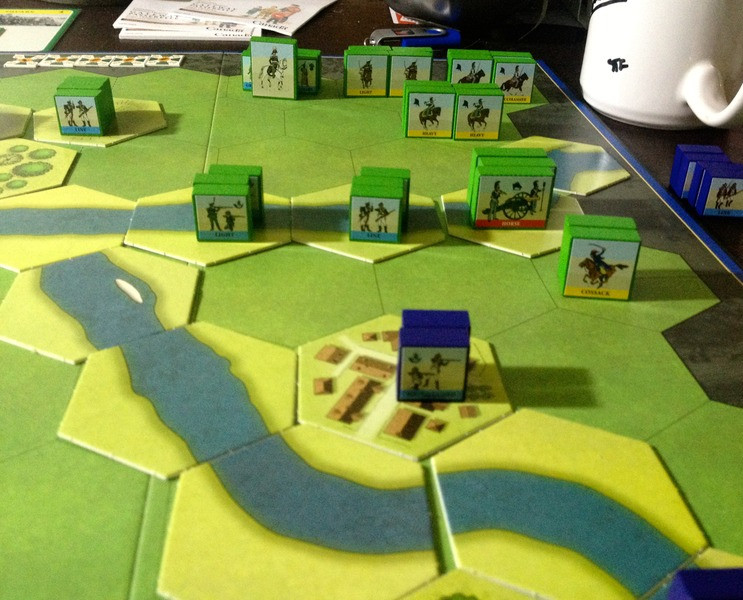
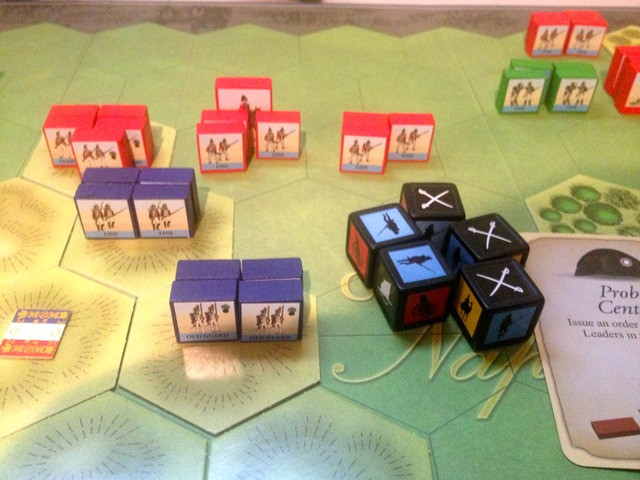
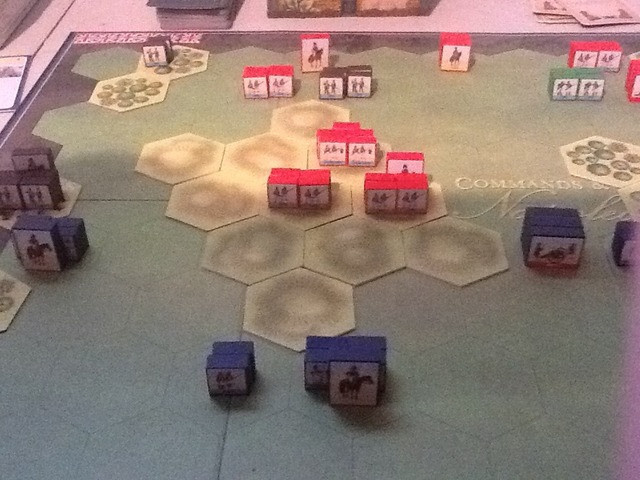
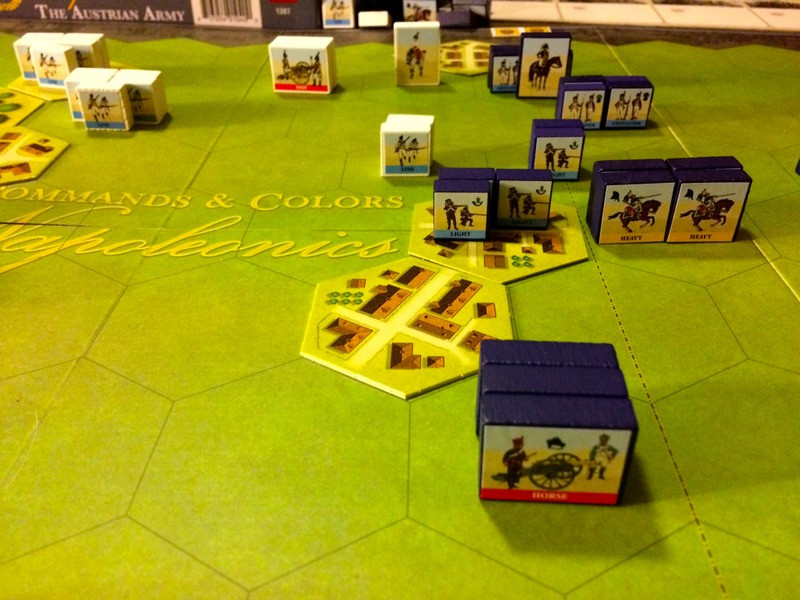
While the Austrians did well early, knocking off a heavy French cavalry unit and killing its leader (sorry, Murat fans), the  French cavalry ground away at the Austrian left, while a timely Flank March card allowed the French to get the grenadiers forward early on.   While bloody for both sides, the end was not long in doubt.  Here’s the view at the end.  The Austrian Left has been entirely eliminated.

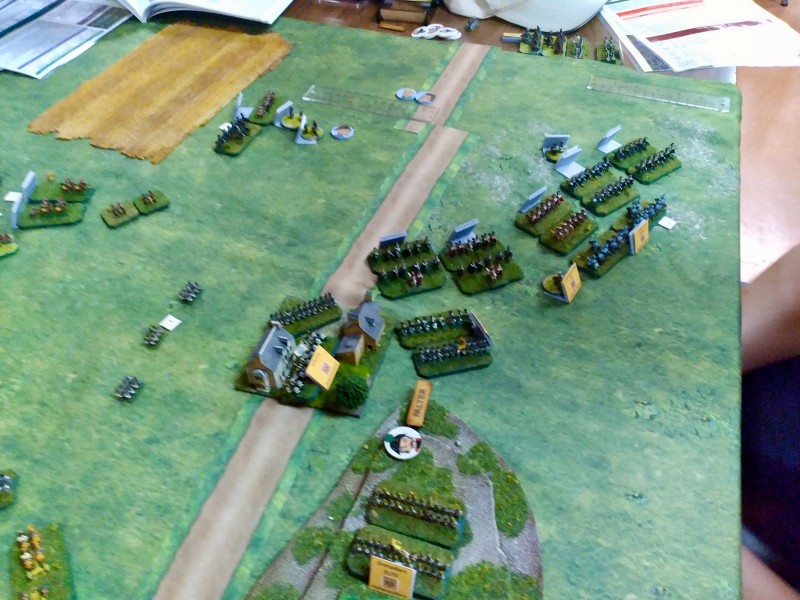
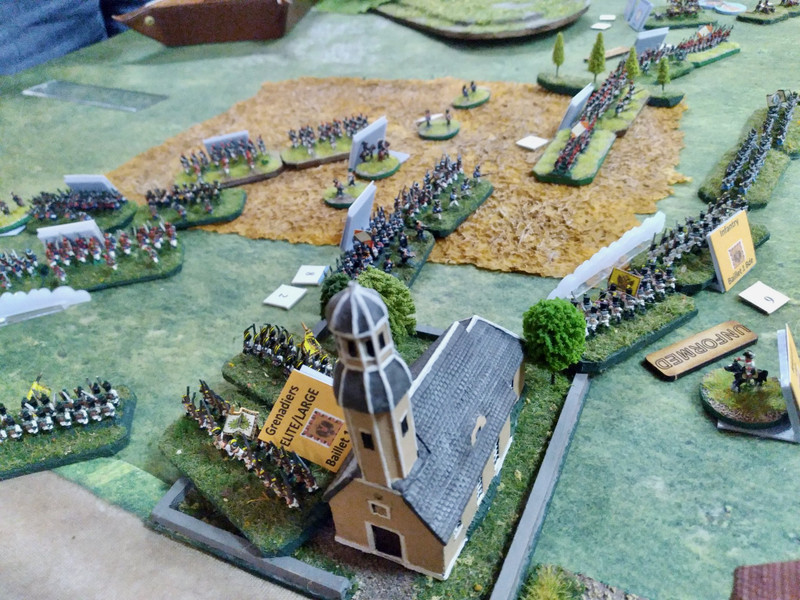
I want to go through the Austrian scenarios and see which ones lend themselves to interesting miniatures games.   I have enough 6mm figures to do Wertingen, but I’m not convinced it would be an interesting battle.   The consensus on CCNaps.net is that this is almost an impossible scenario for the Austrians to win.

I can say though that the Austrian army in CCNaps is interesting.  The big 5 block Austrian line infantry units can put out some fearsome firepower, and the Battalion Mass rule allows Austrian line to go into Square without giving up a card, which seems very handy.   I’m looking forward to dipping into more of the scenarios in this Expansion.  Speaking of CCN Expansions, is anyone else excited about #5, Generals, Marshals and Tactics?  

In a future Tuesday Boardgame, I’ll talk about a game that just arrived in the mail, Huzzah!: Grand Tactical Battles of the American Civil War, from One Small Step.

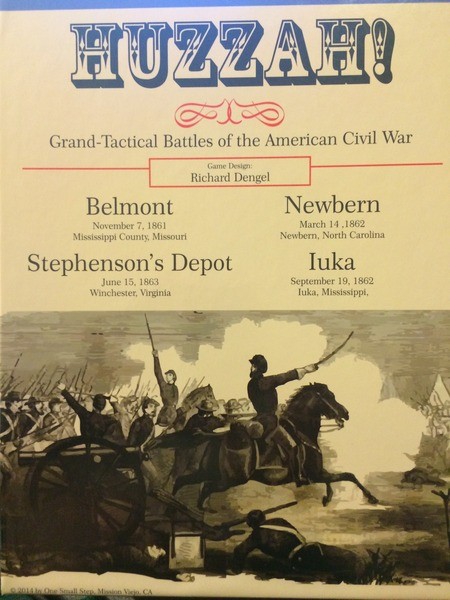
 The designer, Richard A. Dengel, has done at least one other ACW game, Rebel Yell, which I don’t know.  However, the fact that the four battles depicted in this game (Belmot, Newbern, Iuka and Stephenson’s Depot) are fairly obscure, and the small tactical focus of this game, promised to scratch a number of my itches.  There’s a review by Paul Comben here, and a spirited response from Dengel.

Here some quick impressions from my unboxing.  My heart sank as I picked up the shrink wrapped box and heard individual pieces of cardboard rattling around inside.   That didn’t inspire confidence.   Here’s the reason why I was hearing that sound.  Almost half of the counters had detached from the two counter sheets and were rattling around.  Some had infiltrated the folded maps, others had made their way into the rules and scenario booklets.  I tried to be careful not to lose any, but I think sorting the counters out is going to be a bit of a chore.

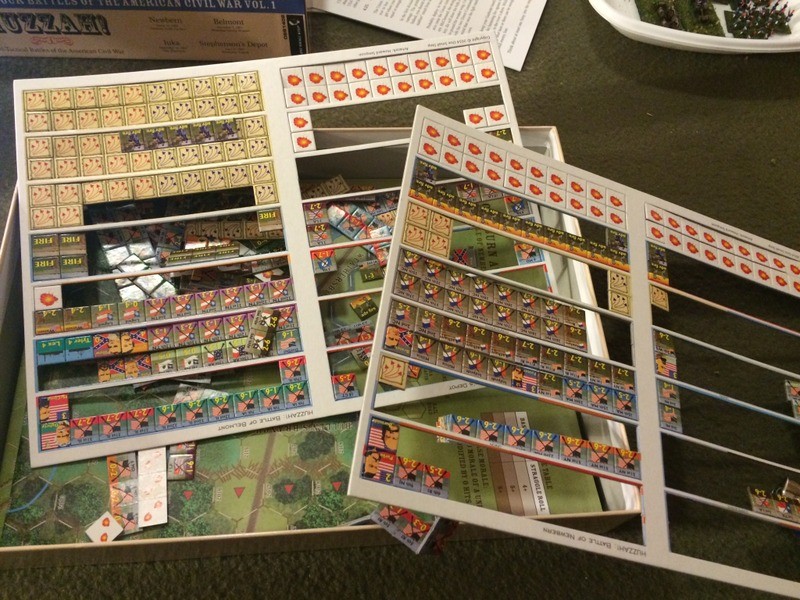
Speaking of counters, it would have been nice of the publisher, OSS, to have at least included a handful of ziplock plastic bags to store the counters once punched and sorted.  GMT does that, and while it’s a small thing, I think it goes some way to making up for the lost golden days of plastic counter trays that SPI and Avalon Hill once routinely included in their boxed games.

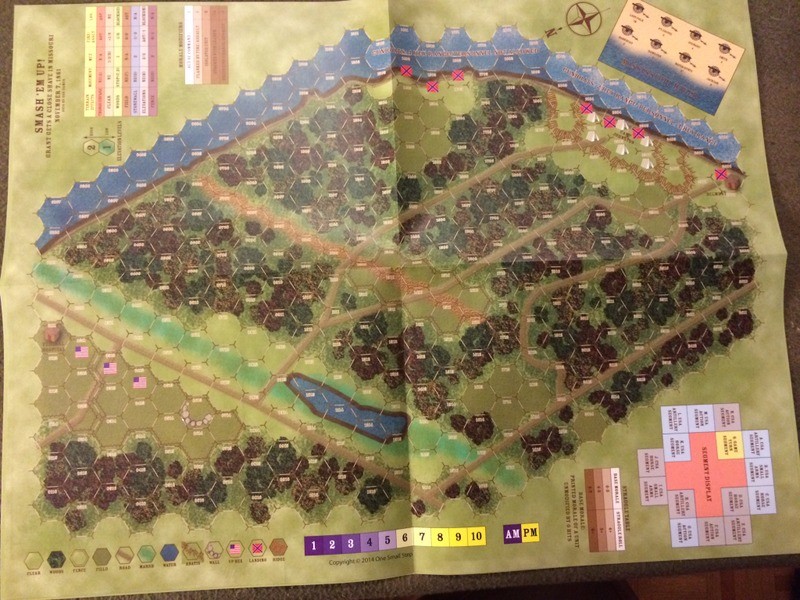
Huzzah! comes with four separate, quite small maps.  Here’s the map for Belmont, which I’m going to try first.  Belmont was US Grant’s first battle, and not his best by a long shot.    The map seems a little dark but it is rich on geographical features and has a pleasing number of charts printed on it, which may make up for the absence of a graphic player aid card (the one reference chart in the box is all text based).

So watch for news of the Battle of Belmont in a future Tuesday Boardgame report.

Before I sign off, I note that today is the anniversary of  the Wilderness, another US Grant battle, and a much bigger one.   I recently read Gordon C. Rhea’s book, The Battle of the Wilderness: May 5-6, 1864.   I know SPI did this battle years ago, perhaps in one of their quad packs, but I’m not aware of anyone who has done a board game treatment since.  It’s a battle that would lend itself well to partial treatment on the tabletop, and I’ve given that some thought, but I’d need a lot of trees.  Lots and lots of trees.  I don’t think one could do the whole battle unless it was in 6mm, as it was a huge, sprawling, confused engagement.  Whatever one thinks of Grant as a commander, and he didn’t exactly shine at the Wilderness, at the end of May 6 he turned his army south, and that was the beginning of the end for Lee and his army.  Not every general would have made that commitment after two days of bruising and mauling battle.  Good fellow, Grant.

Well chaps, it’s past my bedtime, so that’s all for now.  Blessings to your die rolls!

MP+

Tuesday, January 20, 2015

Tuesday Boardgame: Goodies From GMT

No games to report on today but I did get a box in the post yesterday.

Upon opening it I was very happy to find the Spanish Army expansion for GMT’s Command and Colours Napoleonics.  I had put an order in for it with GMT’s 500 reprint club, and had gotten a message from them recently saying my card had been charged, though they didn’t say for what (I have several 500 orders in and they charge credit cards once they reach 500 orders, hence, you know, the name 500 club, but I probably didn’t need to explain that to you, did I?  Right, never mind, carry on).


Anyway, hurrah, says I, I’ve now got the whole CCN series, though as I’ve just finished putting the Prussian Expansion stickers on the blocks, I think I’ll take the Prussians out for a test drive first.

This morning, as I was about to take the packing box down the hall to the recycling bin, I said to myself, “Hello, this box is still rather heavy.  Can they be using extra heavy packing peanuts?”  I looked under the peanuts and found this.

If there’s one thing the nice folks at GMT could do better, it’s tell you exactly what’s shipping to you.   Once I heard how good The Hunters was, and being fascinated by U-Boats since forever, I really wanted to have this game, and it was also shipped out to me.  Super excited to get it. The components look very intriguing, even if there’s no map.   I’m taking the rulebook off to bed with me now,

Monday, September 1, 2014

More CCN Online: Kinch Kickings at Krasnoi

Young Kinch and I met again on Google Hangouts this morning, it being Labour Day on my side of the Atlantic and a day traditionally set aside for studiously avoiding labour.  We enjoyed our last outing so much that we decided to do it again, this time choosing the Krasnoi scenario from the CCN Russian expansion.   Krasnoi was an unpleasant day on the Retreat from Moscow when Napoleon had to employ his Guard to block the Russians and allow the battered troops of Davout’s Corps to escape.

Once again we used parallel setups.   Kinch had the battle set up with his splendid figures, and was able to christen a splendid looking snow mat, seeing as this was the Retreat from Moscow.  Until he finds the time to post it on Joy and Forgetfulness, and I suspect his spare time will be somewhat crimped in the near future, you’ll have to settle with my ugly blocks.

Here’s the initial setup from the French side.  The two block French Line unit on the bridge on the river, and then strung out along the Left/Centre boundary are the half strength units of Davout’s Corps.   The French get a Victory Banner for the first two two-block Line units they withdraw off the French board edge, and get a banner for every two-block Line unit they withdraw thereafter.   The Russian player starts the game with eight Command cards, and loses a card for each of Davout’s two block Line units that the French exit from the board.   The Russians get a banner for every two two-block French Line units they eliminate.  They also get a banner for every turn they hold the bridge, and get two banners if they hold the village of Uvarova, which is on the bed of the river on the French right flank.   In the picture below, I made an error and put a French light infantry unit in Uvarovoa.  Actually, the Russians begin holding the village.


Kinch opens the ball by grabbing the first of the low-hanging fruit.


While on my right, I get incredibly lucky and push the light infantry of the Young Guard into Uvarovoa, eliminating the Russian lights holding the village in one lucky roll.


  Kinch introduces me to his cossacks.  Cossacks in the CCN Russian expansion are incredibly annoying.  They are like mosquitoes, they bite and draw blood, and it doesn’t matter if you swat them, because they don’t count for Victory Banners when you eliminate them.

Having managed the pesky cossacks, I decide to try and block the road with the Old Guard to give Davout’s command time to escape.   I thought they would last longer than they did.


Kinch decides to put pressure on Uvarova, and shoots down half of the Young Guard when they are caught in the open during their smoke break.


The rest of the Guard died shortly thereafter, and while I did my best to bring up reinforcements to hold the village, Kinch sneakily sneaked these horse artillery into Uvarova and that was all she wrote.   

Since the whole match lasted about an hour, we switched sides and tried it again.  This time, we read the scenario notes more carefully and discovered that Davout’s half strength lines are only worth a half Victory Banner each, and not two as we thought in the first game, which of course explains why I lost… well, that and Kinch’s sneakiness.  

I don’t have pictures of the second game, but it was a splendid and drawn out affair that ended in a narrow Russian victory.   Kinch was able to extricate much of Davout’s troops, but I was able to grapple with the Guard and whittle them down.  There was also a fairly large fur ball around Uvarova, where the Russian heavy cavalry stomped all over the Young Guard, that was fun.

Blessings to your die rolls!

MP+

Sunday, August 3, 2014

CC Napoleonics Barossa Refight - Boom!

Last week when young Kinch and I used Google Hangouts to play Command and Colors Napoleonics, using the Barossa scenario from the Spanish Army Expansion 1 set.  During that game, Kinch showed me that one needs to be aggressive and audacious when you play the French.

I left the board set up and played the scenario again solo, trying to Kinch’s advice to heart.   Here’s what happened with the score at 6-3 in favour of the French.   The second of the two British five-block Grenadier Guards units has moved up to contest the vital hill. It hasn’t had a chance to unleash its deadly firepower yet, simply because the British were unlucky getting cards to order units on their right flank.   

On the French turn, I decide to use the Probe Centre card to move order two units, one of which is an untouched Line Infantry unit straddling the line between left flank and centre.   If I move it forward and melee the Guards, the French get four dice plus 1 for the signature French characteristic bonus for infantry fighting infantry.  Hopefully the French can whittle the Guards down a little bit.  And here’s the roll.

BOOM!   The crossed sabres cause casualties in melee, and with the two infantry figures, that wipes out the Guards and gives the French a 7-3 win.   And that’s the game.

And my takeaway from this is:  Audacity.  Always Audacity.  And a bit of luck never hurts.


Tuesday, July 22, 2014

Bad Day At Barossa: Using Google Hangout To Play Command And Colours Napoleonics

The chap on the right and I both had a bad day at Barossa.

Young Kinch and I once used Apple Face time to play a battle of Command and Colours Napoleonics, that being his favourite brew, with one of us being in Dublin, Ireland and the other in Medicine Hat, Alberta.   Two years later, we repeated the experiment, and while my home had shifted a bit Dublinwards since then, we still needed technology to make it happen.   This time, on CK’s suggestion, we used Google + Hangouts, which worked just as well.   All I needed was a quick download from the App Store for my Macbook Air and we had the connection up and running.  The advantage of Google Hangouts, vice FaceTime, I think, is that the Google method would allow more than two players to join in on a game, though I may be wrong there.   There was another reason for using Google +, something about one of CK’s infernal machines, which he may want to expand on.

The battle we chose was Barrosa, from the CCN first expansion, the Spanish Army, which sadly I don’t have and the queue of punters necessary for GMT to do a reprint is not terribly long at the moment.  However, I had the CCN basic set, and used Portugese blocks for the Spanish and green blocks from the Russian expansion for the single unit of Portugese.  Worked well enough.   We chose Barrosa because CK had the game set up in his fabulous gaming room using proper figures and scenery.  I had the GMT version, somewhat less fabulous, in my prosaic Canadian basement.  Rather than fuss with one player holding the other player’s cards up to the computer camera and hoping they were decipherable on the other end, we each chose to use our own CCN card deck, meaning that were playing with twice as many cards as we would in a normal game.  I don’t know enough about statistic to know if that was a pardonable sin, but it was a practical solution.

In the Barossa scenario the French have the first move and they have two jobs, to smash the four inferior Spanish units on the hill which is the key to the battle, and to seize the hill itself.   Taking the village of Barossa on the French far left of the board is a useful means to this end, and can be done with a French light infantry unit which is two hexes away from the empty village and can seize it on its first move.  I wish I knew why I didn’t do that.   Instead I used the Grand Maneuver card to advance four line units at the hill, hoping to drive off Kinch’s Spaniards with the bayonet.   Sadly, I didn’t count on Kinch holding two First Strike cards, meaning that he was able to shatter two of my units before they could land a punch.   In this rather grainy photo you can see the situation shortly afterwards.   CK still had three functioning Spanish units, and had pushed his British Grenadier Guards forward.   They took a pounding, but by the time they died hard I had wasted much time and shot my bolt.  Speaking of Grenadiers, you will see my own Grenadiers in this photo, still waiting patiently on their start line when they should have been committed much earlier.


And it all goes rather pear shaped as CK throws in Graham’s  British infantry and begins pushing me off the hill while French casualties mount.


 Oh dear, this will be hard to explain to the Emperor.

The endgame, with the cavalry now in play.  My heavies have had their chance and accomplished little, while CK’s lights threaten the remnants of my infantry on my left wing.

My lesson from this game, helpfully underscored by CK’s observations, is that I need to be much more aggressive with the French.  Toujours l’audace!  True, I had some bad luck with the two First Strike cards, but I did not push enough forces onto the hill early on and was too shocked by my initial repulse.  Also, as I get more of my 6mm collection sorted and based, I am wondering if I should look at some sort of hex map that would allow me to place figures and scenery on, similar to what CK and Ross M and others do.  That would allow me to use my own figures for CCN games if I wanted to.   It bears thinking on.

I recommend Google Hangout to you if you want to play CCN with a distant friend (not a friend who is distant, as that wouldn’t be a very good friend, but a friend who lives at a distance), or with me for that matter.

Blessings to your die rolls!  MP+


Blog Archive

Followers