
If you listened to the recent Meeples and Miniatures podcast, you’ll know that Richard Clarke of Too Fat Lardies has been a bit distracted of late, but he has managed to put out a little corker of a campaign supplement for Chain of Command.
“Pint sized campaigns” are cheerful and cheap supplements to CoC, allowing players to fight a series of linked engagements, ladder-style, based on an historical incident. They are affordable little gems (the same prize as a pint, Clarkie notes) and I chose Operation Martlet because I have the toys to model a British/SS matchup in Normandy.

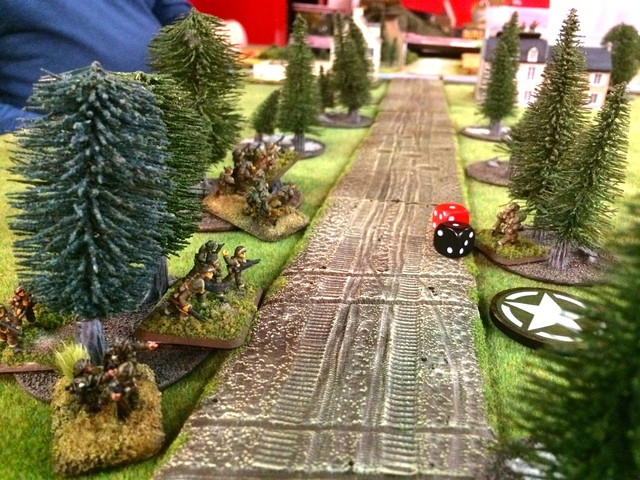
Operation Martlet, a prelude to EPSOM, begins with a platoon of the Royal Scots Fusiliers probing towards the village of Fontenay on 25 June between 04:00 and 08:00. Unfortunately the British have too problems. First, as you see below, they have a fairly unforgiving amount of open ground to cross. Second, their deployment is hampered by heavy morning mist, which requires each element wishing to deploy a 50% chance of getting lost per turn. Each element that fails this roll twice is lost to the British player for the battle.
The British get a standard infantry platoon, with two Senior Leaders, a 2 inch mortar team, PIAT team, and three full sections. The Germans get three sections, each consisting of two 3 man LMG teams. As Stephen the German player remarked, “They’re just kids with a lot of machine guns!” Spot on. The Germans are reinforced by a single Panzer IV, which they widely chose to entrench in a hull down position as per the campaign rules’ support choices for the Germans. The German took an extra full rifle team as a support choice, and got to reinforce one building on the map to create a bunker.
We used my 15mm collection this time, which made the table seem even bigger, emptier, and scarier.
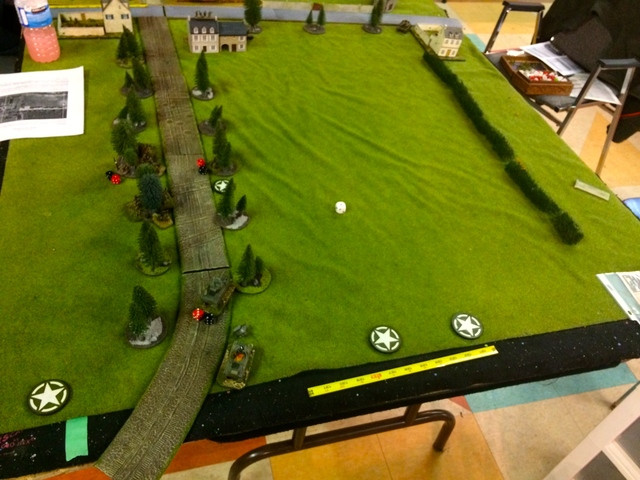
The German positions. If the British can slip one team past the German setup line (the grey road in this photo) they win as per Scenario 2 in the main CoC rules.
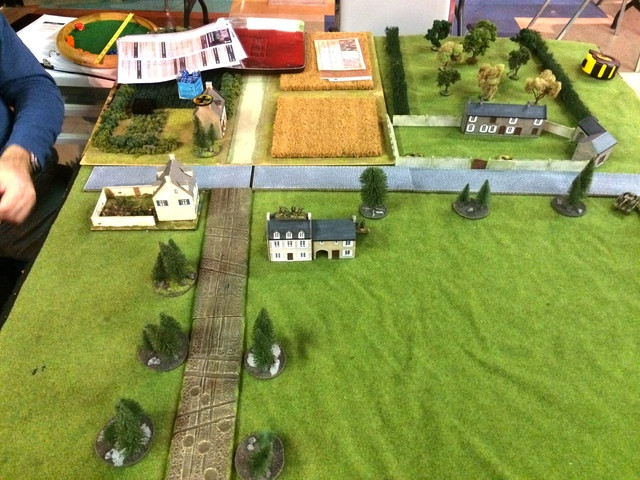
German jump off points. Unlike poor Tommy, the Germans got a lot of cover as a result of the Patrol Phase. We did make one mistake in setting up. The double building left of the grey road and below the brown road was not supposed to be a building at all, but a local monument, a Calvarie. Of course that was the building Jerry chose as his bunker. A hard wicket for the British to start on.
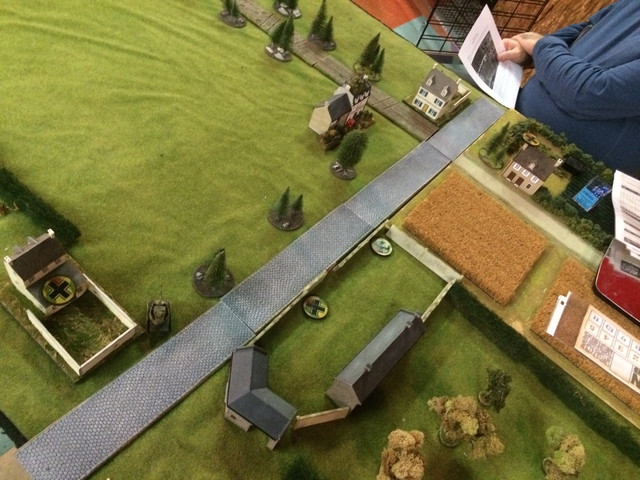
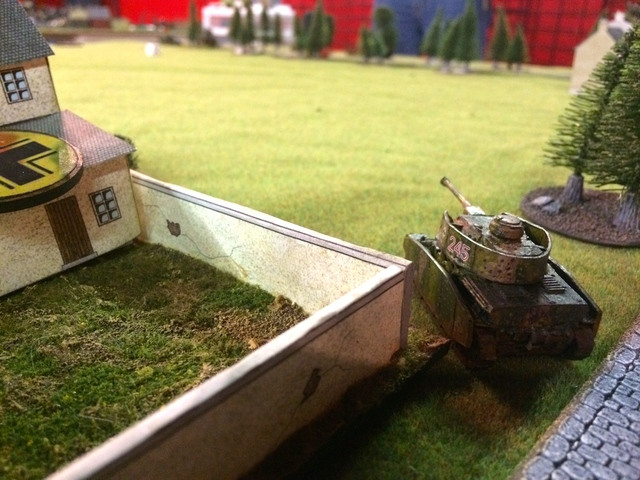
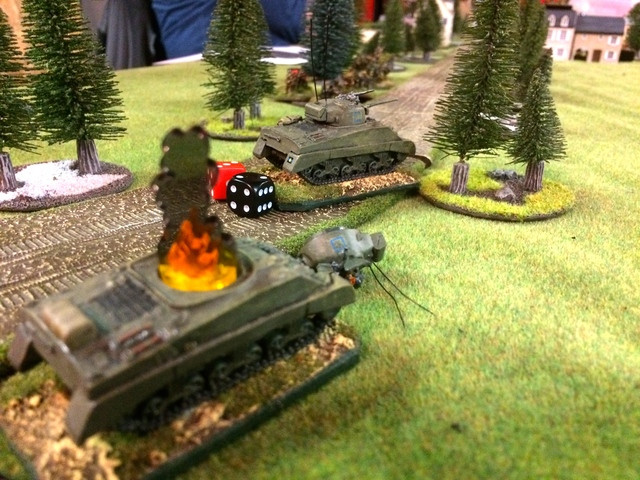
German Panther IV hiding behind its invisible entrenchment.
Bruce the British player soon regrets his support choices, 2 X M4 Shermans. Both were at a disadvantage trying to hit the German tank hull down, a base 9 on 2d6. One Sherman explodes, the other is hammered and shocked into submission.
A full section, a senior leader, and the 2 inch mortar are lost in the mist and fail to arrive. What infantry did arrive is hammered by MG fire from several angles and isn’t going far.
After about six game turns, the British player decided to abort his attack. He lost three men killed, and has to use At the Sharp End, the Chain of Command campaign rules, to see who is available for the next battle. Fortunately the Royal Scots have a mostly intact platoon to try again. Will they try their luck again with the mist in the second campaign turn, from 0801 to 1200, or will they wait until noon for the sun to burn the mist off? Time is working against them, as they will have to fight through this table and push on if they hope to win the campaign. Perhaps different support choices? If it was me, I would take every mortar option I could lay my hands on, and use as much smoke as possible to screen my advance.
Maybe we’ll have another battle, depending on what the chaps at the club want.
Despite a tough initial challenge to the Brits, Operation Martlet looks like a very valuable way to get more fun out of Chain of Command.
Blessings to your die rolls!
We experienced a much, much higher casualty rate in my recent, first game of CoC. Clearly, I need to learn from you on how to keep casualty rate down.
ReplyDeleteGood looking game, Michael!
Like Jonathan, my first game of CoC recently was also a bloodier affair.
ReplyDeleteEnjoyed this though and may well suggest to my CoC partner that we should give this campaign a go.
Lovely set up and game report Padre. Can't beat a good campaign game imo. Looking forward to the next installment.
ReplyDeleteCheers,
Pete.
Thanks chaps. Jonathan and Dai, I wonder if your casualty rates were higher because of tactics or because you were playing a one off game where there was little incentive to preserve your force?
ReplyDeleteTips I find useful for new CoC players:
1) Smoke 'em if you've got 'em. I don't know about the US list but if I'm the British, the 2" mortar firing smoke is very effective to mask enemy positions.
2) Same goes for barrages (e.g. 81mm or 3" mortars). Not only does the barrage cover an 18 inch square area measured from the aiming point, but the barrage area also generates smoke and so the barrage area blocks line of sight. The barrage thus generates smoke AND pain. Plus it strips away a layer of cover from the defender and is wicked against troops in woods, plus the pinning effect is very powerful. A barrage can be a lovely thing when it works.
3) On the attack, don't forget that your supporting MGs can use suppressing fire to degrade enemy weapons performance.
4) Tactical movement can be your friend in certain situations. It is slow (1d6 a turn) but conveys an extra layer of cover.
5) On the attack, consider the Pre-Barrage support option. It makes it problematic for the defender to deploy on his first turn. If you're lucky, any elements deployed onto the table in turn 1 can race forward in turn 2 while your enemy is barely on the table. Useful for grabbing key terrain or crossing at least some of the enemy's fields of fire before he can bring his weapons to bear.
Wise words mate.
DeleteI think an extra 2" mortar and a FOO would have been better support options.
That would have been my choice.
DeleteI was defending and chose a minefield to help funnel my attacking enemy into my PBI and Vickers team. Sadly, it was my dice that killed me - 6's a plenty when I needed 1's and so forth.
DeleteStill, I stuck a long unloved FoW Brit infantry platoon onto pennies as bases last night, so at least next game I'll have correct basing. The FoW model was not convenient for play imo.
Great AAR Michael - would love to see more from this pint sized campaign. I have Chain of Command but have not yet played it. My forces are just about ready to as well.
ReplyDeleteHow did you find you liked playing with team-sized stands?
Thanks Steven. Great news that your own CoC forces are just about ready. I've tried CoC with team-sized stands as per FOW and I've tried it with individual figures. I don't really think it matters, provided that you have a way to distinguish your Leaders. Since my team stands are equal sized, it was a bit of a problem to distinguish between the Bren and rifle teams. For the Martlet scenarios it's easy for the Germans because each infantry team stand is a 3 man LMG stand, so quite easy there.
ReplyDeleteI think you'll find Martlet or one of the other campaigns is a good investment for CoC. It helps to have the At the Sharp End campaign rules as well, but probably not essential.