
-0Last night I tried my second game of Blucher, only this time, instead of playing it solo, I took it to the lads in our group. Marshall Patrick took the French, while James and Mike spilt the Austrians and I helped everyone through it, though sadly, as noted below, made some mistakes.
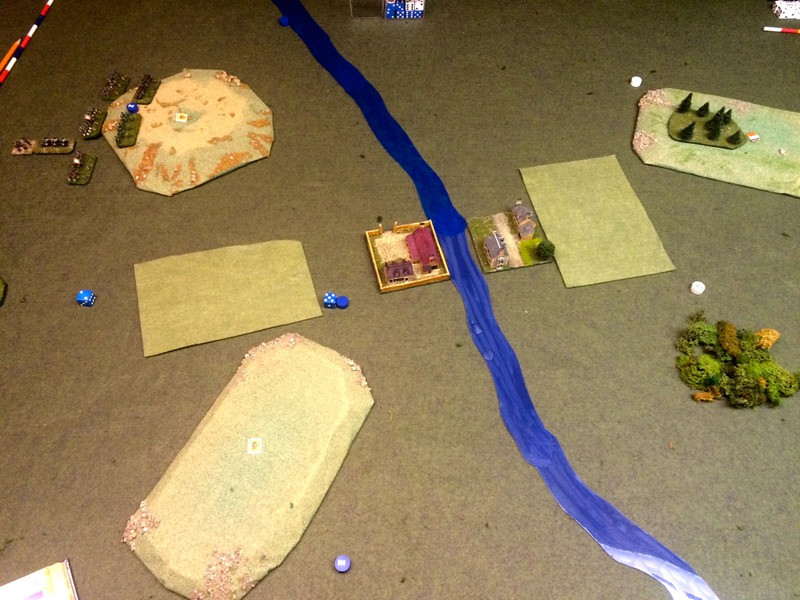
We used the random terrain setup from the basic rules, with each side having a dozen terrain choices. For some reason the chaps decided to put a stream in the middle of the table, forcing us to play from end to end. I chose the armies since we didn’t want to waste time explaining the army builder rules. I rolled a random spread of numbers, giving the Austrians a small advantage, 300 points to the French 260, or 22 Austrian units to the French 19. The Austrians had three corps of infantry (one grenadier, one line, one mostly conscript), a corps of heavy cavalry, and four unattached units of hussars. The French had two corps of infantry (elite and line mixed), a corps of heavy cavalry, and a corps of light cavalry.
All corps entered the game on blinds. I adapted the recon rules from the Scharnhorst campaign rules at the back of the Blucher book, allowing both sides to choose how many light cavalry brigades they will allot to pre game recon. The Austrians put 4 to the French 2, for which I allowed them to spot two French blinds. One was the infantry corps at the top left of this photo, the other was a dummy. In retrospect it would have been more interesting if I had allowed the Austrians to use this advantage to try and bring one or two corps onto another table edge to represent a grand flanking manoeuvre.Austrian objectives are the two hills shown on the left side of the river, which was christened the Pukenbruch. The towns on either side of the river were Fahrtompuken (right) and Neuefahrtompuken (left) and the key hills behind were the Klompenbergen. Yes, we are easily amused in our little gaming circle.
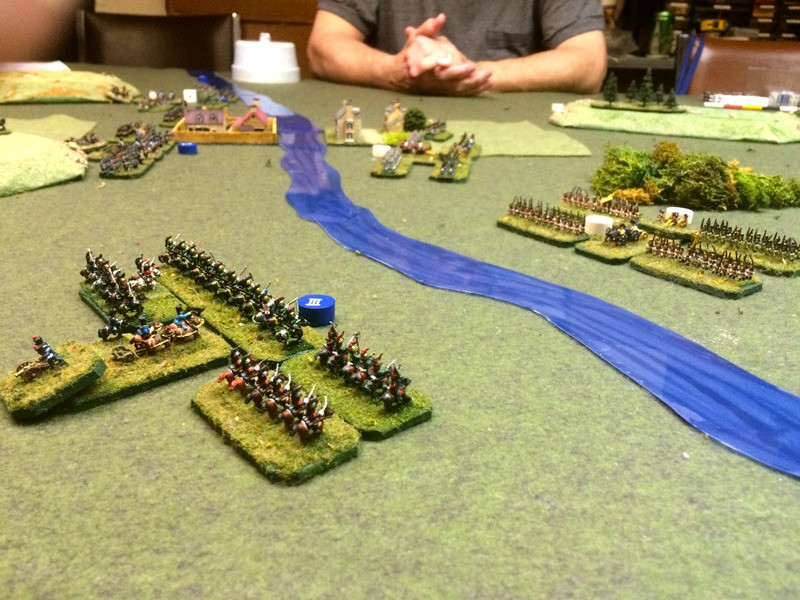
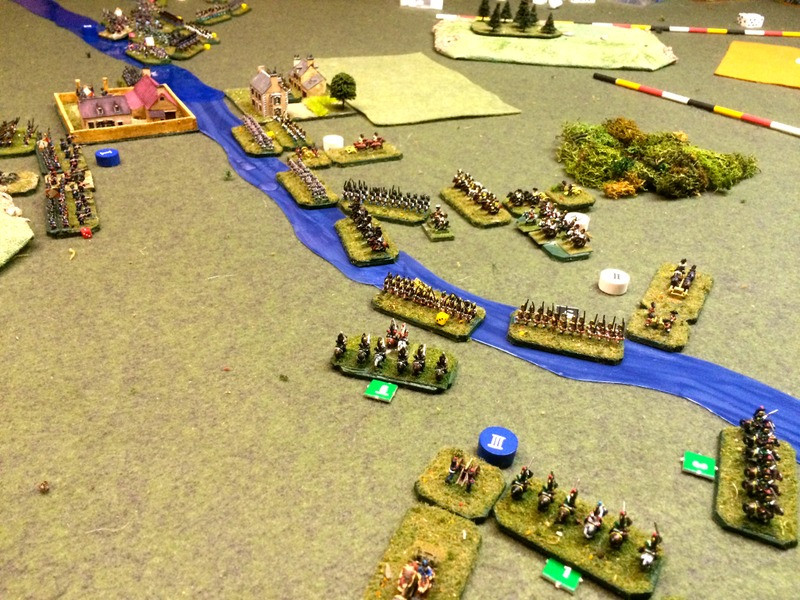
We took units off blinds when they came within 8 Base Widths of enemy. Here the French heavy cavalry (three brigades of dragoons, two of cuirassier, with horse artillery) face off against the Austrian grenadier corps (four brigades of grenadiers and heavy artillery). The river was fordable but difficult terrain, and would prove a hard barrier for the Austrians to cross in the face of opposition. I chose to put the artillery into units rather than parcelling it out among the brigades, to give the players a sense of how artillery works.
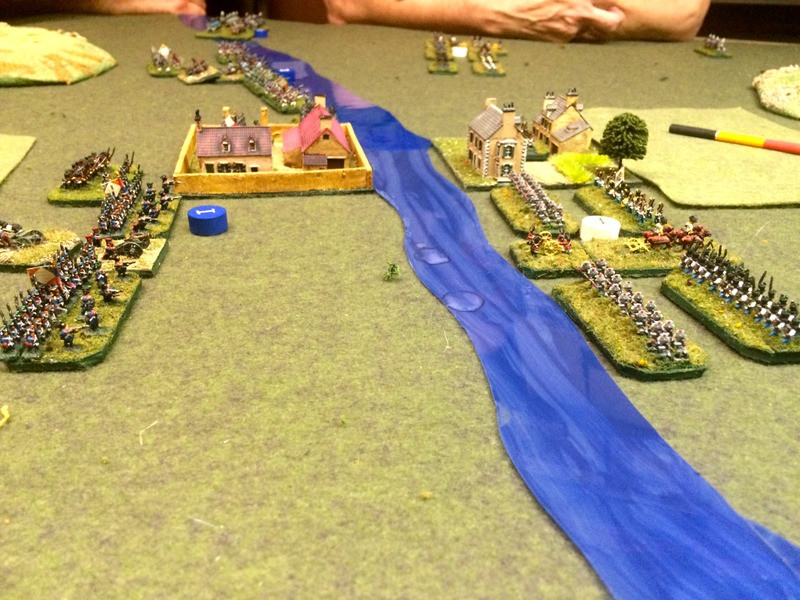
Opposing infantry corps square off in the centre, each putting one brigade into respective halves of the town as garrisons. Not much happened on this front. One of the French brigades got chewed on by artillery but both sides made their main efforts on the flank. At the top you can see Patrick’s hussars and infantry crossing the stream to fight the Austrian conscripts, who would give a surprisingly good account of themselves.
A furball at the bottom of the table, as Patrick’s heavy cavalry kept pushing the grenadiers back across the river. Since they were crossing the stream they were unable to go into square (Prepared in Blucher terms) and would be at a significant disadvantage in combat with the French horse.
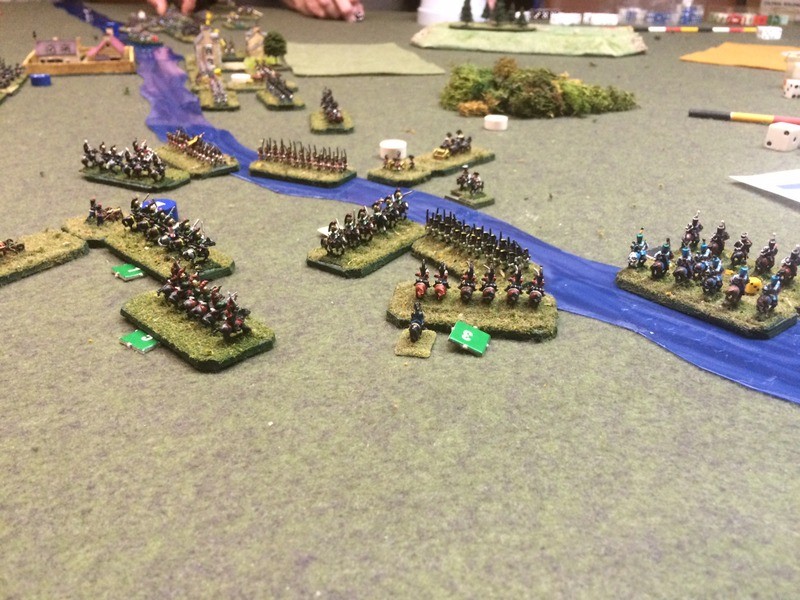
The final battle. The Austrian heavy cavalry corps push across the stream, and the French heavy horse are too depleted to oppose them as the Grenadiers continue to batter them. By this point it was after midnight and we were on the last Austrian turn. Hey, look at those sexy measuring sticks!
We declared the game a French victory, but that may have been an injustice to the Austrians. After checking the rules and the Blucher rules section of the Honour Forum, which is an excellent resource, I found five rules that we were not using properly.
I dislike random player chosen terrain and choosing table edges. Always seems to end up in fighting the length of the table!
ReplyDeleteI much prefer the GM lays out a table and if there is a choice then it is limited to which LONG table edge to defend from. Patrick could have then anchored his flank on the river but not defended behind it.
If you run the Scharnhorst pre-game system you get choice of battlefield and some choice in terrain placement. So does your opponent, of course :)
DeleteYou can end up fighting down the length of the table (during play-testing the best game of Blucher I ever played had that) but generally the final system tends to weight games towards being across the table.
Interesting to read two reports on the same battle. It looks like a good one.
ReplyDeleteDon't forget the townships of Krakenknuckle, Nasenblasen, and Neues Picklebrine!
By the whiskers of Kurvi-Tasch! The Austrians deserve a rematch! Nice report and an interesting looking rule set.
ReplyDeleteSounds good, certainly looks good!
ReplyDelete