
Reading the Canadian historian Mark Zuelkhe’s book on Operation Husky, the Canadians in the Sicilian Campaign of 1943, got me thinking of using some of my 15mm kit to explore that campaign, and to do so I would need some Italianate buildings, enough for a small town. So I turned to a tried and true source, Paper Terrain, run by Scott Washburn, and ordered his Italian Village pack and his Town Expansion set. Here’s an example of one of the sixteen buildings that came promptly in a flat manilla envelope.
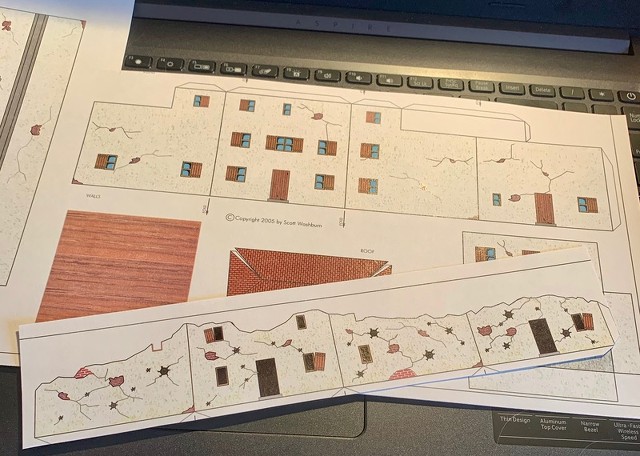
It may look daunting, but all you need is a steady hand, some patience, a decent pair of scissors and a craft knife, and a patient partner who can put up with the myriad bits of paper that are the byproduct of the assembly process. I used a metal ruler and craft knife to lightly score the fold lines, and while the buildings are printed on sturdy cardstock, you need to learn not to score the lines too deeply. Once cut and scored, you fold them together carefully and glue them. I use white carpenter’s glue.
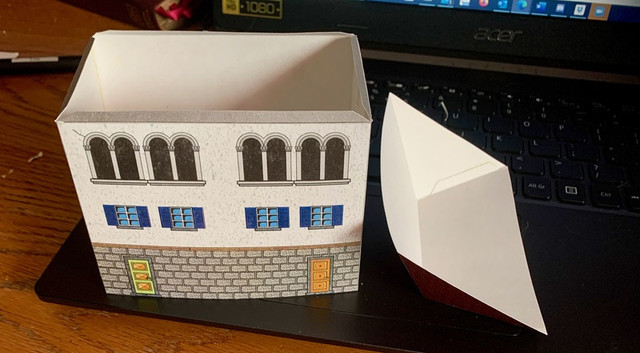
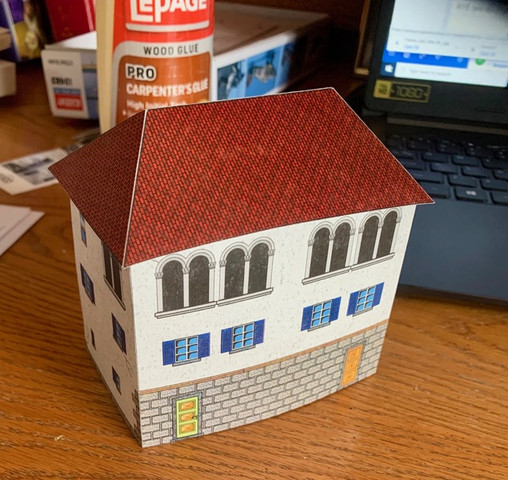
As they say, some assembly required. Putting the roofs on is perhaps the trickiest part but you soon get the hang of it.
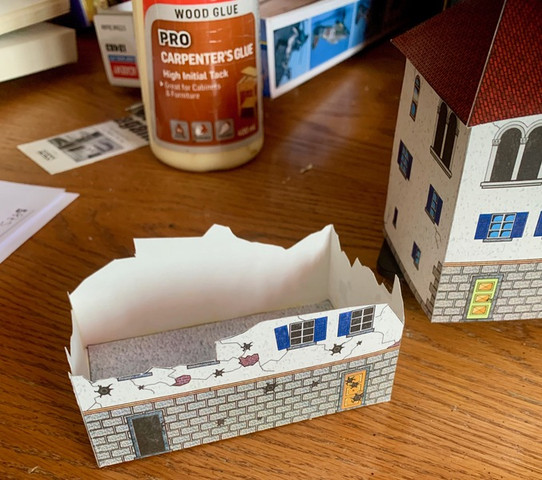
Each building includes a ruined shell which nests in the completed building like a Russian doll set. Very useful once the HE starts flying. I suppose you could dress the interior with rubble, but keeping it clean makes it easier to place stands of occupying troops.
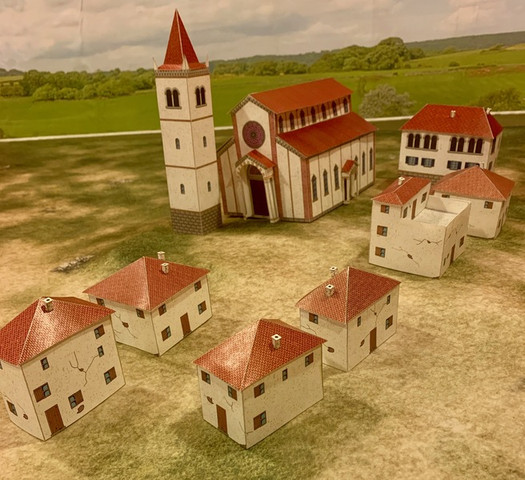
Some of the completed buildings, laid out on my Sicily fabric terrain sheet from Geek Villain, which is a nice piece of kit in its own right. The church is stunning and large.
The buildings look good on their own, but they look even better when based. I am working on two Italian building bases now, using the garden walls and sheds that Scott includes with his terrain sets, and I will show the finished results in another post.
I have several sets of PT products - a Western European town set suitable for France in 1944-45, a Northern Russian village set suitable for the Ostfront or even the black powder era, and now these Italian buildings. I’ve found Scott to be easy to deal with, and quick to answer questions about tricky points of assembly (which are rare in my experience). In my last email exchange, he mentioned that he keeps expecting resin and 3D printed terrain to put him out of business, but demand remains strong. For me the advantage of his product is that it’s relatively sturdy if carefully stored and handled, comes in a variety of scales, does not require painting, and provides an affordable mass of terrain in relatively little prep time.
Blessings to you scissors!
MP+r
Splendid work, these look very good indeed.
ReplyDeleteThanks Alan, they are a fairly cheap way to make a table look better.
DeleteLove the attention to detail of having the ruined version supplied too.
ReplyDeleteCheers,
Pete.
It is very clever, though it will be a shame to mess up that nice church all Monte Cassino like.
DeleteThey do look good on the table and I'm sure will be even better with their bases done too.
ReplyDeleteHow are you storing these?
I store them in plastic totes and try to be careful with them. I'll include a photo in my next post.
ReplyDeleteVery nice. I'm going to keep PT in mind when I need buildings again.
ReplyDeleteWould lining the buildings with cereal board be practical to give the buildings a bit more heft and sturdiness? Would doing so interfere with the ruined versions?
I thought about that myself and decided not to. Adding an additional layer of cardboard on the inside of the buildings would make it problematic to fold and glue the models. You'd have to cut the cereal board to fit the individual wall segments once the model was assembled, and that could be done, sure, but it would be finicky and I'm not sure the models really need the reinforcing. With the ruined shell inside the intact version, there is already a layer of reinforcement present that gives some substance to the model.
DeleteThose are very nice and basing them would help not only with the look, but making them a bit sturdier too.
ReplyDeleteThanks Steve. That is certainly the plan!
Delete